
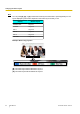
Operating Manual


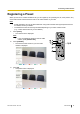


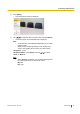

4 Press a numeric button (1–9) to select the preset
number to use.
• The selected preset number is displayed in the
upper right corner of the screen.
Note
• When a preset number that has already been
registered is selected and preset registration is
performed, that preset’s registered information
will be overwritten.
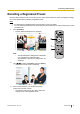
5 Press the buttons on the remote control to adjust the
video camera’
s preset.
[B]: Zoom out
[R]: Zoom in
[ ][ ]: Pan the video camera left/right.
[ ][ ]: Tilt the video camera up/down.
6 Press [G].
• A dialogue box to confirm the saving of settings is
displayed.
7
Use [ ][ ] to select "Yes" and press [Enter].
• The preset screen is displayed.
Note
• To continue making settings, repeat steps 4–7.
8 Press [Home].
• The Home screen is displayed.
Note
• Preset registration information for a video
camera is saved in that video camera. If a video
camera is initialised, its preset registration
information will be lost. In such cases, preset
registration must be performed on the unit again.
66 User Manual Document Version 2013-09
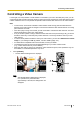
Controlling a Video Camera