
Operating instructions

6. Multi-Function Station software
48
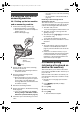
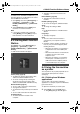
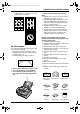
Do not attempt to print on any of the
following types of envelopes (these may
cause damage to the fax machine):
L Envelopes with clasps, snaps or tie strings
L Envelopes with transparent windows
L Envelopes that use encapsulated types of
adhesive that do not require moistening but
rely on pressure to seal them
Scanning
6.5 Using the fax machine
as a scanner
L Keep the front cover page open for button
locations.
6.5.1 Using Multi-Function
Viewer
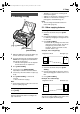
1 Insert the document (up to 20 pages) FACE
DOWN until a single beep is heard and the
unit grasps the document.
2 Start Multi-Function Station.
3 Select [Viewer (Scan)].
L[Multi-Function Viewer] will appear.
4 Click the [Scan] icon in the [Multi-Function
Viewer] window.
L The [Panasonic KX-FLM651E] (default
name) dialogue box will appear.
5 If necessary, change the scanning settings
on your computer.
L To preview the scanned image, click
[Preview]. Only first page will be
displayed. You can drag the frame to
specify the scanned area. If you change
the scan mode, brightness, or contrast
setting, click [Preview] to refresh the
scanned image. Set the document again
before refreshing the scanned image.
L If you select [B/W Graphic] for scan
mode, the resolution will be set to 200
dpi.
6 Click [Scan].
L If you preview the scanned image in step
5, set the document again and click
[Scan].
L The scanned image will be displayed in
the [Multi-Function Viewer] window
after scanning.
L To save the scanned image, select [Save
As...] from the [File] menu.
L To cancel scanning while the document is
being scanned, click [Cancel].
Note:
L You can display the images which support
TIFF, JPEG, PCX, DCX and BMP formats.
L You can save the images in TIFF, JPEG,
PCX, DCX, BMP or PDF formats.
L You can move, copy and delete a file or page.
L You cannot change the scanning settings on
the fax machine.
To scan documents quickly
1. Insert the document (up to 20 pages) FACE
DOWN until a single beep is heard and the
unit grasps the document.
2. Press {SCAN} on the fax machine.
L The previous settings will be displayed on
your computer. You can change them if
necessary.
3. Press {SET} on the fax machine.
L The scanned image will be displayed in
the [Multi-Function Viewer] window
after scanning.
L To cancel scanning while the document is
being scanned, click [Cancel].
Note:
L For details, see the help file by selecting
[Usage Tips] from Multi-Function Station.
Readiris OCR software
With OCR software, you can convert an image
into text data that can be edited with word
processor software. Readiris OCR software can
be installed when installing Multi-Function
Station.
To use this software, click the [OCR] icon in the
[Multi-Function Viewer] window or select
[Readiris (OCR)] from Multi-Function Station.
For detailed instructions about OCR, select
[Help].
Note:
L To use Readiris OCR software continuously,
registration is required. You will need to
connect your PC to the internet to register,
please refer to the Readiris OCR registration
card for detail.
Clasp Transparent window
FLM651E-PFQX2346ZB-en.book Page 48 Tuesday, November 22, 2005 3:26 PM