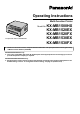
Operating Instructions Multi-Function Printer Model No. The pictured model is KX-MB1500. KX-MB1500HX KX-MB1520EX KX-MB1520FX KX-MB1530EX KX-MB1530FX R Do NOT connect the unit to a computer with the USB cable until prompted to do so during the setup of Multi-Function Station (CD-ROM). KX-MB1520/KX-MB1530 only: R This unit is compatible with Caller ID. Subscription to the appropriate service through your service provider/telephone company is required.
Thank you for purchasing a Panasonic product. You can select the Czech, Hungarian, Slovak or English language (KX-MB1500HX/KX-MB1520EX/ KX-MB1530EX only). The display and reports will be in the selected language. If you want to change the setting, see feature #110 on page 51. Designed to be used in Czech, Hungary and Slovakia according to the location setting feature (KX-MB1520EX/KX-MB1530EX only). The default setting is Czech. To change the location setting, see page 51 (feature #114).
Important Information For your safety For best performance Laser radiation Toner cartridge CLASS 1 LASER PRODUCT R The printer of this unit utilises a laser. Use of controls or adjustments or performance of procedures other than those specified herein may result in hazardous radiation exposure. Laser diode properties Laser output : Max. 10 mW Wavelength : 760 nm - 800 nm Emission duration : Continuous LED light CLASS 1 LED PRODUCT R When using the unit, do not look directly at the CIS’s LED light.
Important Information R The unit should not be exposed to direct sunlight. R Do not place heavy objects on top of the unit. When you leave the unit unused for a long period of time, unplug this unit from the power outlet. R The unit should be kept away from heat sources such as heaters, kitchen stoves, etc. Damp basements should also be avoided. R Do not cover slots or openings on the unit. Inspect the air circulation vents regularly and remove any dust build-up with a vacuum cleaner (A).
Table of Contents 1. Introduction and Installation Accessories 1.1 1.2 Supplied accessories ....................................7 Accessory information ...................................7 Finding the Controls 1.3 1.4 Button descriptions ........................................8 Overview .......................................................9 Installation 1.5 1.6 1.7 1.8 Toner cartridge ............................................10 Connections ................................................
Table of Contents 11. Paper Jams Jams 11.1 Recording paper jam ...................................75 11.2 Document jams (Automatic document feeder) (KX-MB1530 only) .......................................78 12. Cleaning Cleaning 12.1 Cleaning the white plates and glass ............80 12.2 Cleaning the document feeder rollers (KX-MB1530 only) .......................................81 13. General Information Printed Reports 13.1 Reference lists and reports .........................82 Specifications 13.
1. . Introduction and Installation 1. Introduction and Installation 1.1 Supplied accessories A Toner cartridge (starter)*1 B CD-ROM C Important information guide D Quick installation guide E Power cord F Telephone line cord*2 – – Environment: 23 ± 2 °C / 50 ± 10% RH Print mode: Continuous printing *1 Prints about 500 pages at ISO/IEC 19752 standard page. *2 KX-MB1520/KX-MB1530 only Note: R Save the original carton and packing materials for future shipping and transportation of the unit.
1. Introduction and Installation 1.3 Button descriptions AB C MZoomN R To enlarge or reduce a document when copying (page 32). MMuteN (KX-MB1520/KX-MB1530 only) R To mute your voice during a conversation. Press again to resume the conversation. MSP-PhoneN (KX-MB1520/KX-MB1530 only) D E F G H I J K LM N O * The pictured model is KX-MB1520/KX-MB1530. MQualityN R To select the contrast (page 31) and resolution (page 31) when copying.
1. Introduction and Installation Document entrance (KX-MB1530 only) 1.4 Overview Document exit (KX-MB1530 only) Document guides (KX-MB1530 only) 1.4.1 Front view A B C H Document cover Document sub tray (KX-MB1530 only) Recording paper guides Paper input tray Front cover External telephone jack (KX-MB1520/KX-MB1530 only) Telephone line jack (KX-MB1520/KX-MB1530 only) J KL 1.4.2 Rear view A MN * The pictured model is KX-MB1520.
1. Introduction and Installation 3 Detach the orange protective cover (A) from the 1.5 Toner cartridge The supplied toner cartridge is a starter toner cartridge. Caution: R Read the following instructions before you begin installation. After you have read them, open the toner cartridge protective bag. The toner cartridge contains a photosensitive drum. Exposing it to light may damage the drum. – Do not expose the toner cartridge to light for more than 5 minutes.
1. Introduction and Installation 5 Hold the toner cartridge (A) by the centre handle, then insert firmly to lock into place. Note: R To ensure that the unit operates properly, we recommend the use of Panasonic toner cartridge. See page 7 for accessory information. Waste disposal method A Waste material should be disposed of under conditions which meet all national and local environmental regulations.
1. Introduction and Installation Power cord R Connect to a power outlet (220-240 V, 50/60 Hz). Telephone line cord Turn the power switch to the ON position (A). *1 R Connect to a single telephone line jack. [EXT] jack*1 R You can connect an answering machine or an extension telephone. Remove the stopper if attached, and take care of it appropriately.
1. Introduction and Installation 1.8 Recording paper Note for recording paper: R We recommend that you test paper (especially special sizes and types of paper) on the unit before purchasing large quantities.
1. Introduction and Installation 5 Insert the paper input tray into the unit. 3 Load the paper, print-side down (A). Important: R Push down to lock the plate (B) in the paper input tray, if necessary. A B 4 Adjust the recording paper guides. Pinch the rear guide (A), then slide it to match the paper size mark. Pinch the right guide (B), then slide it to adjust the width to the size of the recording paper.
1. Introduction and Installation R After use, pull up the paper exit, and then replace the tab (A) to the original position. A 1.8.2 Manual input tray You can use the manual input tray for printing with the computer and for copying. It can hold one page at a time. When printing or copying multiple pages, add the next page after the first page has been fed into the unit. R Please refer to page 83 for information on recording paper.
1. Introduction and Installation Therefore, if you print with the cover closed, the paper may jam inside the unit.
2. . Preparation 2. Preparation 2.1 Dialling mode (KX-MB1520/ KX-MB1530 only) If you cannot dial (page 38), change this setting according to your telephone line service. MMenuN 2.2 Selecting the operation mode (Scan/Copy) (Fax: KX-MB1520/ KX-MB1530 only) You can select the desired mode by pressing the following button repeatedly. MSetN 1 MMenuN 2 Press MBNM1NM2NM0N to display “DIALLING MODE”. 3 Press M1N or M2N to select the desired setting. M1N “PULSE”: For rotary/pulse dial service.
2. Preparation 2.3 Setting the original 2.3.2 Using the automatic document feeder (KX-MB1530 only) 2.3.1 Using the scanner glass 1 Open the document sub tray (A) by pressing its centre part (B). A A B B 1 Open the document cover (A). 2 Place the document FACE DOWN on the scanner glass (B), aligning the top left of the document with the corner where the mark is positioned. 3 Close the document cover. Note: R Confirm that there are no documents in the automatic document feeder (KX-MB1530 only).
2. Preparation R R R R R R R 356 mm R Maximum document size 216 mm Effective scanning area 4 mm 4 mm 4 mm 4 mm 208 mm 216 mm R Shaded area will be scanned. R When using the unit as a scanner (page 28, 29), the effective scanning length depends on the selected paper size. Document weight R Single sheet: 60 g/m² to 75 g/m² R Multiple sheets: 60 g/m² to 75 g/m² Minimum document size 148 mm R document feeder.
2. Preparation 2.4 Adjusting the volume (KX-MB1520/KX-MB1530 only) 2.5 Date and time (KX-MB1520/ KX-MB1530 only) Important: R Before adjusting the volume, set the operation mode to fax mode. If the MFaxN light is OFF, turn it ON by pressing MFaxN repeatedly. We recommend you to set the date and time. The other party will receive your unit’s date and time as the header information. MMenuN MSetN MCNMDN MFaxN Ringer volume While the unit is idle, press MCN or MDN.
2. Preparation R If the time has not previously been set, Caller ID will not adjust the clock. 2.6 Your logo (KX-MB1520/ KX-MB1530 only) You can program your logo (name, company name, etc.) so that it appears on the top of each page sent. MStopN MMenuN MSetN MFNMEN 1 MMenuN A MBNM1NM0NM2N A MSetN 2 Enter your logo, up to 30 characters (see page 63 for character entry). A MSetN 3 Press MMenuN to exit.
2. Preparation 2.7 Your fax number (KX-MB1520/ KX-MB1530 only) 2.8 Installing Multi-Function Station You can program your fax number so that it appears on the top of each page sent. 2.8.1 Required computer environment MStopN MMenuN MFlashN MSetN MFNMEN 1 MMenuN A MBNM1NM0NM3N A MSetN 2 Enter your fax number, up to 20 digits. R R R R To enter a “+”, press MGN. To enter a space, press MBN. To enter a hyphen, press MFlashN. To erase a number, press MStopN. 3 MSetN 4 Press MMenuN to exit.
2. Preparation 2.8.2 Installing Multi-Function Station on a computer R Install Multi-Function Station (CD-ROM) before connecting the unit to a computer with the USB cable. If the unit is connected to a computer with the USB cable before installing Multi-Function Station, the [Found New Hardware Wizard] dialogue box will appear. Click [Cancel] to close it. R The screenshots shown in these instructions are for Windows XP and are included for reference only.
2. Preparation 2. [Modify] A [Add Multi-Function Station Driver]. Then follow the on-screen instructions. Note: R You cannot connect more than one unit to the same computer at the same time. To modify the software (To add or uninstall each component) 2.9 Starting Multi-Function Station [Start] A [All Programs] or [Programs] A [Panasonic] A the unit’s name A [Multi-Function Station] R Multi-Function Station will appear. You can select the components to install or uninstall anytime after the installation.
2. Preparation [ ] R To display usage tips. [ ] R To display information about Multi-Function Station. Note: R You can confirm if the unit is connected to your computer by using Device Monitor (page 64). R Computer features (printing, scanning, etc.) may not function properly in the following situations: – When the unit is connected to a computer that was custom-built by the user. – When the unit is connected to the computer via a PCI card or other expansion card.
3. . Printer 3. Printer 3.1 Printing from Windows applications You can print a file created in a Windows application. For example, to print from WordPad, proceed as follows: 1 Open the document you want to print. 2 Select [Print...] from the [File] menu. R The [Print] dialogue box will appear. For details about the [Print] dialogue box, click [?], then click the desired item. Setting the printer properties You can change the printer setting in step 3.
3. Printer – Labels that do not completely cover the backing sheet as follows: 6 Click [Print] icon on the print toolbar. R The unit will start printing. 3.2.1 Ecology printing features You can use various printing features and preview the print image without test print. Printer settings 3.2 Easy Print Utility By printing using the Panasonic Easy Print Utility instead of the printer driver, you can use useful printing features for your convenience.
4. . Scanner 4. Scanner 4.1 Scanning from the unit (Push Scan) You can easily scan the document by using the operation panel on the unit. You can select one of the following scanning modes depending on how you intend to use the scanned image.
4. Scanner 4.2 Scanning from a computer (Pull Scan) Note: R When scanning a document, we recommend using the scanner glass rather than the automatic document feeder for better results (KX-MB1530 only). R Do not open the document cover when scanning a document with the automatic document feeder (KX-MB1530 only). 4.2.1 Using Multi-Function scan application By clicking an application icon, the selected application starts automatically after scanning. 1 Set the original (page 18).
4. Scanner The [Select...] button will not be displayed when there is only one printer driver installed.
5. . Copier 5. Copier 5.1 Making a copy 5.1.1 Using the scanner glass MCopyN To select the copy size 1. Press MCopy SizeN repeatedly to select “ORIGINAL SIZE”. 2. Press MCN or MDN repeatedly to select the size of your original document. A MSetN 3. Press MCN or MDN repeatedly to select the size of recording paper size. R When “#2” is selected, you can change the recording paper size by pressing MEN repeatedly. R The appropriate zoom rate will be set automatically.
5. Copier 5.1.2 Using the automatic document feeder (KX-MB1530 only) 5.2 More copying features R Make sure that the MCopyN light is ON. 5.2.1 Zoom copy (enlargement / reduction) 1 Set the original (page 18). 2 Press MZoomN repeatedly to select the zoom rate that MCopyN fits the size of your document and recording paper. – “ZOOM =100%”*1 – “50%” – “200%” *1 Press MCN or MDN repeatedly to change the zoom rate by 1 % at a time from “25%” to “400%”.
5. Copier Example: 150 % enlarged copy Using the scanner glass (A): Original document 2. Place the next document on the scanner glass and press MSetN. Repeat this until you have scanned all pages, and then press MStartN. R The unit will start copying. Enlarged copy 8 A Using the automatic document feeder (KX-MB1530 only): Original document When using the automatic document feeder (KX-MB1530 only): MStartN After you finish copying, press MStopN to reset this feature.
5. Copier R The scanning area changes according to the selected setting in step 4. See the following table for details. The shaded area will be scanned. Original document Page layout “4 in 1” “LANDSCAPE” 2 Press MPage LayoutN repeatedly to select “PAGE LAYOUT”. 3 Press MCN or MDN repeatedly to select “QUIK ID COPY” or “IMAGE REPEAT”. A MSetN “PORTRAIT” 4 Press MCN or MDN repeatedly to select the number of original documents from “2 in 1”, “4 in 1” or “8 in 1”.
5. Copier Original document Page layout “8 in 1” 1 Set the original (page 18). R To make a portrait copy, set the original in portrait direction. To make a landscape copy, set the original in landscape direction. 2 Press MPage LayoutN repeatedly to select “PAGE LAYOUT”. 3 Press MCN or MDN repeatedly to select “N in 1”. A MSetN 4 Press MCN or MDN repeatedly to select the number of original documents from “2 in 1”, “4 in 1” or “8 in 1”.
5. Copier Original document Page layout 5 Enter the desired edge width of long edge using the “8 in 1” “PORTRAIT” 6 Press MCN or MDN repeatedly to select “SHORT dial keypad. A MSetN EDGE”. A MSetN 7 Enter the desired edge width of short edge using the dial keypad. A MSetN “LANDSCAPE” 8 If necessary, enter the number of documents (up to 99). A MStartN 9 After you finish copying, press MStopN to reset this feature. Note: R You can hold the previous edge setting (feature #473 on page 60).
5. Copier – while the unit is printing received fax documents (KX-MB1520/KX-MB1530 only). 1 Set the original (page 18). 2 While “PC PRINTING” or “PRINTING” (KX-MB1520/KX-MB1530 only) is displayed, switch to copy mode by pressing MCopyN repeatedly (page 17), then press MStartN. 3 Make necessary settings such as number of copies, resolution, zoom features and page layout features. A MStartN R “COPY RESERVED” will be displayed. The unit will start copying after the current printing job.
6. . Fax (KX-MB1520/KX-MB1530 only) 6. Fax (KX-MB1520/KX-MB1530 only) 6.1 Sending a fax manually 6.1.1 Using the scanner glass By using the scanner glass, you can send a page from booklets or small size paper. glass by pressing MStartN, and then M1N (To receive a fax, press M2N). R You can change the default operation mode (feature #463 on page 54) and the timer before returning to the default operation mode (feature #464 on page 55).
6. Fax (KX-MB1520/KX-MB1530 only) Printing a sending report A sending report provides you with a printed record of transmission results. To print the sending reports, make sure that feature #401 is activated (page 56). For an explanation of the messages, see page 66. Printing a journal report A journal report provides you with a printed record of the 30 most recent faxes. To print it manually, see page 82.
6. Fax (KX-MB1520/KX-MB1530 only) 6.3 Sending a fax using phonebook Before using this feature, store the desired names and telephone numbers into the phonebook (page 39). R Make sure that the MFaxN light is ON. 6.4 Sending an electronic document as a fax message from your computer 6.3.1 Using the scanner glass You can access the fax function from a Windows application using Multi-Function Station. For example, to send a document created from WordPad, proceed as follows. 1 Set the original (page 18).
6. Fax (KX-MB1520/KX-MB1530 only) – [Do not enter a fax number directly]: You can only select fax numbers stored in the phonebook. – [Re-enter to confirm the fax number]: When entering the fax number using the dial keypad display, re-entry of the number is required. 4. [OK] Note: R For details about each function, click [Help]. 6.5 Selecting the way to use your unit Depending on your situation, select the way you prefer to use your unit.
6. Fax (KX-MB1520/KX-MB1530 only) R The MFax Auto AnswerN light turns OFF. Fax Auto Answer Note: R Make sure feature #404 is set to “TEL” beforehand (page 56). How to receive phone calls and faxes You have to answer all calls manually. To receive a fax document, press MStartN and then M2N. 6.5.3 Use as a telephone and/or fax (TEL/FAX mode) Your situation You want to answer phone calls yourself and receive faxes automatically without rings.
6. Fax (KX-MB1520/KX-MB1530 only) 6.6 Receiving a fax automatically : Auto answer ON 6.7 Receiving a fax manually : Auto answer OFF R A4 or letter size recording paper can be used. R A4 or letter size recording paper can be used. 6.6.1 Activating FAX ONLY mode 6.7.1 Activating TEL mode Press MFax Auto AnswerN repeatedly to display “FAX ONLY MODE”. R The display will show the ring count in FAX ONLY mode.
6. Fax (KX-MB1520/KX-MB1530 only) press MGN MBN M9N (default fax activation code) firmly. 3. Replace the handset. R To answer using another telephone connected to the [EXT] jack of this unit, lift the handset, then press MStopN on the unit to talk to the other party. Note: R To stop receiving, see page 65. R To receive fax documents using the extension telephone, make sure remote fax activation is turned ON (feature #434 on page 58) beforehand. The default setting is ON. 6.7.
6. Fax (KX-MB1520/KX-MB1530 only) R The number of rings is determined by the “Silent fax recognition ring count” (feature #436 on page 58). R Callers will hear a ring back tone different from the one generated by the telephone company. B If you do not answer the call, the unit will activate the fax function. R Some fax machines do not generate fax calling tones when sending faxes, therefore the unit will try to receive a fax even if no fax calling tone is detected. 6.
6. Fax (KX-MB1520/KX-MB1530 only) – the fax activation code (feature #434 on page 58) Note: R If the call is a phone call, the answering machine will record voice messages. If a fax calling tone is detected, the fax machine will receive a fax automatically. R Regarding the remote access code for the answering machine, see the operating instructions of the answering machine.
6. Fax (KX-MB1520/KX-MB1530 only) 2. Press MEN repeatedly to display “JUNK LIST DISP.”. A MSetN 3. Press MCN or MDN repeatedly to display the desired item. A MFN R To cancel erasing, press MStopN, then press MMenuN. 4. MSetN A MMenuN 6.11 Receiving a fax on your computer You can receive a fax document on your computer. The received fax document is saved as an image file (TIFF-G4 format). Important: R Make sure the PC fax setting is set to “ALWAYS” or “CONNECTED” beforehand (feature #442 on page 59).
7. . Caller ID (KX-MB1520/KX-MB1530 only) 7. Caller ID (KX-MB1520/KX-MB1530 only) 7.1 Caller ID service This unit is compatible with the Caller ID service offered by your local telephone company. To use this unit’s Caller ID features, you must subscribe to a Caller ID service. Important: R This unit is designed in accordance with the ETS (European Telecommunication Standard) and only supports the basic CLIP (Calling Line Identification Presentation) features.
7. Caller ID (KX-MB1520/KX-MB1530 only) To correct a mistake 1. Press MFN or MEN to move the cursor to the incorrect number. 2. Press MStopN to delete the number. 3. Enter the correct number. To delete a number Press MFN or MEN to move the cursor to the number you want to delete and press MStopN. 7.4 Erasing caller information 7.4.1 Erasing all caller information 1 Press MMenuN repeatedly to display “CALLER SETUP”. A MSetN R “CALL LIST ERASE” will be displayed. 2 MSetN.
8. Programmable Features 8.1 Programming MMenuN 8. . Programmable Features MSetN 1 MMenuN 2 Press MBN and the 3-digit code (page 51 to page 62). 3 Press the appropriate selection to display the desired setting. R This step will vary depending on the feature. 4 MSetN 5 Press MMenuN to exit.
8. Programmable Features 8.2 Basic features Feature/Code Selection Setting the date and time MBNM1NM0NM1N (KX-MB1520/KX-MB1530 only) Enter the date and time using the dial keypad. See page 20 for details. Setting your logo MBNM1NM0NM2N (KX-MB1520/KX-MB1530 only) Enter your logo using the dial keypad. See page 21 for details. Setting your fax number MBNM1NM0NM3N (KX-MB1520/KX-MB1530 only) Enter your fax number using the dial keypad. See page 22 for details.
8. Programmable Features Feature/Code Selection Setting the ADSL mode MBNM1NM2NM4N (KX-MB1520/KX-MB1530 only) When you use a DSL/ADSL line, this feature improves the reliability by reducing the transmission speed. M0N “OFF” (default) M1N “ON” Note: R Calling charges may be higher than usual.
8. Programmable Features Feature/Code Selection Setting the beep sounds and keytones MBNM1NM6NM5N M0N “OFF”: Deactivates this feature. M1N “ON” (default): You will hear confirmation/error beep sounds and keytones. Setting the off-hook alert MBNM1NM7NM1N (KX-MB1520/KX-MB1530 only) To alert you with a beeping sound when the telephone line has been left off-hook for more than 1 minute without dialling. M0N “OFF”: Deactivates this feature.
8. Programmable Features Feature/Code Selection Setting the recording paper size in the paper input tray MBNM3NM8NM0N M1N “LETTER”: Letter-size paper M2N “A4” (default): A4-size paper M6N “16K”: 16K-size paper Note: R When “16K” is selected, received fax documents will be stored in memory (KX-MB1520/KX-MB1530 only).
8. Programmable Features Feature/Code Selection Setting the default operation mode timer MBNM4NM6NM4N (KX-MB1520/KX-MB1530 only) To set the timer before returning to the default operation mode (feature #463). M0N “OFF”: Deactivates this feature. M1N “30s”: 30 seconds M2N “1min” (default): 1 minute M3N “2min”: 2 minutes M4N “5min”: 5 minutes Setting toner save feature MBNM4NM8NM2N M0N “OFF” (default): Deactivates this feature. M1N “ON”: The toner cartridge will last longer.
8. Programmable Features 8.3 Fax features (KX-MB1520/KX-MB1530 only) Feature/Code Selection Changing the TEL/FAX delayed ring count MBNM2NM1NM2N If you use an extension telephone in TEL/FAX mode, select the desired number of times the extension telephone rings before the unit answers the call. KX-MB1520EX/KX-MB1530EX: M2N “2” (default) M3N “3” M4N “4” KX-MB1520FX/KX-MB1530FX: M1N “1” M2N “2” (default) M3N “3” M4N “4” M5N “5” M6N “6” M7N “7” M8N “8” M9N “9” Note: R See page 44 for details.
8. Programmable Features Feature/Code Selection Sending a fax at a specific time MBNM4NM1NM2N This feature allows you to take advantage of low-cost calling hours offered by your telephone company. This feature can be set up to 24 hours in advance of the desired time. M0N “OFF” (default) M1N “ON” To send a document: 1. If the MFaxN light is OFF, turn it ON by pressing MFaxN repeatedly. 2. Set the original (page 18). 3. If necessary, change the contrast (page 38) and the resolution (page 38). 4.
8. Programmable Features Feature/Code Selection Confirming the destination before sending a fax MBNM4NM2NM0N M0N “OFF” (default): Deactivates this feature. M1N “ON”: You can send a fax after confirming the destination. When the displayed destination is correct, press MStartN to send the fax. Setting dial keypad entry restriction MBNM4NM2NM1N M0N “OFF” (default): Deactivates this feature. M1N “ON”: If you do not wish to dial a fax number manually using the dial keypad, activate this feature.
8. Programmable Features Feature/Code Selection Setting the memory reception alert MBNM4NM3NM7N To alert you with a beeping sound when a received fax document is stored into memory. M0N “OFF”: Deactivates this feature. M1N “ON” (default): You will hear a beeping sound. Note: R If documents are stored into memory due to some printing problem, the beeps will continue until you solve the problem. If a message is displayed, see page 67 to page 68 for directions on printing out the stored documents.
8. Programmable Features 8.4 Copy features Feature/Code Selection Setting the input tray to use for copy MBNM4NM6NM0N M1N “#1” (default): The paper input tray is selected. The displayed paper size depends on the recording paper size setting (feature #380 on page 54). M2N “#2”: The manual input tray is selected. The displayed paper size depends on the recording paper size setting (feature #381 on page 54).
8. Programmable Features 8.5 PC print features Feature/Code Selection Changing the data timeout setting MBNM7NM7NM4N The unit will automatically print the remaining data in memory when the computer does not send data to the unit during the set time. 1. MMenuN A MBNM7NM7NM4N A MSetN 2. Enter the desired data timeout setting from “005” seconds to “600” seconds, using the dial keypad. R The default setting is “060” seconds. 3.
8. Programmable Features 8.6 Scan features Feature/Code Selection Setting the scan mode for Push Scan MBNM4NM9NM3N M1N “VIEWER” (default): The scanned image will be displayed in the [Multi-Function Viewer] window. M2N “FILE”: The scanned image will be saved as a file. M3N “EMAIL”: The scanned image will be saved for email attachment. M4N “OCR”: The scanned image will be displayed in the OCR window. Note: R The OCR software is not supplied.
9. . Useful Information 9. Useful Information 9.1 Character entry (KX-MB1520/ KX-MB1530 only) The dial keypad is used to enter characters and numbers. – Press MFN or MEN to move the cursor. – Press the dial keys to enter characters and numbers. – Press MStopN to erase the character or number highlighted by the cursor. Press and hold MStopN to erase all characters or numbers.
9. Useful Information 9.2 Status of the unit 9.2.1 Using Remote Control You can easily operate the following functions from your computer.
9. Useful Information 9.3 Cancelling the operations You can cancel the current operation from the unit. You can also select the desired operation to cancel. 1 MStopN R “USER STOPPED” is displayed. R If “USER STOPPED” is not displayed, go to step 2. 2 To cancel printing: Press MStopN repeatedly to display “STOP PRINTING?”. To cancel scanning (KX-MB1520/KX-MB1530 only): Press MStopN repeatedly to display “STOP SCANNING?”. 9.
10. . Help 10. Help 10.1 Report messages (KX-MB1520/KX-MB1530 only) To indicate the unit’s fax transmission/reception status, one of the following messages will be printed on the sending and journal reports (page 39). Message COMMUNICATION ERROR Code 40-42 46-72 FF Cause & Solution R A transmission or reception error occurred. Try again or check with the other party. 43 44 R A line problem occurred. Connect the telephone line cord to a different jack and try again.
10. Help 10.2 Display messages To indicate the unit’s status, one or more of the following messages will appear on the display. Display Cause & Solution “CALL SERVICE” R There is something wrong with the unit. Contact our service personnel. “CHANGE CARTRIDGE” R The toner cartridge is not inserted properly. Re-insert it correctly (page 10). R There is something wrong with the toner cartridge. Replace the toner cartridge. “CHECK CARTRIDGE” R The toner cartridge is not inserted properly.
10. Help Display Cause & Solution “LOW TEMP.” R The inside of the unit is extremely cold and cannot be operated. Use the unit in a warmer area. “MEMORY FULL” R When performing memory transmission, the document being stored exceeded the memory capacity of the unit. Send the entire document manually. R When making a copy, the document being stored exceeded the memory capacity of the unit. Press MStopN to clear the message. Divide the document into sections.
10. Help 10.3 When a function does not work 10.3.1 General Problem Cause & Solution The unit does not work. R Check the connections (page 11, 23). The recording paper exit becomes full quickly or the recording paper does not stack properly on the recording paper exit. R High humidity may cause the recording paper to curl. Try turning the paper over and re-inserting it. If the curl on the paper is heavy, please remove it from the recording paper exit.
10. Help Problem Cause & Solution I forgot the password for feature programming via remote operation. R You may have changed the feature programming password. If you do not remember it, assign a new password using feature #155 (page 52). When required to enter the current password, enter “0101” instead. During programming, I cannot enter the code or ID number. R All or part of the number is the same as another code or ID. Change the number: – fax activation code: feature #434 on page 58.
10. Help Problem Cause & Solution When using the unit as a printer, the printing result is distorted. R When your unit is connected to the computer by USB, if you cancel printing using your computer, then immediately re-start printing, the printing result may be distorted. To avoid this, you must wait for 60 seconds before re-printing. 10.3.3 Scanner Problem Cause & Solution I cannot scan. R When scanning at a high resolution, a large amount of available memory is required.
10. Help 10.3.5 Fax (KX-MB1520/KX-MB1530 only) Problem Cause & Solution I cannot send documents. R The telephone line cord is connected to the [EXT] jack on the unit. Connect to the [LINE] jack (page 11). R The other party’s fax machine is busy or has run out of recording paper. Try again. R The other party’s machine is not a fax machine. Check with the other party. R The other party’s fax machine failed to answer the fax automatically. Send the fax manually (page 38). R Set the maximum fax speed to “14.
10. Help Problem Cause & Solution I cannot select the desired receiving mode. R If you want to set FAX ONLY mode: – press MFax Auto AnswerN repeatedly to turn ON the MFax Auto AnswerN light. R If you want to set TEL mode or TEL/FAX mode: – select the desired mode using feature #404 (page 56), and press MFax Auto AnswerN repeatedly to turn OFF the MFax Auto AnswerN light. When an extension telephone is connected, I cannot receive documents by pressing MGNMBNM9N.
10. Help Problem Cause & Solution Callers complain that they cannot send a document. R There is no room left in the memory of your answering machine to record voice messages. See the operating instructions of the answering machine and erase unnecessary messages. R You set the answering machine to only give a greeting message. 10.3.7 If a power failure occurs R The unit will not function. R If any documents are stored in the memory (i.e. during copying, PC printing), they will be lost.
11. . Paper Jams 11. Paper Jams 11.1 Recording paper jam 2. Push down both green levers (A) until they stop. 11.1.1 When the recording paper has jammed inside of the unit The display will show the following: – “PAPER JAMMED” L “OPEN REAR COVER” “OPEN FRONT COVER” Caution: R Do not open the paper input tray before opening the front and rear covers as the jammed paper may be pulled and the jam may get worse. A 3. Remove the jammed paper (A) carefully by pulling it toward you.
11. Paper Jams 4. Push up the green levers (A) to the original position. 2. Remove the jammed paper (A) carefully by pulling it toward you. A A 5. Close the rear cover. R If the recording paper has jammed behind the toner cartridge, remove the toner cartridge (A) first, and remove the jammed paper (B). Then reinsert the toner cartridge into the unit. A R Open and close the front cover to clear the error message. Case 2: When the recording paper has jammed inside the front cover: 1.
11. Paper Jams 3. Close the front cover. 11.1.2 When the recording paper is not fed into the unit properly The display will show the following: – “CHECK PAPER #1 PRESS START” 1 Pull the paper input tray completely out. 2 Re-load the recording paper. 3 Insert the paper input tray into the unit. Note: R If the message is still displayed, check the recording paper specifications and load the recording paper again. See page 13 for details. 11.1.
11. Paper Jams 11.2 Document jams (Automatic document feeder) (KX-MB1530 only) The display will show the following: – “REMOVE DOCUMENT” Caution: R Do not pull out the jammed document forcibly before lifting the ADF cover. R Be careful not to damage the transparent plastic sheets (A). A 78 1 Open the ADF cover (A) while holding the document cover (B).
11. Paper Jams 2 Remove the jammed document (A) carefully. When the document has jammed near the document entrance: 3 Close the ADF cover. A MStopN R Press MStopN to clear the message. When the document has jammed near the document exit: A R If you cannot remove the jammed document (A), open the document cover, remove the document, then close the document cover.
12. . Cleaning 12. Cleaning 12.1 Cleaning the white plates and glass Clean the white plates and glass when a black line, a white line or a dirty pattern appears on: – your recording paper, – the original document, – the scanned data, or – the fax document received by the other party (KX-MB1520/KX-MB1530 only). 2 Hold the document cover while cleaning the white plates (A) and the scanner glass (B).
12. Cleaning 12.2 Cleaning the document feeder rollers (KX-MB1530 only) 4 Close the ADF cover. Clean the rollers when documents frequently misfeed, or when a line or a dirty pattern appears on documents. Caution: R Do not use paper products, such as paper towels or tissues for cleaning. 1 Turn the power switch OFF. 2 Open the ADF cover (A) while holding the document cover (B). A B 5 Turn the power switch ON.
13. . General Information 13. General Information 13.1 Reference lists and reports You can print out the following lists and reports for your reference. – “SETUP LIST” – “TEL NO. LIST”*1 – – “JOURNAL REPORT”*1 “PRINTER TEST” – “CALLER ID LIST”*1 *1 KX-MB1520/KX-MB1530 only 13.2 Specifications n Applicable lines*1: Public Switched Telephone Network n Document size: Scanner glass: Max. 216 mm in width, Max. 297 mm in length Automatic document feeder (KX-MB1530): Max. 216 mm in width, Max.
13. General Information Standby: Approx. 4 W (KX-MB1500) Approx. 4.3 W (KX-MB1520) Approx. 5 W (KX-MB1530) ITU-T No.1 Test Chart Preheat: Approx. 55 W Copy: Approx. 350 W Maximum: Approx. 950 W (When the fuser lamp turns on) n Power supply: 220-240 V AC, 50/60 Hz n Memory capacity (for operation and storing memory): 32 MB n Fax memory capacity*1: 3.5 MB in total Approx. 110 pages of memory reception Approx. 150 pages of memory transmission (Based on the ITU-T No. 1 Test Chart in standard resolution.
13. General Information Toner cartridge life The toner cartridge needs to be replaced regularly. Toner cartridge life depends on the amount of content in a printed document. Toner cartridge life varies in actual usage. The following is the approximate number of pages that the toner cartridge can print according to the various printing examples. Example 1 – Approx. 1,500 pages can be printed using KX-FAT390X. – Approx. 2,500 pages can be printed using KX-FAT410X. Table of Contents1. 1. Table of Contents 1.
14. Index 14.
14.
14.
PNQX3909YA C0611KN1012