
Operating instructions
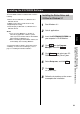
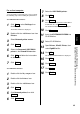


Start Windows NT 4.0.
Quit all applications.
Click Start , move the pointer to
Settings, then click Control Panel.
The Control Panel window is displayed.
Double click Add/Remove Programs .
The Add/Remove Program Properties window
is displayed.
Click Install .
The Install Program From Floppy Disk or CD-
ROM window is displayed.
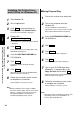
Insert the KX-PS8000 CD-ROM into
CD-ROM drive.
Click Next> .
The Run Installation Program window is
displayed.
Click Finish .
Wait until the Panasonic KX-PS8000 Utilities
Welcome window is displayed.
Click Next> .
The Setup Type window is displayed.
Click the type of setup, then click
Next> .
The Select Program Folder window is
displayed.
Click Next> .
The Start Copying Files window is displayed.
Click Next> .
After copying files, the Add Printer Wizard
window is displayed.
Click Next> .
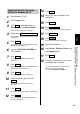
Select LPT port by clicking on the
check box.
Click Next> .
Click Have Disk... .
The Install From Disk window is displayed.
Click Browse... .
Click Cancel .
The Locate File window is displayed.
Select CD-ROM drive.
Open Drivers, Winnt40, Printer, then
select pgdint.inf file.
Click Open .
Follow the instructions on the screen
to complete the installation.
To connect the printer to a SCSI port, the
SCSI port needs to be installed.
( ☞ P. 34 Installing the SCSI port)
33
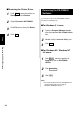
Installing the KX-PS8000 Software
(Installing the Printer Driver and Utilities for Windows NT 4.0)
Installing the Printer Driver and
Utilities for Windows NT 4.0
Setup
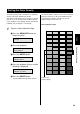
7
4
5
6
8
1
2
3
9
10
11
12
15
16
17
13
14
18
19
22
21
20