Operating Instructions Digital Cordless Phone Model No. KX-TCD280FX Digital Cordless Answering System KX-TCD290 Model No. KX-TCD290FX This unit is compatible with Caller ID and SMS. To use these features, you must subscribe to the appropriate service of your service provider. Charge the battery for about 8 hours before initial use. Please read these operating instructions before using the unit and save them for future reference.
Introduction Introduction Thank you for purchasing a new Panasonic digital cordless phone. For your future reference Attach or keep original receipt to assist with any repair under warranty. Serial No. (found on the bottom of the base unit) Date of purchase Name and address of dealer Declaration of Conformity: L Panasonic Communications Co. (U.K.) Ltd.
Table of Contents Table of Contents Preparation Accessory information ..............................4 Important Information ...............................5 Connections .............................................7 Battery installation ....................................8 Battery charge ..........................................9 Battery replacement ...............................10 Controls and displays .............................11 Turning the power on/off ........................
Preparation Accessory information Included accessories AC adaptor PQLV19CE Telephone line cord Rechargeable battery HHR-P105 Handset cover Belt clip Operating Instructions Quick Guide Additional/replacement accessories Accessory Items Order number Rechargeable nickel metal hydride (Ni-MH) battery HHR-P105 Additional Digital Cordless Handset KX-TCA128FX 4
Preparation Important Information General L Use only the AC adaptor included with this product, noted on page 4. L Do not connect the AC adaptor to any AC outlet other than a standard 220-240 V AC outlet. L This product is unable to make calls when: - The portable handset battery needs recharging or has failed. - There is a power failure. - The key lock feature is turned on. - The call bar feature is turned on (only phone numbers stored in the unit as emergency numbers can be called).
Preparation Splash-resistant (handset only) The handset is designed to be splashresistant. You can use the handset with wet hands. L Do not immerse in water or leave under running water. L Keep the handset away from salt water. L Avoid exposure to prolonged high humidity. L Since water in headset jack may cause damage, close the headset jack cover when the optional headset is not in use. When the optional headset is connected, do not use the handset with wet hands.
Preparation Connections Raise the antennas. Fasten the AC adaptor cord. 220-240 V, 50 Hz Hook To telephone network Important: Use only the AC adaptor and telephone line cord supplied with this unit. Note: L After connection, you must charge the battery to make or answer calls (page 9). L Never install telephone wiring during a lightning storm. L The AC adaptor must remain connected at all times. (It is normal for the adaptor to feel warm during use.
Preparation If you subscribe to an xDSL service L Please attach a noise filter (contact your xDSL provider) to the telephone line between the base unit and the telephone line jack in the event of the following: – Noise is heard during conversations. – Caller ID features (page 34) do not function properly. Battery installation 1 Release the battery cover latch and lift the cover open. 2 Insert the battery (1), and press it down until it snaps into the compartment (2). 2 1 3 Close the handset cover.
Preparation Battery charge Place the handset on the base unit for about 8 hours before initial use. When charging, the battery icon is shown as follows. When the battery is fully charged, 5 remains on the display. Battery strength Battery icon Battery strength 5 High 6 Medium 7 Low When flashing: Needs to be charged. Note: L When 7 flashes, recharge the handset battery. 7 will continue to flash until the battery has been charged for at least 15 minutes.
Preparation Battery replacement If 7 flashes even after the handset battery has been charged for 8 hours, the battery must be replaced. Important: L We recommend the use of a Panasonic rechargeable battery as noted on page 4. If you install a non-rechargeable battery and start charging, the battery may leak electrolyte. 1 Release the battery cover latch and lift the cover open. 2 Replace the old battery with a new one, and close the cover (see page 8 for battery installation).
Preparation Controls and displays Controls Base unit A F G H B I J * The pictured model is KX-TCD290. A Antennas B Charge contacts C VOL.
Preparation Handset I J A B C D E F G H /OK K L M N O P Q R A Speaker B {k} (Phonebook) C Headset jack D {C} (Talk) E Navigator key {e}{v}: To search for the desired item in menus. {>}: To select the desired item or move the cursor to the right. {<}: To return to the previous screen or move the cursor to the left.
Preparation Display icon Meaning -2Base unit number: The left icon shows base unit 2 example (page 27). F New SMS message received (SMS users only; page 38) [IN USE] Line is being used by another handset. Turning the power on/off Example: 3:30 PM Press {0}{3} {3}{0}, then press {*} repeatedly until “03:30 PM” is displayed. 7 Press {j/OK}. 8 Press {ih}. Note: To correct a digit, press {<} or {>} to move the cursor, then make the correction. The date and time may be incorrect after a power failure.
Making/Answering Calls Making calls 1 Lift the handset and dial the phone number. L To correct a digit, press {C/T}, then enter the correct number. 2 Press {C}. 3 When finished talking, press {ih} or place the handset on the base unit. Speakerphone The handset features a digital speakerphone, which allows you to have hands-free conversations. 1 During a conversation, press {s} to turn on the speakerphone. L Speak alternately with the caller.
Making/Answering Calls To edit a number in the redial list before calling it 1 Press {R}. 2 Press {e} or {v} repeatedly to select the desired number, then press {j/OK}. 3 Select “Edit and Call”, then press {>}. 4 Press {<} or {>} to move the cursor, then edit the number. L Place the cursor on the number you wish to erase, then press {C/T}. L Place the cursor to the right of where you want to insert a number, then press the appropriate dial key. 5 Press {C} or {s}.
Making/Answering Calls Note: L Calls to emergency numbers (page 32) cannot be made until key lock is turned off. L Key lock is turned off when the handset is turned off. R button (to use the recall feature) {R} is used to access optional telephone services. Contact your service provider for details. Note: L If your unit is connected to a PBX (private branch exchange), pressing {R} can allow you to access certain features of your host PBX such as transferring an extension call.
Making/Answering Calls Answering calls 1 Lift the handset and press {C} or {s} when the unit rings. L You can also answer a call by pressing any dial key from {0} to {9}, {*}, {#}, or {INT}. (Any key answer feature) 2 When finished talking, press {ih} or place the handset on the base unit. Auto talk feature You can answer calls simply by lifting the handset off the base unit. You do not need to press {C}. To turn this feature on, see page 28.
Phonebooks Handset phonebook The handset phonebook allows you to make calls without having to dial manually. You can add 200 names and phone numbers to the handset phonebook, assign each handset phonebook entry to the desired category, and search for handset phonebook entries by name or category. Adding entries to the handset phonebook 1 Press {k}, then press {j/OK}. 2 Select “New Entry”, then press {>}. 3 Enter the party’s name (16 characters max.; see page 54 for character entry), then press {j/OK}.
Phonebooks Searching by first character (index search) 1 Press {k}, then press {R}. 2 Select “Index Search”, then press {>}. 3 Select the character entry mode that contains the character you are searching for, and press {>}. 4 Press the dial key ({0} to {9}) which contains the character you are searching for (page 54). L Press the same dial key repeatedly to display the first entry corresponding to each letter located on that dial key.
Phonebooks One touch dial Chain dial Assigning an entry in the handset phonebook to a one touch dial key Dial keys {1} to {9} can each be used as a one touch dial key, allowing you to dial a number from the handset phonebook by simply pressing a dial key. This feature allows you to dial phone numbers in the handset phonebook while you are on a call.
Phonebooks 6 To record an audible call announcement, select “Start Recording”, then press {>}, otherwise select “Skip Recording”, press {>}, then go to step 9. L Audible call (page 35) is useful for Caller ID subscribers only. L If “Memory Full” is displayed, erase any unnecessary answering system messages (page 43). 7 When “Recording” is displayed, speak into the microphone. L Maximum recording time is 10 seconds. L Hold the handset about 20 cm away and speak clearly into the microphone.
Phonebooks Editing entries in the shared phonebook Erasing entries from the shared phonebook Shared phonebook entries can be edited after you have saved them. You can change the name, phone number, and audible call. Erasing an entry Changing a name, phone number, audible call 1 Find the desired entry (page 21), then press {j/OK}. 2 Select “Edit”, then press {>}. 3 Edit the name if necessary (16 characters max.; see page 54 for character entry), then press {j/OK}.
Phonebooks Copying phonebook entries to other handsets Copying handset phonebook entries to other handsets Handset phonebook entries (page 18) can be copied from the handset to the phonebook of a compatible Panasonic handset. Copying one entry 1 Find the desired handset phonebook entry (page 18), then press {j/OK}. 2 Select “Copy”, then press {>}. 3 Enter the handset number you wish to send the handset phonebook entry to. 4 To continue copying another entry, select “Yes”, then press {>}.
Handset Settings Guide to handset settings For your reference, a chart of all items which can be customised for the handset is printed below. L When customising the handset, the current item or setting is indicated by >. Handset settings menu Time Settings Ringer Setup Display Setup Call Options Registration Select Base Other Options Sub-menu Sub-menu 2 Set Date & Time Alarm Ringer Volume Ext. Ringtone Int.
Handset Settings Time settings Ringer setup Alarm Ringer volume An alarm will sound for 3 minutes at the set time once or daily. Set the date and time beforehand (page 13). 1 2 3 4 5 1 2 3 4 5 Press {j/OK}. Select “Handset Setup”, then press {>}. Select “Time Settings”, then press {>}. Select “Alarm”, then press {>} 2 times. Select an alarm mode, then press {>}. – “Once”: The alarm will sound once at the set time. Enter the desired day and month by selecting 2 digits for each.
Handset Settings Note: L If you select one of the melody ringtones, the ringtone will continue to sound for several seconds if the caller hangs up before you answer. You may hear a dial tone or no one on the line when you answer a call. L The preset melodies in this product are used with permission of © 2004 M-ZoNE Co., Ltd. Night mode Night mode allows you to select a block of time during which the handset will not ring for outside calls.
Handset Settings 6 Press the desired category numbers, then press {j/OK}. L The selected category number will flash. L To cancel a selected category number, press the number again. The number will stop flashing. 7 Press {ih}. Note: L If a call is received from one of the categories set to bypass night mode, only the handset will ring. Display setup Selecting the standby mode display “Base Number”: The current base unit number is displayed. “Handset Number”: The current handset number is displayed.
Handset Settings 6 Select “On” or “Off”, then press {>}. 7 Press {ih}. Note: L When call bar is turned on, o is displayed. Turning auto talk on/off When this feature is turned on, you can answer calls simply by lifting the handset off the base unit. You do not need to press {C}. 1 2 3 4 5 6 Press {j/OK}. Select “Handset Setup”, then press {>}. 1 2 3 4 5 6 Press {j/OK}. Select “Handset Setup”, then press {>}. Select “Other Options”, then press {>}. Select “LetterWise”, then press {>}.
Handset Settings Note: L The following items will be deleted or reset to their default settings: – Settings listed on page 24 – Redial list – Voice enhancer – Category names – Category ringtones L The following items will be retained: – Handset phonebook entries (category names and ringtones will be reset to their default settings.
Base Unit Settings Guide to base unit settings For your reference, a chart of all items which can be customised for the base unit is printed below. L When customising the base unit, the current item or setting is indicated by >. Base unit settings menu Sub-menu Ringer Setup Ringer Volume Night Mode Sub-menu 2 Other Options Page Medium page 31 Start/End 23:00/06:00 page 31 On/Off Off page 31 60 sec. page 31 Tone page 32 Recall 600 msec. page 32 Pause Length 3 sec.
Base Unit Settings Ringer setup 8 Enter the desired hour and minute you wish to end this feature by selecting 2 digits for each. L If you use 12-hour time entry, select “AM” or “PM” by pressing {*} repeatedly before entering the time. Ringer volume 1 Press {j/OK}. 2 Select “Base Unit Setup”, then press {>}. 3 Enter “0000” (default base unit PIN). L If you changed the PIN, enter it (page 33). 4 Select “Ringer Setup”, then press {>}. 5 Select “Ringer Volume”, then press {>}.
Base Unit Settings Call options Setting dialling mode (tone/pulse) “Tone”: Select when you have a touch tone service. “Pulse”: Select when you have rotary or pulse service. 1 Press {j/OK}. 2 Select “Base Unit Setup”, then press {>}. 3 Enter “0000” (default base unit PIN). L If you changed the PIN, enter it (page 33). 4 Select “Call Options”, then press {>}. 5 Select “Dial Mode”, then press {>}. 6 Select the desired setting, then press {>}. 7 Press {ih}.
Base Unit Settings 4 Select “Call Options”, then press {>}. 5 Select “Call Restrict”, then press {>}. 6 Set which handsets will be restricted by pressing the desired handset number. L All the registered handset numbers will be displayed. L Flashing numbers indicate call restriction is turned on for the corresponding handset. L To turn call restriction off for a handset, press the number again. The number will stop flashing. 7 Press {j/OK}. 8 Select a memory location, then press {>}.
Caller ID Service Using Caller ID service Important: L This unit is Caller ID compatible. To use Caller ID features (such as displaying caller phone numbers), you must subscribe to Caller ID service. Consult your service provider for details. Caller ID features When an outside call is received, the caller’s phone number can be displayed. L Phone numbers of the last 50 different callers will be logged in the caller list.
Caller ID Service Audible call for shared phonebook (KX-TCD290 only) Audible call allows you to know who is calling without looking at the display. If you record an audible call announcement for a shared phonebook entry (page 21), the audible call recording will be announced when you receive a call from that person. Note: L If the handset ringer is turned off, audible call announcements will not be heard. 3 Press {e} or {v} repeatedly to display the desired entry.
SMS (Short Message Service) Using SMS (Short Message Service) SMS allows you to send and receive text messages between other fixed-line and mobile phones that support compatible SMS networks and features. Important: L To use SMS features, you must: – subscribe to the Caller ID and/or appropriate service – confirm SMS is turned on – confirm the correct message centre numbers are stored Consult your service provider for details and availability.
SMS (Short Message Service) Sending a message Writing and sending a new message 1 Press {j/OK}. 2 Select “SMS”, then press {>}. 3 Select “Create”, then press {>}. L If “^Use Last Text?” is displayed, you can use the text from the last message you created by pressing {e}. 4 Enter the message (page 40), then press {j/OK}. 5 Enter the destination phone number (20 digits max.), then press {j/OK}.
SMS (Short Message Service) 5 Press {j/OK}, select “Edit Message”, press {>}, then continue from step 4, “Writing and sending a new message”, page 37. Erasing saved messages 1 2 3 4 Press {j/OK}. Select “SMS”, then press {>}. Select “Send List”, then press {>}. Press {e} or {v} repeatedly to select the message, then press {j/OK}. 5 Press {j/OK}, select “Erase”, then press {>}. L To erase all messages, select “Erase All”, then press {>}. 6 Select “Yes”, then press {>}. 7 Press {ih}.
SMS (Short Message Service) Storing the sender’s number in the handset phonebook Storing the PBX line access number (for PBX users only) 1 While reading a received message, Store your PBX line access number (4 digits max.) so that SMS messages are sent properly. When sending SMS messages to entries in the handset phonebook or redial list, the PBX line access number will be deleted. press {j/OK}. 2 Select “Add Phonebook”, then press {>}.
SMS (Short Message Service) Available character entries for SMS Important: L For character entry when entering the name for phonebook, etc., see page 54. The dial keys are used to enter characters and numbers. Each dial key has multiple characters assigned to it. The available character entry modes are, LetterWise, Alphabet, Numeric, Greek, and Extended. When in Alphabet (ABC), Greek (F), or Extended (G) character entry modes, you can select which character is entered by pressing a dial key repeatedly.
SMS (Short Message Service) Alphabet character table (ABC) Numeric entry table (0-9) Greek character table (M) Extended character table (N) L The following are used for both uppercase and lowercase: 41
Answering System Features (KX-TCD290 only) Answering system The KX-TCD290 contains an answering system which can answer and record calls for you when you are unavailable to answer the phone. You can also record your own voice memos (page 44) and phone conversations (page 16). For details about memory capacity, see page 44. Important: L Only 1 handset can access the answering system (listen to messages, record a greeting message, etc.) at a time.
Answering System Features (KX-TCD290 only) not be recorded and the unit will play a different prerecorded greeting message asking callers to call again. Playing back the greeting message 1 Press {j/OK}. 2 Select “Answer System”, then press {>}. 3 Select “Play Greeting”, then press {>}. 4 Press {ih}. Erasing the greeting message If you erase your own greeting message, the unit will play a prerecorded greeting message for callers. 1 Press {j/OK}. 2 Select “Answer System”, then press {>}.
Answering System Features (KX-TCD290 only) L To stop a message during playback: – for the base unit, press {■}. – for the handset, press {9}. L To erase a message during playback: – for the base unit, press {4} – for the handset, press, {*}, {4}. Erasing all messages Using the base unit Press {4} 2 times. Using the handset 1 Press {j/OK}. 2 Select “Answer System”, then press {>}. 3 Select “Erase Message”, then press {>}. 4 Select “Erase All”, then press {>}. 5 Select “Yes”, then press {>}. 6 Press {ih}.
Answering System Features (KX-TCD290 only) Using direct commands Remote operation You can operate the answering system by pressing dial keys, rather than navigating through the menus. To use the following commands, press {j/OK}, select “Answer System”, then press {>}. Using a touch tone phone, you can call your phone number from outside and access the unit to listen to messages or change answering system settings.
Answering System Features (KX-TCD290 only) sec.” for activating the ring delay feature. Using the answering system remotely 1 Dial your phone number from a touch Remote commands You can press dial keys to access certain answering system functions without waiting for the voice guidance to prompt you. Key Remote command tone phone. L If the number of rings is set to “Auto”, (page 47), the number of rings you hear will indicate whether or not you have new messages.
Answering System Features (KX-TCD290 only) 3 Enter your remote access code within 10 seconds of the long beep. L The greeting message is played back. L You can hang up, or enter your remote access code again and begin remote operation. 4 Select “Number of Rings”, then press {>}. 5 Select the desired setting, then press {>}. 6 Press {ih}.
Answering System Features (KX-TCD290 only) Turning message alert on/off This feature alerts you when new messages have been recorded. The base unit beeps about once a minute until you have listened to all new messages. 1 Press {j/OK}. 2 Select “Answer System”, then press {>}. 3 Select “Settings”, then press {>}. 4 Select “New Msg. Alert”, then press {>}. 5 Select “On” or “Off”, then press {>}. 6 Press {ih}.
Multi-unit Operation Operating additional units Additional handsets Up to 6 handsets can be registered to a single base unit. Additional handsets will give you the freedom to, for example, have an intercom call with another handset while a third handset is on an outside call. See page 4 for information on ordering additional handsets. Important: L The additional handset model recommended for use with this unit is noted on page 4.
Multi-unit Operation To register a handset to an additional base unit (manual registration) You can register a handset to a base unit manually using the following method. 1 Press {j/OK}. 2 Select “Handset Setup”, then press {>}. 3 Select “Registration”, then press {>} 2 times. 4 Select a base unit number, then press {>}. L This number is used by the handset as a reference only. 5 Press and hold {x} on the base unit for about 3 seconds, until the registration tone sounds.
Multi-unit Operation 6 Select the handset(s) you want to cancel, by pressing the desired handset number. L The selected handset number(s) will flash. L To cancel a selected handset number, press the number again. The number will stop flashing. 7 Press {j/OK}. 8 Select “Yes”, then press {>}. 9 Press {ih}. Cancelling a base unit A handset can be registered to a maximum of 4 base units. A handset can cancel a base unit that it is registered to. This allows the handset to “forget” the base unit.
Multi-unit Operation 3 Handset 1: To complete the call transfer, press {ih}. To establish a conference call, press {3}. Transferring a call without speaking to the other handset user 1 During an outside call, press {INT}, then press the desired handset number. L The other handset rings if it is within range of the base unit and turned on. 2 Press {ih}. L The outside call rings at the other handset. Note: L k flashes to indicate the outside call is on hold.
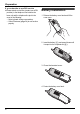
Useful Information Belt clip Headset (optional) You can hang the handset on your belt or pocket using the included belt clip. Connecting an optional headset to the handset allows hands-free phone conversations. To attach the belt clip To connect an optional headset to the handset Headset jack To remove the belt clip While pressing the top of the clip (1), pull the right edge in the direction of the arrow (2).
Useful Information Available character entries Important: L For character entry when writing SMS messages, see page 40. The dial keys are used to enter characters and numbers. Each dial key has multiple characters assigned to it. The available character entry modes are, LetterWise, Alphabet, Numeric, Greek, Extended 1, Extended 2, and Cyrillic.
Useful Information Alphabet character table (ABC) Numeric entry table (0-9) Greek character table (M) Extended 1 character table (N) L The following are used for both uppercase and lowercase: 55
Useful Information Extended 2 character table (O) L The following are used for both uppercase and lowercase: Cyrillic character table (P) 56
Useful Information Troubleshooting If you still have difficulties after following the instructions in this section, disconnect the AC adaptor and turn off the handset, then reconnect the AC adaptor and turn on the handset. Initial settings Problem w is flashing. The handset display is blank. The handset will not turn on. Cause & solution L The handset is not registered to the base unit. Register it (page 49). L The handset is too far from the base unit. Move closer. L The AC adaptor is not connected.
Useful Information Telephone Problem I cannot make or receive calls. The unit does not ring. The battery should be charging but the battery icon does not change. A busy tone is heard when {C} is pressed. Static is heard, sound cuts in and out. Interference from other electrical units. 58 Cause & solution L The AC adaptor or telephone line cord is not connected. Check the connections.
Useful Information Problem Noise is heard during a call. The handset/base stops working while being used. Cause & solution L You are using the handset or base unit in an area with high electrical interference. Locate the handset and base unit away from interference sources, such as antenna and mobile phones. L Disconnect the AC adaptor and turn off the handset. Connect the AC adaptor, turn on the handset and try again. L A call is being received. To answer the call, press {C}.
Useful Information SMS (Short Message Service) Problem I cannot send or receive SMS messages. “FD” is displayed. “FE” is displayed. “E0” is displayed. “Q” is not displayed after you read a message. An error code (“FD”, “FE”, or “E0”) is displayed. Cause & solution L You have not subscribed to the appropriate service. Consult your service provider. L The SMS message centre number(s) are not stored or are incorrect. Store the correct numbers. L Message transmission was interrupted.
Useful Information Problem I cannot operate the answering system with the handset. I cannot operate the answering system remotely. While recording a greeting message or listening to messages, the unit rings and recording stops. Cause & solution L Another handset user is using the answering system, SMS features, access the caller list or changing base unit settings. Wait for the other user to finish. L A caller is leaving a message. Wait for the caller to finish.
Useful Information Specifications N Standard: DECT (Digital Enhanced Cordless Telecommunications), GAP (Generic Access Profile) N Number of channels: 120 Duplex Channels N Frequency range: 1.88 GHz to 1.9 GHz N Duplex procedure: TDMA (Time Division Multiple Access) N Channel spacing: 1,728 kHz N Bit rate: 1,152 kbit/s N Modulation: GFSK (Gaussian Frequency Shift Keying) N RF transmission power: Approx.
Useful Information Declaration of Conformity form 63
Useful Information 64
Useful Information 65
Index Index A Alarm: 25 Answering calls: 17 Answering system: 42 Listening to messages: 43 Remote operation: 45 Settings: 47 Turning on/off: 42 Audible call: 20, 22 Auto talk: 17, 28 B Base unit Additional base units: 49 Cancelling: 51 PIN: 33 Resetting: 33 Selecting: 50 Settings: 30 Battery Charge: 9 Installation: 8 Life: 9 Strength: 9 Belt clip: 53 C Call bar: 27 Caller ID service: 34 Call restriction: 32 Call screening: 47 Category: 18 Ringtones: 34 Chain dial: 20 Character entry: 54 Character entry for
Index Volume Receiver: 14 Ringer (Base unit): 31 Ringer (Handset): 25 Speakerphone: 14 67
1999/5/EC Panasonic Communications Company (U.K.) Ltd. Pencarn Way, Duffryn, Newport, South Wales, NP10 8YE, United Kingdom Copyright: This material is copyrighted by Panasonic Communications Co. (U.K.) Ltd., and may be reproduced for internal use only. All other reproduction, in whole or in part, is prohibited without the written consent of Panasonic Communications Co. (U.K.) Ltd. © 2005 Panasonic Communications Co. (U.K.) Ltd. All Rights Reserved.