
Operating instructions


Preparation
For assistance, please visit http://www.panasonic.com/phonehelp 11
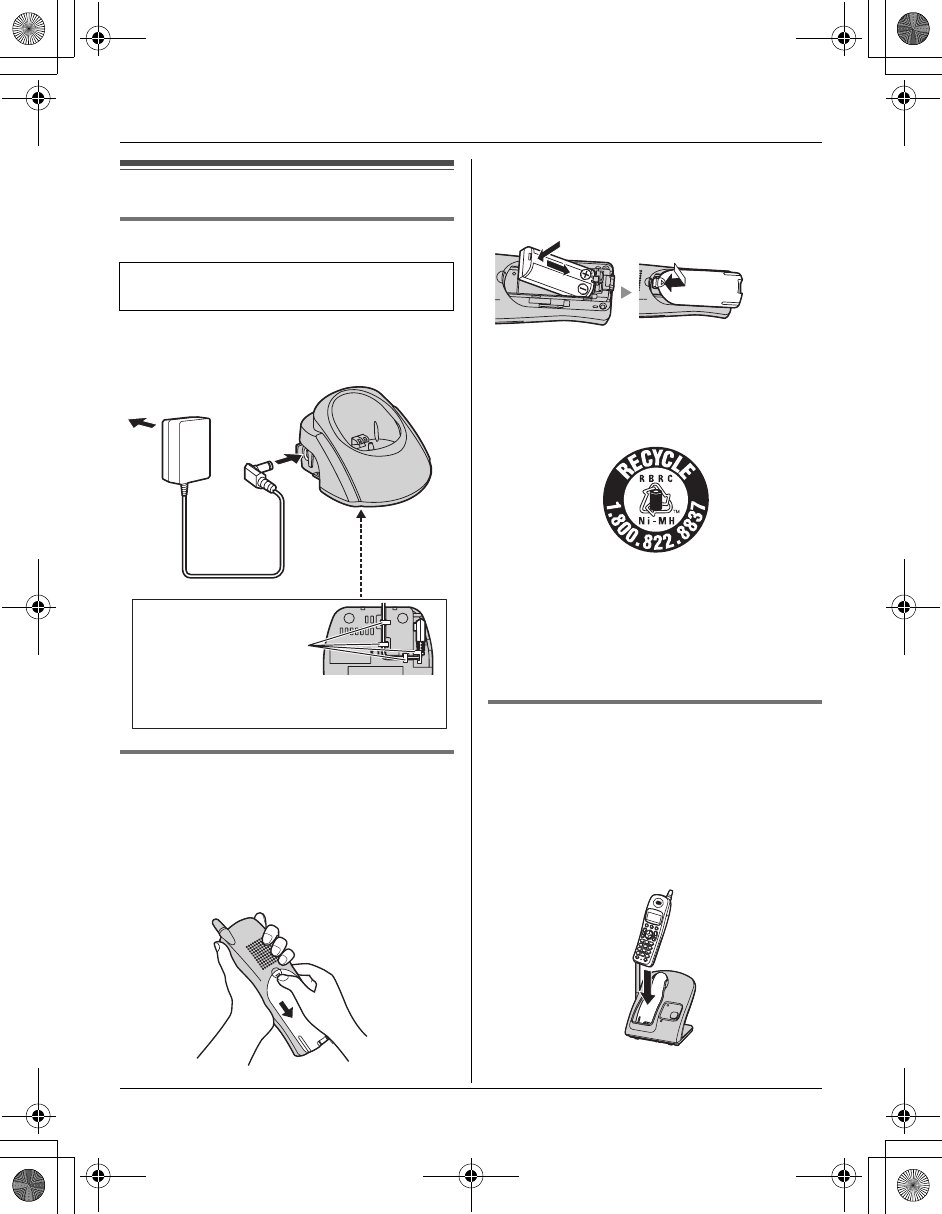
Setting up the handset
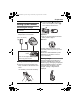
Connecting the charger
L Use only the included Panasonic AC
adaptor PQLV19 or PQLV255.
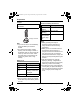
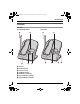
Battery installation/replacement
1 Press the notch of the handset cover
firmly, and slide it in the direction of the
arrow.
L If necessary, remove the old battery.
2 Insert the battery (A), and press it
down until it snaps into position (B).
Then close the handset cover.
Important:
L Use only the rechargeable Panasonic
battery noted on page 9.
Attention:
A nickel metal hydride battery that is
recyclable powers the product you have
purchased.
Please call 1-800-8-BATTERY (1-800-
822-8837) for information on how to
recycle this battery.
Battery charge
Place the handset on the base unit or
charger for 6 hours before initial use.
While charging, “Charging” is displayed
and the CHARGE indicator on the base
unit lights. When the battery is fully
charged, “Charge completed” is
displayed.
L Model shown is KX-TG2620.
Available model:
KX-TG2622
Fasten the AC adaptor cord to prevent
it from being disconnected.
(120 V AC, 60 Hz)
Bottom of the charger
Hooks
B
A
PQQX14928XA ITI_2.book Page 11 Wednesday, August 23, 2006 10:44 AM