Operating Instructions Link-to-Cell Cellular Convergence Solution Model No. KX-TG7841 Model shown is KX-TG7841. KX-TG7842 KX-TG7843 KX-TG7844 KX-TG7845 KX-TG365SK KX-TG7871 KX-TG7872 KX-TG7873 KX-TG7874 KX-TG7875 KX-TG385SK Before initial use, see “Getting Started” on page 10. Thank you for purchasing a Panasonic product. Please read these operating instructions before using the unit and save them for future reference. Consulte “Guía Rápida Española”, página 80.
Table of Contents Introduction Caller ID Service Model composition .......................................3 Accessory information ..................................3 Using Caller ID service ...............................48 Caller list ....................................................49 Important Information Using Bluetooth Devices For your safety .............................................6 Important safety instructions ........................7 For best performance .............................
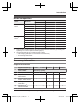
Introduction Model composition Base unit Handset Part No. Part No.
Introduction Supplied handset qty. 1 unit*1 No.
Introduction *2 *3 By installing this unit, you can extend the range of your phone system to include areas where reception was previously not available. This product can be purchased online. Please visit our Web site: http://shop.panasonic.com/support By registering the key detector (4 max.) to a Panasonic Digital Cordless Phone and attaching it to an easy-to-lose item in advance, you can locate and find the mislaid item to which the key detector is attached. Please visit our Web site: http://www.
Important Information R Do not allow the AC adaptor or telephone line cord to be excessively pulled, bent or placed under heavy objects. For your safety To prevent severe injury and loss of life/ property, read this section carefully before using the product to ensure proper and safe operation of your product. WARNING Power connection R Use only the power source marked on the product. R Do not overload power outlets and extension cords. This can result in the risk of fire or electric shock.
Important Information R This product is unable to make calls when: – the handset batteries need recharging or have failed. – there is a power failure. Battery R We recommend using the batteries noted on page 4. USE ONLY rechargeable Ni-MH batteries AAA (R03) size. R Do not mix old and new batteries. R Do not open or mutilate the batteries. Released electrolyte from the batteries is corrosive and may cause burns or injury to the eyes or skin. The electrolyte is toxic and may be harmful if swallowed.
Important Information R If the reception for a base unit location is not satisfactory, move the base unit to another location for better reception. Environment R Keep the product away from electrical noise generating devices, such as fluorescent lamps and motors. R The product should be kept free from excessive smoke, dust, high temperature, and vibration. R The product should not be exposed to direct sunlight. R Do not place heavy objects on top of the product.
Important Information Specifications R Standard: DECT 6.0 (Digital Enhanced Cordless Telecommunications 6.0) Bluetooth wireless technology 2.1 R Frequency range: 1.92 GHz to 1.93 GHz (DECT) 2.402 GHz to 2.48 GHz (Bluetooth) R RF transmission power: 115 mW (max.) R Power source: 120 V AC, 60 Hz R Power consumption: Base unit:*1 Standby: Approx. 1.2 W Maximum: Approx. 4.5 W Base unit:*2 Standby: Approx. 1.2 W Maximum: Approx. 8.5 W Charger: Standby: Approx. 0.1 W Maximum: Approx. 1.
Getting Started Setting up Connections R If you do not connect the telephone line cord and use only cellular lines, set the cellular line only mode to use this unit more conveniently (page 19). n Base unit (KX-TG7841 series: page 3) R Use only the supplied Panasonic AC adaptor PNLV226. n Base unit (KX-TG7871 series: page 3) R Use only the supplied Panasonic AC adaptor PNLV234. R The hook of the base unit is not designed to hold the AC adaptor cord for the desk stand or wall mounting use (page 67).
Getting Started Battery installation Note when setting up R USE ONLY Ni-MH batteries AAA (R03) size. R Do NOT use Alkaline/Manganese/Ni-Cd batteries. R Confirm correct polarities ( , ). Note for connections R The AC adaptor must remain connected at all times. (It is normal for the adaptor to feel warm during use.) R The AC adaptor should be connected to a vertically oriented or floor-mounted AC outlet.
Getting Started Panasonic Ni-MH battery performance (supplied batteries) Operation Operating time In continuous use 10 hours max.*1 Not in use (standby) 8 days max.*1 *1 Controls Handset G If eco mode is on. Note: R Actual battery performance depends on usage and ambient environment. R Even after the batteries are fully charged, the handset can be left on the base unit or charger without any ill effect on the batteries.
Getting Started n Control type Soft keys The handset features 2 soft keys. By pressing a soft key, you can select the feature shown directly above it on the display. After a cellular phone is paired, MCELLN is displayed. Navigator key – MDN, MCN, MFN, or MEN: Scroll through various lists and items. (Volume: MDN or MCN): Adjust the – receiver or speaker volume while talking. : View the phonebook entry. – MFN – MEN REDIAL: View the redial list. – MCN CID (Caller ID): View the caller list.
Getting Started Charging the cellular phone by USB Available for: KX-TG7871 series (page 3) Display/Indicators Handset display items Item By connecting a USB cable (not supplied) to the cellular phone and the base unit, you can charge a cellular phone. However, the cellular phone cannot exchange data with the base unit through a USB cable. Meaning Within base unit range Out of base unit range The landline is in use. R When flashing: The call is put on hold.
Getting Started Item Meaning Item Alarm is on. (page 44) Meaning Clarity booster is on.*2 (page 23) “Greeting only” is selected as the caller’s recording time. In this case, the answering system answers calls with a greeting message and caller messages are not recorded. (page 62) In use Answering system is being used by another handset or the base unit. A Bluetooth headset is connected to the base unit. Ready to use it. Cell1 in use Someone is using the cellular line.
Getting Started Display language Initial settings n Direct command code: Programmable settings can be accessed by pressing MMENUN, #, and then the corresponding code on the dial keypad (page 36). Example: Press MMENUN#101. n Symbol meaning: Example: MbN: “Off” Press MCN or MDN to select the words in quotations. Date and time Important: R When you install the batteries for the first time, the handset may prompt you to set date and time. First press MSELECTN, then proceed to step 2.
Link to Cell Link to cell feature To use this feature, you must first pair and connect your cellular phones to the base unit (page 17). Your cellular phones must have Bluetooth wireless technology that is compatible with this product. This feature allows you to: – make or answer cellular calls using your home phone (handset or base unit) with better reception.
Link to Cell Link to cell settings Selecting which unit receives cellular calls You can select which unit rings and receives calls for a cellular line. When “All” is selected, all handsets and the base unit ring. – “On (without Talking CID)”: The handset and base unit use your cellular phone’s ringer tone. Caller information is not announced even if the Talking Caller ID is turned on. Important: R To use this feature, your cellular phone must support Bluetooth in-band ringtone.
Link to Cell intervals when it returns within base unit range. You can set the interval. The default setting is “1 min”. Important: R When you are using a cellular line or a Bluetooth headset, the base unit loses its connection from other Bluetooth devices (cellular phone or headset). To automatically resume the connection to cellular phones, leave the auto connection on. R Some cellular phones lose connection after usage, please check the specifications of your cellular phone for more details.
Link to Cell – will be displayed on the handset momentarily. The handset can be used once is displayed. When you use the landline again 7-digit phone number when making cellular calls. Handset 1 2 MMENUN#633 Enter the 3-digit area code. R To correct a digit, press MCLEARN. Before connecting the telephone line to the base unit, select “Off” in step 2, “Cellular line only mode (If you do not use the landline)”, page 19.
Making/Answering Calls Using the Handset Making cellular calls Important: R Only 1 cellular line can be used at a time. R Before making calls, confirm that the CELL 1 or CELL 2 indicator lights up (page 15). 1 Lift the handset and dial the phone number. R To correct a digit, press MCLEARN. 2 MCELLN R The unit starts dialing when: – only 1 cellular phone is paired. – a specific line is set to make cellular calls (page 20). Go to step 4.
Making/Answering Calls Using the Handset 3 M 2 N When you finish talking, press MOFFN or place the handset on the base unit or charger. Storing a number to the phonebook Phone numbers of up to 24 digits can be stored in the phonebook. n When a cellular phone is paired: 1 MEN REDIAL 2 3 4 MbN: Select the desired phone number. a MMENUN You can answer calls simply by lifting the handset off the base unit or charger. You do N. To turn this feature not need to press M on, see page 41.
Making/Answering Calls Using the Handset *1 The call is taken when: – only 1 cellular phone is paired. – a specific line is set to make cellular calls (page 20). R The base unit user can take the call by pressing MCELL 1N or MCELL 2N. To release hold on the landline: Press M N. R Another handset user can take the call by pressing M N. R The base unit user can take the call by pressing MZN. Note: R If a call is kept on hold for more than 9 minutes, an alarm tone starts to sound.
Making/Answering Calls Using the Handset Handset noise reduction This feature allows you to hear the voice of the person you are talking to clearly, by reducing the surrounding noise coming from the other party’s telephone. Press MNOISE REDUCTIONN to turn on/off while talking. Note: R When this feature is turned on, is displayed while talking. R Depending on the environment where this handset is being used, this feature may not be effective. R This feature is not available using the speakerphone.
Making/Answering Calls Using the Handset 2 MbN: Select the desired cellular phone. a MSELECTN R The call is transferred to the handset. Using the other line during a conversation You can handle a cellular call and a landline call at the same time. When another call is being received during a conversation, the interrupt tone sounds (page 39), and the 2nd caller’s information is displayed if you subscribe to Caller ID (page 48). You can answer the 2nd call while holding the 1st call.
Making/Answering Calls Using the Handset Panasonic Ni-MH battery performance (supplied batteries) during power back-up mode When the batteries are fully charged, operating time of the handset in power back-up mode varies depending on usage. – Continuous use of the handset in power back-up mode: 1.5 hours max. – Continuous use of the handset other than a handset in power back-up mode: 2 hours max. – Not in use in power back-up mode: 2 hours max.
Making/Answering Calls Using the Handset n When 2 or more handsets are registered: When the unit rings, use a handset which is not supplying power to the base unit. For the operation, please see “Answering calls”, page 22. R Do not use or lift the handset which is placed on the base unit during power back-up mode. Note: R During a call with the handset placed on the base unit (power back-up mode), the call may be disconnected if you touch the handset. In such case, try to call back.
Making/Answering Calls Using the Base Unit Making cellular calls 1 2 3 4 Dial the phone number. Press MCELL 1N or MCELL 2N. When the other party answers, speak into the microphone. R Speak alternately with the other party. When you finish talking, press MZN. Note: R For best performance, use the speakerphone in a quiet environment. R While on a call, you can switch from the base unit to the handset: With the call sharing mode on (page 30), press MCELLN on the handset.
Making/Answering Calls Using the Base Unit – a specific line is set to make cellular calls (page 20). Answering calls When a landline call is being received, the SP-PHONE indicator flashes rapidly. When a cellular call is being received, the CELL 1 or CELL 2 indicator and SP-PHONE indicator flash rapidly. 1 Press MZN when the unit rings. R You can also answer the cellular call by pressing MCELL 1N or MCELL 2N. 2 3 Speak into the microphone. When you finish talking, press MZN.
Making/Answering Calls Using the Base Unit If you subscribe to both Caller ID and Call Waiting with Caller ID services, the 2nd caller’s information is displayed after you hear the call waiting tone on the base unit. 1 Press MCALL WAITN to answer the 2nd call. 2 To switch between calls, press MCALL WAITN. Note: R Please contact your service provider/ telephone company for details and availability of this service in your area.
Making/Answering Calls Using the Base Unit 2 To make a 2nd call: Dial the phone number. a MZN To answer a 2nd call: MZN R To hold the 2nd call, press MHOLDN. 3 To hang up the 2nd call and return to the 1st call (cellular call), press MZN, then press MCELL 1N or MCELL 2N. For assistance, please visit http://shop.panasonic.com/support TG78xxUS(en)_0221_ver402.
Shared Phonebook Shared phonebook The shared phonebook allows you to make calls without having to dial manually. The base unit and any handset registered to the base unit can use the shared phonebook. You can add 3,000 names and phone numbers to the shared phonebook, and assign each phonebook entry to the desired group (“Home”, “Cell 1”, “Cell 2”). Important: R Only 1 person can access the shared phonebook at a time. R Caller ID subscribers can use group ringer tone features (page 49).
Shared Phonebook Finding and calling from a phonebook entry Scrolling through all entries 3 4 n Using a cellular line: Handset 1 2 3 4 MFN MbN: Select the desired entry. MCELLN R The unit starts dialing when: – only 1 cellular phone is paired. – a specific line is set to make cellular calls (page 20). MbN: Select the desired cellular phone. a MSELECTN Base unit 1 2 3 M You can narrow down the search to enter the first characters of a name.
Shared Phonebook 4 5 MbN: Select the desired entry. To make a cellular/landline call, continue from step 3 for handset or step 3 for base unit, “Scrolling through all entries”, page 33. Editing entries Handset 1 2 3 Find the desired entry (page 33). MMENUN a MbN: “Edit” a MSELECTN Edit the name if necessary (16 characters max.; page 32). a MOKN 4 Edit the phone number if necessary (24 digits max.). a MOKN 5 MbN: Select the desired group (page 32).
Speed Dial Erasing an entry Speed dial You can assign 1 phone number to each of the dial keys (1 to 9) on the handset. Adding phone numbers to speed dial keys n By entering phone numbers: 1 Press and hold the desired speed dial key (1 to 9). a MADDN 2 3 MbN: “Manual” a MSELECTN Enter the party’s name (16 characters max.). a MOKN 4 Enter the party’s phone number (24 digits max.). a MOKN 5 MSELECTN a MOFFN n From the shared phonebook: 1 Press and hold the desired speed dial key (1 to 9).
Programming Programmable settings You can customize the unit by programming the following features. To access the features, there are 2 methods. Handset / Base unit n Scrolling through the display menus 1 MMENUN 2 3 4 Press MCN or MDN to select the desired main menu. a MSELECTN Press MCN or MDN to select the desired item from the next sub-menus. a MSELECTN Press MCN or MDN to select the desired setting. a MSAVEN R This step may vary depending on the feature being programmed.
Programming Sub-menu 1 Sub-menu 2 Settings Code Play all msg. – – #324 Erase all msg.
Programming Main menu: “Bluetooth” Sub-menu 1 Sub-menu 2 Link to cell – 1: Add new device*4 (for CELL 1) – 2: Add new device*4 (for CELL 2) Connect*1/ Disconnect*1 Settings Code – 19 #6252*6 Ringer volume – Handset 0–6: Off–6 <6> Ringer volume – Base unit*1 0–6: Off–6 <1> Ringer tone*7, *8 *5 *6 #6281*5 22 #6282*6 #G6281*5 29 #G6282*6 Select unit to ring*1 1–6: Handset 1-6 G: Ring as cell (limited)*1 1: 2: On (without Talking CID) 0: Off
Programming Sub-menu 1 Sub-menu 2 Settings Code Settings Auto connect*1 1: <1 min> 2: 3 min 3: 5 min 4: 10 min 0: Off #632 18 – #633 20 Cell line only mode*1 1: On 0: #157 19 Cell line select – Handset 1: Cellphone 1*4 2: Cellphone 2*4 0: #634 20 Cell line select – Base unit*1 1: *4 2: Cellphone 2*4 #G634 Set PIN*1 <0000> #619 Cell area code*1 Main menu: 20 “Set date & time” Sub-menu 1 Sub-menu 2 Settings Code Date and time*1 – #101 16 Alarm
Programming Sub-menu 1 Sub-menu 2 Set date & time Date and time*1 Talking Caller ID Code #101 16 Alarm 1: Once 2: Daily 0: #720 44 Time adjustment*1, *9 1: 0: Manual #226 – – 48 Handset 1: 0: Off #162 Base unit*1 1: On 0: #G162 Handset name – Key detector setting*12 – 1: Add new device (for Detector1)*13 – 2: Add new device (for Detector2) – 3: Add new device (for Detector3) – 4: Add new device (for Detector4) Settings Change name*1 Registration
Programming Sub-menu 1 Sub-menu 2 Settings Code 1: On 0: #200 22 Set dial mode*1 1: Pulse 2: #120 16 Set flash time*1, *18 0: 900 ms 1: <700 ms> 2: 600 ms 3: 400 ms 4: 300 ms 5: 250 ms G: 200 ms #: 160 ms 6: 110 ms 7: 100 ms 8: 90 ms 9: 80 ms #121 23 1: A 2: #122 – 1: 0: Off #194 24, 30 – Auto talk*17 Set tel line*3 Set line mode*1, *19 – Call sharing*1 Registration Register handset – #130 47 Deregistration*2 – #131 47 1: 0: Off #152 25 Displa
Programming n Base unit Main menu: “Phonebook” Operation Code Viewing the phonebook entry. #280 Main menu: “Caller list” Operation Code Viewing the caller list. #213 Main menu: Sub-menu 2 Screen call – Settings Code Off #310 56 “Bluetooth” Sub-menu 1 Sub-menu 2 Settings Code Link to cell*20 – Cellular phone 1*4 – Cellular phone 2*4 Ringer volume Off–6 <1> #6281*5 Headset*22 29 #6282*6 Text msg. alert*21 (msg.
Programming Sub-menu 1 Sub-menu 2 Settings Code – – #217 First ring*1 Off #173 46 num*1, *2 On #240 46 LCD contrast (Display contrast) – Level 1–6 <3> #145 – Caller ID edit (Caller ID number auto edit) – Off #214 50 Change language (Display) – Español #110 16 Call block*1 Block w/o (Block calls without phone number) Main menu: “Cust. Support” Operation Code Displaying customer support Web address.
Programming *17 If you subscribe to a Caller ID service and want to view the caller’s information after lifting up the handset to answer a call, turn off this feature. *18 The flash time depends on your telephone exchange or host PBX. Contact your PBX supplier if necessary. The setting should stay at “700 ms” unless pressing MFLASHN fails to pick up the waiting call. *19 Generally, the line mode setting should not be changed.
Programming 5 6 7 Enter the desired hour and minute you wish to end this feature. *: Select “AM” or “PM”. MSAVEN a MOFFN R When the silent mode is set, displayed. is Base unit 1 2 3 4 5 6 7 5 MbN: Select the desired setting. a MSAVEN R If you select “Off”, press MEXITN to exit. Enter the desired hour and minute you wish to start this feature. MAM/PMN: Select “AM” or “PM”. a MOKN Enter the desired hour and minute you wish to end this feature. MAM/PMN: Select “AM” or “PM”.
Programming 7 Handset n When a cellular phone is paired: 1 MCN CID 2 3 4 5 6 7 1 2 3 MSAVEN 4 MbN: “Call block” a MSELECTN Edit the phone number if necessary (24 digits max.). MSAVEN a MOFFN n When a cellular phone is not paired: 1 MCN CID 2 3 4 5 6 7 8 MbN: Select the entry to be blocked. R To edit the number: MMENUN a MbN: “Edit” a MSELECTN Press MEDITN repeatedly until the phone number is shown in the 10-digit format. And then, press MSAVEN. Go to step 5.
Programming 3 Proceed with the operation for your unit. Handset: MOFFN Base unit: MEXITN Viewing/editing/erasing call block numbers Handset 1 2 3 MMENUN#217 MbN: Select the desired entry. R To exit, press MOFFN. To edit a number: MEDITN a Edit the phone number. a MSAVEN a MOFFN To erase a number: MERASEN a MbN: “Yes” a MSELECTN a MOFFN Important: R See page 5 for information on the available model. Registering a handset to the base unit The supplied handset and base unit are pre-registered.
Caller ID Service Using Caller ID service Important: R This unit is Caller ID compatible. To use Caller ID features, you must subscribe to a Caller ID service. Contact your service provider/telephone company for details. Phonebook name display When caller information is received and it matches a phone number stored in the phonebook, the stored name in the phonebook is displayed and logged in the caller list.
Caller ID Service Ringer ID for handset You can select the desired ringer tone to a group that each phonebook entry is assigned (page 32). When a call is received from a caller assigned to a group, the ringer tone you selected for that group rings instead of the called line’s ringer tone (page 18, 38, 39) after caller information is displayed. If you select “Current ringer” (default), the unit uses the called line’s ringer tone you selected on page 39 when calls from this group are received.
Caller ID Service Editing a caller’s phone number before calling back You can edit a phone number in the caller list by removing its area code and/or the long distance code “1”. Handset n When a cellular phone is paired: 1 MCN CID 2 3 MbN: Select the desired entry. Press MSELECTN, then press * repeatedly until the phone number is shown in the desired format.
Caller ID Service Note: R Phone numbers from the 4 most recently edited area codes are automatically edited. n When a cellular phone is not paired: 1 MCN CID 2 Erasing selected caller information Handset / Base unit 1 3 4 5 6 Proceed with the operation for your unit. Handset: MCN CID Base unit: MCIDN 2 3 4 MbN: Select the desired entry. MERASEN a MbN: “Yes” a MSELECTN Proceed with the operation for your unit.
Using Bluetooth Devices Copying phonebook from a cellular phone (phonebook transfer) You can copy phonebook entries from the paired cellular phones or other cellular phones (not paired) to the unit’s shared phonebook. A cellular phone must be compatible with Bluetooth wireless technology. Important: R If a copied entry has 2 or more phone numbers, each phone number (6 max.) is stored as a separate entry with the same name.
Using Bluetooth Devices 2 To store “International”: #117 To store “Country code”: #118 To store “National access”: #119 3 4 Enter the desired number. a MSAVEN MEXITN Note: R After you copy the entries, confirm that the numbers were transferred correctly. R Refer to your cellular phone operating instructions for information on how to install applications.
Using Bluetooth Devices communicate with the base unit within a range of approximately 10 m (33 feet). Pairing a headset to the base unit Important: R Make sure that the Bluetooth headset is not connected to any other Bluetooth device. 1 Your headset: Set your headset to pairing mode. R Refer to the headset operating instructions. 2 Handset: MMENUN#621 3 If your headset PIN is “0000”, go to step 4. If your headset PIN is other than “0000”, press MCLEARN, then enter your headset PIN.
Using Bluetooth Devices n To switch to the base unit: Press MZN on the base unit. Call sharing between your headset and the handset Important: R To activate this feature, you should set call sharing mode to on beforehand (page 41). n While the handset is on a landline call: To join the conversation with your headset, turn on the headset referring to your headset operating instructions. n While your headset is on a landline call: To join the conversation with the handset, N.
Answering System for Landline Answering system for landline The answering system can answer and record calls for you when you are unavailable to answer the phone. You can also set the unit to play a greeting message but not to record caller messages by selecting “Greeting only” as the recording time setting (page 62). Important: R Only 1 person can access the answering system (listen to messages, record a greeting message, etc.) at a time.
Answering System for Landline Recording your greeting message Handset 1 2 3 4 5 MMENUN#302 MbN: “Yes” a MSELECTN After a beep sounds, hold the handset about 20 cm (8 inches) away and speak clearly into the microphone (2 minutes max.). Press MSTOPN to stop recording. The unit provides 2 pre-recorded greeting messages: – If you erase or do not record your own greeting message, the unit plays a pre-recorded greeting asking callers to leave a message.
Answering System for Landline Erasing all messages Key Operation Press MERASEN 2 times while the unit is not in use. 8 Turn answering system on MPAUSEN Pause message*2 9 or MSTOPN Stop recording Stop playback Listening to messages using the handset When new messages have been recorded, “New message” is displayed.
Answering System for Landline Advanced new message alerting features Audible message alert This feature allows the base unit to beep to inform you of a new message arrival when new messages are recorded. The base unit beeps 2 times every minute until you listen to the messages, if the “Base unit beep” setting is turned on. The default setting is “Off”.
Answering System for Landline Erasing the set phone number Handset 1 2 3 4 MMENUN#338 MbN: “Notification to” a MSELECTN MMENUN a MbN: “Erase” a MSELECTN MbN: “Yes” a MSELECTN a MOFFN R The new message alert setting is turned off. Activating/inactivating the remote access code to play messages If you activate this feature, you must enter the remote access code (page 60) to play the new message from the new message alert call. This is so that unauthorized parties cannot listen to your messages.
Answering System for Landline 2 After the greeting message starts, enter your remote access code. *1 3 Follow the voice guidance prompts as necessary or control the unit using remote commands (page 61). *2 *3 4 When finished, hang up. Voice guidance n When the English voice guidance is selected During remote operation, the unit’s voice guidance starts and prompts you to press 1 to perform a specific operation, or press 2 to listen to more available operations.
Answering System for Landline For voice mail service subscribers If you subscribe to a flat-rate service package that includes Caller ID, call waiting, voice mail, and unlimited local/regional/long distance calls, please note the following: R To use the voice mail service provided by your service provider/telephone company rather than the unit’s answering system, turn off the answering system (page 56).
Voice Mail Service for Landline Example: Voice mail service for landline Voice mail is an automatic answering service offered by your service provider/telephone company. After you subscribe to this service, your service provider/telephone company’s voice mail system answers calls for you when you are unavailable to answer the phone or when your line is busy. Messages are recorded by your service provider/telephone company, not your telephone.
Voice Mail Service for Landline Listening to voice mail messages The unit lets you know that you have new voice mail messages in the following way: – “New Voice Mail” is displayed if message indication service is available. Handset 1 MMENUN#330 R The speakerphone turns on. 2 3 Follow the pre-recorded instructions. When finished, press MOFFN. Note: R In step 1, you can also press MVMN*1 to listen to new voice messages.
Intercom/Locator Answering an intercom call Intercom Intercom calls can be made: – between handsets – between a handset and the base unit Note: R When paging unit(s), the paged unit(s) beeps for 1 minute. R If you receive an outside call while talking on the intercom, you hear 2 tones. – To answer the call with the handset, N. press MOFFN, then press M – To answer the call with the base unit, press MZN 2 times.
Intercom/Locator 5 To complete the transfer: Press MOFFN. R The outside call is being routed to the destination unit. To establish a conference call: MMENUN a MbN: “Conf.” a MSELECTN R To leave the conference, press MOFFN. The other 2 parties can continue the conversation. R To put the outside call on hold: MMENUN a MbN: “Hold” a MSELECTN To resume the conference: MMENUN a MbN: “Conf.
Useful Information 3 Wall mounting The base unit can be mounted on a wall by changing the wall mounting adaptor’s position. Note: R Make sure that the wall and the fixing method are strong enough to support the weight of the unit. R Model shown is KX-TG7841 series. Insert the lower tabs of the adaptor into the unit’s bottom slots (A), then insert by pushing down the levers of the adaptor into the upper slots (B). R The words “UP WALL” should be facing up.
Useful Information Error messages Display message Cause/solution Base no power or No link. Re-connect base AC adaptor. or No link. R The handset has lost communication with the base unit. Move closer to the base unit and try again. R Unplug the base unit’s AC adaptor to reset the unit. Reconnect the adaptor and try again. R The handset’s registration may have been canceled. Re-register the handset (page 47). R When “No link.
Useful Information Display message Cause/solution Use rechargeable battery. R A wrong type of battery such as Alkaline or Manganese was inserted. Use only the rechargeable Ni-MH batteries noted on page 4, 7. Troubleshooting If you still have difficulties after following the instructions in this section, disconnect the base unit’s AC adaptor, then reconnect the base unit’s AC adaptor. Remove the batteries from the handset, and then insert the batteries into the handset again.
Useful Information Problem Cause/solution I cannot connect a cellular phone to the base unit. R Confirm that your cellular phone is turned on. R Confirm that your cellular phone is within base unit range (page 14). R Depending on the state of the wireless environment, such as the presence of any electrical interference, there may be a delay even if the auto connection feature is turned on. You can connect to the base unit manually (page 19). R The cellular phone has not been paired to the base unit.
Useful Information Making/answering calls, intercom Problem Cause/solution R The handset is too far from the base unit. Move closer. R The base unit’s AC adaptor is not properly connected. Reconnect AC adaptor to the base unit. R The handset is not registered to the base unit. Register it (page 47). is displayed. Noise is heard, sound cuts in and out. R You are using the handset or base unit in an area with high electrical interference.
Useful Information Problem Cause/solution I cannot make a call using the landline. R The dialing mode may be set incorrectly. Change the setting (page 16). R The cellular line only mode is turned on. Turn it off (page 19). I cannot make long distance calls. R Make sure that you have long distance service. Caller ID/Talking Caller ID Problem Cause/solution Caller information is not displayed. R You must subscribe to Caller ID service. Contact your service provider/telephone company for details.
Useful Information Problem Cause/solution The caller list/incoming phone numbers are not edited automatically. R The Caller ID number auto edit feature is turned off. Turn it on and try again (page 40, 43). R You need to call back the edited number to activate Caller ID number auto edit. I cannot dial the phone number edited in the caller list. R The phone number you dialed might have been edited incorrectly (for example, the long distance “1” or the area code is missing).
Useful Information Problem Cause/solution I cannot connect my headset to the base unit. R Confirm that your headset is turned on. R If your headset is already connected to another Bluetooth device such as your cellular phone, disconnect the headset from your cellular phone, then perform the connecting procedure from the base unit. R If someone is using a cellular line, you cannot connect the headset. There can be only one active Bluetooth connection at a time.
Useful Information Answering system Problem Cause/solution The unit does not record new messages. R The answering system is turned off. Turn it on (page 56). R The answering system does not answer or record calls from cellular lines. R The message memory is full. Erase unnecessary messages (page 57). R The recording time is set to “Greeting only”. Change the setting (page 62). R If you subscribe to a voice mail service, messages are recorded by your service provider/telephone company, not your telephone.
Useful Information Liquid damage Problem Cause/solution Liquid or other form of moisture has entered the handset/base unit. R Disconnect the AC adaptor and telephone line cord from the base unit. Remove the batteries from the handset and leave to dry for at least 3 days. After the handset/base unit are completely dry, reconnect the AC adaptor and telephone line cord. Insert the batteries and charge fully before use. If the unit does not work properly, contact an authorized service center.
Useful Information FCC and other information This equipment complies with Part 68 of the FCC rules and the requirements adopted by the ACTA. On the bottom of this equipment is a label that contains, among other information, a product identifier in the format US:ACJ----------. If requested, this number must be provided to the telephone company. L Registration No.............(found on the bottom of the unit) L Ringer Equivalence No. (REN).......0.
Useful Information manufacturer about the availability of Hearing Aids which provide adequate shielding to RF energy commonly emitted by digital devices. WHEN PROGRAMMING EMERGENCY NUMBERS AND(OR) MAKING TEST CALLS TO EMERGENCY NUMBERS: 1) Remain on the line and briefly explain to the dispatcher the reason for the call. 2) Perform such activities in the off-peak hours, such as early morning or late evenings. This device complies with Part 15 of the FCC Rules.
Useful Information Compliance with TIA-1083 standard: Telephone handsets identified with this logo have reduced noise and interference when used with T-Coil equipped hearing aids and cochlear implants. Compatible with Hearing Aid T-Coil T TIA-1083 For assistance, please visit http://shop.panasonic.com/support TG78xxUS(en)_0221_ver402.
Guía Rápida Española Guía Rápida Española Conexiones Unidad base para la serie KX-TG7841 L Use solo el adaptador de corriente Panasonic PNLV226 incluido. Oprima firmemente el contacto. Correcto Incorrecto Gancho “Clic” “Clic” A la toma de teléfono de línea única (RJ11C) Filtro DSL/ADSL* A la toma de corriente *Se requiere un filtro DSL/ADSL (no incluido) si tiene servicio de DSL/ADSL. Unidad base para la serie KX-TG7871 L Use solo el adaptador de corriente Panasonic PNLV234 incluido.
Guía Rápida Española Instalación de la batería/Carga de las baterías Cargue aproximadamente durante 7 horas. Confirme que aparezca “Cargando”. SOLO baterías Ni-MH recargables Nota: L UTILICE SOLO baterías de Ni-MH tamaño AAA (R03). L NO utilice baterías Alcalinas, de Manganeso o de Ni-Cd. L Compruebe que las polaridades son las correctas (S, T). Sugerencias de operación Teclas de función La unidad incluye teclas de función.
Guía Rápida Española Cambio de idioma (predeterminado: “English”) Cuando instale las baterías por primera vez, es posible que aparezca “Date and time Press SELECT”. Oprima {OFF} para salir. Idioma de la pantalla (Auricular/Unidad base) 1 {MENU}(11) s {r}: “Español” s {GUARDA} 2 Continúe operando su unidad.
Guía Rápida Española Enlace a celular Cómo emparejar un teléfono celular con Bluetooth 1 Auricular: Para CELL 1: {MENU}(6241 Para CELL 2: {MENU}(6242 L Después de que el indicador de CELL 1 o CELL 2 comienza a parpadear en la unidad base, el resto del procedimiento debe completarse en menos de 5 minutos. 2 Su teléfono celular: Mientras el indicador de CELL 1 o CELL 2 está parpadeando, siga las instrucciones de su teléfono celular para entrar al modo de emparejamiento.
Guía Rápida Española Enlace a celular Cómo conectar o desconectar el teléfono celular Conexión automática al teléfono celular La unidad se conecta al teléfono celular a intervalos regulares si se pierde la conexión. Consulte las instrucciones de operación para cambiar el intervalo (predeterminado: “1 min”). L Cuando está usando una línea celular o un audífono con Bluetooth, la unidad base pierde la conexión de otros dispositivos con Bluetooth (teléfono celular o audífono).
Guía Rápida Española Operaciones básicas Cómo hacer y contestar llamadas (Auricular) Para ajustar el volumen del receptor o del altavoz Oprima {^} o {V} repetidamente mientras habla. Cómo hacer una llamada usando la lista de remarcación 1 2 {>} REDIAL s {r}: Seleccione el número telefónico deseado. Para hacer una llamada celular: Cuando solo hay 1 teléfono celular emparejado: {CEL.} o Cuando hay 2 teléfonos celulares emparejados: {CEL.} s {r}: Seleccione el teléfono celular deseado. s {SELEC.
Guía Rápida Española Operaciones básicas Directorio telefónico compartido (Auricular) 1 2 3 4 Para añadir entradas 5 1 2 Para hacer llamadas {<} C s {MENU} {r}: “Agregar Ent. Nueva” s {SELEC.} Introduzca el nombre de la persona (máx. 16 caracteres). s {OK} Introduzca el número telefónico de la persona (máx. 24 dígitos). s {OK} {r}: Seleccione el grupo deseado. s {SELEC.} 2 veces s {OFF} {<} C s {r}: Seleccione la entrada deseada.
Guía Rápida Española Cómo usar dispositivos Bluetooth Copiado de entradas del directorio telefónico desde un teléfono celular con Bluetooth (transferencia del directorio telefónico) Puede copiar entradas del directorio telefónico desde los teléfonos celulares emparejados o desde otros teléfonos celulares (no emparejados) al directorio telefónico compartido de la unidad. 1 Auricular: {MENU}(618 2 Auricular: Para copiar desde teléfonos celulares emparejados: {r}: Seleccione el teléfono celular deseado.
Guía Rápida Española Cómo usar dispositivos Bluetooth Cómo usar un audífono Bluetooth (opcional) para llamadas por la línea terrestre Al emparejar un audífono Bluetooth con la unidad base, podrá tener conversaciones inalámbricas a manos libres para llamadas terrestres. L La conexión del audífono con Bluetooth no está disponible mientras alguien se encuentra usando la línea celular. Cómo emparejar un audífono con la unidad base 1 2 3 4 Su audífono: Configure su audífono en modo de emparejamiento.
Guía Rápida Española Preguntas frecuentes Pregunta Causa y solución ¿Por qué aparece _? L El auricular está demasiado lejos de la unidad base. Acérquelo. L El adaptador para corriente de la unidad base no está conectado correctamente. Conecte de nuevo el adaptador para corriente a la unidad base. L El auricular no está registrado en la unidad base. Regístrelo.
Appendix Customer services Shop Accessories! for all your Panasonic gear Go to hp://shop.panasonic.com/support Get everything you need to get the most out of your Panasonic products Accessories & Parts for your Camera, Phone, A/V products, TV, Computers & Networking, Personal Care, Home Appliances, Headphones, Baeries, Backup Chargers & more… Customer Services Directory For Product Informa!on, Opera!ng Assistance, Parts, Owner’s Manuals, Dealer and Service info go to hp://shop.panasonic.
Appendix Limited Warranty (ONLY FOR U.S.A.
Appendix Limited Warranty Limits and Exclusions This warranty ONLY COVERS failures due to defects in materials or workmanship, and DOES NOT COVER normal wear and tear or cosmetic damage.
Index Index # A B C D 3-way conference: 24, 30 Additional handset: 47 Alarm: 44 Answering calls: 22, 29 Answering system Call screening: 56 Erasing messages: 57, 58, 61 Greeting message: 56 Greeting only: 62 Listening to messages: 57, 58, 60 New message alerting: 59 Number of rings: 61 Recording time: 62 Remote access code: 60 Remote operation: 60 Ring count: 61 Toll saver: 61 Turning on/off: 56 Auto talk: 22, 41 Battery: 11 Belt clip: 14 Bluetooth wireless technology Cellular phone (Link to cell): 17
Index U V W USB charging: 14 VM (Voice mail): 63 Voice guidance language: 16 Voice mail: 62, 63 Volume Receiver: 21 Ringer (Base unit): 29, 38, 42 Ringer (Handset): 22, 38, 39 Speaker: 21, 28 Wall mounting: 67 94 TG78xxUS(en)_0221_ver402.
Notes 95 TG78xxUS(en)_0221_ver402.
IMPORTANT! If your product is not working properly. . . 1 Reconnect AC adaptor to the base unit. 2 Check if telephone line cord is connected. 3 Use rechargeable Ni-MH batteries. (Alkaline/Manganese/Ni-Cd batteries CANNOT be used.) 4 Read troubleshooting page in the Operating Instructions. Visit our Web site: http://shop.panasonic.com/support L FAQ and troubleshooting hints are available.