
Operating instructions

9
Preparation
Battery installation/
replacement
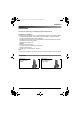
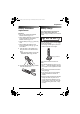
Important:
L Use only the included rechargeable
batteries noted on page 4, 5.
L When replacing batteries, we recommend
using the Panasonic rechargeable
batteries noted on page 4, 5.
L Wipe the battery ends (S, T) with a dry
cloth.
L When installing the batteries, avoid
touching the battery ends (S , T) or the
unit contacts.
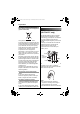
1 Press the notch on the handset cover
firmly and slide it in the direction of the
arrow.
L When replacing batteries, remove the
old batteries positive (S) end first.
2 Insert the batteries negative (T) end first.
Close the handset cover.
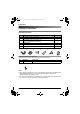
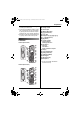
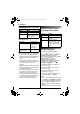
Battery charge
Place the handset on the charger for
about 7 hours before initial use.
When charging, the battery icon is shown as
follows.
When the batteries are fully charged, 5
remains on the display.
L The charge indicator lights up when the
handset is placed on the charger.
L The pictured model is KX-TGA715.
Note:
L The handset display may show “Please
Wait...” when the handset is placed on
the charger if it is not registered to a base
unit.
L It is normal for the handset to feel warm
during charging.
L If you want to use the unit immediately,
charge the batteries for at least 15
minutes.
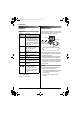
L Clean the charge contacts of the handset,
charger with a soft, dry cloth once a
month, otherwise the batteries may not
charge properly. Clean more often if the
unit is exposed to grease, dust, or high
humidity.
Charge contacts
TGA715FX_717FX(e-e).book Page 9 Wednesday, February 28, 2007 2:47 PM