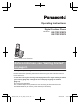
Operating Instructions Digital Cordless Phone Model No. KX-TGC210FX KX-TGC212FX Model shown is KX-TGC210. Before initial use, see “Getting Started” on page 9. Thank you for purchasing a Panasonic product. Please read these operating instructions before using the unit and save them for future reference. To use this unit in your country, first change the unit’s region setting to match your country (page 25). Change the unit’s display language as needed (page 13).
Table of Contents Introduction Index...........................................................34 Model composition .......................................3 Accessory information ..................................3 General information ......................................4 Important Information For your safety .............................................5 Important safety instructions ........................6 For best performance ...................................6 Other information .................
Introduction Model composition Base unit Handset Part No. Part No. KX-TGC210 KX-TGC210 KX-TGCA20 1 KX-TGC212 KX-TGC210 KX-TGCA20 2 Series Model No. KX-TGC210 series Quantity Accessory information Supplied accessories No.
Introduction Other information R Design and specifications are subject to change without notice. R The illustrations in these instructions may vary slightly from the actual product. General information R This equipment is designed for use on the Czech, Slovakia, Estonia, Latvia, Lithuania, Croatia, Slovenia, Romania and Bulgaria analogue telephone network. R In the event of problems, you should contact your equipment supplier in the first instance.
Important Information R Do not allow the AC adaptor or telephone line cord to be excessively pulled, bent or placed under heavy objects. For your safety To prevent severe injury and loss of life/ property, read this section carefully before using the product to ensure proper and safe operation of your product. WARNING Power connection R Use only the power source marked on the product. R Do not overload power outlets and extension cords. This can result in the risk of fire or electric shock.
Important Information R This product is unable to make calls when: – the handset batteries need recharging or have failed. – there is a power failure. – the key lock feature is turned on. 4. Use only the power cord and batteries indicated in this manual. Do not dispose of batteries in a fire. They may explode. Check with local codes for possible special disposal instructions. SAVE THESE INSTRUCTIONS Battery R We recommend using the batteries noted on page 3.
Important Information should not be placed in rooms where the temperature is less than 0 °C or greater than 40 °C. Damp basements should also be avoided. R The maximum calling distance may be shortened when the product is used in the following places: Near obstacles such as hills, tunnels, underground, near metal objects such as wire fences, etc. R Operating the product near electrical appliances may cause interference. Move away from the electrical appliances.
Important Information Specifications R Standard: DECT (Digital Enhanced Cordless Telecommunications), GAP (Generic Access Profile) R Frequency range: 1.88 GHz to 1.90 GHz R RF transmission power: Approx. 10 mW (average power per channel) R Power source: 220–240 V AC, 50/60 Hz R Power consumption: Base unit: Standby: Approx. 0.52 W Maximum: Approx. 2.7 W Charger: Standby: Approx. 0.12 W Maximum: Approx. 1.
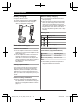
Getting Started n Charger Setting up A Connect the AC adaptor plug to the unit until you hear a click. Connections B Connect the AC adaptor to the power outlet. n Base unit Connect the AC adaptor to the unit by pressing the plug firmly. Fasten the cord by hooking it. Connect the AC adaptor to the power outlet. Connect the telephone line cord to the unit, then to the telephone line jack until you hear a click. A DSL/ADSL filter (not supplied) is required if you have a DSL/ADSL service.
Getting Started Battery charging Note for battery charging Charge for about 7 hours. R Confirm “Charging” is displayed (1). R When the batteries are fully charged, “Fully charged” is displayed. R It is normal for the handset to feel warm during charging. R Clean the charge contacts of the handset, base unit, and charger with a soft and dry cloth once a month. Before cleaning the unit, disconnect from power outlets and any telephone line cords.
Getting Started M N (Intercom) R This feature is not available for single handset models. Charge contacts Controls Handset F G n Control type Soft keys By pressing a soft key, you can select the feature shown directly above it on the display. Navigator key Navigator keys functions as follows. Symbol A H B C I D J E K N MDN Up MCN Down MWN MFN Left MTN MEN Right – MDN, MCN, MFN, or MEN: Scroll through various lists and items.
Getting Started Handset soft key icons Display icons Icon Handset display items Item Returns to the previous screen or outside call. Meaning Range status: The more bars visible, the closer the handset is to the base unit. Displays the menu. OK Accepts the current selection. Makes a call. (page 14) Out of base unit range Temporarily turns off the ringer for incoming calls. (page 14) Paging, intercom mode*1 Z Speakerphone is on. (page 14) Places a call on hold.*1 W Opens the phonebook.
Getting Started – When the one touch eco mode is off: “Normal” is temporarily displayed and goes off from the handset display. Language setting Display language 1 2 3 M N#110 MbN: Select your desired language. a MOKN M N Date and time 1 2 3 4 M N#101 Enter the current date, month, and year. a MOKN Example: 15 July, 2014 15 07 14 Enter the current hour and minute. Example: 9:30 09 30 R You can select 24-hour or 12-hour clock format (“AM” or “PM”) by pressing *.
Making/Answering Calls Example: If you need to dial the line access number “0” when making outside calls with a PBX: Making calls 1 2 3 1 2 Lift the handset and dial the phone number. R To correct a digit, press MCN. M N N or When you finish talking, press M place the handset on the base unit or charger. Dial the phone number and press MZN. When you finish talking, press M N. Note: R To switch back to the receiver, press MZN/ M N.
Making/Answering Calls 2 To return to the call, press M N. Recall/flash MR/ECON allows you to use the special features of your host PBX such as transferring an extension call, or accessing optional telephone services. Note: R To change the recall/flash time, see page 21. For call waiting or Call Waiting Caller ID service users To use call waiting or Call Waiting Caller ID, you must first subscribe with your service provider/telephone company.
Making/Answering Calls answer the call, press M M N. N, then press Making an intercom call 1 2 M N When you finish talking, press M N. Answering an intercom call 1 2 Press M N or M N to answer the page. When you finish talking, press M N. Key lock The handset can be locked so that no calls or settings can be made. Incoming calls can be answered, but all other functions are disabled while key lock is on. To turn key lock on, press M N for about 3 seconds.
Phonebook Phonebook You can add 50 names (16 characters max.) and phone numbers (24 digits max.) to the phonebook. Important: R All entries can be shared by any registered handset. 4 MWN a M N MbN: “New Entry” a MOKN Enter the party’s name. a MOKN R You can change the character entry mode by pressing MR/ECON (page 28). Enter the party’s phone number. a MOKN 2 times a M N Storing a redial list number to the phonebook 1 2 3 M N Editing entries 1 2 3 4 Find the desired entry (page 17).
Phonebook PIN that you have stored in the phonebook, without having to dial manually. 1 2 3 4 During an outside call, press M N. MbN: “Phonebook” a MOKN MbN: Select the desired entry. N (right soft key) to dial the Press M number. Note: R When storing a calling card access number and your PIN in the phonebook as one phonebook entry, press MDN (Pause) to add pauses after the number and PIN as necessary (page 14).
Programming Menu list To access the features, there are 2 methods. n Scrolling through the display menus 1 M N 2 3 4 Press MCN, MDN, MEN, or MFN to select the desired main menu. a MOKN Press MCN or MDN to select the desired item from the next sub-menus. a MOKN Press MCN or MDN to select the desired setting. a MOKN n Using the direct command code 1 M N a Enter the desired code. Example: Press M N#101. 2 Select the desired setting. a MOKN Note: R R R R To exit the operation, press M N.
Programming Main menu: “Initial Setup” Sub-menu 1 Sub-menu 2 Settings Code Ringer Setup Ringer Volume Off-6 <6> #160 – Ringtone*4, *5 #161 – Off #173 – First Time Settings Ring*1, *6 #101 13 Memo Alarm – Alarm1-3 Once Daily Weekly #720 22 Time Adjustment*1, *2 Caller ID #226 – Handset Name Nuisance Call Block*1 – Set Date/Time*1 – Single Number Range of Numbers Withheld Speed Dial – #104 24 – #217 23 #240 24 – On – #261 18
Programming Sub-menu 1 Sub-menu 2 Settings Code Line Setup Dial Mode*1 Pulse #120 13 Recall/Flash*1, *9, *10 900 msec. 700 msec. <600 msec.> 400 msec. 300 msec. 250 msec. 200 msec. 160 msec. 110 msec. 100 msec. 90 msec. 80 msec. #121 15 Privacy Mode*1, *3, *11 – On #194 – Base Unit PIN*1 – <0000> #132 24 Repeater Mode*1 – On #138 25 Register Register H.set – #130 33 Cancel Register*12 – #131 33 Česká rep.
Programming *1 If you program these settings using one of the handsets, you do not need to program the same item using another handset. (KX-TGC212) *2 This feature allows the unit to automatically adjust the date and time each time caller information including date and time is received. To turn this feature on, select “Caller ID”. To turn this feature off, select “Manual”. (Caller ID subscribers only) To use this feature, set the date and time first (page 13).
Programming 4 Proceed with the operation according to your selection in step 3. n Once: Enter the desired date and month. a MOKN n Weekly: MbN: Select the desired day of the week and press M N. a MOKN 5 6 7 When a call is received, the unit does not ring while the caller is being identified. If the caller’s phone number matches an entry in the call block list, the unit emits no sound to the caller, and disconnects the call. Important: R Rejected calls are logged in the caller list. Set the desired time.
Programming Blocking incoming calls that have no phone number You can reject calls when no phone number is provided, such as private callers. 1 2 3 M N#240 MbN: Select the desired setting. a MOKN M N Viewing/editing/erasing call block numbers 1 2 M handsets. You can also select whether or not the handset name is displayed in standby mode. The default setting is “No”. If you select “Yes” without entering any handset name, “Handset 1” or “Handset 2” is displayed.
Programming your new PIN. The unit will not reveal the PIN to you. If you forget your PIN, contact an authorised service centre. 1 2 M N#132 Enter the current 4-digit base unit PIN (default: “0000”). 3 Enter the new 4-digit base unit PIN. a MOKN 4 MbN: “Yes” a MOKN a M N Changing the unit’s region setting/Resetting the base unit 1 2 3 M Registering the DECT repeater (KX-A405) to the base unit Note: R Please use a repeater that has not yet been registered to another unit.
Caller ID Service Using Caller ID service Important: R This unit is Caller ID compatible. To use Caller ID features, you must subscribe to a Caller ID service. Contact your service provider/telephone company for details. R Caller ID service is realised in FSK system (for Poland). Caller ID features When an outside call is being received, the caller information is displayed. Caller information for the last 50 callers is logged in the caller list from the most recent call to the oldest.
Caller ID Service 2 3 MbN: Select the desired entry. M N a MbN: “Yes” a MOKN a M N Erasing all caller information 1 2 M N M N a MbN: “Yes” a MOKN a M N 27 TGC210_212FX_(en-en)_0410_ver.031.
Useful Information Voice mail service Voice mail is an automatic answering service offered by your service provider/telephone company. After you subscribe to this service, your service provider/telephone company’s voice mail system answers calls for you when you are unavailable to answer the phone or when your line is busy. Messages are recorded by your service provider/telephone company, not your telephone. is displayed on the handset if message indication service is When you have new messages, available.
Useful Information Numeric entry table (0-9) z 1 2 Greek character table ( z 1 2 3 1 2 5 6 7 8 9 y 4 5 6 7 8 9 y 4 5 6 7 8 9 y 7 8 9 y ) 3 Extended 1 character table ( z 4 ) 3 R The following are used for both uppercase and lowercase: Extended 2 character table ( z 1 2 ) 3 4 5 6 R The following are used for both uppercase and lowercase: 29 TGC210_212FX_(en-en)_0410_ver.031.
Useful Information Cyrillic character table ( z 1 2 ) 3 4 5 6 7 8 9 y Error messages Display message Cause/solution Base no power or No link. Reconnect AC adaptor. R The handset has lost communication with the base unit. Move closer to the base unit and try again. R Unplug the base unit’s AC adaptor to reset the unit. Reconnect the adaptor and try again. R The handset’s registration may have been cancelled. Re-register the handset (page 33).
Useful Information Problem Cause/solution The unit does not work. R R R R The handset display is blank. R The handset is not turned on. Turn the power on (page 12). I cannot hear a dial tone. R Make sure that you are using the supplied telephone line cord. Your old telephone line cord may have a different wiring configuration. R The base unit’s AC adaptor or telephone line cord is not connected. Check the connections.
Useful Information Making/answering calls, intercom Problem is displayed. Cause/solution R The handset is too far from the base unit. Move closer. R The base unit’s AC adaptor is not properly connected. Reconnect AC adaptor to the base unit. R The handset is not registered to the base unit. Register it (page 33). R Activating one touch eco mode reduces the range of the base unit in standby mode. If required, turn eco mode off (page 13). Noise is heard, sound cuts in and out.
Useful Information Liquid damage Problem Cause/solution Liquid or other form of moisture has entered the handset/base unit. R Disconnect the AC adaptor and telephone line cord from the base unit. Remove the batteries from the handset and leave to dry for at least 3 days. After the handset/base unit are completely dry, reconnect the AC adaptor and telephone line cord. Insert the batteries and charge fully before use. If the unit does not work properly, contact an authorised service centre.
Index Index A B C D E F H I K M N P R S Alarm: 22 Answering calls: 14 Auto talk: 14, 20 Base unit Resetting: 25 Battery: 9, 10 Call restriction: 24 Call share: 15 Call waiting: 15 Call Waiting Caller ID: 15 Caller ID service: 26 Caller list: 26 Chain dial: 17 Character entry: 28 Conference calls: 15 Control type: 11 Date and time: 13 Dialling mode: 13 Direct command code: 19 Display Contrast: 20 Language: 13 Eco mode: 13 Error messages: 30 First ring: 20 Handset Deregistration: 33 Name: 24 Registr
Notes 35 TGC210_212FX_(en-en)_0410_ver.031.
Sales Department: N Czech N Slovakia Thámova 289/13 (Palác Karlín) 186 00 Praha 8 +420-236 032 511 telefon: centrální fax: +420-236 032 411 zákaznická linka: +420-236 032 911 e-mail: panasonic.praha@eu.panasonic.com aktuální info na www.panasonic.cz Štúrova 11, 811 01 Bratislava, Slovenská republika Telefón: +421-2-2062-2211 Fax: +421-2-2062-2311 zákaznícka linka: +421-2-2062-2911 e-mail: panasonic.bratislava@eu.panasonic.com aktuálne info na www.panasonic.sk N Romania B-dul Preciziei, Nr.