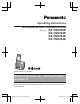
Operating Instructions Link-to-Mobile Bluetooth Convergence Solution Model No. KX-TGH260E KX-TGH262E KX-TGH263E KX-TGH264E Model shown is KX-TGH260. Before initial use, see “Getting Started” on page 11. Thank you for purchasing a Panasonic product. Please read these operating instructions before using the unit and save them for future reference. TGH26xE_(en)_0203_ver120.
Table of Contents Introduction Caller ID Service Model composition .......................................3 Accessory information ..................................3 General information ......................................5 Graphical symbols for use on equipment and their descriptions ..........................................6 Using Caller ID service ...............................46 Caller list ....................................................46 Important Information For your safety .............
Introduction Model composition Base unit Handset Part No. Part No. KX-TGH260 KX-TGH260 KX-TGHA22 1 KX-TGH262 KX-TGH260 KX-TGHA22 2 KX-TGH263 KX-TGH260 KX-TGHA22 3 KX-TGH264 KX-TGH260 KX-TGHA22 4 Series Model No. KX-TGH260 series Quantity Accessory information Supplied accessories No. Supplied handset qty.
Introduction Additional/replacement accessories Please contact your nearest Panasonic dealer for sales information. Accessory item Model number/Specifications Rechargeable batteries*1 Battery type: – Nickel metal hydride (Ni-MH) – 2 x AAA (R03) size for each handset – 1.2 V – Minimum amperage of 550 mAh DECT repeater KX-A405, KX-A406 Key finder KX-TGA20EX*2 *1 *2 Replacement batteries may have a different capacity from that of the supplied batteries.
Introduction Sales and support information Customer Communications Centre R For customers within the U.K.: 0344 844 3899 R For customers within Ireland: 01289 8333 R For further support on your product, please visit our website: www.panasonic.co.uk Direct Sales at Panasonic U.K. R Order accessory and consumable items for your product with ease and confidence by phoning our Customer Communications Centre Monday - Friday 9:00am - 5:00pm (Excluding public holidays).
Introduction Graphical symbols for use on equipment and their descriptions Symbol Explanation Symbol Explanation Alternating current (A.C.) Class P equipment (equipment in which protection against electric shock relies on Double Insulation or Reinforced Insulation) Direct current (D.C.
Important Information R Do not allow the AC adaptor or telephone line cord to be excessively pulled, bent or placed under heavy objects. For your safety To prevent severe injury and loss of life/ property, read this section carefully before using the product to ensure proper and safe operation of your product. WARNING Power connection R Use only the power source marked on the product. R Do not overload power outlets and extension cords. This can result in the risk of fire or electric shock.
Important Information R This product is unable to make calls when: – the handset batteries need recharging or have failed. – there is a power failure. – the key lock feature is turned on. 4. Use only the power cord and batteries indicated in this manual. Do not dispose of batteries in a fire. They may explode. Check with local codes for possible special disposal instructions. SAVE THESE INSTRUCTIONS Battery R We recommend using the batteries noted on page 4.
Important Information should not be placed in rooms where the temperature is less than 0 °C or greater than 40 °C. Damp basements should also be avoided. R The maximum calling distance may be shortened when the product is used in the following places: Near obstacles such as hills, tunnels, underground, near metal objects such as wire fences, etc. R Operating the product near electrical appliances may cause interference. Move away from the electrical appliances.
Important Information Specifications R Standard: DECT (Digital Enhanced Cordless Telecommunications), GAP (Generic Access Profile) Bluetooth wireless technology 2.1 R Frequency range: DECT: 1.88 GHz to 1.90 GHz Bluetooth: 2.402 GHz to 2.48 GHz R RF transmission power: DECT: Approx. 10 mW (average power per channel) 250 mW (max.) Bluetooth: 10 mW (max.) R Power source: 100–240 V AC, 50/60 Hz R Power consumption: Base unit: Standby: Approx. 1.1 W Maximum: Approx. 4.0 W Charger: Standby: Approx. 0.
Getting Started n Charger Connect the AC adaptor plug to the unit until you hear a click. Connect the AC adaptor to the power outlet. Setting up Connections n Base unit Connect the AC adaptor to the unit by pressing the plug firmly. Fasten the cord by hooking it. Connect the AC adaptor to the power outlet. Connect the telephone line cord to the unit, then to the telephone line jack until you hear a click. A DSL/ADSL filter (not supplied) is required if you have a DSL/ADSL service.
Getting Started Battery charging Charge for about 7 hours. R Confirm “Charging” is displayed (1). R When the batteries are fully charged, “Fully Charged” is displayed. 1 R Clean the charge contacts of the handset, base unit, and charger with a soft and dry cloth once a month. Before cleaning the unit, disconnect from power outlets and any telephone line cords. Clean more often if the unit is exposed to grease, dust, or high humidity. Battery level Icon Battery level High Medium Low Needs charging.
Getting Started indicator Charge contacts Controls Handset F G A H B C I J D E K n Control type Soft keys By pressing a soft key, you can select the feature shown directly above it on the display. After a mobile phone is paired, MMOBILEN is displayed. Navigator key Navigator keys functions as follows. Symbol Meaning M MDN Up M N MCN Down MWN MFN Left MTN MEN Right N – MDN, MCN, MFN, or MEN: Scroll through various lists and items.
Getting Started MOBILE 1 indicator MOBILE 2 indicator MjN/MkN (VOL.: Volume up/down) MANSWER ON/OFFN M N (PLAY/STOP) Message indicator M N (Repeat) M N (Skip) MERASEN M /LOCATORN R You can locate a misplaced handset by pressing MLOCATORN. Item Meaning A mobile phone is connected.*2 Ready to make/ receive mobile calls. R When turned off: A mobile phone is not connected to the base unit. (page 20) – A mobile call is being done on that line. – The mobile line is selected for the setting.
Getting Started Item Mobile 1 in use Meaning Status Meaning Baby monitor is activated. The name/number displayed next to the icon indicates the monitoring unit. (page 42) Flashing – The mobile line is in use. – Phonebook entries are being copied from a mobile phone (page 48). – The base unit is searching for the paired mobile phone. – The base unit is pairing a mobile phone. – A mobile call is put on hold. Flashing rapidly A mobile call is being received.
Getting Started – Stop the alarm sound. (page 40) *1 KX-TGH262/KX-TGH263/KX-TGH264 Date and time 1 2 MMENUN (right soft key) #101 Enter the current date, month, and year. a MOKN Example: 15 July, 2017 15 07 17 R You can select the date format by pressing #: – dd/mm/yy (date/month/year) – yy/mm/dd 3 Enter the current hour and minute. Example: 9:30 09 30 R You can select 24-hour or 12-hour clock format (“AM” or “PM”) by pressing *.
Getting Started 2 MbN: Select the desired setting and press MSELECTN. R “ ” is displayed next to the selected features. R To cancel a selected feature, press MSELECTN again. “ ” disappears. 3 MOKN a M – “Eco Mode” is not displayed in the display menu (page 37). N Note: R If the indicator flashes when the handset is not placed on the base unit or charger, battery consumption is faster than usual.
Link to Mobile Link to mobile feature You can connect your base unit and mobile phone using Bluetooth wireless technology, so that you can make or answer mobile calls using your phone system. This allows you to: – use the unit to talk on mobile calls even if some areas of your home have poor mobile reception, simply by placing your mobile phone in an area with good reception. – talk on mobile calls even if your mobile phone is in your pocket or bag.
Link to Mobile Link to mobile settings Selecting which unit receives mobile calls Available for: KX-TGH262/KX-TGH263/KX-TGH264 You can select which unit rings and receives calls for a mobile line. When “All” is selected, all handsets and the base unit ring. 1 For MOBILE 1: MMENUN (right soft key) #6271 For MOBILE 2: MMENUN (right soft key) #6272 2 MbN: Select the desired handset or “All”.
Link to Mobile R Some mobile phones lose connection after usage, please check the specifications of your mobile phone for more details. 1 2 3 MMENUN (right soft key) #632 MbN: Select the desired setting. MOKN a M N Note: R Some mobile phones may ask you if you accept the connection requirement from the base unit. In that case, select “Off” in step 2. Check the specifications of your mobile phone.
Link to Mobile – “Manual” (default): You can select the desired mobile line when making a call. – “Mobile Phone 1”*1: MOBILE 1 is selected. – “Mobile Phone 2”*1: MOBILE 2 is selected. 1 2 3 *1 3 4 Enter the new 4-digit PIN again. a MOKN M N MMENUN (right soft key) #634 MbN: Select the desired setting. N MOKN a M After the Bluetooth device is paired, the device name is displayed.
Making/Answering Calls Making mobile calls Important: R The unit can be used to talk on 2 lines at the same time (for example, 2 mobile lines, or the landline and 1 mobile line). R Only 2 Bluetooth devices can be used with the unit at the same time (for example, 2 mobile lines, or the headset and 1 mobile line). R Before making calls, confirm that the corresponding MOBILE indicator on the base unit lights up (page 15). 1 2 3 Lift the handset and dial the phone number.
Making/Answering Calls 1 2 3 MTN MbN: Select the desired entry. M N/MZN R If MZN is pressed and the other party’s line is engaged, the unit automatically redials multiple times. Pause (for PBX/long distance service users) A pause is sometimes required when making calls using a PBX or long distance service. When storing a calling card access number and/or PIN in the phonebook, a pause is also needed (page 29).
Making/Answering Calls 2 To return to the call, press MMUTEN. Note: R MMUTEN is a soft key visible on the display during a call. Recall/flash for landline calls MR/ECON allows you to use the special features of your host PBX such as transferring an extension call, or accessing optional telephone services. Note: R To change the recall/flash time, see page 38.
Making/Answering Calls R To prevent other users from joining your conversations with outside callers, turn privacy mode on (page 38). Transferring calls, conference calls Available for: KX-TGH262/KX-TGH263/KX-TGH264 Outside calls can be transferred or a conference call with an outside party can be made between 2 handsets. 1 2 3 4 5 During an outside call, press MMENUN. MbN: “Intercom” a MOKN MbN: Select the desired unit. a MOKN Wait for the paged party to answer.
Making/Answering Calls Answering a 2nd call during a mobile call 1 2 3 4 *1 Using the Smart Function Key Press M N to answer the page. Press MMENUN during a mobile call. MbN: “Hold” a MOKN Turning auto intercom on/off To answer the 2nd call: Press M N or MMOBILEN while the 2nd call is being received. This feature allows the handset to answer intercom calls automatically when it is called. You do not need to press M N.
Phonebook 8 Phonebook You can store up to 3,000 phonebook entries and assign a name (16 characters max.) and up to 3 phone numbers to each (24 digits max. each). You can also assign a label to each phone number, and assign each phonebook entry to a category (page 27). The following categories are available: – Category 1: “Home”*1 (default) – Category 2: “Mobile 1”*1 – Category 3: “Mobile 2”*1 – Category 4-9: You can change the category name for each category.
Phonebook Changing category names/setting category ringer tone 1 2 3 4 3 MWN a MMENUN MbN: “Category” a MOKN MbN: Select the desired category. a MOKN R If you selected “Home”, “Mobile 1”, or “Mobile 2”, go to step 5. To change category names MbN: “Category Name” a MOKN a Edit the name (10 characters max.). a MOKN 5 To set category ringer tone MbN: Select the current setting of the category ringer tone. a MOKN a MbN: Select the desired ringer tone. a MOKN 6 M 4 MbN: Select the desired mobile phone.
Phonebook 4 5 To change the name: Edit the name. a MOKN To change the phone number: Edit the phone number. a MOKN MbN: Select the desired label. a MOKN To change the category: MbN: Select the desired category (page 27). a MOKN MbN: “” a MOKN a M N Erasing entries Erasing an entry 1 Find the desired entry (page 28). a MMENUN 2 3 MbN: “Erase” a MOKN MbN: “Yes” a MOKN a M pauses after the number and PIN as necessary (page 23).
Phonebook Erasing an entry 1 Press and hold the desired speed dial key (1 to 9). a MMENUN 2 3 MbN: “Erase” a MOKN MbN: “Yes” a MOKN a M N Viewing an entry/Making a call n Using a mobile line: 1 Press and hold the desired speed dial key (1 to 9). 2 MMOBILEN R The unit starts dialling when: – only 1 mobile phone is paired. – a specific line is set to make mobile calls (page 20). 3 MbN: Select the desired mobile phone. a MOKN n Using the landline: 1 Press and hold the desired speed dial key (1 to 9).
Programming Menu list To access the features, there are 2 methods. n Scrolling through the display menus 1 MMENUN (right soft key) 2 3 4 Press MCN, MDN, MEN, or MFN to select the desired main menu. a MOKN Press MCN or MDN to select the desired item from the next sub-menus. a MOKN Press MCN or MDN to select the desired setting. a MOKN n Using the direct command code 1 MMENUN (right soft key) a Enter the desired code. Example: Press MMENUN (right soft key) #101. 2 Select the desired setting.
Programming Sub-menu 1 Sub-menu 2 Settings Code New Message Alert*1 Outgoing Call – On/Off On #338 55 Outgoing Call – Notification to Settings – Outgoing Call – Remote Code Activate Base Unit Beep On #339 55 Number of Rings*1 2-9 Rings <5 Rings> Auto #211 57 Recording Time*1 1 Minute <3 Minutes> Greeting Only*2 #305 58 – Remote Code*1 Call Screening Off #306 56 #310 57 Answer On*1 – – #327 52 Answer Off*1 – – #328 52 Main menu: “Ringe
Programming Sub-menu 1 Sub-menu 2 – First Ring*1, *6 Main menu: Settings Code Off #173 “Intercom”*7 Operation Code Paging the desired unit. #274 Main menu: 26 “Nuisance Call Block”*1, *8 Operation Code Storing/Viewing blocked call numbers. Main menu: – “Key Sub-menu 1 #217 41 Finder”*9 Sub-menu 2 Settings Code Search – – Battery Check – – Helpline Tel. No.: U.K. 0344 844 3899 Ireland 01289 8333 TGH26xE_(en)_0203_ver120.
Programming Main menu: “Bluetooth” Sub-menu 1 Sub-menu 2 Link to Mobile – 1: Add New Device*10 (for MOBILE 1) – 2: Add New Device*10 (for MOBILE 2) Connect*1/ Disconnect*1 Settings Code – #6251*11 Ringer Volume – Handset Off–6 <6> Ringer Volume – Base Unit*1 Off–6 <3> Ringtone*4 *11 *12 #6281*11 23 #6282*12 #G6281*11 #G6282*12 #6291*11 – #6292*12 Select unit to ring*1 Handset 1-3 #6271*11 Ring as Mobile (limited)*1 Off #6141*11 SMS Alert – On/Off*
Programming Sub-menu 1 Sub-menu 2 Settings Code Settings Auto Connect*1 <1 min> 3 min 5 min 10 min Off #632 19 #633 21 Mobile Area Code*1 Main menu: – Mobile Line Only Mode*1 On #157 20 Mobile Line Select Mobile Phone 1*10 Mobile Phone 2*10 #634 20 Set pairing PIN*1 <0000> #619 21 International Code*1 – #117 48 Country Code*1 – #118 National Access Code*1 – #119 “Baby Monitor” Sub-menu 1 Settings Code On/Off Sub-menu 2 – On #268 42 Sensitivit
Programming Main menu: “Initial Setup” Sub-menu 1 Sub-menu 2 Settings Code Ringer Setup Ringer Volume – Handset *3 Off-6 <6> #160 – Ringer Volume – Base Unit*1, *3 Off-6 <3> #G160 – Ringtone*3, *4 (Handset) #161 – Interrupt Tone*5 Off #201 25 Do Not Disturb Mode – On/Off On #238 40 Do Not Disturb Mode – Start/End <23:00/06:00> #237 41 Do Not Disturb Mode – Ring Delay 30 sec. <60 sec.> 90 sec. 120 sec.
Programming Sub-menu 1 Sub-menu 2 Settings Key Finder Setup*9 – 1:Add New Device (for Finder1)*15 – 2:Add New Device (for Finder2) – 3:Add New Device (for Finder3) – 4:Add New Device (for Finder4) Change Name*1 Finder1 #6561 Finder2*16 #6562*17 Finder3*16 #6563*17 Finder4*16 #6564*17 Register Code – #6571 – – #6572*17 #6573*17 #6574*17 Cancel Register – #6581 – #6582*17 #6583*17 #6584*17 Nuisance Call Block*1 Single Number – Range of Numbers – Withheld On #217 41 #240
Programming Sub-menu 1 Settings Code Auto Intercom Sub-menu 2 – On #273 26 Keytones – Off #165 – – #256 44 On #200 23 900 msec. 700 msec. 600 msec. 400 msec. 300 msec. 250 msec. 200 msec. 160 msec. 110 msec. <100 msec.> 90 msec. 80 msec.
Programming *5 *6 *7 *8 *9 *10 *11 *12 *13 *14 *15 *16 *17 *18 *19 *20 *21 *22 *23 This tone lets you know when you receive an outside call while you are on another line or an intercom call. If you select “On”, the tone sounds 2 times. If you do not want the unit to ring before the caller information is received, set to “Off”. (Caller ID subscribers only) You can only remove the first ring if the unit rings 2 times or more by default, which depends on your service provider/telephone company.
Programming Alarm An alarm sounds at the set time for 1 minute and is repeated 5 times at 5 minute intervals (snooze function). A text memo can also be displayed for the alarm. A total of 5 separate alarm times can be programmed for each handset. You can set one of 3 different alarm options (once, daily, or weekly) for each alarm time. Important: R Make sure the unit’s date and time setting is correct (page 16). 1 2 3 MMENUN (right soft key) #720 MbN: Select the desired alarm option.
Programming 4 Enter the desired hour and minute you wish to end this feature. a MOKN a N M Changing the start and end time 1 2 MMENUN (right soft key) #237 Continue from step 3, “Turning do not disturb mode on/off”, page 40. Setting the ring delay This setting allows the handset to ring during do not disturb mode if the caller waits long enough. After the selected amount of time passes, the handset rings. If you select “No Ringing”, the handset never rings during do not disturb mode.
Programming Blocking incoming calls that have no phone number MMENUN (right soft key) #217 This feature allows you to listen in on a room where another handset is located, allowing you to easily monitor from different areas of the house or place. The monitored handset (placed in a baby’s room, for example) will automatically call the monitoring handset or the phone number stored when it detects sound.
Programming 1 2 3 MMENUN (right soft key) #268 Turning off the baby monitor MbN: “On” a MOKN The monitored handset cannot be used while baby monitor is set to “On”. MbN: Select the desired handset number to monitor with. a MOKN R “Baby Monitor” will be displayed. R The registered handset name/number is displayed. Note: R When this feature is on, another handset can hear the monitored handset by making an intercom call.
Programming Answering the baby monitor Displaying the handset name n When monitoring with a handset: Press M N to answer calls. If you want to respond from the monitoring handset, press MMUTEN. R The monitoring handset will answer calls automatically when the auto intercom feature is set to “On” (page 26). You can select whether or not the handset name is displayed in standby mode. The default setting is “Off”.
Programming 2 3 MbN: Selected the desired setting. a MOKN M N Note: R If you set repeater mode to “On” (page 45): – Security is set to “Normal” and is displayed. – “Security” is not displayed in the display menu (page 37). R When enhanced security is enabled, sound may cut in and out during conversations. Changing the base unit PIN Important: R If you change the PIN (Personal Identification Number), please make note of your new PIN. The unit will not reveal the PIN to you.
Caller ID Service Using Caller ID service Important: R This unit is Caller ID compatible. To use Caller ID features, you must subscribe to a Caller ID service. Contact your service provider/telephone company for details. Caller ID features When an outside call is being received, the caller information is displayed. Caller information for the last 50 callers is logged in the caller list from the most recent call to the oldest.
Caller ID Service Using the Smart Function Key is displayed and the indicator When flashes slowly, there are missed calls. Press M N in step 1 on “Viewing the caller list and calling back”, page 46. R “Missed Call” must be set to “On” in “Setting the Smart Function Key”, page 16. R If the handset is placed on the base unit or charger, you need to lift up the handset to view the caller list after pressing M N.
Using Bluetooth Devices Copying phonebook from a mobile phone (phonebook transfer) You can copy phonebook entries from the paired mobile phones or other mobile phones (not paired) to the unit’s phonebook. A mobile phone must be compatible with Bluetooth wireless technology. Important: R Your mobile phone must support Phone Book Access Profile (PBAP) or Object Push Profile (OPP) specification. R The unit can copy up to 3 phone numbers of a copied entry for each entry.
Using Bluetooth Devices – “Country Code”: Your country code for international calls. – “National Access Code”: A trunk prefix; the initial digit(s) to be dialled in a domestic call, prior to the area code. R Refer to your mobile phone operating instructions for information on how to install applications. 1 2 The following settings are available. The default is “On”. – “On”: The handset notifies you. – “Off”: The handset does not notify you.
Using Bluetooth Devices Using a Bluetooth wireless headset (optional) for landline calls By pairing a Bluetooth headset to the base unit, you can have a hands-free conversation wirelessly for landline calls. Important: R Your Bluetooth wireless headset must support the HeadSet Profile (HSP) specification. R 1 headset can be paired to the base unit. R Only 2 Bluetooth devices can be used with the unit at the same time (for example, 2 mobile lines, or the headset and 1 mobile line).
Using Bluetooth Devices Switching between the base unit and your headset You can switch between the base unit and your headset while listening to messages recorded on the base unit answering system. R You can only switch from the base unit to your headset. n To switch to your headset: Turn on the headset referring to your headset operating instructions. Call sharing between your headset and the handset Important: R To activate this feature, you should set privacy mode to off beforehand (page 38).
Answering System for Landline Answering system for landline The answering system can answer and record calls for you when you are unavailable to answer the phone. You can also set the unit to play a greeting message but not to record caller messages by selecting “Greeting Only” as the recording time setting (page 58). Important: R Make sure the unit’s date and time setting is correct (page 16). Base unit Press MANSWER ON/OFFN to turn on/off the answering system.
Answering System for Landline messages are not recorded and the unit plays a different pre-recorded greeting message asking callers to call again. Resetting to a pre-recorded greeting message If you want to use a pre-recorded greeting message once you record your own greeting message, you need to erase your own greeting message.
Answering System for Landline Press M N in step 1 on “Using the handset”, page 53. R “New Message” must be set to “On” in “Setting the Smart Function Key”, page 16. Listening to messages from the message list You can select the item to play back.
Answering System for Landline 2 MbN: “Yes” a MOKN a M 3 4 N Advanced new message alerting features Audible message alert 5 2 3 4 5 MMENUN (right soft key) #339 MbN: Select the desired setting. a MOKN N aM New message alert by a call This feature allows you to receive a notification by phone when new messages are recorded. The base unit calls a phone number you specify. You can then operate the answering system remotely to listen to the new message.
Answering System for Landline Activating/inactivating the remote access code to play messages If you activate this feature, you must enter the remote access code (page 56) to play the new message from the new message alert call. This is so that unauthorised parties cannot listen to your messages. The default setting is “Inactivate”. – “Inactivate”: You can listen to the message by pressing 4 to play new messages (without entering the remote access code).
Answering System for Landline Note: R If you do not press any dial keys within 10 seconds after a voice guidance prompt, the unit disconnects your call. R You can either hang up, or enter your remote access code again and begin remote operation (page 56). Remote commands Answering system settings You can press dial keys to access certain answering system functions without waiting for the voice guidance to prompt you.
Answering System for Landline system, turn off the answering system (page 52). R To use this unit’s answering system rather than the voice mail service provided by your service provider/telephone company, please contact your service provider/ telephone company to deactivate your voice mail service.
Useful Information Voice mail service for landline Voice mail is an automatic answering service offered by your service provider/telephone company. After you subscribe to this service, your service provider/telephone company’s voice mail system answers calls for you when you are unavailable to answer the phone or when your line is busy. Messages are recorded by your service provider/telephone company, not your telephone.
Useful Information Alphabet character table (ABC) z 1 2 3 4 5 6 7 8 9 y 3 4 5 6 7 8 9 y 4 5 6 7 8 9 y 4 5 6 7 8 9 y 7 8 9 y Numeric entry table (0-9) z 1 2 Greek character table ( z 1 2 ) 3 Extended 1 character table ( z 1 2 ) 3 R The following are used for both uppercase and lowercase: Extended 2 character table ( z 60 1 2 3 ) 4 5 6 Helpline Tel. No.: U.K. 0344 844 3899 Ireland 01289 8333 TGH26xE_(en)_0203_ver120.
Useful Information R The following are used for both uppercase and lowercase: Cyrillic character table ( z 1 2 ) 3 4 5 6 7 8 9 y Error messages Display message Cause/solution Base no power or No link to base. Reconnect main base AC adaptor. R The handset has lost communication with the base unit. Move closer to the base unit and try again. R Unplug the base unit’s AC adaptor to reset the unit. Reconnect the adaptor and try again. R The handset’s registration may have been cancelled.
Useful Information Display message Cause/solution You must first subscribe to Caller ID. R You must subscribe to a Caller ID service. Once you receive caller information after subscribing to a Caller ID service, this message will not be displayed. Troubleshooting If you still have difficulties after following the instructions in this section, disconnect the base unit’s AC adaptor and turn off the handset, then reconnect the base unit’s AC adaptor and turn on the handset.
Useful Information Problem Cause/solution I cannot connect a mobile phone to the base unit. R Confirm that your mobile phone is turned on. R Confirm that your mobile phone is within base unit range (page 14). R Your mobile phone’s Bluetooth feature is turned off. Turn it on. R Depending on the state of the wireless environment, such as the presence of any electrical interference, there may be a delay even if the auto connection feature is turned on. You can connect to the base unit manually (page 20).
Useful Information Battery recharge Problem Cause/solution The handset beeps and/or flashes. R Battery charge is low. Fully charge the batteries (page 12). I fully charged the batteries, but – still flashes or – the operating time seems to be shorter. ) and the charge contacts with R Clean the battery ends ( , a dry cloth and charge again. R It is time to replace the batteries (page 11). Making/answering calls, intercom Problem Cause/solution R The handset is too far from the base unit. Move closer.
Useful Information Problem Cause/solution I cannot make or answer mobile calls with the handset. R Depending on the mobile phone’s compatibility, you may not be able to make or answer mobile calls even if the mobile phone is connected to the base unit. R Make sure that the MOBILE indicator lights up and the mobile phone is connected to the base unit (page 20). R Only 2 Bluetooth devices can be used with the unit at the same time (for example, 2 mobile lines, or the headset and 1 mobile line).
Useful Information Using Bluetooth devices Problem Cause/solution I cannot copy phonebook entries from a mobile phone. R Confirm that the mobile phone supports Bluetooth wireless technology. R Confirm that the mobile phone supports the Phone Book Access Profile (PBAP) or Object Push Profile (OPP) specification. R If the mobile phone is already connected to another Bluetooth device such as a Bluetooth headset, turn it off or disconnect it from the mobile phone. R Someone is using a mobile line or headset.
Useful Information Problem Cause/solution SMS alerts are not displayed. R Confirm that the mobile phone supports the Message Access Profile (MAP) specification. R If your smartphone does not support Message Access Profile (MAP), download the “Text Message Alert” app (page 49). R SMS alert is set to “Off”. Set it to “On”. R The Bluetooth device’s Bluetooth notifications setting is turned off. R The handset selected to display alerts is in use.
Useful Information Bluetooth PIN Problem Cause/solution I cannot remember the PIN. R Change the PIN using the following method. 1 2 3 4 MMENUN (right soft key) #619 *7000 Enter the new 4-digit PIN. a MOKN Enter the new 4-digit PIN again. a MOKN a M N Liquid damage Problem Cause/solution Liquid or other form of moisture has entered the handset/base unit. R Disconnect the AC adaptor and telephone line cord from the base unit.
Useful Information Conditions of guarantee This guarantee is in addition to and does not in any way affect any statutory or other rights of consumer purchasers. If within the applicable guarantee period, the product proves to be defective by reason of faulty design, workmanship or materials, we undertake subject to the following conditions to have the defective product (or any part or parts there of) repaired or replaced free of charge. 1.
Index H Index A B C D E F Alarm: 40 Answering calls: 23 Answering system: 52 Call screening: 57 Erasing messages: 53, 54, 57 Greeting message: 52 Greeting only: 58 Listening to messages: 53, 56 Message list: 54 New message alerting: 55 Number of rings: 57 Recording time: 58 Remote access code: 56 Remote operation: 56 Turning on/off: 52 Auto intercom: 26 Auto talk: 23, 38 Baby monitor: 42 Battery: 11, 12 Bluetooth wireless technology Headset: 50 Mobile phone (Link to mobile): 18 Phonebook transfer: 48
Index Ringer (Handset): 23, 34, 36 Speaker: 22 71 TGH26xE_(en)_0203_ver120.
IMPORTANT! If your product is not working properly. . . 1 Reconnect AC adaptor to the base unit. 2 Check if telephone line cord is connected. 3 Use rechargeable Ni-MH batteries. (Alkaline/Manganese/Ni-Cd batteries CANNOT be used.) 4 Read troubleshooting page in the Operating Instructions. If you still have any problems, please call the Panasonic DECT Helpline 0344 844 3899 (U.K.) 01289 8333 (Ireland) or contact us through our website: www.panasonic.co.