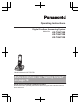
Operating Instructions Digital Cordless Answering System Model No. KX-TGH720E KX-TGH722E KX-TGH723E Model shown is KX-TGH720. Before initial use, see “Getting Started” on page 10. Thank you for purchasing a Panasonic product. Please read these operating instructions before using the unit and save them for future reference.
Table of Contents Introduction Caller ID Service Model composition .......................................3 Accessory information ..................................3 General information ......................................4 Graphical symbols for use on equipment and their descriptions ..........................................5 Using Caller ID service ...............................40 Caller list ....................................................40 Answering System For your safety .................
Introduction Model composition Base unit Handset Part No. Part No. KX-TGH720 KX-TGH720 KX-TGHA72 1 KX-TGH722 KX-TGH720 KX-TGHA72 2 KX-TGH723 KX-TGH720 KX-TGHA72 3 Series Model No. KX-TGH720 series Quantity Accessory information Supplied accessories No. Quantity Accessory item/Part number KX-TGH720 KX-TGH722 KX-TGH723 A AC adaptor for base unit/PNLV226E0U 1 1 1 B Telephone line cord/PNJA1191Z (for U.K.
Introduction Other information R Design and specifications are subject to change without notice. R The illustrations in these instructions may vary slightly from the actual product. Sales and support information Customer Communications Centre R For customers within the U.K.: 0344 844 3899 R For customers within Ireland: 01289 8333 R For further support on your product, please visit our website: www.panasonic.co.uk Direct Sales at Panasonic U.K.
Introduction Graphical symbols for use on equipment and their descriptions Symbol Explanation Symbol Explanation Alternating current (A.C.) Class P equipment (equipment in which protection against electric shock relies on Double Insulation or Reinforced Insulation) Direct current (D.C.
Important Information For your safety To prevent severe injury and loss of life/ property, read this section carefully before using the product to ensure proper and safe operation of your product. WARNING Power connection R Use only the power source marked on the product. R Do not overload power outlets and extension cords. This can result in the risk of fire or electric shock. R Completely insert the AC adaptor/power plug into the power outlet.
Important Information R This product is unable to make calls when: – the handset batteries need recharging or have failed. – there is a power failure. – the key lock feature is turned on. 4. Use only the power cord and batteries indicated in this manual. Do not dispose of batteries in a fire. They may explode. Check with local codes for possible special disposal instructions. SAVE THESE INSTRUCTIONS Battery R We recommend using the batteries noted on page 3.
Important Information appliances, etc. It should not be placed in rooms where the temperature is less than 0 °C or greater than 40 °C. Damp basements should also be avoided. R The maximum calling distance may be shortened when the product is used in the following places: Near obstacles such as hills, tunnels, underground, near metal objects such as wire fences, etc. R Operating the product near electrical appliances may cause interference. Move away from the electrical appliances.
Important Information Specifications R Standard: DECT (Digital Enhanced Cordless Telecommunications), GAP (Generic Access Profile) R Frequency range: 1.88 GHz to 1.90 GHz R RF transmission power: Approx. 10 mW (average power per channel) 250 mW (max.) R Power source: 100–240 V AC, 50/60 Hz R Rechargeable battery: AAA (R03) Ni-MH battery (1.2 V, 550 mAh) R Power consumption: Base unit: Standby: 0.6 W Maximum: 2.1 W Charger: Standby: 0.1 W Maximum: 1.
Getting Started Connect the AC adaptor to the power outlet. Note: R Use only the supplied Panasonic AC adaptor PNLV233E. Setting up Connections n Base unit Connect the AC adaptor to the unit by pressing the plug firmly. Fasten the cord by hooking it. Connect the AC adaptor to the power outlet. Connect the telephone line cord to the unit until you hear a click. Fasten the cord by hooking it. Connect the telephone line cord to the telephone line jack until you hear a click.
Getting Started Removing the battery Note when setting up Note for connections R The AC adaptor must remain connected at all times. (It is normal for the adaptor to feel warm during use.) R The AC adaptor should be connected to a vertically oriented or floor-mounted AC outlet. Do not connect the AC adaptor to a horizontally oriented AC outlet that faces the floor, such as an AC outlet installed on a ceiling or under a table, as the weight of the adaptor may cause it to become disconnected.
Getting Started Ni-MH battery performance (supplied batteries) Operation Operating time In continuous use 14 hours max. Not in use (standby) 250 hours max. Note: R Actual battery performance depends on usage and ambient environment. R When eco mode is set to “Eco Plus”, the base unit stops communicating with the handset while it is in standby mode. As a result, the handset uses more power than usual to search for the base unit and therefore battery usage time is shortened (page 15).
Getting Started M N (Call block) MBN (Memory dial) M N (Off/Power) Charge contacts Item n Control type Soft keys By pressing a soft key, you can select the feature shown directly above it on the display. (Example: MENU, OK, etc.) Navigator key Navigator keys functions as follows. {^} The line is in use. R When flashing slowly: The call is on hold. R When flashing rapidly: An incoming call is now being received. Missed call*2 (page 40) Eco mode is set to “Eco”. (page 15) Eco mode is set to “Eco Plus”.
Getting Started Item Meaning Line in use Someone is using the line.*1 IN USE Answering system is being used by another unit. *1 *2 *3 KX-TGH722/KX-TGH723 Caller ID subscribers only Voicemail subscribers only Icon Stops alarm. Snooze button on the alarm. Selects entries or handsets. Plays a message. Stops recording or playback. n Stores phone numbers. Erases the selected item. Base unit display items Item Meaning -- “Greeting Only” is selected. Caller messages are not recorded.
Getting Started 3 Enter the current hour and minute. Example: 9:30 09 30 R You can select 24-hour or 12-hour clock format (“AM” or “PM”) by pressing *. 4 MOKN a M N Recording your greeting message You can record your own greeting message instead of using a pre-recorded greeting message. See page 42 for details. 1 2 3 MMENUN (right soft key) #302 MbN: “Yes” a MOKN Record a greeting message.
Making/Answering Calls Making calls 1 2 Lift the handset and then dial the phone number. R To correct a digit, press MCLEARN. Press M /ZN to make the call. R To make the call using the speakerphone, press and hold M ZN for a few seconds. / 3 When you finish talking, press M N or place the handset on the base unit or charger. Note: R While talking, you can switch between the receiver and the speakerphone by pressing M /ZN.
Making/Answering Calls Base unit Press MjN or MkN repeatedly to select the desired volume while ringing. R To turn the ringer off, press and hold MkN until the unit beeps. Note: R To change the ringer volume and ringer tone for an outside call, see page 30. Useful features during a call Hold 1 2 3 Press MMENUN during an outside call. MbN: “Hold” a MOKN To release hold, press M /ZN. Note: R After holding for 10 minutes, the call is disconnected. Mute 1 2 Press MYN during a call.
Making/Answering Calls Transferring calls, conference calls Available for: KX-TGH722/KX-TGH723 Outside calls can be transferred or a conference call with an outside party can be made between handsets in the same radio cell. 1 2 3 4 5 During an outside call, press MMENUN. MbN: “Intercom” a MOKN To finish intercom, press M N. To answer the call, press M /ZN. R To change the ringer volume and ringer tone for intercom, see page 30.
Nuisance Call Block Nuisance call block You can press the M N key in the following situations to disconnect the current call and add a phone number to the call block list: – when an incoming call is being received – when an incoming call is being recorded by the answering system – when talking on an outside call Once a phone number has been added to the call block list, the unit will block calls from that phone number in the future. 1 Press M above.
Nuisance Call Block Blocking incoming calls that have no phone number Displaying and clearing the blocked call count You can block calls when no phone number is provided, such as private callers. The total number of blocked calls (up to 65,000) will be displayed. 1 2 3 4 1 2 3 M 4 5 MCLEARN M N MbN: “Nuisance Call Block” a MOKN MbN: “Withheld” a MOKN MbN: Select the desired setting. a MOKN aM N N MbN: “Nuisance Call Block” a MOKN MbN: “Blocked Calls Count” a MOKN R To exit, press M N.
Automated call block list periodically. If necessary, register the entry to the phonebook or allow name list to connect the call next time. Automated call block Automated call block means the unit screens incoming calls before ringing. If the call is allowed, the unit will ring. If the call is identified as an automated/telemarketing call, the unit will not ring. The unit will play a greeting message to the caller and prompt them to enter an access code.
Automated call block Displaying and clearing the blocked call count The total number of blocked calls (up to 65,000) will be displayed. 1 2 3 4 M N a MOKN MbN: “Blocked Calls Count” a MOKN R To exit, press M N. MCLEARN MbN: “Yes” a MOKN a M N 4 MbN: “Yes” a MOKN a M N Greeting message for automated call block When the unit answers a call, a greeting message is played to the caller.
Automated call block 2 MbN: “Automated Call Greeting” a MOKN 3 MbN: “Default” a MOKN 2 times a M N Playing back the greeting message for automated call block 1 2 3 4 M N a MOKN MbN: “Automated Call Greeting” a MOKN MbN: “Play Greeting” a MOKN To exit, press M N. Helpline Tel. No.: U.K.
Phonebook Phonebook You can store up to 200 phonebook entries and assign a name (16 characters max.) and up to 3 phone numbers to each (24 digits max. each). You can also assign a label to each phone number, and assign each phonebook entry to a category (page 24). The total number of entries that can be stored varies depending on how many phone numbers you have stored for each entry.
Phonebook 2 3 To scroll through all entries MbN: Select the desired entry. a M /ZN To search by first character Press the dial key (0 to 9) which contains the character you are searching for (page 48). MbN: Scroll through the phonebook if necessary. a M /ZN To search by query You can narrow down the search to enter the first characters of a name. * To search for the name, enter the first characters (up to 4) in uppercase (page 48) MOKN MbN: Scroll through the phonebook if necessary.
Phonebook Note: R When storing a calling card access number and your PIN in the phonebook as one phonebook entry, press MDN (Pause) to add pauses after the number and PIN as necessary (page 16). Editing an entry 1 Speed dial: Press and hold the desired key (1 to 9). a MMENUN Memory dial: Press the desired key (MAN or MBN).
Programming Menu list To access the features, there are 2 methods. n Scrolling through the display menus 1 MMENUN (right soft key) 2 3 4 Press MCN, MDN, MEN, or MFN to select the desired main menu. a MOKN Press MCN or MDN to select the desired item from the next sub-menus. a MOKN Press MCN or MDN to select the desired setting. a MOKN n Using the direct command code 1 MMENUN (right soft key) a Enter the desired code. Example: Press MMENUN (right soft key) #101. 2 Select the desired setting.
Programming Sub-menu 1 Sub-menu 2 Settings Code New Message Alert*1 Outgoing Call – On/Off On #338 44 Outgoing Call – Notification to Settings – Outgoing Call – Remote Code Activate Base Unit Beep On #339 44 Number of Rings*1 Auto <5 Rings> 2-9 Rings #211 47 Recording Time*1 <3 Minutes> 1 Minute Greeting Only*2 #305 47 #306 46 #310 47 – Remote Code*1 Call Screening Off Answer On*1 – – #327 42 Answer Off*1 – – #328 42 – #101 14
Programming Sub-menu 1 Settings Code Ringer Volume (Intercom) (Handset) Sub-menu 2 – 1-6 <6> #175 – Ringtone (External)*5 (Handset) – #161 – Ringtone (Intercom)*5 (Handset) – #163 – On/Off On #238 34 Start/End <23:00/06:00> #237 34 Ring Delay 30 sec. <60 sec.> 90 sec. 120 sec.
Programming Main menu: “Initial Setup” Sub-menu 1 Sub-menu 2 Settings Code Ringer Setup Ringer Volume (External) – Handset Off-6 <6> #160 – Ringer Volume (External) – Base Unit*1 Off-6 <3> #G160 – Ringer Volume (Intercom) (Handset) 1-6 <6> #175 – Ringtone (External)*5 (Handset) #161 – Ringtone (Intercom)*5 (Handset) #163 – Do Not Disturb Mode – On/Off On #238 34 Do Not Disturb Mode – Start/End <23:00/06:00> #237 34 Do Not Disturb Mode – Ring
Programming Sub-menu 1 Sub-menu 2 Settings Code Automated Call Block*1 Block/Unblock Block #787 21 Allow Name List Nuisance Call Block*1 #794 22 Access Code <1> – #789 21 Automated Call Greeting Record Greeting #791 22 Play Greeting #792 23 Default #793 22 Blocked Calls Count – #790 22 Single Number – #217 19 Range of Numbers – #240 20 – #177 20 Withheld On Blocked Calls Count Memory Dial – – #247 26 Speed Dial – – #261 26 Eco Mode*1, *7
Programming Sub-menu 1 Sub-menu 2 Keytones – Call Restrict*1 – Auto – Talk*10 Line Setup Recall/Flash*1, *11 Settings Code Off #165 – #256 37 On – #200 16 80 msec. 90 msec. <100 msec.> 110 msec. 160 msec. 200 msec. 250 msec. 300 msec. 400 msec. 600 msec. 700 msec. 900 msec.
Programming *5 The preset melodies in this product (“Ringtone 3” - “Ringtone 40”) are used with the permission of © 2012 - 2017 Copyrights Vision Inc. *6 If you do not want the unit to ring before the caller information is received, set to “Off”. (Caller ID subscribers only) You can only remove the first ring if the unit rings 2 times or more by default, which depends on your phone service provider. *7 This menu is not displayed when repeater mode is set to “On”.
Programming 8 MbN: Select the desired snooze setting. a MOKN 9 MOKN a M 4 N Note: R Press MSTOPN to stop the alarm completely. R When the handset is in use, the alarm will not sound until the handset is in standby mode. R Press any dial key or MSNOOZEN to stop the sound but keep the snooze function activated. R If you want to make an outside call when the snooze function is activated, please stop the snooze function before making the call.
Programming the phone number stored when it detects sound. Important: R Before using this feature, we recommend that you test this feature and adjust the baby monitor sensitivity as needed, especially if you plan to monitor from outside. R This feature should not be used as a substitute for a medical or caregiver’s supervision. It is the caregiver’s responsibility to stay close enough to handle any eventuality.
Programming 1 Press MMENUN on the handset being monitored. 2 3 MbN: “On/Off” a MOKN MbN: “Off” a MOKN a M N Editing an outside monitoring number 1 Press MMENUN on the handset being monitored. 2 3 4 5 6 7 MbN: “On/Off” a MOKN n When monitoring with a handset: Press M /ZN to answer calls. If you want to respond from the monitoring handset, press MYN. R The monitoring handset will answer calls automatically when the auto intercom feature is set to “On” (page 18).
Programming Displaying the handset name You can select whether or not the handset name is displayed in standby mode. The default setting is “Off”. 1 2 MMENUN (right soft key) #105 MbN: Select the desired setting. a MOKN aM N Note: R If you set repeater mode to “On” (page 38): – Security is set to “Normal” and is displayed. – “Security” is not displayed in the display menu (page 31). R When enhanced security is enabled, sound may cut in and out during conversations.
Programming Registering a handset to a base unit The supplied handset and base unit are pre-registered. If for some reason the handset is not registered to the base unit (for example, is displayed even when the handset is near the base unit), re-register the handset. 1 Handset: MMENUN (right soft key) #130 2 MbN: Select a base unit number. a MOKN R This number is used by the handset as a reference only. 3 Base unit: Press and hold M N for about 5 seconds.
Programming 1 Base unit: Press and hold M 2 DECT repeater: Connect the AC adaptor, then wait until the indicator and indicator light green. 3 Base unit: To exit the registration mode, press M N for about 5 seconds. N. Helpline Tel. No.: U.K.
Caller ID Service Using Caller ID service Important: R This unit is Caller ID compatible. To use Caller ID features, you must subscribe to a Caller ID service. Contact your phone service provider for details. Caller ID features When an outside call is being received, the caller information is displayed. Caller information for the last 50 callers is logged in the caller list from the most recent call to the oldest.
Caller ID Service 3 MERASEN a MbN: “Yes” a MOKN a M N Erasing all caller information 1 2 M N MERASEN a MbN: “Yes” a MOKN a M N Helpline Tel. No.: U.K.
Answering System Answering system The answering system can answer and record calls for you when you are unavailable to answer the phone. You can also set the unit to play a greeting message but not to record caller messages by selecting “Greeting Only” as the recording time setting (page 47). Important: R Make sure the unit’s date and time setting is correct (page 14). Memory capacity (including your greeting message) The total recording capacity is about 40 minutes.
Answering System messages are not recorded and the unit plays a different pre-recorded greeting message asking callers to call again. Resetting to a pre-recorded greeting message Use this procedure to erase your greeting message and use a pre-recorded one. 1 2 MMENUN (right soft key) #304 MOKN a M N Playing back the greeting message 1 2 MMENUN (right soft key) #303 N M Listening to messages Using the base unit When new messages have been recorded, the message indicator ( ) on the base unit flashes.
Answering System 2 3 MbN: Select the desired item from the message list. a MPLAYN R You can erase the selected message as follows: MMENUN a MbN: “Erase” a MOKN a MbN: “Yes” a MOKN When finished, press M N. *2 When you play a message from the message list, the unit stops message playback and the display goes back to the message list.
Answering System recorded. The base unit calls a phone number you specify. You can then operate the answering system remotely to listen to the new message. To use this feature, you must: – store a phone number to which the unit makes the call to. – turn on the new message alert setting. After you answer the new message alert call, you can listen to messages from that call (page 45). Important: R A new message alert is stopped 1 minute after the unit starts to call.
Answering System n When the remote access code is set to “Inactivate”: Press 4 to play the new message during the announcement. n When the remote access code is set to “Activate”: 1 Enter the remote access code (page 46) during the announcement. 2 Press 4 to play the new message. Note: R Within 10 seconds after listening to new messages, you can press #9 during the call to turn off the new message alert by a call feature.
Answering System Key Operation 0 Turn answering system off *4 Erase currently playing message *5 Erase all messages *6 Reset to a pre-recorded greeting message (during greeting message playback) *# End remote operation (or hang up) *1 If pressed within the first 5 seconds of a message, the previous message is played. Turning on the answering system remotely 1 Dial your phone number from a touch-tone phone. 2 Let the phone ring 20 times. R A long beep is heard.
Useful Information Voicemail service In addition to your unit’s answering system you may also have voicemail service from your phone service provider. Voicemail is an answering service that may be offered by your phone service provider. This service can also record calls when you are unavailable to answer the phone or when your line is busy. Messages are recorded on the phone company system and not on the unit’s answering system.
Useful Information Alphabet character table (ABC) z 1 2 3 4 5 6 7 8 9 3 4 5 6 7 8 9 3 4 5 6 7 8 9 4 5 6 7 8 9 7 8 9 Numeric entry table (0-9) z 1 2 Greek character table ( z 1 ) 2 Extended 1 character table ( z 1 2 ) 3 R The following are used for both uppercase and lowercase: Extended 2 character table ( z 1 2 ) 3 4 5 6 Helpline Tel. No.: U.K.
Useful Information R The following are used for both uppercase and lowercase: Cyrillic character table ( z 1 2 ) 3 4 5 6 7 8 9 Error messages Display message Cause/solution Base no power or No link to base. Reconnect main base AC adaptor. R Confirm the base unit’s AC adaptor is connected to the unit and the power outlet correctly. R The handset has lost communication with the base unit. Move closer to the base unit and try again. R Unplug the base unit’s AC adaptor to reset the unit.
Useful Information Troubleshooting If you still have difficulties after following the instructions in this section, disconnect the base unit’s AC adaptor and turn off the handset, then reconnect the base unit’s AC adaptor and turn on the handset. General use Problem Cause/solution The handset does not turn on even after installing charged batteries. R Place the handset on the base unit or charger to turn on the handset. The unit does not work. R R R R The handset display is blank or dark.
Useful Information Problem Cause/solution I cannot use the intercom feature. R This feature is available between the handsets. Although the handset displays “Intercom”, or “Auto Intercom”, these features are not available for single handset models. The unit does not emit the specified number of rings.
Useful Information Making/answering calls, intercom Problem Cause/solution is displayed. R The handset is too far from the base unit. Move closer. R The base unit’s AC adaptor is not properly connected. Reconnect AC adaptor to the base unit. R The handset is not registered to the base unit. Register it (page 38). R Activating eco mode reduces the range of the base unit in standby mode. If required, turn eco mode off (page 15). Noise is heard, sound cuts in and out.
Useful Information Problem Cause/solution Caller information is slow to display. R Depending on your phone service provider, the unit may display the caller’s information at the 2nd ring or later. Set the first ring to “Off” (page 30). R Move closer to the base unit. Time on the unit has shifted. R Incorrect time information from incoming Caller ID changes the time. Set the time adjustment to “Manual” (off) (page 30). Answering system Problem Cause/solution The unit does not record new messages.
Useful Information Conditions of guarantee This guarantee is in addition to and does not in any way affect any statutory or other rights of consumer purchasers. If within the applicable guarantee period, the product proves to be defective by reason of faulty design, workmanship or materials, we undertake subject to the following conditions to have the defective product (or any part or parts there of) repaired or replaced free of charge. 1.
Index Index A B C D E 56 Additional base units: 37 Alarm: 33 Answering calls: 16 Answering system: 42 Call screening: 47 Erasing messages: 43, 44, 47 Greeting message: 42 Greeting only: 47 Listening to messages: 43, 46 Message list: 43 New message alerting: 44 Number of rings: 47 Recording time: 47 Remote access code: 46 Remote operation: 46 Turning on/off: 42 Auto intercom: 18 Auto talk: 16, 32 Automated call block: 21 Baby monitor: 34 Base unit Cancelling: 38 Selecting: 38 Battery: 10, 11 Call rest
Notes 57
Notes 58
Notes 59
IMPORTANT! If your product is not working properly. . . 1 Reconnect AC adaptor to the base unit. 2 Check if telephone line cord is connected. 3 Use rechargeable Ni-MH batteries. (Alkaline/Manganese/Ni-Cd batteries CANNOT be used.) 4 Read troubleshooting page in the Operating Instructions. If you still have any problems, please call the Panasonic DECT Helpline 0344 844 3899 (U.K.) 01289 8333 (Ireland) or contact us through our website: www.panasonic.co.