
Digital Camera User Manual
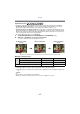
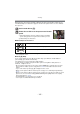
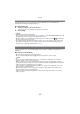
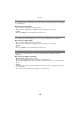
Table Of Contents
- Contents
- Before Use
- Preparation
- Basic
- Selecting the Recording Mode
- Tips for taking good pictures
- Taking a Still picture
- Taking Pictures using the Automatic Function (Intelligent Auto Mode)
- Taking Pictures with Defocus Control Function
- Taking Pictures with Your Favorite Settings (Program AE Mode)
- Recording Motion Pictures
- Playing Back Pictures/Motion Pictures
- Deleting Pictures
- Setting the Menu
- Setting the Quick Menu
- About the Setup Menu
- Recording
- Optical Image Stabilizer
- Taking Pictures with the Zoom
- Taking Pictures using the Built-in Flash
- Compensating the Exposure
- Taking Pictures using Burst Mode
- Taking Pictures using Auto Bracket
- Taking Pictures with the Self-timer
- Taking Pictures with Auto Focus
- Taking Pictures with Manual Focus
- Adjusting the White Balance
- Setting the Light Sensitivity
- Using the function button
- Taking Pictures by Specifying the Aperture/ Shutter Speed
- Taking Pictures that match the Scene being recorded (Scene Mode)
- Taking Pictures with different image effects (Creative Control Mode)
- Taking Pictures in Custom Mode
- Recording still pictures while recording motion pictures
- Taking a Picture with Face Recognition Function
- Entering Text
- Using the [REC] Mode Menu
- [PHOTO STYLE]
- [ASPECT RATIO]
- [PICTURE SIZE]
- [QUALITY]
- [FACE RECOG.]
- [FOCUS MODE]
- [QUICK AF]
- [METERING MODE]
- [FLASH]
- [RED-EYE REMOVAL]
- [FLASH SYNCHRO]
- [FLASH ADJUST.]
- [I.RESOLUTION]
- [I.DYNAMIC] (Intelligent dynamic range control)
- [ISO LIMIT SET]
- [ISO INCREMENTS]
- [LONG SHTR NR]
- [SHADING COMP.]
- [EX. TELE CONV.]
- [DIGITAL ZOOM]
- [BURST RATE]
- [AUTO BRACKET]
- [SELF-TIMER]
- [COLOR SPACE]
- [STABILIZER]
- Using the [MOTION PICTURE] Mode Menu
- Using the [CUSTOM] Menu
- Playback/Editing
- Connecting to other equipment
- Others
- 101 -
Recording
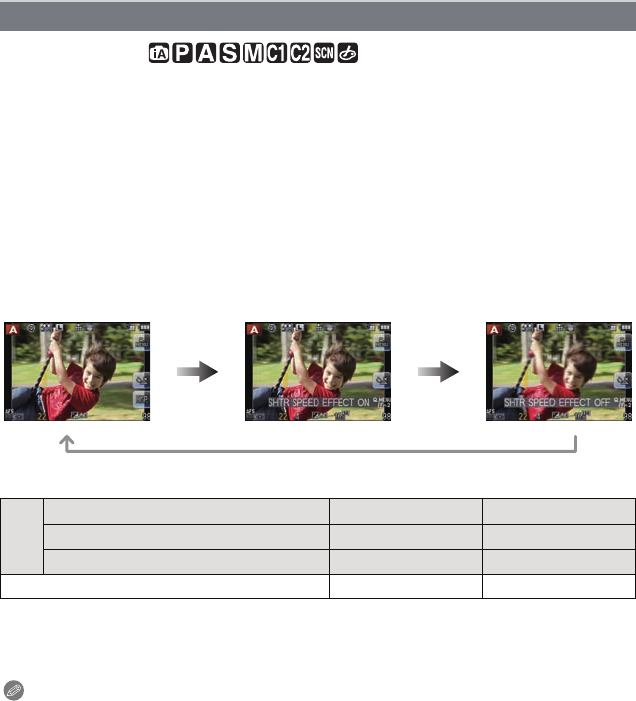
Applicable modes:
The effects of aperture and shutter speed can be checked by using the Preview Mode.
•
Confirm the effects of aperture: You can check the depth of field (effective focus range)
before taking a picture by closing the leaf shutter to the aperture value you set.
• Confirm the effects of shutter speed: Movement can be confirmed by displaying the actual
picture that will be taken with that shutter speed. When the shutter speed is set for high speed,
display in the shutter speed preview will be displayed like a time-release film. It is used in cases
such as stopping the movement of running water.
• The initial setting of [Fn2] is set to [PREVIEW].
1 Set [Fn BUTTON SET] in the [CUSTOM] menu to [PREVIEW]. (P56)
2 Switch to confirmation screen by pressing [Fn2].
•
Screen is switched every time [Fn2] is pressed.
∫ Depth of field properties
¢1 Recording conditions
¢2 Example: When you want to take a picture with a blurred background etc.
¢3 Example: When you want to take a picture with everything in focus including the background
etc.
Note
•
It is possible to record while in Preview Mode.
• Range for shutter speed effect check is 8 seconds to 1/1000th of a second.
Confirm the Effects of Aperture and Shutter Speed (Preview Mode)
Normal recording
screen
Effects of Aperture
Effects of Shutter
Speed
¢1
Aperture value Small Large
Focus length of the lens Tele Wide
Distance to the subject Near Distant
Depth of field (effective focus range) Shallow (Narrow)
¢2
Deep (Wide)
¢3