
Digital Camera User Manual
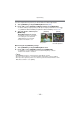
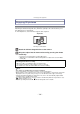
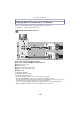

Table Of Contents
- Contents
- Before Use
- Preparation
- Basic
- Selecting the Recording Mode
- Tips for taking good pictures
- Taking a Still picture
- Taking Pictures using the Automatic Function (Intelligent Auto Mode)
- Taking Pictures with Defocus Control Function
- Taking Pictures with Your Favorite Settings (Program AE Mode)
- Recording Motion Pictures
- Playing Back Pictures/Motion Pictures
- Deleting Pictures
- Setting the Menu
- Setting the Quick Menu
- About the Setup Menu
- Recording
- Optical Image Stabilizer
- Taking Pictures with the Zoom
- Taking Pictures using the Built-in Flash
- Compensating the Exposure
- Taking Pictures using Burst Mode
- Taking Pictures using Auto Bracket
- Taking Pictures with the Self-timer
- Taking Pictures with Auto Focus
- Taking Pictures with Manual Focus
- Adjusting the White Balance
- Setting the Light Sensitivity
- Using the function button
- Taking Pictures by Specifying the Aperture/ Shutter Speed
- Taking Pictures that match the Scene being recorded (Scene Mode)
- Taking Pictures with different image effects (Creative Control Mode)
- Taking Pictures in Custom Mode
- Recording still pictures while recording motion pictures
- Taking a Picture with Face Recognition Function
- Entering Text
- Using the [REC] Mode Menu
- [PHOTO STYLE]
- [ASPECT RATIO]
- [PICTURE SIZE]
- [QUALITY]
- [FACE RECOG.]
- [FOCUS MODE]
- [QUICK AF]
- [METERING MODE]
- [FLASH]
- [RED-EYE REMOVAL]
- [FLASH SYNCHRO]
- [FLASH ADJUST.]
- [I.RESOLUTION]
- [I.DYNAMIC] (Intelligent dynamic range control)
- [ISO LIMIT SET]
- [ISO INCREMENTS]
- [LONG SHTR NR]
- [SHADING COMP.]
- [EX. TELE CONV.]
- [DIGITAL ZOOM]
- [BURST RATE]
- [AUTO BRACKET]
- [SELF-TIMER]
- [COLOR SPACE]
- [STABILIZER]
- Using the [MOTION PICTURE] Mode Menu
- Using the [CUSTOM] Menu
- Playback/Editing
- Connecting to other equipment
- Others
Connecting to other equipment
- 170 -
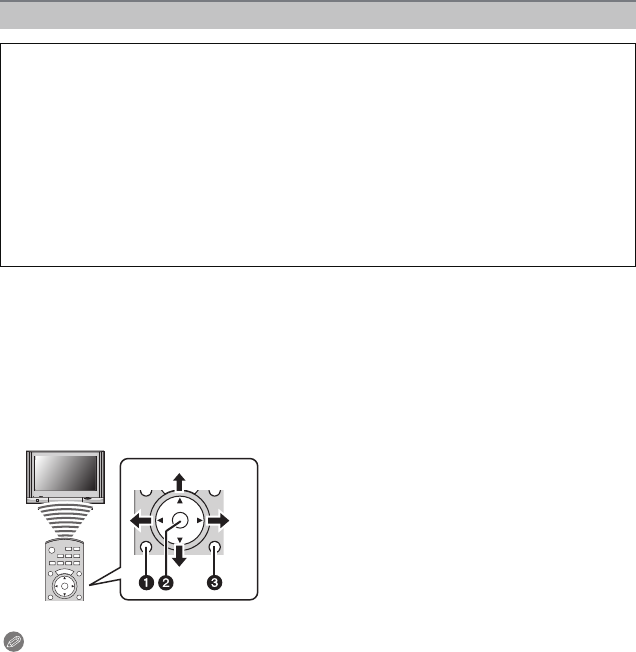
1 Connect this unit to a Panasonic TV compatible with VIERA Link with a HDMI
mini cable (optional) (P168).
2 Turn the camera on and then press [(].
3 Operate with the remote control for the TV.
•
Operate with reference to the operation icons displayed on the screen.
Panasonic TV compatible with VIERA Link
Note
•
To playback the audio of the motion pictures, set the [SOUND] in the Slide Show setting screen
to [AUTO] or [AUDIO].
• Operation icons are hidden, if no operation is performed for a while when the operation icons
are displayed. Operation icons are displayed when one of the following buttons is pressed
while the operation icons are not displayed.
– 3/4/2/1, [OK], [SUB MENU], [RETURN], Red button, Green button, Yellow button
• It is recommended to connect this unit to an HDMI terminal other than the HDMI1 if there are 2
or more HDMI input terminals on the TV.
• When the [VIERA Link] (P67) of this unit is set to [ON], operation using the button on this unit
will be limited.
• VIERA Link must be activated on the connected TV. (Read the operating instructions of the TV
for how to set etc.)
• If you are not using VIERA Link, set [VIERA Link] (P67) to [OFF].
Playback using VIERA Link (HDMI) (HDAVI Control™)
What is the VIERA Link?
•
VIERA Link™ is a new name for EZ Sync™.
• This function allows you to use your remote control for the Panasonic TV for easy
operations when this unit has been connected to a VIERA Link compatible device using a
HDMI mini cable (optional) for automatic linked operations. (Not all operations are possible.)
• VIERA Link is a unique Panasonic function built on a HDMI control function using the
standard HDMI CEC (Consumer Electronics Control) specification. Linked operations with
HDMI CEC compatible devices made by other companies are not guaranteed. When using
devices made by other companies that are compatible with VIERA Link, refer to the
operating instructions for the respective devices.
• This unit is compatible with VIERA Link Ver.5. VIERA Link Ver.5 is the newest Panasonic
version and is also compatible with existing Panasonic VIERA Link devices. (As of
December 2010)
Preparations: Set the [VIERA Link] to [ON]. (P67)
1 [SUB MENU]
2 [OK]
3 [RETURN]
¢ The shape of the remote control varies
depending on the region. Operate following
the TV instructions displayed on screen.