
Digital Camera User Manual
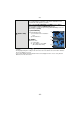
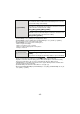
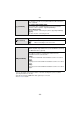
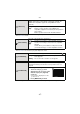
Table Of Contents
- Contents
- Before Use
- Preparation
- Basic
- Selecting the Recording Mode
- Tips for taking good pictures
- Taking a Still picture
- Taking Pictures using the Automatic Function (Intelligent Auto Mode)
- Taking Pictures with Defocus Control Function
- Taking Pictures with Your Favorite Settings (Program AE Mode)
- Recording Motion Pictures
- Playing Back Pictures/Motion Pictures
- Deleting Pictures
- Setting the Menu
- Setting the Quick Menu
- About the Setup Menu
- Recording
- Optical Image Stabilizer
- Taking Pictures with the Zoom
- Taking Pictures using the Built-in Flash
- Compensating the Exposure
- Taking Pictures using Burst Mode
- Taking Pictures using Auto Bracket
- Taking Pictures with the Self-timer
- Taking Pictures with Auto Focus
- Taking Pictures with Manual Focus
- Adjusting the White Balance
- Setting the Light Sensitivity
- Using the function button
- Taking Pictures by Specifying the Aperture/ Shutter Speed
- Taking Pictures that match the Scene being recorded (Scene Mode)
- Taking Pictures with different image effects (Creative Control Mode)
- Taking Pictures in Custom Mode
- Recording still pictures while recording motion pictures
- Taking a Picture with Face Recognition Function
- Entering Text
- Using the [REC] Mode Menu
- [PHOTO STYLE]
- [ASPECT RATIO]
- [PICTURE SIZE]
- [QUALITY]
- [FACE RECOG.]
- [FOCUS MODE]
- [QUICK AF]
- [METERING MODE]
- [FLASH]
- [RED-EYE REMOVAL]
- [FLASH SYNCHRO]
- [FLASH ADJUST.]
- [I.RESOLUTION]
- [I.DYNAMIC] (Intelligent dynamic range control)
- [ISO LIMIT SET]
- [ISO INCREMENTS]
- [LONG SHTR NR]
- [SHADING COMP.]
- [EX. TELE CONV.]
- [DIGITAL ZOOM]
- [BURST RATE]
- [AUTO BRACKET]
- [SELF-TIMER]
- [COLOR SPACE]
- [STABILIZER]
- Using the [MOTION PICTURE] Mode Menu
- Using the [CUSTOM] Menu
- Playback/Editing
- Connecting to other equipment
- Others
Basic
- 68 -
• If you set a different language by mistake, select [~] from the menu icons to set the desired
language.
• [–. –] is displayed as the lens firmware when the lens is not mounted.
• The folder number is updated and the file number starts from 0001.
• A folder number between 100 and 999 can be assigned.
The folder number should be reset before it reaches 999. We recommend formatting the card
(P68) after saving the data on a PC or elsewhere.
• To reset the folder number to 100, format the card first and then use this function to reset the
file number.
A reset screen for the folder number will then appear. Select [YES] to reset the folder number.
• When the [REC] Mode settings are reset, data registered with [FACE RECOG.] will also be
reset.
• When [SETUP]/[CUSTOM] menu settings are reset, the following settings are also reset. In
addition, [ROTATE DISP.] is set to [ON].
– The birthday and name settings for [BABY1]/[BABY2] and [PET] in Scene Mode
– The settings of [TRAVEL DATE] (departure date, return date, location)
– The [WORLD TIME] setting
• The folder number and the clock setting are not changed.
• Use a battery with sufficient battery power or the AC adaptor (optional) when formatting. Do not
turn the camera off during formatting.
• If the card has been formatted on a PC or other equipment, format it on the camera again.
• If the card cannot be formatted, please try another card before contacting your nearest Service
Center.
~ [LANGUAGE] Set the language displayed on the screen.
[VERSION DISP.]
This enables the firmware versions of the camera and lens to be
checked.
v [NO.RESET] Reset the file number of the next recording to 0001.
w [RESET]
The [REC] or [SETUP]/[CUSTOM] menu settings are reset to the
initial settings.
[FORMAT]
The card is formatted.
Formatting permanently deletes all data on your memory
card. Please be sure all pictures and motion pictures are
saved elsewhere before using this feature.
For Canadian assistance, please call:
1-800-99-LUMIX (1-800-995-8649) or
send e-mail to: lumixconcierge@ca.panasonic.com
For USA and Puerto Rico assistance, please call:
1-800-211-PANA(7262) or, contact us via the web at:
http://www.panasonic.com/contactinfo