
Digital Camera User Manual
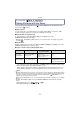
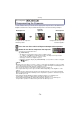
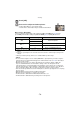
Table Of Contents
- Contents
- Before Use
- Preparation
- Basic
- Selecting the Recording Mode
- Tips for taking good pictures
- Taking a Still picture
- Taking Pictures using the Automatic Function (Intelligent Auto Mode)
- Taking Pictures with Defocus Control Function
- Taking Pictures with Your Favorite Settings (Program AE Mode)
- Recording Motion Pictures
- Playing Back Pictures/Motion Pictures
- Deleting Pictures
- Setting the Menu
- Setting the Quick Menu
- About the Setup Menu
- Recording
- Optical Image Stabilizer
- Taking Pictures with the Zoom
- Taking Pictures using the Built-in Flash
- Compensating the Exposure
- Taking Pictures using Burst Mode
- Taking Pictures using Auto Bracket
- Taking Pictures with the Self-timer
- Taking Pictures with Auto Focus
- Taking Pictures with Manual Focus
- Adjusting the White Balance
- Setting the Light Sensitivity
- Using the function button
- Taking Pictures by Specifying the Aperture/ Shutter Speed
- Taking Pictures that match the Scene being recorded (Scene Mode)
- Taking Pictures with different image effects (Creative Control Mode)
- Taking Pictures in Custom Mode
- Recording still pictures while recording motion pictures
- Taking a Picture with Face Recognition Function
- Entering Text
- Using the [REC] Mode Menu
- [PHOTO STYLE]
- [ASPECT RATIO]
- [PICTURE SIZE]
- [QUALITY]
- [FACE RECOG.]
- [FOCUS MODE]
- [QUICK AF]
- [METERING MODE]
- [FLASH]
- [RED-EYE REMOVAL]
- [FLASH SYNCHRO]
- [FLASH ADJUST.]
- [I.RESOLUTION]
- [I.DYNAMIC] (Intelligent dynamic range control)
- [ISO LIMIT SET]
- [ISO INCREMENTS]
- [LONG SHTR NR]
- [SHADING COMP.]
- [EX. TELE CONV.]
- [DIGITAL ZOOM]
- [BURST RATE]
- [AUTO BRACKET]
- [SELF-TIMER]
- [COLOR SPACE]
- [STABILIZER]
- Using the [MOTION PICTURE] Mode Menu
- Using the [CUSTOM] Menu
- Playback/Editing
- Connecting to other equipment
- Others
Recording
- 76 -
Recording Mode:
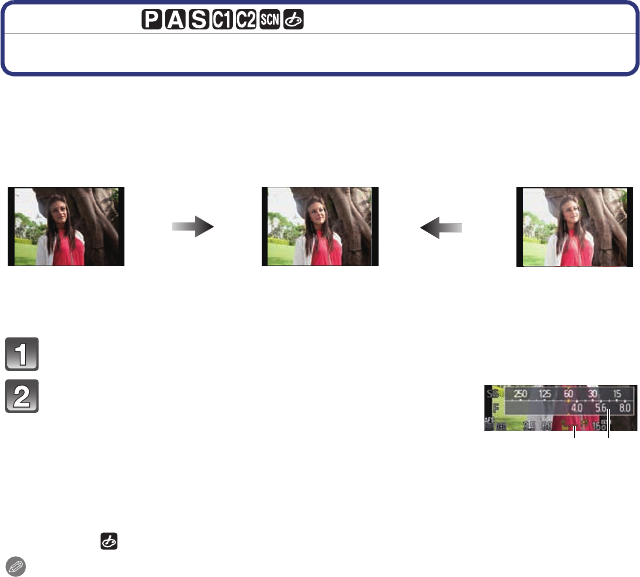
Compensating the Exposure
Use this function when you cannot achieve appropriate exposure due to the difference in
brightness between the subject and the background. Look at the following examples.
Press the rear dial to switch to Exposure Compensation operation.
Rotate the rear dial to compensate the exposure.
A Exposure Compensation value
B [EXPO.METER]
• The Exposure Compensation value can be set within a range
of j5 EV to i5 EV. When recording motion pictures, the Exposure Compensation
value can be set within a range of j3EV to i3EV.
• Select [0] to return to the original exposure.
• Rotate the rear dial to display the [EXPO.METER]. (P138) (However, it does not appear
in
¿/ Mode.)
Note
•
When the exposure value is out of the j3EV to i3 EV range, the brightness of the recording
screen will no longer change. It is recommended to record by checking the actual brightness of
the recorded image in the Auto Review or playback screen.
• The set exposure value is memorized even if the camera is turned off.
• The compensation range of the exposure will be limited depending on the brightness of the
subject.
• When the aperture and shutter speed values are displayed in the screen in the Program AE
Mode, Program Shift operation and Exposure Compensation operation is switched every time
the rear dial is pressed.
• In the Aperture-Priority AE Mode, Aperture Setting operation (P102) and Exposure
Compensation operation is switched every time the rear dial is pressed.
• In the Shutter-Priority AE Mode, Shutter Speed Setting operation (P102) and Exposure
Compensation operation is switched every time the rear dial is pressed.
Underexposed
Properly
exposed
Overexposed
Compensate the exposure
towards positive.
Compensate the exposure
towards negative.
A B