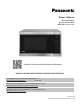
Owner’s Manual Microwave Oven Household Use Only Model No. NN-SC668S Scan this code for special instructions and features. READ ALL INSTRUCTIONS CAREFULLY BEFORE USING THE OVEN. For assistance, please contact us via the web at: http://shop.panasonic.com/support (U.S.A only) For microwave oven safety reference, please visit the FDA’s web page at: http://www.fda.gov/Radiation -EmittingProducts/default.htm Para obtener instrucciones en español, por favor visite la página web en: http://shop.panasonic.
CONTENTS Safety Information IMPORTANT SAFETY INSTRUCTIONS ............................................................................................................................................... 1-3 Installation ..................................................................................................................................................................................................... 3 Food Preparetion ............................................................................
IMPORTANT SAFETY INSTRUCTIONS Your safety and the safety of others are very important. We have provided important safety messages in this manual and on your appliance. Always read and obey all safety messages. This is the safety alert symbol. It is used to alert you to potential hazards that can kill or hurt you and others. All safety messages will follow the safety alert symbol and either the word “DANGER”, “WARNING” or “CAUTION”.
IMPORTANT SAFETY INSTRUCTIONS (continued) 10. DO NOT allow children to use this appliance, unless closely supervised by an adult. DO NOT assume that because a child has mastered one cooking skill he/she can cook everything. 11. DO NOT operate this appliance if it has a damaged cord or plug, if it is not working properly, or if it has been damaged or dropped. 12. DO NOT immerse cord or plug in water. 13. Keep cord away from heated surfaces. 14. DO NOT let cord hang over edge of a table or counter. 15.
IMPORTANT SAFETY INSTRUCTIONS (continued) 3. DO NOT dry clothes, newspapers or other materials in the oven, or use newspaper or paper bags for cooking. 2. DO NOT operate the oven without the Glass Tray fully engaged on the drive hub. Improper cooking or damage to the oven could result. Verify that the Glass Tray is properly engaged and rotating by observing its rotation when you press Start. Note: The Glass Tray can turn in either direction. 4. DO NOT hit or strike Control Panel.
GROUNDING INSTRUCTIONS Grounding Instructions Wiring Requirements THIS APPLIANCE MUST BE GROUNDED. 3-Pronged Plug In the event of an electrical short circuit, grounding reduces the risk of electric shock by providing an escape wire for the electric Ground Plug current. This appliance is equipped with a cord having 3-Prong Receptacle a grounding wire with a grounding plug. The plug must be plugged into an outlet that is properly installed and grounded.
Food Preparation (continued) 3) DEEP FAT FRYING • DO NOT deep fat fry in your microwave oven. Cooking oils may burst into flames and may cause damage to the oven and may result in burns. Microwave utensils may not withstand the temperature of the hot oil, and can shatter or melt. 8) THERMOMETERS • DO NOT use a conventional meat thermometer in your oven. Arcing may occur. Microwave safe thermometers are available for both meat and candy.
Cookware Guide This section answers the question, “Can I use in the Microwave?” Aluminum Foil Glass Jars It is not recommended to use. Arcing can occur if foil is too close to oven wall or door and cause damage to your oven. No. Most glass jars are not heat resistant. Browning Dish Yes. Only use browning dishes that are designed for microwave cooking. Check browning dish information for instructions/heating chart. Do not preheat for more than six minutes.
Location of Controls 12 14 12 Auto More Less oz lb g kg / 16 / Defrost Auto More Less 15 Defrost 17 21 20 11 23 27 29 10 11 12 13 14 15 16 17 18 19 20 External Air Vent Internal Air Vent Door Safety Lock System Exhaust Air Vent Control Panel Identification Plate Glass Tray Roller Ring Heat/Vapor Barrier Film (do not remove) Waveguide Cover (do not remove) Door Release Button Warning label Menu label Power Supply Cord Power Supply Plug Display Window Popcorn Pad (See page 10) Auto Reheat Pad
Operation Using the Microwave Setting the Clock for the First Time 1 1 Setting the Child Safety Lock Cooking 1 1 When the time of day appears in the display, press Start three times; If cooking at high power (10), skip to step 2. Press Power Level until the desired power level appears in the display. PL10 is the highest and PL1 is the lowest. Display Window Plug into a properly grounded electrical outlet. The oven automatically defaults to the imperial measure system (oz/lb).
Operation (continued) Cooking (continued) Setting a Standing Time 3 Press Start; the cooking will start and the time will count down in the display. At the end of cooking, five beeps will sound. Setting a Delayed Start 1 1 Some recipes call for a standing time after cooking. To do this, repeat steps 1 and 2 in the Cooking section on previous page. Then press Cooking Timer . The start time can be delayed to start cooking at a later time. To do this, first press Cooking Timer .
Operation (continued) Quick 30 Popcorn (Set or add cooking time in 30 seconds increments) (Example: To pop 3.5 oz (100 g). of popcorn) 1 1 Press Popcorn until the desired size appears in the display. Once for 3.5 oz (100g), twice for 1.75 oz (50 g), or three times for 3.0 oz (85 g). Press Quick 30 until the desired cooking time (up to 5 minutes) appears in the display. Power Level is pre-set at PL10. 2 2 Press Start; the cooking will start and the time will count down in the display.
Operation (continued) Auto Defrost 1 Conversion Defrosting Tips & Techniques Follow the chart to convert ounces or hundredths of a pound into tenths of a pound. To use Auto Defrost, enter the weight of the food in pounds (1.0) and tenths of a pound (0.1). If a piece of meat weighs 1.95 lbs or 1 lb 14 oz, enter 1.9 lbs. Preparation For Freezing: 1. Freeze meats, poultry, and fish in packages with only one or two layers of food. Place wax paper between layers. 2.
Operation (continued) Auto Reheat 1 Press Auto Reheat. 2 If desired, press Auto Reheat several times to choose 9.0,12.0,15.0,18.0 Oz. 3 Auto Cook 1 NOTES: 1. After having used the Auto Reheat feature a few times, you may decide you would prefer your food cooked to a different doneness – that is why you would utilize the More/Less pads. 2. All foods must be previously cooked. 3. Foods should always be covered loosely with plastic wrap, wax paper or casserole lid.
Operation (continued) Auto Cook Chart Setting the Timer See the chart below for Auto Cook categories. Recipe 1.Beverages Serving/Weight 1-3 cups (250, 500,750 ml) Hints This feature allows you to reheat 1 cup (250 ml) 2 cups (500 ml) or 3 cups(750ml) of room temperature beverages without setting power and time. NOTE: 1. Use a microwave safe cup. 2. Heated liquids can erupt if not mixed with air. Do not heat liquids in your microwave oven without stirring before and halfway through heating. 3.
Food Characteristics Food Characteristics Covering Bone and Fat As with conventional cooking, moisture evaporates during microwave cooking. Casserole lids or plastic wrap are used for a tighter seal. When using plastic wrap, vent the plastic wrap by folding back part of the plastic wrap from the edge of the dish to allow steam to escape. Loosen or remove plastic wrap as recipe directs for stand time.
Care and Cleaning of Your Microwave Oven Please see below and the following page for particular cleaning instructions for each section of the oven. BEFORE CLEANING: Unplug oven at wall outlet. If outlet is inaccessible, leave oven door open while cleaning. AFTER CLEANING: Be sure to place the Roller Ring and the Glass Tray in the proper position and press Stop/Reset Button to clear the Display. 1. Outside oven surfaces: Clean with a damp cloth.
Before Requesting Service See below before calling for service, as most problems can easily be remedied by following these simple solutions: The oven causes TV interference. Some radio and TV interference might occur when you cook with the microwave oven. This interference is similar to the interference caused by small appliances such as mixers, vacuums, blow dryers, etc. It does not indicate a problem with your oven. Steam accumulates on oven door and warm air comes from the oven vents.
Limited Warranty (Only for U.S.A.
Specifications Power Source ............................................................................................................................................................................................................................120 V, 60 Hz Power Consumption ................................................................................................................ .................................................................................. 12 Amps, 1,400 W Cooking Power* .....
User’s Record The serial number of this product may be found on the back side of the oven or on the left side of the control panel. You should note the model number and the serial number of this oven in the space provided and retain this book as a permanent record of your purchase for future reference. Model No. ______________________________ Serial No.