Operating Instructions and Cookbook Microwave Oven Model No.
Important Notice The IEC (60705) power output (watts) The heating category for small packs of food Microwave symbol Thank you for purchasing a Panasonic Microwave Oven. Your oven is rated 1000 Watts (IEC). When using other cookbooks remember to adjust cooking times accordingly. The symbol above, which is displayed on your oven door, indicates the heating category for your oven when cooking or reheating convenience foods. Your oven is rated ‘E’, which is very efficient.
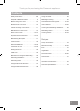
Thank you for purchasing this Panasonic appliance. Contents Safety Instructions. . . . . . . . . . . . . . . . . . 4-8 Using the Timer. . . . . . . . . . . . . . . . . . . . . 29 Disposal of Waste Products . . . . . . . . . . . . 9 Multistage Cooking. . . . . . . . . . . . . . . . . . 30 Before Using Your Oven. . . . . . . . . . . . . . 10 Auto Reheat/Cook Programs . . . . . . . 31-33 Placement Of Your Oven. . . . . . . . . . . . . . 10 Chaos Defrost. . . . . . . . . . . . . . . . . . .
Safety Instructions � � � � � � 4 Important safety instructions. Before operating this oven, please read these instructions carefully and keep for future reference.
Safety Instructions � � � � � Liquids and other foods must not be heated in sealed containers since they are liable to explode. Warning! Do not attempt to tamper with or make any adjustments or repairs to the door, control panel housing, safety interlock switches or any other part of the oven. Do not remove the outer panel from the oven which gives protection against exposure to microwave energy. Repairs should only be by a qualified service person.
Safety Instructions � � � � � � � � 6 Microwave heating of beverages can result in delayed eruptive boiling, therefore care must be taken when handling the container. The contents of feeding bottles and baby food jars are to be stirred or shaken. The temperature has to be checked before consumption to avoid burns. Do not cook eggs in their shells and whole hard-boiled eggs by microwave. Pressure may build up and the eggs may explode, even after the microwave heating has ended.
Safety Instructions � � � � � � � This appliance is not intended to be operated by means of an external timer or separate remote-control system. In case of electronic failure, oven can only be turned off at wall socket. Metal containers or dishes with metallic trim should not be used during microwave cooking. Sparking will occur. This microwave oven is intended for heating food and beverages only. Take care when heating foods low in moisture, e.g. bread items, chocolate, biscuits and pastries.
Safety Instructions Read carefully and keep for future reference. Important! The wires in this mains lead are coloured in accordance with the following code: Green-andyellow: Earth. Blue: Neutral. Brown: Live. This appliance is supplied with a moulded three pin mains plug for your safety and convenience, which may be marked, and rated 10 amps.
Disposal of Waste Products Information on Disposal for Users of Waste Electrical & Electronic Equipment (private households). For business Users in the European Union If you wish to discard electrical and electronic equipment, please contact your dealer or supplier for further information. This symbol on the products and/or accompanying documents means that used electrical and electronic products should not be mixed with general household waste.
Before Using Your Oven Examine Your Oven Note 1. Unpack oven, remove all packing material, and examine the oven for any damage such as dents, broken door latches or cracks in the door. Notify dealer immediately if unit is damaged. Do not install if unit is damaged. The appliance should be inspected for damage to the door seals and door seal areas. If these areas are damaged the appliance should not be operated until it has been repaired by a service technician trained by the manufacturer. Guarantee 2.
Care & Cleaning of Your Oven 5. If the control panel becomes dirty, clean with a soft, dry cloth. Do not use harsh detergents or abrasives on control panel. When cleaning the control panel, leave the oven door open to prevent the oven from accidentally turning on. After cleaning press Stop/Cancel button to clear display window. Important It is essential for the safe operation of the oven that it is kept clean, and wiped out after each use.
Maintenance of Your Oven Service Warning! 1. When your oven requires a service call your local Panasonic engineer (Customer Communications Centre on 0344 844 3899 can recommend an engineer). The appliance should be inspected for damage to the door seals and door seal areas. If these areas are damaged the appliance should not be operated until it has been repaired by a service technician trained by the manufacturer. Door Seals 2.
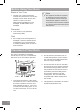
Parts of Your Oven 1. Door release Push to open the door. Opening the door during cooking will stop the cooking process without cancelling the program. Cooking resumes as soon as the door is closed and Start button is pressed. 2. See-through oven window 3. Door safety lock system 4. Oven air vent 5. Waveguide cover (do not remove) 6. External oven air vents 7. Control panel 13 8. Power supply cord 9. Plug 10. Identification label 11. Glass turntable 12. Roller ring (i).
Important User Instructions Safety Foods Low in Moisture If smoke is emitted or a fire occurs in the oven, press Stop/Cancel and leave the door closed in order to stifle any flames. Disconnect the power cord, or shut off power at the fuse or the circuit breaker panel. Take care when heating foods low in moisture, e.g. bread items, chocolate, popcorn, biscuits and pastries. These can easily burn, dry out or catch on fire if cooked too long.
Important User Instructions Liquids Paper, Plastic When heating liquids, e.g. soup, sauces and beverages in your microwave oven, overheating the liquid beyond boiling point can occur without evidence of bubbling. When heating food in plastic or paper containers keep an eye on the oven due to the possibility of ignition. Do not use wire twist-ties with roasting bags as arcing will occur. Do not use recycled paper products, e.g.
Important User Instructions Fan Motor operation Arcing After using the oven the fan motor may rotate for a few minutes to cool the electric components. This is normal and you can take out food even though the fan motor operates. You can continue using the oven during this time. Arcing may occur if a metal container has been used accidentally or if the incorrect weight of food is used or the wire rack has been damaged. Arcing is when blue flashes of light are seen in the microwave oven.
Microwaving Principles Microwaves are present in the atmosphere all the time, both naturally and from manmade sources. Manmade sources include radar, radio, television, telecommunication links and mobile phones. Turntable Note The dish used to cook or reheat the food will get warm during cooking, as the heat conducts from the food.
Control Panel 1 Display window 3 Auto Reheat button (page 31-32) 2 4 5 6 1 7 8 3 9 4 2 5 Microwave power levels button (page 24) Auto Cook button (page 31, 33) Chaos defrost button (page 34-35) Dial (page 28) Enter time or weight of food by turning the dial. Use the dial for the Add Time function. Timer/Clock button (page 23, 29) Quick 30 button (page 27) Stop/Cancel button: Before cooking: One press clears your instructions During cooking: One press temporarily stops the cooking program.
General Guidelines Standing time Moisture content Dense foods e.g. meat, jacket potatoes and cakes, require a standing time (inside or outside of the oven) after cooking, to allow heat to finish conducting to cook the centre completely. Many fresh foods e.g. vegetables and fruit, vary in their moisture content throughout the season, particularly jacket potatoes. For this reason cooking times may have to be adjusted. Dry ingredients e.g.
General Guidelines Dish size Starting temperature Follow the dish sizes given in the recipes, as these affect the cooking and reheating times. A quantity of food spread in a bigger dish cooks and reheats more quickly. The colder the food, the longer it takes to heat up. Food from a fridge takes longer to reheat than food at room temperature. Food temperature should be between 5-8 ºC before cooking.
Containers to Use Choosing the correct container is a very important factor in deciding the success or failure of your cooking. Result If the dish is suitable for microwaving, it will remain cool, whilst the water in the jug will begin to feel warm. If the testing dish feels warm, do not use as it is obviously absorbing microwave energy.
Containers to Use Plastic Wicker, Wood, Straw Baskets Many plastic containers are designed for microwave use, but do not use for cooking foods high in sugar or fat or for foods that require long cooking times e.g. brown rice. Only use Tupperware® containers if they are designed for microwave use. Do not use Melamine. Never cook in margarine cartons or yoghurt pots, as these will melt with the heat from the food. Dishes will crack and could ignite. Do not use wooden dishes in your microwave.
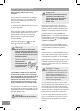
Setting the Clock When the oven is first plugged in “88:88” appears in display window. Press Timer/Clock twice A colon starts to blink. Turn dial Enter the time by turning the dial. The time appears in the display. Press Timer/Clock The colon stops blinking. Time of day is now locked into the display. Notes 1. To reset time of day, repeat step 1 through to step 3, as above. 2. The clock will keep the time of day as long as the oven is plugged in and electricity is supplied. 3.
Microwave Cooking and Defrosting The glass turntable must always be in position when using the oven. Press Level Wattage Once High 1000 W Twice Medium 600 W Once Low 440 W Twice Simmer 300 W Once Defrost 270 W Twice Warm 100 W Press the desired microwave power levels button once or twice depending on required power level. Set the cooking time using the dial. Your oven can be programmed for up to 90 minutes in Medium, Low, Simmer, Warm and Defrost power.
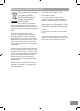
Defrosting Guidelines For Best Results: 1. Place foods in a suitable container. Meat joints and chickens should be placed on an upturned saucer or on a plastic rack if you have one. 2. Check food during defrosting, as foods vary in their defrosting speed. Arrange food in a single layer. 3. It is not necessary to cover the food. 4. Always turn or stir the food especially when the oven “beeps’’. Shield if necessary (see point 6). 5.
Defrosting Chart The times given below are a guideline only. Always check the progress of the food by opening the oven door and then re-starting. For larger quantities adjust times accordingly. Food should not be covered during defrosting. Food Defrosting Time per 450 g (1 lb) Beef/Lamb/Pork Joint 450 g (1 lb) 10 - 15 mins Place in a suitable dish or on an upturned saucer or use a rack. Turn 3-4 times. Shield. 60 mins Minced Beef 450 g (1 lb) 10 - 15 mins Place in a suitable dish.
Using the Quick 30 Function This function allows you to quickly set cooking time in 30 second increments. Press Quick 30 to set the desired cooking time (up to 5 minutes). Each press is 30 seconds. Time appears in the display. Power level is pre-set at High power (1000 W). Press Start The cooking will start and the time in the display will count down. At the end of cooking, five beeps will sound. Note 1. If desired, you can use other power levels. Select desired power level before pressing Quick 30. 2.
Using the Add Time Function This feature allows you to add cooking time at the end of previous cooking. After cooking, turn dial to select Add Time function. Maximum cooking time: High power (1000 W): up to 30 minutes, other powers: up to 90 minutes. Press Start Time will be added. The time in the display window will count down. Note 1. This function is only available for Micro Power function and it is not available for Auto programs. 2. The Add Time function will not operate after 1 minute cooking. 3.
Using the Timer The Timer can be used either before, during or after a cooking program. This feature can be used to set a standing time after cooking or to delay the start of your cooking. 1. To Set a Standing Time: Set the desired Cooking Program, by selecting power level and time required. Press Timer/Clock Set desired standing time using the dial (max 9 hrs). Press Start Cooking program will commence after which the standing time will count down. Note 1.
Multistage Cooking 2 or 3 stage cooking Example: Press a microwave power levels button. To select desired power level. Example: Set the cooking time using the dial. Press a microwave power levels button. To select desired power level. Set the cooking time using the dial. Press Start The cooking program will start and the time in the display will count down. Example: To cook on Simmer (300 W) for 2 minutes and Defrost (270 W) for 3 minutes. Press Low Simmer twice to select Simmer (300 W).
Auto Reheat / Cook Programs This feature allows you to cook foods by setting the weight. The oven determines the microwave power level and then gives a cooking time; this cooking time has been developed following extensive testing by our Home Economists in our development kitchen. Select the category of food and enter the weight. Example: or Select desired program by pressing the button once, twice, three or four times.
Auto Reheat Programs Program Weight Instructions 150 g - 600 g To reheat chilled soup. Place soup into a microwaveable bowl or container. Cover with lid or pierced cling film. Select program (1 press of Auto Reheat), enter weight using the dial, then press Start. Stir at beeps. Allow to stand for 2 minutes. Ensure that the soup is piping hot. Stir the soup before serving. 200 g - 800 g To reheat a chilled convenience meal that can be stirred.
Auto Cook Programs Program Weight 4. Fresh vegetables 200 g - 800 g 1 Press 5. Fresh fish 200 g - 800 g 2 Presses 6. Jacket potatoes 200 g - 1400 g 3 Presses 7. Rice 100 g - 300 g 4 Presses Instructions To cook fresh vegetables. Place prepared vegetables into a shallow container on turntable. Add 15 ml (1 tbsp) water per 100 g vegetables. Cover with pierced cling film or lid. Select program (1 press of Auto Cook), enter weight using the dial, then press Start. Stir at beeps. To cook fresh fish.
Chaos Defrost This feature allows you to defrost minced meat, chops, chicken portions, meat joints and bread. Press Chaos defrost to select the correct defrost category and then enter in the weight of the food in grams (see page 35). Foods should be placed in a suitable dish, whole chickens and joints of meat should be on an upturned saucer or on a microwave safe plate. Chops, chicken portions and slices of bread should be placed in a single layer. It is not necessary to cover the foods.
Chaos Defrost With this feature you can defrost frozen foods according to the weight. Select the category and set the weight of the food. Select desired program. Press Chaos defrost once to select Bread, twice to select Meat Items and three times to select Meat Joints. The auto program number and indicators for the microwave, Auto Cook and Chaos Defrost appear in the display. Program Select the weight of the food by turning the dial. Turning the dial slowly will count up in 10 g steps.
Cooking and Reheating Guidelines Most foods reheat very quickly in your oven by High power (1000 W). Meals can be brought back to serving temperature in just minutes and will taste freshly cooked. Always check food is piping hot and return to oven if necessary. Canned Foods Remove foods from can and place in a suitable dish before heating. Soups As a general rule, always cover wet foods, e.g. soups, casseroles and plated meals. Place soup in a bowl.
Reheating Charts The times given in the charts below are a guideline only, and will vary depending on starting temperature, dish size etc. Heating Category The IEC (60705) power output (watts) Your oven is Heating Category E and this is displayed on the front of your oven door. The information on this label will assist you in using new instructions on food packs to enable you to program the best heating time in your oven.
Reheating Charts Food Weight/ Quantity Power Level Time to Select (approx) 235 ml High 1 - 1 min 30 secs High 3 - 3 mins 30 secs High 1 min 30 secs - 2 mins High 3 - 4 mins Instructions/Guidelines Drinks - Coffee 1 mug 2 mugs 470 ml Place in a microwave safe mug on turntable. Stir, before, during and after reheating. Drinks - Milk 1 mug 235 ml 1 jug 600 ml Place in a microwave safe mug on turntable. Stir, before, during and after reheating. Pastry Products - Precooked - N.B.
Reheating Charts Food Weight/ Quantity Power Level Time to Select (approx) Instructions/Guidelines Purchased Convenience Foods - Chilled N.B. Transfer food from foil container to a similar sized microwave safe dish. Plastic dishes designed for microwave and conventional ovens may be used with care.
Cooking Charts Food Weight/ Quantity Power Level Time to Select (approx) 130 g (4) High 2 - 3 mins or 40 - 50 secs per rasher Instructions/Guidelines Bacon-from raw Rashers Place on a microwave safe rack or plate on turntable. Cover with a piece of kitchen roll.
Cooking Charts Weight/ Quantity Food Power Level Time to Select (approx) High 30 secs 1. then High 20 secs 2. High 1 min 3. then High 40 secs High 5 mins then Medium 6 mins High 10 - 12 mins Defrost 5 mins then Rest 2 mins then Low 4 mins Instructions/Guidelines Eggs – Scrambled 1 Egg 2 Eggs 4. Add 1 tbsp of milk for each egg used. Beat eggs, milk and knob of butter together. Cook for 1st cooking time then stir. Cook for 2nd cooking time then stand for 1 minute.
Cooking Charts Weight/ Quantity Food Power Level Time to Select (approx) Instructions/Guidelines Pizza – Fresh chilled – N.B. Remove all packaging. Pizzas will have a soft base. Thin & crispy 400 g High 4 - 4 mins 30 secs Place on heatproof plate on turntable. Do not cover. Deep pan 475 g High 4 - 5 mins Place on heatproof plate on turntable. Do not cover.
Cooking Charts Weight/ Quantity Food Power Level Time to Select (approx) Instructions/Guidelines Fresh Vegetables – Place in shallow microwave safe dish. Courgettes, mange tout 450 g High 5 - 6 mins Peas 450 g High 6 - 7 mins Potatoes – boiled 450 g High 8 - 10 mins 1 High 5 - 6 mins 2 High 7 - 9 mins Potatoes – jacket (250 g / 9 oz each) Add 90 ml (6 tbsp) water. Cover and place on turntable. Wash and prick skins. Place directly on turntable.
Soups & snacks Cream of Mushroom Soup ingredients 1. Serves 4 2 5 g (1 o z ) butter 1 small onion, cho pped 6 0 0 ml (1 pt) hot chick e n s t o c k 2 2 5 g (8 oz ) butto n mushrooms, sliced bo uquet g ar ni 1 5 ml (1 t bsp) cor nf lo u r 3 0 0 ml (½ pt) milk salt and pepper cream to gar nish 2. Dish: large bowl 3. 4. 5. 6. Place the butter and chopped onion in a large bowl. Cover and cook on High power (1000 W) for 3 minutes or until soft. Add the stock, mushrooms and bouquet garni.
ingredients 1. Serves 4 3 -4 clov es garlic, crus h e d 1 cm (¼”) piece f resh g in g e r, g rated 5 0 g (2 oz ) g round alm o n ds 4 5 ml (3 tbsp) water 3 who le cardamon po ds 2 clo v es 2 .5 cm (1 ”) stick of cinn a mo n 1 onion chopped 3 0 ml (2 tbsp) o il 4 5 0 g (1 lb) boned lamb, trimmed and cut into c u be s 5 ml (1 tsp) g round cor ia n de r 5 ml (1 tsp) g round cum in 1 .5 ml (¼ tsp) garam m a s a la 1 .5 ml (¼ tsp) cay enne pe ppe r 1 5 0 ml (¼ pt) sing le cre a m salt and pepper 2. 3. 4. 5.
Meat and poultry Savoury Mince ingredients 1. Serves 2 1 small onion, diced 1 clo v e garlic, crushed 5 ml (1 tsp) o il 2 0 0 g (7 oz ) can cho ppe d to mato es 1 5 ml (1 tbsp) to mato pu re e 5 ml (1 tsp) mixed herb s 2 2 5 g (8 oz ) minced be e f salt and pepper 2. 3. Dish: 1 .5 L itre ( 3 pt) Casserole dish Chicken Satay ingredients 1.
Thin fillets of fish i.e. plaice, should be rolled up prior to cooking to avoid overcooking on the thinner outside edge and tail. Do not sprinkle salt onto fish before cooking as this may make the fish dry. Fish When cooking frozen fish, add liquid as above for even cooking. Arranging Noise Fish steaks should be arranged in a circle, thicker part to the outside. Cover with cling film or lid. During cooking, popping sounds may be heard.
Vegetables Wild Mushroom and Basil Risotto ingredients Serves 4 4 0 g (1 ½ oz ) dried Cep mushrooms 5 0 g (2 oz ) butter 1 clo v e garlic, f inely cho ppe d 1 small onion, f inely cho ppe d f reshly gro und black pe ppe r 2 5 0 g (8 oz ) Arborio ric e 3 0 0 ml (½ pt) ho t v egetable sto ck 1 2 basil leav es, tor n 5 0 g (2 oz ) Parmesan c h e e s e , g rated Dish: 3 litre ( 6 pt) casserole dish 1. 2. 3. 4. 5. 6. 7. 8. Soak mushrooms in 300 ml (½ pt) warm water for 30 minutes.
ingredients Serves 4 1 5 0 g (5 oz ) self -raising f lo u r pinch o f salt 5 0 g (2 oz ) caster sug a r 5 0 g (2 oz ) suet 1 eg g 1 5 0 ml (¼ pt) milk 3 0 ml (2 tbsp) jam or g o lden sy rup Opt ional: add 1 tbsp of sultanas t o dr y ing redients 1. 2. 3. 4. In a mixing bowl, sift together the flour and salt. Stir in the sugar and suet. Make a well in the centre and add beaten egg and milk. Mix to a soft dropping consistency.
Desserts / cakes Date Puddings and Butterscotch Sauce ingredients Serves 4 2 0 0 g (7 oz ) f resh date s , stoned and f inely chop pe d 1 7 5 g (6 oz ) self -raising f lo u r 5 ml (1 tsp) baking pow de r 5 ml (1 tsp) v anilla ess e n c e 1 5 ml (1tbsp) Camp coff ee essence 1 0 0 ml (3 ½ f l.o z ) milk 7 5 g (3 oz ) butter 1 5 0 g (5 oz ) caster sug a r 2 eg g s lig htly beaten 1. 2. 3. 4. B utterscotch sauce 4 5 g (1 ¾ oz ) butter 1 2 0 ml (8 tbsp) sof t brown sug ar 2 0 0 ml (7 f l.
Custard 1. Serves 4 3 0 ml (2 tbsp) custard po wde r 1 5 ml (1 tbsp) sugar 6 0 0 ml (1 pt) co ld milk 2. 3. 4. Mix together the custard powder, sugar and a little milk to form a smooth paste. Blend in the remaining milk, whisking well. Cook on High power (1000 W) for 5-8 minutes stirring regularly. Whisk well halfway through cooking time and again at the end. Dish: 1 litre ( 2 pt) jug White Pouring Sauce ingredients 1. Serves 2 2 5 g (1 oz ) butter 2 5 g (1 oz ) f lo ur 6 0 0 ml (1 pt) milk 2.
Questions and Answers Q: The oven won’t accept my program. Why? A: The oven is designed not to accept an incorrect program. For example, the oven will not accept a fourth stage, and will not accept an Auto program after delay start. Q: Why won’t my oven turn on? A: When the oven does not turn on, check the following: 1. Is the oven plugged in securely? Remove the plug from the outlet, wait 10 seconds and reinsert. 2. Check the circuit breaker and the fuse.
Technical Specifications Manufacturer Panasonic Model NN-SD25HB, NN-SD26HM 230-240 V 50 Hz Power Supply 2450 MHz Operating Frequency: Input Power: Output Power: Maximum 1500 W Microwave 1100 W 1000 W (IEC-60705) Microwave External Dimensions 488 mm (W) x 395 mm (D) x 279 mm (H) Interior Dimensions W x D x H (mm) 315 mm (W) x 353 mm (D) x 206 mm (H) Uncrated Weight (approx.) 9.5 Kg Noise 57 dB Weight and Dimensions shown are approximate.
learn Visit Panasonic's The Ideas Kitchen website for Microwave advice, recipes, cooking tips and offers: www.theideaskitchen.co.uk cook share PHONE OUR CUSTOMER COMMUNICATIONS CENTRE 0344 844 3899 For service or spares. Or order spares direct on line at www.panasonic.co.uk Panasonic Corporation http://www.panasonic.com © Panasonic Corporation 2017 F0003BW41BP PA0217-10417 Printed in P.R.C.