Operating Instructions Video Cassette Recorder NV-FJ631 Series (Hi-Fi) NV-FJ630 Series (Hi-Fi) NV-FJ626 Series (Hi-Fi) NV-FJ623 Series (Hi-Fi) Contents Page Information 2 Setting up 3 Controls 4 Operations 5 Recording 6 Functions 8 Tuning 10 Receiver 11 Decoder 12 Amplifier 13 Troubleshooting 14 Special Features 15 Index Specifications 16 y N2QAKB000027 N2QAKB000022 N2QAHB000022 ‘ • Model: NV-FJ626 NV-FJ630 NV-FJ631 Model: NV-FJ623 Standard Accessories: 1 remote control 1
Information Warning and Important Information Safety Information ƒ n This unit is intended for use in moderate climates. n Please observe copyright laws when recording sound tracks and film. Caution ! n Do not install, or place this unit, in a bookcase, built-in cabinet or in another confined space. Ensure the unit is well ventilated. To prevent risk of electric shockor fire hazard due to overheating, ensure that curtains and any other materials do not obstruct the ventilation vents.
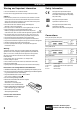
Setting up Connecting and Setting up Set up the connections shown here, and connect the mains lead (supplied) to your AC mains. Automatic Setting with Q Link (for NV-FJ631, NV-FJ630, NV-FJ626) If your TV is equipped with Q Link or with a similar function from other manufacturers (see notes), the TV programme positions can be downloaded with a fully-wired 21-pin Scart cable (not supplied). Aerial (not supplied) VCR TV The programme positions must be tuned on the TV first. n Connect the Scart cable.
Controls VCR display The functions of these buttons can be operated by the remote control or directly on the VCR. In this description, the remote control symbols are used in most cases. Menu Operation Playback VCR display These buttons are also used as cursors :;8 9 in order to select items on the menu. Display the Main menu. (indicated by = m ) EXIT a menu. (indicated by = e) Select or store a function.
Operations TV Operation With this remote control you can operate some Panasonic TV. Please also read the operating instructions for your TV. Switch the TV on and off. Model: NV-FJ626 / NV-FJ630 / NV-FJ631 Select the channel or the Show View number Use the Numeric buttons. Sample: 18 = Switch to teletext mode. Select the AV input on the TV. Select the TV channel. Operate the TV volume. Operate the teletext menu. Change over to AV channel. Press this button repeatedly.
Recording Timer Recording with On Screen Menu Recording n Switch on the TV to the video output channel, and insert a cassette with an intact erasure prevention tab into the VCR. n Before recording, select the channel. VCR display Select the AV channel if you want to record a programme fed with a 21-pin Scart cable. n Press to start recording. n Press the Stop Button ` to stop recording. n Use button to pause recording. n Restart recording by pressing this button again.
Recording Timer Recording with ShowView (not for NV-FJ623) Switch on the TV to the video output channel, insert a cassette with an intact erasure prevention tab into the VCR and set the remote control to VCR operation. n Press n Enter the ShowView number. For correction use 8 . = n To access [Timer recording], press o . n If the channel name is not set automatically, select your Channel [Pos] :; and store with o . The name of channel will be saved. To modify the [Name], see page 10.
Functions n When a cassette is inserted, the VCR switches on automatically. n When a cassette without an erasure prevention tab is inserted, the VCR will automatically start playback. n The cassette will automatically be rewound when reaching the tape end. n The CVC System (Crystal View Control) ensures optimum picture quality. Repeat Playback Function Press the Playback Button > for more than 5 seconds when the VCR is on stop mode (the letter R will appear on the OSD).
Functions Setting of On Screen Displays (OSD) Panasonic VCR n Press m Main menu Timer recording n Select [Other settings] ; Tuning n Access by pressing o Clock setting Other settings n Select [OSD] ; Panasonic VCR Other settings n Select the input field 9 Tape length : AUTO (8E-240) n Select the settings :; SQPB : AUTO Power save : OFF n Store by pressing o VCR display : DIMMED n Press e OSD : 4:3 4:3 16:9 OFF displays are on the edge of the screen (the displays are not visible during playback in 16:9 form
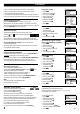
Tuning To change the order of the Channel positions and the names of the TV station Panasonic n Press m Main menu Timer recording n Select [Tuning] ; Tuning Clock setting n Access by pressing o Other settings n Access [Manual] by pressing o Panasonic Tuning n Select the Channel to be changed :; Manual n Access by pressing o Auto - Setup Restart Shipping condition n Select the input field for [POS] 9 n Input the Channel position :; Panasonic Tuning n Store the setting by pressing o Pos Name Ch n Select [Name
Receiver With some Satellite- or Digital Receivers it is possible to start a Timer recording, with a 21-pin Scart cable (not supplied) by using EXT LINK function. (Please read the operating instructions for your Satellite- or Digital Receiver for further information).
Decoder RF IN AC IN~ AV2 (DECODER/EXT) AV1 (TV) L AUDIO OUT R RF OUT Connecting a Decoder with a 21-pin Scart cable (not supplied) to AV2 of the VCR (for NV-FJ631, NV-FJ630, NV-FJ626, NV-FJ623EC/ECN/ECY). This device is used to decode scrambled broadcasts (Pay TV).
Amplifier Connect your VCR (NV-FJ631, NV-FJ630, NV-FJ626) with an Audio cable (not supplied) to the stereo amplifier. Take care on the direction of the connection: left = white (L) right = red (R) VCR L R Audio cable (not supplied) Stereo Amplifier With an special scart cable (not supplied) you can connect the VCR’s AV out with an amplifier. This is also possible with the NV-FJ623.
Troubleshooting Adjusting the Playback picture If the picture is distorted with noise bars, press the TRACKING / V-LOCK Button in the (+) or (-) direction during Playback, Still Playback or Slow Playback. Noise bars on the TV picture For automatic adjustment, press (+) and (-) at the same time. Note: The tracking cannot be adjusted on certain cassettes. This is not a functional fault of the VCR.
Special Features I-TIMER page 7 Thru this INTELLIGENT TIMER function the programming and the recording will be even more easy than before. The INTELLIGENT TIMER is storing the programme data up to 8 timer recordings. For example, if you want to record the continuation of your favourite series, you need only to press the I-TIMER button and the stored programme data will be displayed with today's date.
Index Add Aerial AUDIO Automatic Setting AV input AV LINK Battery Brightness of VCR display CANCEL Page 10 3 5, 13 3 2, 3, 5, 12 12 2 9 Page Language setting 8 LP 6, 7 Menu Operation 4 8 5, 9 10 MESECAM Mono sound Move NICAM sound NTSC 9 9 7 3, 9, 12 8 3, 8 3 8 OFF ON On Screen Displays On Screen Menu OSD/DISPLAY 6 6 9, 14 6 5 Decoder Delete Digital Receiver DIMMED DIRECT TV REC Disposal 3, 6, 8 12 10 11 9 6 2 Picture distorted Playback Playback Off Timer Power save PROG.