
Operation Manual

Powering ON/OFF
ENGLISH -
37
Basic Operation
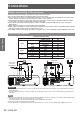
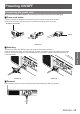
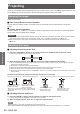
Complete peripheral connections (with a 1 )
computer, VCR, etc.) before turning on the
projector.
Connect the projector’s AC power cord into an 2 )
AC outlet. The <ON(G)/STANDBY(R)> indicator
lights red.
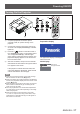
Press the <3 ) > button on the side control or
the <POWER ON> button on the remote control.
The <ON(G)/STANDBY(R)> indicator lights
green and the cooling fans start to operate. The
preparation display appears on the screen and
the count down starts.
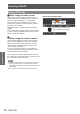
After the countdown, the input source that was 4 )
selected the last time and the lamp power status
icon appear on the screen.
If the projector is locked with a PIN code, PIN
code input dialog box will appear. Enter the PIN
code as instructed on the next page.
Note
When the [Logo select] function is set to [Off], the logo
z
will not be shown on the screen (
Æ
page 63).
When [Countdown off] or [Off] is selected in the [Display]
z
function, the preparation display will not be shown on the
screen (
Æ
page 63).
When the [Direct on] function is set to [On], the projector
z
will be turned on automatically by connecting the AC
power cord to an AC outlet.
The Lamp replacement icon and the Filter replacement
z
icon may appear on the screen depending on the usage
state of the projector.
When the [Picture in Picture] function is set to User
z
1-5, User 1-5, Input source, Lamp power status, Lamp
replacement icon and Filter warning icon will appear on
the screen for 10 seconds.
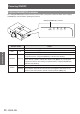
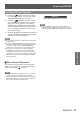
Turning On the Projector
(2)
(3)
(3)
06
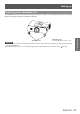
The preparation display will disappear
after 30 seconds.
Lamp power status
Input source
Initial display
Preparation display