
User's Manual
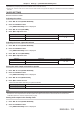
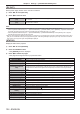
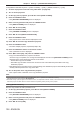
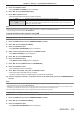
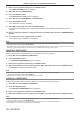
Table Of Contents
- Read this first!
- Chapter 1 Preparation
- Chapter 2 Getting Started
- Chapter 3 Basic Operations
- Switching on/off the projector
- Projecting
- Using the USB memory
- Operating with the remote control
- Using the shutter function
- Using the mute function
- Adjusting the volume
- Using the freeze function
- Using the on-screen display function
- Using the automatic setup function
- Using the screen adjustment function
- Using the digital zoom function
- Switching the image aspect ratio
- Using the presentation timer function
- Using the function button
- Displaying internal test pattern
- Using the status function
- Using the ECO management function
- Setting ID number of the remote control
- Chapter 4 Settings
- Menu navigation
- [PICTURE] menu
- [POSITION] menu
- [ADVANCED MENU] menu
- [DISPLAY LANGUAGE] menu
- [DISPLAY OPTION] menu
- [PROJECTOR SETUP] menu
- [PROJECTOR ID]
- [PROJECTION METHOD]
- [ECO MANAGEMENT]
- [LightID]
- [INITIAL STARTUP]
- [STARTUP INPUT SELECT]
- [DATE AND TIME]
- [SCHEDULE]
- [RS-232C]
- [REMOTE1 MODE]
- [FUNCTION BUTTON]
- [LENS CALIBRATION]
- [AUDIO SETTING]
- [FILTER COUNTER]
- [DC OUT]
- [STATUS]
- [DATA CLONING]
- [SAVE ALL USER DATA]
- [LOAD ALL USER DATA]
- [INITIALIZE]
- [SERVICE PASSWORD]
- [TEST PATTERN] menu
- [SIGNAL LIST] menu
- [SECURITY] menu
- [NETWORK/USB] menu
- Chapter 5 Operations
- Chapter 6 Maintenance
- Chapter 7 Appendix

Chapter 4 Settings — [PROJECTOR SETUP] menu
ENGLISH - 125
[AUDIO IN 1]
Audio connected to the <AUDIO IN 1> terminal is output during projection of image from the set input
terminal.
[AUDIO IN 2]
Audio connected to the <AUDIO IN 2> terminal is output during projection of image from the set input
terminal.
[AUDIO IN 3]
Audio connected to the <AUDIO IN 3> terminal is output during projection of image from the set input
terminal.
[HDMI1 AUDIO IN]
*1
Audio input to HDMI1 is output.
[HDMI2 AUDIO IN]
*2
Audio input to HDMI2 is output.
[DIGITAL LINK AUDIO IN]
*3
Audio input to DIGITAL LINK is output.
[NETWORK/USB AUDIO IN]
*4
Outputs the audio of MEMORY VIEWER, MIRRORING, or Panasonic APPLICATION.
*1 Only when the input signal is HDMI1
*2 Only when the input signal is HDMI2
*3 Only when the input signal is DIGITAL LINK
*4 Only when the input signal is MEMORY VIEWER, MIRRORING, or Panasonic APPLICATION
[FILTER COUNTER]
Check the runtime of the lter and set the cleaning/replacement cycle of the lter. Also, the runtime of the lter can
be reset.
1) Press as to select [FILTER COUNTER].
2) Press the <ENTER> button.
f The [FILTER COUNTER] screen is displayed.
[FILTER COUNTER]
Displays the runtime of the lter.
[TIMER]
Sets the cleaning/replacement cycle of the lter.
[FILTER COUNTER RESET]
Resets the runtime of the lter.
Setting [TIMER]
If the lter is to be cleaned/replaced periodically, set the cycle in hours. Once the runtime of the lter reaches
the set time, a message prompting to clean/replace the lter [FILTER COUNTER has reached the set time.] is
displayed on the projected image.
1) Press as to select [FILTER COUNTER].
2) Press the <ENTER> button.
f The [FILTER COUNTER] screen is displayed.
3) Press as to select [TIMER].
4) Press qw to switch the item.
f The items will switch each time you press the button.
[OFF]
Select this item when a message is not to be displayed.
[1000 H] - [20000 H]
Select this item when a message is to be displayed. The cleaning/replacement cycle of the lter can
be set in 1 000 hour intervals.
Resetting [FILTER COUNTER]
Reset the runtime of the lter.
1) Press as to select [FILTER COUNTER].
2) Press the <ENTER> button.
f The [FILTER COUNTER] screen is displayed.
3) Press as to select [FILTER COUNTER RESET].
4) Press the <ENTER> button.
5) The confirmation screen is displayed, so pressqw to select [OK], and press the <ENTER> button.
f Display of [FILTER COUNTER] will change to [0 H].