Digital Video Camcorder Operating Instructions Models No. (PV-GS15 Shown) PV-GS9 PV-GS13 PV-GS15 Before attempting to connect, operate or adjust this product, please read these instructions thoroughly. [For PV-GS13/PV-GS15] [For PV-GS13/PV-GS15] For assistance, please call : 1-800-561-5505 or visit us at www.panasonic.
Things You Should Know Thank you for choosing Panasonic! You have purchased one of the most sophisticated and reliable products on the market today. Used properly, we’re sure it will bring you and your family years of enjoyment. Please take time to fill in the information on the right. The serial number is on the tag located on the underside of your Camcorder. Be sure to retain this manual as your convenient Camcorder information source.
CAUTION: TO PREVENT FIRE OR SHOCK HAZARD AND ANNOYING INTERFERENCE, USE THE RECOMMENDED ACCESSORIES ONLY. CAUTION: TO PREVENT ELECTRIC SHOCK, MATCH WIDE BLADE OF PLUG TO WIDE SLOT, FULLY INSERT. CAUTION: DANGER OF EXPLOSION IF BATTERY IS INCORRECTLY REPLACED. REPLACE ONLY WITH THE SAME OR EQUIVALENT TYPE. • Since this product gets hot during use, operate it in well ventilated place; do not install this equipment in a confined space such as a bookcase or similar unit.
Important Safeguards 1. Read Instructions — All the safety and operating instructions should be read before the unit is operated. 2. Retain Instructions — The safety and operating instructions should be retained for future reference. 3. Heed Warnings — All warnings on the unit and in the operating instructions should be adhered to. 4. Follow Instructions — All operating and maintenance instructions should be followed. 5. Cleaning — Unplug this video unit from the wall outlet before cleaning.
15. Power Lines — An outside antenna system should not be located in the vicinity of overhead power lines or other electric light or power circuits, or where it can fall into such power lines or circuits. When installing an outside antenna system, extreme care should be taken to keep from touching such power lines or circuits as contact with them might be fatal. 16. Overloading — Do not overload wall outlets and extension cords as this can result in a risk of fire or electric shock. 17.
Before opening the CD-ROM package (PV-GS13 (LSFT0577)/PV-GS15 (LSFT0575): Supplied, PV-GS9: Optional Software), please read the following. End User License Agreement (for USB Driver, WebCam Driver (PV-GS13/PV-GS15: Supplied, PV-GS9: Optional Software) and DV STUDIO (PV-GS13: Supplied, PV-GS9/PV-GS15: Optional Software)) You (“Licensee”) are granted a license for the Software defined in this End User Software Agreement (“Agreement”) on condition that you agree to the terms and conditions of this Agreement.
This operating instruction book is designed for use with models PV-GS9, PV-GS13 and PV-GS15. The PV-GS15 is the model used for illustrative purposes. Features may vary, so please read carefully. Differences between models Model Number Battery Pack (Supplied) Memory Card CD-ROM USB Cable Lens Photoshot (Tape) Feature Mode Dial PV-GS9 PV-GS13 PV-GS15 CGR-D08R (800 mAh) CGR-D08R (800 mAh) CGR-D14 (1 350 mAh) Supplied (RP-SD008MMK0) Supplied (RP-SD008MMK0) Optional Software Optional f2.1-42 mm, F1.
Contents Before Use Things You Should Know ....................................2 Safety Precautions ..............................................2 Important Safeguards ..........................................4 Precautions .........................................................5 End User License Agreement..............................6 Differences between models ...............................7 Quick Guide.......................................................10 Standard Accessories.....................
Playback Mode Playing Back a Tape ..........................................35 Finding a Scene You Want to Play Back ...........35 Slow Motion Playback (Remote Control Only) ..36 Still Playback/Still Advance Playback ................36 Index Search Functions (Remote Control Only) ....................................37 Playback Zoom Function (Remote Control Only) ....................................37 Playback Digital Effect Functions ......................38 Playing Back a Memory Card (For PV-GS13/PV-GS15).
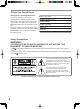
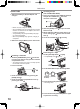
Before Use Quick Guide 1 Attach the Battery to the AC Adaptor and charge it. Inserting a Card (For PV-GS13/PV-GS15) 1 Place your Thumb on the [OPEN▼] Knob 1 and pull the LCD Monitor 2 out in the direction of the arrow. 1 2 • Before use, fully charge the Battery. • Since the Battery will not be charged when the DC Cable is connected to the AC Adaptor, disconnect it from the AC Adaptor. • The [POWER] Lamp and [CHARGE] Lamp light up, and charging starts.
Before Use Recording a Still Picture on Tape (PV-GS9 Only) 2 Set the Mode Dial to Tape Playback Mode. 1 Set the Mode Dial to Tape Recording Mode. (PV-GS13/ (PV-GS9) PV-GS15) 3 Press the [ ] Button to rewind the tape. 2 Press the [PHOTO SHOT] Button in the Recording Pause Mode. 4 Press the [►] Button to start playback. Recording a Still Picture on Card (Photoshot) (For PV-GS13/PV-GS15) 5 Press the [ ] Button to stop playback. 1 Set the Mode Dial to Card Recording Mode.
Before Use Before Use Controls and Components Camcorder Standard Accessories 6 Illustrated are accessories supplied with the Camcorder. 1) 7 2 10 PV-DAC11-K LSJA0288 2) 1 K2CB2CB00014 3) CR2025 CGR-D08R CGR-D14 (For PV-GS9/ (PV-GS15 Only) PV-GS13) 4) 5) LSJA0280 6) LSFC0018 3 1 LSSQ0411 RP-SD008MMK0 (For PV-GS13/ PV-GS15) 7) LSFT0577 K1HA05CD0005 (PV-GS13 Only) LSFT0575 (For PV-GS13/ (PV-GS15 Only) PV-GS15) 2 CAUTION: This unit will operate on 110/120/220/240 V AC.
Before Use 18 Mode Selector Switch 33 Microphone Jack [MIC] (PV-GS15 Only) [AUTO/MANUAL/FOCUS] (pp. 24, 30-32) 19 Menu Button [MENU] (p. 19) 20 Multi Button [MULTI] (p. 33) Picture-in-Picture Button [P-IN-P] (p. 34) 21 Reset Button [RESET] (pp. 60, 70) 26 22 23 24 • When connecting an external microphone or audio equipment to this jack, the built-in microphone does not operate. • A compatible plug-in powered microphone can be used. Please consult your dealer for more information.
Before Use 45 46 62 47 48 57 58 59 60 61 49 45 Shoulder Strap Holders (p. 17) 46 Grip Belt (p. 17) 47 Battery Holder 48 Battery Eject Switch [BATTERY RELEASE] (p. 16) 49 Tripod Receptacle • Used for mounting the Camcorder on an optional tripod. Using the wireless Remote Control that is supplied with the Camcorder, most of the Camcorder functions can be operated from a distance.
Before Use The Remote Control Using the Remote Control Inserting the Button-type Battery Before using the Remote Control, insert the supplied button-type battery. 1 Direct the Remote Control at the Remote Control Sensor 31 of the Camcorder and press an appropriate button. 1 While pressing the Lock Button 1 , pull out the Battery Holder. Then, remove the button-type battery. 15° 15° 31 15° 15° 1 2 Insert the button-type battery with the (+) marking facing upward.
Before Use Power Supply 2 Attach the charged Battery to the Camcorder. Using the AC Adaptor 1 Connect the DC Cable to the Camcorder. 2 Connect the DC Cable to the AC Adaptor. 3 Connect the AC Cable to the AC Adaptor and the AC Jack. • Before connecting or disconnecting the power supply, set the [OFF/ON] Switch 44 on the Camcorder to [OFF] and make sure that [POWER] Lamp is not lit. (p. 18) Using the Battery Before use, fully charge the Battery. • We recommend using a Panasonic Battery.
Before Use The Grip Belt Attaching the Shoulder Strap To Use as a Grip Belt Adjust the length of the Grip Belt to the size of your hand. 1 Detach the end of the Grip Belt. 2 Adjust the length of the Grip Belt to the size of your hand. We recommend that you attach the Shoulder Strap before going out to avoid dropping the Camcorder. 1 Pull the end of the Shoulder Strap through the Shoulder Strap Holder on the Camcorder.
Before Use Accidental Erasure Prevention Opening the accidental erasure prevention slider 1 on the cassette (by sliding it to the [SAVE] arrow direction) prevents recording. To enable recording, close the accidental erasure prevention slider (by sliding it to the [REC] arrow direction). 1 Turning on the Camcorder Turn on the power first and then select modes. How to Turn on the Power 1 Set the [OFF/ON] Switch 44 to [ON] while pressing the button 1 . • The [POWER] Lamp 41 lights up.
Before Use Using the Viewfinder/LCD Monitor Using the Viewfinder Before using the Viewfinder, adjust the field of view so that the displays inside the Viewfinder become clear and easy to read. 1 Pull the Viewfinder. 1 180° 2 90° Closing the LCD Monitor Push the LCD Monitor until it is securely locked. • Make sure the Card Slot Cover is closed. 2 Adjust by turning the Eyepiece Corrector Knob 35 .
Before Use • The Menu corresponding to the Mode selected by using the Mode Dial 40 is displayed. • After the above File Selection Procedure, carry out the various Menu Operations. (The above procedure will not be repeated in the following instructions.) 40 (PV-GS13/ (PV-GS9) PV-GS15) List of Menus 2 Press the [ / ] Button 13 16 to select a desired Sub-Menu. • Press the [ item. / ] Button to display the highlighted 3 Press the [ ] Button 14 to display the selected Sub-Menu.
Before Use [AUDIO REC] Audio Recording Mode (p. 23) [SCENE INDEX] Scene Index Mode (p. 37) [TAPE PLAYBACK MENU] Tape Playback Menu (PV-GS13/PV-GS15) (PV-GS9) [WIND CUT] Wind Noise Reduction (p. 29) [ZOOM MIC] Zoom Microphone (p. 27) [CINEMA] Cinema-like Format Recording (p. 29) 5) [DISPLAY] Display Setup Sub-Menu [DISPLAY] Display Mode (p. 60) [DATE/TIME] Date and Time Indication (p. 60) [C.DISPLAY] Counter Display Mode (p. 60) [C.RESET] Counter Reset (p. 71) • It resets the counter to zero.
Before Use 7) [INITIAL] Initial Setup Sub-Menu [BLANK SEARCH] [EVF ON/AUTO] Using the Viewfinder (p. 19) [AV JACK] 6) [INITIAL] Initial Setup Sub-Menu [AV JACK] AV Jack (pp. 13, 65) AV Jack (pp. 13, 65) [REMOTE] [REMOTE] Remote Control Mode (p. 15) Remote Control Mode (p. 15) [BEEP SOUND] [BEEP SOUND] Beep Sound (p. 61) Beep Sound (p. 61) Blank Search (p. 24) [CLOCK SET] Date and Time Setting (p.
Before Use 5) [LCD/EVF] LCD/EVF Setup Sub-Menu [LCD/EVF SET] LCD and Viewfinder Adjustment (p. 19) [EVF ON/AUTO] Internal Lithium Battery Recharge The internal lithium battery sustains the operation of the clock. When the [ ] Indication flashes, the internal lithium battery is near exhaustion. Using the Viewfinder (p. 19) 6) [INITIAL] Initial Setup Sub-Menu [AV JACK] AV Jack (pp. 13, 65) [REMOTE] Remote Control Mode (p.
Recording Mode Recording Mode About Recording When recording pictures on a tape, set the Mode Dial 40 to Tape Recording Mode [ ]. When recording still pictures on a card, set the Mode Dial 40 to Card Recording Mode [ ] (For PV-GS13/PV-GS15). When recording with the [AUTO/MANUAL/FOCUS] Switch 18 set to [AUTO], the Camcorder automatically adjusts the focus and white balance. In some cases, they cannot be adjusted automatically and need to be adjusted manually. (pp.
Recording Mode • The [BLANK] Indication appears during the Blank Search. • Approximately 1 second before the last recorded scene, the Camcorder switches to the Recording Pause Mode or the Still Playback Mode. • If there is no blank left on the Cassette, the Camcorder stops at the end of the tape. To Cancel Blank Search Before Completion Press the [ ] Button. Digital Still Picture When the [STILL] Button 13 is pressed, images become still pictures.
Recording Mode Maximum number of still pictures recordable on a MultiMediaCard (optional) PICTURE FINE NORMAL ECONOMY QUALITY 8 MB 45 95 190 • These figures vary depending on the subject being photographed. Recording with the Built-in LED Video Light (For PV-GS13/PV-GS15) To brighten the natural colours in a scene. Gain Up mode works with the Built-in Video Light to enhance the light’s brightness. 1 Press the [LIGHT] Button 11 .
Recording Mode 3 Set the [OFF/ON] Switch 44 to [ON]. • The Camcorder will be ready for recording in approximately 1.3 seconds. • Zoom Magnification Indication is displayed for a few seconds. To Cancel the Quick Start Keep the [QUICK START] Button pressed for approximately 2 seconds and make sure the Quick Start Recording Lamp is not lit. • For other notes concerning this item, see page 62.
Recording Mode 2 Push the [W/T] Lever 26 towards [W] or towards [T] to zoom in or out. Fade In/Out Functions Fade In Fade In brings out images and sounds gradually from a black screen at the beginning of a scene. 26 To Cancel the Digital Zoom Function Set [TAPE RECORDING MENU] >> [CAMERA] >> [D.ZOOM] >> [OFF]. • For other notes concerning this item, see page 62. 1 Keep pressing the [FADE] Button 16 during the Recording Pause Mode.
Recording Mode 2 When the image is completely gone, press the Recording Start/Stop Button 43 to stop recording. 43 Soft-Skin Mode This enables you to record skin colours in a softer tone. In order to get the best result, avoid background colours similar to the skin colour of the subject. Otherwise, this may result in a softer background lacking in detail. 1 Press the [SOFT SKIN] Button 9 . 3 Release the [FADE] Button 16 . 9 • The still picture cannot fade in or fade out.
Recording Mode • Black bars appear at the top and bottom of the screen. 1) [ ] Sports Mode • For recording scenes involving quick movements, such as sports scenes. 2) [ ] Portrait Mode • Use when you want to make people (subjects) stand out from the background. To Cancel the Cinema Function Set [TAPE RECORDING MENU] >> [RECORDING] >> [CINEMA] >> [OFF]. • For other notes concerning this item, see page 63.
Recording Mode 1) Automatic White Balance Adjustment [AWB] 2) The white balance setting that was previously ] set manually [ 3) Outdoor Mode [ ] 4) Indoor Mode (recording under incandescent ] lamp) [ To Resume Automatic Adjustment Press the [ ] Button 14 or [ ] Button 17 until the [AWB] Indication appears. Or, set the [AUTO/MANUAL/FOCUS] Switch to [AUTO]. To Resume Automatic Adjustment Press the [ ] Button 14 or [ ] Button 17 until the [AWB] Indication is displayed.
Recording Mode Manual Shutter Speed Adjustment Useful for recording fast-moving subjects. 1 Set the [AUTO/MANUAL/FOCUS] Switch 18 to [MANUAL]. 18 • The [MNL] Indication appears. 2 Press the [ENTER] Button 15 until the Shutter Speed Indication appears. 3 Press the [ ] Button 14 or [ 17 to adjust the iris. ] Button Range of Iris Adjustment CLOSE (Closed), F16, ..., F2.0, OP (Opened) + 0dB, ..., OP + 18dB When a value closer to [CLOSE] is selected, the image becomes darker.
Recording Mode Digital Effect Functions This Camcorder is equipped with Digital Effect Functions that add special effects to the scene. Digital Effects 1 [EFFECT1] To Select a Desired Digital Effect Set [TAPE RECORDING MENU] >> [DIGITAL] >> [EFFECT1] or [EFFECT2] >> a desired Digital Effect. 1) MULTI 2) P-IN-P 3) WIPE To Cancel the Digital Effect Set [TAPE RECORDING MENU] >> [DIGITAL] >> [EFFECT1] or [EFFECT2] >> [OFF].
Recording Mode Deleting All the Captured Multi-Pictures While 9 multi-pictures are displayed, press the [MULTI] Button. Wipe Mode and Mix Mode Wipe Mode: • If [MANUAL] has been selected, press the [MULTI] Button after 9 pictures are displayed. Like drawing a curtain, the still picture of the last recorded scene gradually changes to the moving image of a new scene. To Display the Multi-Pictures Again Press the [MULTI] Button for 1 second or longer.
Playback Mode Playback Mode Playing Back a Tape The recorded scene can be played back immediately after the recording. 1 Set the [OFF/ON] Switch 44 to [ON]. • The [POWER] Lamp 41 lights up. Adjusting the Sound Volume To adjust the volume, push the [W/T] Lever 26 to display the [VOLUME] Indication. Push the [W/T] Lever towards [T] to increase the volume or push the [W/T] Lever towards [W] to decrease the volume. The [VOLUME] Indication disappears immediately after adjustment is made.
Playback Mode Variable Speed Search Function The speed of Cue Playback or Review Playback can be varied. 1 During playback, press the [►] Button 15 . • The [1X ] Indication appears. 15 Scenes recorded in the SP Mode are played back at approximately 1/5th of the normal speed. Scenes recorded in the LP Mode are played back at approximately 1/3rd of the normal speed. To Resume Normal Playback Press the [►] Button 72 .
Playback Mode Index Search Functions (Remote Control Only) To facilitate searching for desired scenes, this Camcorder automatically records index signals during recording, as explained in the following. Scene Index Search 1 Set [TAPE PLAYBACK MODE] >> [PLAYBACK] >> [SEARCH] >> [SCENE]. 2 Press the [ ] Button or [ on the Remote Control. ] Button 58 Photoshot Index Signal (PV-GS9) These signals are automatically recorded whenever still pictures are taken in Photoshot Mode. (p.
Playback Mode To Change the Zoom Magnification 2 Change the magnification by pressing the [W] Button or [T] Button 62 on the Remote Control. Wipe Mode and Mix Mode (Remote Control Only) 1 Press the [►] Button 72 . 72 62 2 Press the [SELECT] Button 59 on the Remote Control and select [WIPE] or [MIX]. To Change the Enlarging Area of an Image 3 Press the Arrow Button (▲, ◄, ►, ▼) 56 on the Remote Control that points to the area you want to enlarge. To Cancel the Playback Zoom Function Press the [P.B.
Playback Mode Slide Show (For PV-GS13/PV-GS15) 1 The recorded still pictures in the Card can be played back like a Slide Show. 2 3 1 2 3 Folder File Number Picture Size (p. 60) File Number To Select a Desired File and Playing Back 1 Set the Mode Dial 40 to Picture Playback Mode. 1 Set the Mode Dial 40 to Picture Playback Mode. 40 2 Press the [►] Button 15 . 15 40 • The [SLIDE ] Indication is displayed. 2 Press the [MULTI] Button 20 .
Playback Mode Creating a Title (For PV-GS13/ PV-GS15) 1 2 You can create a title and record on a Card. 1 Recording Mode: Set the Mode Dial 40 to Tape Recording Mode or Card Recording Mode. Set the Lens to the image you want to use for creating a title.
Playback Mode 4 Press the [ / / / ] 13 14 16 17 Button to select a desired title. 4 Press the [ ] Button 14 or [ ] Button 17 to select the number of pictures to be printed, and press the [ENTER] Button 15 . • [ ] Indication 2 is displayed in the picture set. (p. 60) 13 14 16 17 • The selected title is marked with a frame. 5 Press the [MULTI] Button 20 . • The selected title is displayed. • Recording and Photoshot Recording can be made with pictures that have titles.
Playback Mode Deleting the Files Recorded on a Card (For PV-GS13/PV-GS15) Formatting a Card (For PV-GS13/ PV-GS15) Using the Camcorder, you can delete the files recorded on a Card. After the file is deleted, it cannot be restored. If a Card becomes unreadable by the Camcorder, format it for reuse. Formatting erases all the data recorded on a Card. To Select and Delete Files or Titles 1 Set [PICTURE PLAYBACK MENU] >> [EDITING] >> [CARD FORMAT] >> [YES].
Playback Mode Playing Back on Your TV By connecting your Camcorder with your TV, the recorded scenes can be viewed on your TV screen. • Before connecting them, turn off the power of both the Camcorder and TV. 1 Connect the [AV OUT] Jack of the Camcorder and the Video and Audio Input Jacks of the TV. [VIDEO IN] [S-VIDEO IN] [AUDIO IN] 2 1 (PV-GS15 Only) • Connect to the TV with the AV Cable 1 . If the TV has an S-Video Jack, connect the S-Video Cable (not supplied) 2 , too (PV-GS15 Only).
Editing Mode Editing Mode Recording from a Tape onto a Card (For PV-GS13/PV-GS15) • When recording to tape, select the tape position before recording. The picture will be recorded to the tape position when the [PHOTO SHOT] Button is pressed at Step 3. • Photoshot index signals are automatically recorded. Still pictures can be recorded on the Memory Card from scenes that have already been recorded on a cassette. • For other notes concerning this item, see page 65.
Editing Mode To Dub Audio While Listening to a Pre-recorded Sound When pausing the audio dubbing, set the [12bit AUDIO] on the [PLAYBACK] Sub-Menu to [ST2] and you can check the pre-recorded sound. When a microphone (PV-GS15 only) is used for audio dubbing, use headphones to listen to the pre-recorded sound while dubbing the audio. (When using headphones, set [AV JACK] on the [INITIAL] to [OUT/PHONES].
Editing Mode Recorder: 3 While pressing the [ REC] Button 54 , press the [PLAY] Button 72 on the Remote Control. Or while pressing the [REC] Button 7 , press the [BACK LIGHT] Button 10 on the Camcorder. 7 10 • Recording starts. To Stop Dubbing Press the [ ] Button 69 or the [ ] Button 70 . CAUTION: Unauthorized exchanging and/or copying of copyrighted recordings may be copyright infringement. • For other notes concerning this item, see page 65.
With a PC With a PC Using the Software with a Personal Computer An image stored on the DV Cassette or Memory Card can be transferred to your personal computer. Software Installation (For Windows) 1 Turn on the personal computer and start up Windows. 2 Insert the CD-ROM into the personal computer’s CD-ROM drive. • The [Setup Menu] screen appears.
With a PC 5 Finish installation by following the on-screen instructions. • Click [Next] and proceed with installation. • After completing the installation, Click [Finish]. 6 After the USB Driver is installed, please restart your computer. • Reboot the computer to finish installing USB driver. • Installation continues after the computer reboots if you selected additional software. • A message indicating a conflict between versions may be displayed during the installation. This will not cause a problem.
With a PC [Windows 98SE/Me/2000] [Windows XP] To disconnect USB cable safely (For Windows) 1 2 If USB Cable is disconnected while computer is on, error dialogue may appear. In such case click [OK] and close the dialogue box. By following the steps below you can disconnect the cable safely. 1 Double click the icon in task tray. • Hardware disconnect dialogue appears. • You can view images stored on the Memory Card and also save them to your hard disk.
With a PC (For Macintosh) Removing the USB Cable safely for Macintosh Operating environment OS: IBM PC/AT compatible personal computer with preinstalled; Microsoft Windows XP Home Edition/Professional (In this case of Windows XP, SP1 or later is needed.
With a PC Installing WebCam Driver 1 Turn on the personal computer and start up Windows. 3 Connect the Camcorder to your personal computer with USB Cable. 2 Insert the CD-ROM into the personal computer’s CD-ROM drive. • Quit all applications. • The [Setup Menu] Screen appears. [PV-GS15: Supplied] [PV-GS13: Supplied, PV-GS9/ PV-GS15: Optional Software] 3 Click the [WebCam Driver]. • The set up program starts running. • “WEB” is displayed on the LCD Monitor of the Camcorder.
With a PC Setting up the Windows Messenger When starting the Windows Messenger for the first time, its setup screen is displayed. (However, the screen is not displayed if the Windows Messenger setup has already been done.) For more details, please read the corresponding Help file. 6 Click on [Audio Tuning Wizard...] in the [Tools] menu to confirm that equipment is connected correctly. 1 Click [Click here to sign in]. 7 Select [USB Video Device] in the [Camera] menu. 2 Select [.
With a PC 2 Type in your Sign-in name and password. • If you do not have your Sign-in name and password, click [Get one here]. 8 Confirm the [Panasonic DVC Web Camera Device] 1 is selected. 1 3 Please carefully read the displayed contents and then proceed. 4 After the setup is completed, sign in and start the MSN Messenger. 5 Click on [Audio Tuning Wizard...] in the [Tools] menu to confirm that equipment is connected correctly.
With a PC Using the DV STUDIO 3.1E-SE (PV-GS13: Supplied; PV-GS9/PV-GS15: Optional Software) Installing DV STUDIO 3.1E-SE (PV-GS13: Supplied; PV-GS9/PV-GS15: Optional Software) Following Software is not supplied for models PV-GS9 and PV-GS15; 1 Turn on the personal computer and start up Windows. • LSFT0577 (DV STUDIO 3.1E-SE) 2 Insert the CD-ROM into the personal computer’s CD-ROM drive.
With a PC To Use DV STUDIO 3.1E-SE • When using the USB Connection Kit, use of the AC Adaptor is recommended for the power supply of the Camcorder. 1 Set the Camcorder to Tape Recording Mode or Tape Playback Mode. Using the ArcSoft Software (PV-GS15: Supplied) There are 2 types of image editing software in the ArcSoft Software package. 1 PhotoBase 4 (Windows), PhotoBase 2 (Mac) • To capture images from a tape, set the Camcorder to Tape Playback Mode and insert a tape.
With a PC (For Macintosh) OS: Mac OS 9 – X 5 When the component selection screen is displayed, check the software to be installed and click [Next]. CPU: iMac, iBook or Power Book G4, Power Mac G4 or Power Mac G5 Graphic display: High Colour (16 bit or more) Desktop resolution of 800 x 600 pixels or more RAM: 64 MB or more (128 MB or more is recommended) Free hard disk space: At least 300 MB • This instruction manual describes only the procedures for installation, connection and startup.
With a PC To start ArcSoft Software (For Windows) 1 Select [Start] >> [All Programs (Programs)] >> [ArcSoft Software Suite] >> [PhotoBase 4] or [PhotoImpression 4]. • For other information about ArcSoft Software, please refer to Help. (For Macintosh) 1 Double-click the [PhotoImpression] or [PhotoBase] icon on the desktop. • For other information about ArcSoft Software, please refer to Help. For Information on ArcSoft Software: TEL: 1-510-440-9901 Web Site: www.arcsoft.
With a PC • If you install the USB Driver after the USB Cable is connected, or if you do not follow these Operating Instructions, the Camcorder will not be recognized correctly. In this case, delete the USB Driver from [Device Manager] as described below, uninstall the USB Driver, and re-install it. • With the Camcorder and personal computer connected via a USB Cable, open the [Device Manager]. Right-click [!DVC] 1 in [Ports] or [Other devices], and select [Uninstall].
Others Others Indications Various functions and the Camcorder status are shown on the screen. : Remaining Battery Power • When the battery power becomes low, the Indication changes. When the battery is discharged completely, ( ) Indication flashes. the R0:45: Remaining Tape Time • Remaining tape time is indicated in minutes. (When it reaches less than 3 minutes, the indication starts flashing.) Tape Recording Mode (p. 24) : : Tape Playback Mode (p. 35) : Card Recording Mode (p.
Others : GAINUP: (White): LED Video Light is on. (p. 26) Gain up Mode (p. 26) DPOF Setting completed (set to 1 or more picture) (p. 41) 640 : [640 x 480] Image size • For images not recorded with this Camcorder, the size display is determined as follows according to the number of horizontal pixels. 640 : 640 or more, less than 800 (The size is not displayed at under 640 pixels.
Others NO CARD: Card is not inserted. NO DATA: There are no recorded files in the card. UNPLAYABLE CARD: You are attempting to play back data which is not compatible with this Camcorder. CARD ERROR: The Card is not compatible with this Camcorder. COPY INHIBITED: Because the medium is protected by a copy guard, images cannot be recorded correctly. INCORRECT OPERATION: The Recording Start/Stop Button was pressed without connecting the USB cable to the PC in Picture Playback Mode.
Others • When using a card formatted by other equipment, intervals between recorded pictures may become large. • If you repeatedly record or erase pictures, intervals between recorded pictures may become large. In this case, back up your important data on a PC, and format your card using this Camcorder. Recording with the Built-in LED Video Light • The subject should be within 4.9 feet (1.5 metres) of the Camcorder. • Using the LED Video Light reduces battery time.
Others • The MagicPix Function makes the signal charging time of CCD longer up to 30 times longer than usual, so that dark scenes that are invisible to the naked eyes can be recorded brightly. For this reason, a bright dots may be seen, but this is not a malfunction. • The Image Stabilizer Function does not work. In this case, the [EIS] Indication flashes. • The Soft Skin Function and the Backlight Compensation Function cannot be changed.
Others In the following cases, using the [EFFECT1] on the [DIGITAL] Sub-Menu is not possible. • When the MagicPix Mode and Light are set (pp. 26, 29) In the following cases, using the Digital Effect Function is not possible. • Title in Multi-Picture Mode • If the [MULTI] Button is pressed while self-recording Mirror Mode (p. 26) is used, the still picture is displayed from the upper right corner of the screen, but, in reality, the picture is recorded from the upper left corner as usual.
Others • If the number of images that can be recorded on a Card is small, you may not be able to create a title. Adding a Title • The Title In Function and Digital Effects cannot be used simultaneously. • The Title In Function and RapidFire Consecutive Photoshot cannot be used simultaneously. • When a title is displayed in Tape Playback Mode, the title is not output from the DV Terminal. • The Multi-Picture Mode cannot be used once the title is inserted.
Others • Do not use near a cell phone because doing so may cause noise to adversely affect the picture and sound. • Recordings on the tape may be damaged, or images may be distorted, by strong magnetic fields created by speakers or large motors. • Electromagnetic wave radiation generated by a microprocessor may adversely affect the Camcorder, causing the disturbance of images and sounds.
Others When [ DEW ] blinks in red • The Power Indicator Lamp blinks for about 1 minute and then the Camcorder automatically turns off. Leave it for about 2 to 3 hours. 3 Turn the Camcorder on again, set it to the Tape Recording/Playback Mode and then check if the condensation indication disappears. Especially in cold conditions, dew may be frozen. In this case, it may take more time before the condensation indication disappears.
Others Cautions for Storage Before storing the Camcorder, take the Cassette out and detach the Battery. Store all the components in a dry place with a relatively stable temperature. (Recommended Temperature: 59 °F to 77 °F (15 °C to 25 °C), Recommended Humidity: 40 % to 60 %) Camcorder • Wrap it with a soft cloth to prevent dust from getting into the Camera. • Do not leave the Camcorder in places that expose it to high temperature.
Others Lens Hood • Is the power source connected correctly? (p. 16) The Camcorder power is turned off automatically. Battery • Is the Battery fully charged? Charge it with the AC Adaptor. (p. 16) • Are you using the Battery in an extremely cold place? In cold places, the operating time of the Battery becomes shorter. (p. 68) • Has the Battery worn out? If the operating time is still too short even after the Battery is fully charged, the Battery has worn out.
Others Although the Camcorder is correctly connected to a TV, playback images cannot be seen. Playback picture is not clear. • Is [PICT QUALITY] on the [CARD] Sub-Menu set to [NORMAL] or [ECONOMY]? If recording is done with it set to [NORMAL] or [ECONOMY], images with fine details may include a mosaic-like pattern. Set [PICT QUALITY] to [FINE]. (p. 25) Photoshot Playback images do not look normal.
Others Explanation of Terms Digital Video System In a digital video system, images and sounds are converted into digital signals and recorded on a tape. This complete digital recording is capable of recording and playback with minimal image and sound deterioration. In addition, it automatically records data, such as Time Code and Date/Time, as digital signals.
Others Specifications Digital Camcorder Information for your safety Power Source: DC 7.2/7.8 V Power Consumption: Recording 4.5 W Recording Format: Mini DV (Consumer-use Digital Video SD Format) Tape Used: 6.35 mm digital video tape Recording/Playback Time: SP: 80 min.; LP: 120 min.
Others Camcorder Accessory System Accessory # Figure Description PV-DAC11A-K AC Adaptor with AC Cable and DC Cable CGR-D08A/1B 800 mAh/1 h 30 min, Battery Pack CGR-D16A/1B 1 600 mAh/3 h, Battery Pack CGP-D28A/1B 2 800 mAh/5 h, Battery Pack CGR-D53A/1K 5 300 mAh/9 h, Battery Pack PV-DDC9-K DV Interface Cable (i.
Others Warranty Panasonic Canada Inc. 5770 Ambler Drive, Mississauga, Ontario L4W 2T3 PANASONIC PRODUCT – LIMITED WARRANTY Panasonic Canada Inc. warrants this product to be free from defects in material and workmanship and agrees to remedy any such defect for a period as stated below from the date of original purchase.
Others Index A I S AC Adaptor .......................16, 66 ArcSoft Software ....................55 Audio Dubbing ........................44 Auto Focus .............................71 Iris...........................................32 SD Memory Card....................58 Self-timer Recording...............27 Self Recording ........................26 Sepia Mode ............................33 Shutter Speed ........................32 Simultaneous Motion/ Still Record Mode .................24 Slide Show ..
Panasonic Canada Inc. 5770 Ambler Drive, Mississauga, Ontario L4W 2T3 (905) 624-5010 www.panasonic.ca Montréal: 3075 Louis A. Amos, Lachine, Québec H8T 1C4 (514) 633-8684 Toronto: 5770 Ambler Drive, Mississauga, Ontario L4W 2T3 (905) 238-2181 Calgary: 6835 8th Street N.E.
Caméscope numérique Manuel d’utilisation (Modèle PV-GS15 illustré) Modèles PV-GS9 PV-GS13 PV-GS15 Il est recommandé de lire attentivement ce manuel avant d’utiliser I’appareil. Conserver ce manuel. [Pour PV-GS13/PV-GS15] [Pour PV-GS13/PV-GS15] Pour de I’aide, composez le 1-800-561-5505 ou visitez notre site Internet à www.panasonic.
Renseignements Merci d’avoir choisi Panasonic! Vous avez acheté l’un des appareils les plus perfectionnés et les plus fiables actuellement sur le marché. Utilisé selon les directives, il vous apportera ainsi qu’à votre famille des années de plaisir. Veuillez prendre le temps de remplir la case ci-contre. Le numéro de série se trouve sur l’étiquette située sur le dessous de votre caméscope. Conservez le présent manuel afin de pouvoir le consulter au besoin.
ATTENTION: POUR ÉVITER UN INCENDIE, DES CHOCS ÉLECTRIQUES OU DE L’INTERFÉRENCE, N’UTILISER QUE LES ACCESSOIRES RECOMMANDÉS. ATTENTION: POUR ÉVITER LES CHOCS ÉLECTRIQUES, INTRODUIRE LA LAME LA PLUS LARGE DE LA FICHE DANS LA BORNE CORRESPONDANTE DE LA PRISE ET POUSSER JUSQU’AU FOND. ATTENTION: AFIN DE PRÉVENIR TOUT RISQUE D’EXPLOSION, NE REMPLACER LE BLOC-BATTERIE QU’AVEC UN BLOC-BATTERIE IDENTIQUE OU ÉQUIVALENT.
Directives importantes 1. Lire les instructions – Les instructions concernant la sécurité et le fonctionnement de l’appareil doivent être lues avant l’utilisation. 2. Conserver les instructions – Le manuel d’utilisation devrait être conservé pour consultation ultérieure. 3. Tenir compte des avertissements – Tous les avertissements figurant sur l’appareil et dans le manuel d’utilisation doivent être respectés. 4.
15. Lignes de transmission d’électricité – L’antenne extérieure ne doit pas être située près de lignes de transmission d’électricité ou de circuits d’éclairage ou d’alimentation, ou à un endroit où elle pourrait tomber sur des lignes ou circuits. Au moment de l’installation de l’antenne extérieure, il faut s’assurer d’éviter tout contact avec ces lignes de transmission ou ces circuits, car cela pourrait causer une décharge électrique fatale. 16.
Avant d’ouvrir l’emballage du CD-ROM (PV-GS13 (LSFT0577)/PV-GS15 (LSFT0575): fourni; PV-GS9: logiciel en option), veuillez lire ce qui suit.
Le présent manuel convient aux modèles PV-GS9, PV-GS13 et PV-GS15, même si seul ce dernier est utilisé pour les illustrations. Les caractéristiques peuvent être différentes d’un modèle à l’autre ; aussi, est-il recommandé de lire attentivement les instructions. Différences entre les modèles Modèle PV-GS9 PV-GS13 PV-GS15 Bloc-batterie (fourni) Carte mémoire CD-ROM Câble USB CGR-D08R (800 mAh) Logiciel en option En option f2,1 – 42 mm, F1.8 – 3.
Table des matières Préface Renseignements .................................................2 Mesures de sécurité ............................................2 Directives importantes .........................................4 Précautions .........................................................5 Accord de licence ................................................6 Différences entre les modèles .............................7 Guide sommaire ................................................
Mode lecture Lecture d’un enregistrement sur bande.............35 Repérage d’une scène pour la lecture ..............35 Lecture au ralenti (Avec télécommande seulement) ....................36 Lecture fixe/Lecture avance fixe........................36 Fonctions de recherche par index (Avec télécommande seulement) ....................37 Fonction de lecture zoom (Avec télécommande seulement) ....................37 Lecture avec effets numériques ........................
Préface Guide sommaire 1 Fixer la batterie à l’adaptateur secteur et la charger. Mise en place de la carte (Pour PV-GS13/PV-GS15) 1 Appuyer sur le loquet d’ouverture [OPEN▼] 1 et sortir l’écran à cristaux liquides 2 dans le sens de la flèche. 2 1 • Charger complètement la batterie avant de l’utiliser. • Débrancher le câble c.c., puisque la batterie ne sera pas chargée s’il est branché à l’adaptateur secteur. • Les voyants de marche [POWER] et de charge [CHARGE] s’allument et la charge s’amorce.
Préface Enregistrement d’images fixes sur bande (PV-GS9 seulement) 2 Régler la molette de sélection de mode sur le mode de lecture de bande. 1 Régler la molette de sélection de mode sur la position de mode d’enregistrement sur bande. (PV-GS13/ (PV-GS9) PV-GS15) 3 Appuyer sur la touche [ la cassette. ] pour rebobiner 2 Appuyer sur la touche [PHOTO SHOT] en mode pause d’enregistrement. 4 Appuyer sur la touche [►] pour commencer la lecture.
Préface Préface Nomenclature (Commandes et accessoires) Accessoires standard Les accessoires fournis avec le caméscope figurent ci-dessous.
Préface 17 Touche de rebobinage/rétrospective [ 18 19 20 21 ] (p. 35) Commutateur de sélection de mode [AUTO/MANUAL/FOCUS] (p. 24, 30-32) Touche du menu [MENU] (p. 19) Touche d’écran multiple [MULTI] (p. 33) Touche d’image sur image [P-IN-P] (p. 34) Touche de réinitialisation [RESET] (p. 60, 70) 26 33 Prise de microphone [MIC] (PV-GS15 seulement) • Connecter à un microphone externe ou à un équipement audio. (Lorsque la prise est utilisée, le micro incorporé ne fonctionne pas.
Préface 45 46 62 47 48 57 58 59 60 61 49 45 Fixation de la bandoulière (p. 17) 46 Courroie de la poignée (p. 17) 47 Support de batterie 48 Commutateur d’éjection de la batterie [BATTERY RELEASE] (p. 16) 49 Emplacement pour fixation du trépied • Utilisé pour la fixation du caméscope sur un trépied en option. À l’aide de la télécommande sans fil, fournie avec le caméscope, il est possible de commander à distance la plupart des fonctions du caméscope.
Préface Télécommande En utilisant la télécommande Mise en place d’une pile de type button Avant d’utiliser la télécommande, mettre en place la pile de type bouton fournie. 1 Diriger la télécommande vers le capteur de télécommande 31 du caméscope et appuyer sur une touche adéquate. 1 Tout en appuyant sur le butoir 1 , retirer le support de la pile. Ensuite, retirer la pile de type bouton. 15° 15° 31 15° 15° 1 2 Installer la pile de type bouton en dirigeant sa face (+) vers le haut.
Préface Source d’alimentation 2 Fixer la batterie chargée au caméscope. Utilisation de l’adaptateur secteur 1 Connecter le cordon c.c. au caméscope. 2 Connecter le cordon c.c. à l’adaptateur secteur. 3 Connecter le cordon d’alimentation c.a. à l’adaptateur et le brancher dans une prise de courant. Débranchement de la source d’alimentation Régler le commutateur [OFF/ON] 44 sur [OFF].
Préface Courroie de la poignée Fixation de la bandoulière Utilisation comme courroie de transport Ajuster la courroie à votre main. Il est conseillé de fixer la bandoulière avant de sortir à l’extérieur pour éviter de faire tomber le caméscope. 1 Enfiler l’extrémité de la bandoulière dans le support de la bandoulière situé sur le caméscope et tirer la bandoulière. 1 Détacher la pointe de la courroie. 2 Ajuster la longueur de la courroie.
Préface Prévention d’effacements accidentels Ouvrir la languette de protection anti-effacement accidentel 1 sur la cassette (en la glissant dans la direction de la flèche [SAVE]) pour empêcher tout enregistrement. Pour permettre l’enregistrement, fermer la languette de protection (en la faisant glisser dans la direction de la flèche [REC]). 1 Mise en marche/arrêt du caméscope Mettre sous tension d’abord et sélectionner les modes ensuite.
Préface Utilisation du viseur/écran à cristaux liquides Utilisation du viseur Avant d’utiliser le viseur, régler le champ de vision de façon à ce que les indications dans le viseur soient claires et faciles à lire. 1 Extraire le viseur. 1 180° 2 90° Refermer l’écran à cristaux liquides Appuyer sur l’écran jusqu’à ce qu’il soit parfaitement verrouillé. 2 Effectuer le réglage en tournant le bouton de correction du viseur 35 . • S’assurer que le couvercle de la fente de la carte est fermé.
Préface • Le menu correspondant au mode sélectionné au moyen de la molette de sélection 40 s’affiche. 2 Appuyer sur la touche 15 pour confirmer la sélection du fichier. • Une fois le fichier sélectionné, procéder aux opérations voulues dans le menu. (La marche à suivre décrite ici ne sera pas répétée dans les instructions décrites plus loin dans le présent manuel.) 40 (PV-GS13/ (PV-GS9) PV-GS15) 2 Appuyer sur la touche [ / ] 13 16 pour sélectionner le sous-menu désiré.
Préface [AUDIO REC] Mode d’enregistrement audio (p. 23) [SCENE INDEX] Mode d’indexation des scènes (p. 37) [TAPE PLAYBACK MENU] Menu de lecture sur bande (PV-GS13/PV-GS15) (PV-GS9) [WIND CUT] Atténuation bruit du vent (p. 29) [ZOOM MIC] Microphone zoom (p. 27) [CINEMA] Enregistrement au format qualité cinéma (p. 29) 5) [DISPLAY] (Affichage) Sous-menu de configuration de l’affichage [DISPLAY] 1) [PLAYBACK] (Lecture) Sous-menu des fonctions de lecture [SEARCH] Mode d’affichage (p.
Préface 7) [INITIAL] (Configuration initiale) Sous-menu de configuration initiale [BLANK SEARCH] Recherche des blancs (p. 24) [AV JACK] Prise audio/vidéo (p. 13, 65) [REMOTE] Mode de pilotage par télécommande (p. 15) [BEEP SOUND] Tonalité d’avertissement (p. 61) [EVF ON/AUTO] Utilisation du viseur (p. 19) 6) [INITIAL] (Configuration initiale) Sous-menu de configuration initiale [AV JACK] Prise audio/vidéo (p. 13, 65) [REMOTE] Mode de pilotage par télécommande (p.
Préface 5) [LCD/EVF] (Écran à cristaux liquides/viseur) Sous-menu de configuration de l’écran/viseur [LCD/EVF SET] Réglage de l’écran/viseur (p. 19) [EVF ON/AUTO] Utilisation du viseur (p. 19) Recharge de la pile incorporée au lithium La pile incorporée au lithium assure le fonctionnement ] clignote, la pile de l’horloge. Si I’indication [ incorporée au lithium est presque épuisée. 6) [INITIAL] (Configuration initiale) Sous-menu de configuration initiale [AV JACK] Prise audio/vidéo (p.
Mode enregistrement Mode enregistrement Enregistrement Lors d’un enregistrement sur bande, régler la molette de sélection de mode 40 sur la position ]. d’enregistrement sur bande [ Pour l’enregistrement d’images fixes sur une carte mémoire, régler la molette de sélection 40 sur le ] (Pour mode d’enregistrement sur carte [ PV-GS13/PV-GS15). Si l’enregistrement est fait avec le commutateur [AUTO/MANUAL/FOCUS] 18 réglé sur [AUTO], le caméscope ajuste automatiquement la mise au point et l’équilibre du blanc.
Mode enregistrement • L’indication [BLANK] apparaît lors de la recherche des blancs. • 1 seconde environ avant la fin de la dernière scène enregistrée, le caméscope passe en mode pause d’enregistrement ou en mode lecture fixe. • S’il ne reste plus aucune partie blanche sur la cassette, le caméscope s’arrête à la fin de la cassette. Annulation de la recherche des blancs avant la fin Appuyer sur la touche [ ].
Mode enregistrement Nombre maximum d’images fixes pouvant être enregistrées sur une carte MultiMediaCard (en option) Enregistrement avec lampe à diode intégrée (Pour PV-GS13/PV-GS15) QUALITÉ DE FINE NORMAL ECONOMY L’IMAGE 8 Mo 45 95 190 • Ces valeurs peuvent varier selon le sujet photographié. Pour accentuer la richesse chromatique d’une scène. La fonction de gain (GAIN UP) s’utilise de pair avec la lampe à diode pour accroître l’éclairement. 1 Appuyer sur la touche [LIGHT] 11 .
Mode enregistrement 3 Régler le commutateur [OFF/ON] 44 sur [ON]. • Le caméscope sera prêt pour l’enregistrement dans seulement 1,3 seconde. • Le grossissement du zoom est affiché pendant quelques secondes. Annulation de l’activation rapide Maintenir la touche [QUICK START] enfoncée pendant environ 2 secondes et s’assurer que le voyant d’activation rapide est éteint. • Pour d’autres notes, voir à la page 62.
Mode enregistrement 2 Pour utiliser le zoom avant et arrière, appuyer sur la touche [W/T] 26 en direction [W] ou en direction [T]. Fonctions fondu à l’entrée et fondu en sortie Fondu à l’entrée Une entrée en fondu fait apparaître peu à peu les images et les sons à partir du noir au début d’une scène. 26 Annulation de la fonction zoom numérique Régler [TAPE RECORDING MENU] >> [CAMERA] >> [D.ZOOM] >> [OFF]. • Pour d’autres notes, voir à la page 62.
Mode enregistrement 2 Après la disparition totale de l’image, appuyer sur la touche d’enregistrement 43 pour arrêter l’enregistrement. Fonction de carnation Cette fonction permet d’adoucir les tons de chair. Pour des résultats de qualité optimale, veiller à ce que l’arrière-plan ne soit pas d’une couleur similaire à celle de la peau du sujet. Autrement, l’arrière-plan pourrait paraître estompé et mal défini. 1 Appuyer sur la touche [SOFT SKIN] 9 . 43 9 3 Relâcher la touche [FADE] 16 .
Mode enregistrement • Une bande noire apparaît dans le haut et le bas de l’écran. 1) [ ] Mode sports • Pour enregistrer des scènes qui impliquent des actions rapides telles que des scènes de sport. 2) [ ] Mode portrait • Les sujets en premier-plan apparaissent plus clairement que ceux en arrière-plan. 3) [ ] Mode éclairage faible • Permet un enregistrement plus claire d’une scène sombre. Désactivation du mode cinéma Régler [TAPE RECORDING MENU] >> [RECORDING] >> [CINEMA] >> [OFF].
Mode enregistrement 1) Réglage automatique [AWB] 2) Le réglage qui avait été précédemment réglé ] manuellement [ 3) Mode extérieur [ ] 4) Mode intérieur (filmer sous un éclairage incandescent) [ ] Pour continuer le réglage automatique ] 14 ou [ ] 17 Appuyer sur la touche [ jusqu’à ce que l’indication du réglage automatique de l’équilibre du blanc [AWB] s’affiche. Ou, alternativement, régler le commutateur [AUTO/MANUAL/FOCUS] sur [AUTO].
Mode enregistrement Réglage manuel de la vitesse d’obturation 3 Appuyer sur la touche [ ] 14 ou [ ] 17 pour régler l’ouverture du diaphragme. Portée de l’ouverture du diaphragme réglable Utile pour enregistrer les scènes à action rapide. CLOSE (Fermé), F16, ..., F2.0, OP (Ouvert) + 0dB, ..., OP + 18dB Lorsqu’une valeur plus proche de [CLOSE] est sélectionnée, l’image devient plus foncée. Lorsqu’une valeur plus proche de [OP + 18dB] est sélectionnée, l’image devient plus claire.
Mode enregistrement Effets numériques Ce caméscope offre un choix d’effets numériques qui permettent l’ajout d’effets spéciaux à la scène. Effets numériques 1 [EFFECT1] Sélection d’un effet numérique désiré Régler [TAPE RECORDING MENU] >> [DIGITAL] >> [EFFECT1] ou [EFFECT2] >> un effet numérique désiré. 1) MULTI 2) P-IN-P 3) WIPE Annulation de l’effet numérique Régler [TAPE RECORDING MENU] >> [DIGITAL] >> [EFFECT1] ou [EFFECT2] >> [OFF].
Mode enregistrement Effacer tous les multi-écrans capturés Lorsque les 9 multi-images sont affichées, appuyer sur la touche [MULTI]. • Si [MANUAL] a été sélectionné, appuyer sur la touche [MULTI] après que les 9 images aient été affichées. Pour afficher les multi-écrans à nouveau Appuyer sur la touche [MULTI] pendant 1 seconde ou plus.
Mode lecture Mode lecture Lecture d’un enregistrement sur bande La scène enregistrée peut être visionnée immédiatement après l’enregistrement. 1 Régler l’interrupteur [OFF/ON] 44 sur [ON]. Réglage du volume du son Pour régler le volume, pousser la touche [W/T] 26 de manière que l’indication [VOLUME] s’affiche. Pousser la touche [W/T] vers la position [T] pour monter le volume ou vers la position [W] pour le baisser. L’indication [VOLUME] s’éteint une fois le réglage terminé.
Mode lecture Fonction de recherche à vitesse variable La vitesse de lecture ou de la recherche d’image peut varier. 1 Pendant la lecture, appuyer sur la touche [►] 15 . • L’indication [1X ] apparaît. Les scènes enregistrées en mode standard (SP) sont reproduites à environ 1/5e de la vitesse normale. Les scènes enregistrées en mode LP sont reproduites à environ 1/3e de la vitesse normale. Retour à la lecture normale Appuyer sur la touche [►] 72 .
Mode lecture Fonctions de recherche par index (Avec télécommande seulement) Afin de faciliter la recherche d’une scène, ce caméscope enregistre automatiquement les signaux de l’index lors de l’enregistrement, comme expliqué ci-après. Signaux de l’index PhotoShot (PV-GS9) Ces signaux sont automatiquement enregistrés lorsque les images fixes sont captées en mode PhotoShot. (p. 25) Les signaux de l’index PhotoShot ne sont pas enregistrés sur les images fixes captées en mode PhotoShot continu.
Mode lecture Changement de l’incrément du zoom 2 Changer l’incrément du zoom en appuyant sur la touche [W] ou [T] 62 de la télécommande. Lecture en mode volet et mode mixage (Avec télécommande seulement) 1 Appuyer sur la touche [►] 72 . 72 62 Changement de la zone agrandie d’une image 3 Appuyer sur la touche fléchée (▲, ◄, ►, ▼) 56 de la télécommande qui pointe sur la zone que vous voulez agrandir. Annulation de la fonction de lecture zoom Appuyer sur la touche [P.B. ZOOM] 74 de la télécommande.
Mode lecture Diaporama (Pour PV-GS13/PV-GS15) 1 Les images fixes sauvegardées sur la carte mémoire peuvent être présentées en séquence à la manière d’un diaporama. 2 1 Régler la molette de sélection de mode 40 sur la position mode de lecture d’image fixe. 3 1 2 3 Numéro du fichier-dossier Taille du fichier (p. 60) Numéro du fichier Sélection d’un fichier souhaité et visualisation 1 Régler la molette de sélection de mode 40 sur le mode de lecture d’image fixe. 40 40 2 Appuyer sur la touche [►] 15 .
Mode lecture Création d’un titre (Pour PV-GS13/ PV-GS15) Il est possible de créer un titre et l’enregistrer sur une carte mémoire. 1 Mode d’enregistrement: Régler la molette de sélection de mode 40 sur la position de mode d’enregistrement sur bande ou d’enregistrement sur carte. Régler la mise au point sur l’image devant être utilisée pour la création du titre.
Mode lecture 4 Appuyer sur la touche [ / / / ] 13 14 16 17 pour sélectionner un titre. 13 14 4 Appuyer sur la touche [ ] 14 ou [ ] 17 pour sélectionner le nombre d’images à imprimer, puis appuyer sur la touche [ENTER] 15 . • L’indication [ ] 2 s’affiche dans l’image sélectionnée. (p. 60) 16 17 • Le titre sélectionné est encadré. 5 Appuyer sur la touche [MULTI] 20 . • Le titre sélectionné s’affiche. • Il est possible d’enregistrer des images animées et des images fixes comportant des titres.
Mode lecture Effacement des fichiers enregistrés sur carte mémoire (Pour PV-GS13/ PV-GS15) Il est possible, au moyen des commandes du caméscope, de supprimer des fichiers enregistrés sur une carte mémoire. Un fichier supprimé ne peut être récupéré. Sélection et effacement d’un fichier ou d’un titre 1 Régler [PICTURE PLAYBACK MENU] >> [DELETE] >> [FILE BY SEL] >> [YES].
Mode lecture Lecture sur téléviseur En branchant votre caméscope à un téléviseur, les scènes enregistrées peuvent être visionnées sur l’écran du téléviseur. • Avant de les connecter, mettre le caméscope et le téléviseur hors marche. 1 Effectuer le branchement de la fiche [AV OUT] du caméscope avec les prises d’entrée audio et vidéo du téléviseur. [VIDEO IN] [S-VIDEO IN] [AUDIO IN] 2 1 (PV-GS15 seulement) • Raccorder le caméscope à un téléviseur au moyen du fil AV 1 .
Mode édition Mode édition Enregistrement sur carte à partir d’une cassette (Pour PV-GS13/PV-GS15) Il est possible d’enregistrer sur une carte mémoire des images fixes déjà enregistrées sur cassette. 1 Régler la molette de sélection de mode 40 sur le mode de lecture de bande. • Avant d’amorcer un enregistrement sur bande, repérer l’endroit sur la bande à partir duquel l’enregistrement doit se faire.
Mode édition Doublage audio pendant l’écoute d’un son enregistré Pendant la pause au doublage audio, régler [12bit AUDIO] du sous-menu [PLAYBACK] sur [ST2] et il est possible de vérifier le son enregistré. Lorsqu’un microphone (PV-GS15 seulement) est utilisé pour le doublage audio, un casque d’écoute permet d’entendre le son enregistré pendant le doublage audio. (Lors de l’utilisation d’un casque d’écoute, régler [AV JACK] du sous-menu [INITIAL] sur [OUT/PHONES].
Mode édition Enregistreur: 3 Tout en appuyant sur la touche [ REC] 54 , appuyer sur la touche [PLAY] 72 sur la télécommande. Ou bien, tout en maintenant la touche [REC] 7 enfoncée, appuyer sur la touche [BACK LIGHT] 10 sur le caméscope. 7 10 • L’enregistrement commence. Arrêt du doublage Appuyer sur la touche [ ] 69 ou [ ] 70 . ATTENTION: Échanger et(ou) copier des enregistrements non autorisés et protégés par des droits d’auteur est une infraction. • Pour d’autres notes, voir à la page 65.
Ordinateur personnel Ordinateur personnel Utilisation du logiciel avec un ordinateur Une image mémorisée dans une cassette DV ou carte mémoire peut être transférée sur un PC. Installation du logiciel (Pour Windows) 1 Allumer l’ordinateur et lancer Windows. 2 Introduire le CD-ROM dans le lecteur de CD-ROM. • [Setup Menu] (Menu d’installation) apparaît.
Ordinateur personnel 5 Suivre les instructions qui s’affichent à l’écran pour procéder à l’installation. • Cliquer sur [Next] (Suivant) et procéder à l’installation. • Après l’installation, cliquer sur [Finish] (Terminer). 6 Après l’installation du pilote USB, redémarrer l’ordinateur. • Pour terminer l’installation du pilote USB, redémarrer l’ordinateur. • Si d’autres logiciels ont été sélectionnés, le processus d’installation se poursuit après le redémarrage de l’ordinateur.
Ordinateur personnel [Windows 98 Deuxième Édition/Me/2000] [Windows XP] Déconnexion du câble USB (Avec Windows) Si le câble USB est déconnecté alors que l’ordinateur est en marche, un message d’erreur s’affiche. Dans un tel cas, cliquer sur [OK] et fermer la boîte de dialogue. Suivre les instructions ci-après pour déconnecter le câble. 1 2 1 Double-cliquer sur l’icône de tâches. dans la barre • La boîte de dialogue de déconnexion s’affiche.
Ordinateur personnel (Avec Macintosh) Environnement d’exploitation Débranchement du câble de raccordement USB en toute sécurité sur un ordinateur Macintosh SE: Ordinateur personnel IBM PC/AT compatible fonctionnant sous; Microsoft Windows XP Édition Familiale/Professionnel (Avec Windows XP, SP1 ou une version subséquente est nécessaire.
Ordinateur personnel Installation du pilote WebCam 1 Démarrer l’ordinateur personnel et lancer Windows. 2 Insérer le CD-ROM dans le lecteur de CD-ROM de l’ordinateur. 3 Connecter le caméscope au PC à l’aide du câble USB. • Quitter toutes les applications. • [Setup Menu] (Menu d’installation) apparaît. [PV-GS15: fourni] [PV-GS13: fourni; PV-GS9 /PV-GS15: logiciel en option] 3 Cliquer sur [WebCam Driver] (Pilote WebCam). • L’indication “WEB” s’affiche à l’écran à cristaux liquides du caméscope.
Ordinateur personnel Configuration de Windows Messenger Au premier lancement de Windows Messenger, son écran de configuration s’affiche. (Toutefois, l’écran ne s’affiche pas si la configuration de Windows Messenger a déjà été effectuée.) Pour de plus amples renseignements, consulter le fichier d’aide correspondant. 6 Cliquer sur [Audio Tuning Wizard...] (Assistant ajustement audio…) dans le menu [Tools] (Outils) pour confirmer la connexion adéquate de l’équipement.
Ordinateur personnel 2 Taper l’adresse de courriel et le mot de passe. • En l’absence d’un nom d’utilisateur et d’un mot de passe, cliquer sur [Get one here] (Obtenez-en un ici). 8 Confirmer que [Panasonic DVC Web Camera Device] (Caméra Web DVC Panasonic) 1 a été sélectionné. 1 3 Lire attentivement le contenu et suivre les instructions. 4 L’installation terminée, s’enregistrer et démarrer MSN Messenger. 5 Cliquer sur [Audio Tuning Wizard...
Ordinateur personnel Utilisation de DV STUDIO 3.1E-SE (PV-GS13: fourni; PV-GS9/PV-GS15: logiciel en option) Le logiciel et le matériel suivants ne sont pas fournis avec les modèles PV-GS9 et PV-GS15 : • LSFT0577 (DV STUDIO 3.1E-SE) • K1HA05CD0005 (câble USB) Le logiciel permet la captation d’une image fixe tirée d’une vidéo enregistrée sur une bande et de la transférer sur un ordinateur. Installation de DV STUDIO 3.
Ordinateur personnel Lancement de DV STUDIO 3.1E-SE • Si un ensemble de connexion USB est utilisé, il est recommandé de faire fonctionner le caméscope sur le secteur (adaptateur fourni). Logiciel ArcSoft (PV-GS15: fourni) Le logigiel ArcSoft comprend 2 types de logiciel. 1 PhotoBase 4 (Windows), PhotoBase 2 (Mac) 1 Régler le caméscope sur le mode enregistrement ou lecture sur bande.
Ordinateur personnel (Avec Macintosh) SE: Mac OS 9 à X UCT: 5 Si l’écran de sélection de composant s’affiche, cocher le logiciel à installer, puis cliquer sur le bouton [Next] (Suivant).
Ordinateur personnel Lancement d’un logiciel de la suite ArcSoft Software (Avec Windows) 1 Sélectionner [Démarrer] >> [Tous les programmes (Programmes)] >> [ArcSoft Software Suite] (Suite logicielle Arcsoft) >> [PhotoBase 4] ou [PhotoImpression 4]. • De plus amples renseignements au sujet du logiciel Arcsoft se trouvent dans le fichier d’aide. (Avec Macintosh) 1 Double-cliquer sur l’icône [PhotoImpression] ou [PhotoBase] sur le bureau.
Ordinateur personnel • Si le pilote de périphérique USB est installé lors du raccordement du câble USB, ou si les présentes instructions ne sont pas suivies, le caméscope ne sera pas reconnu correctement. Le cas échéant, supprimer le pilote USB sous [Gestionnaire de périphériques] tel que décrit ci-dessous, désinstaller le pilote USB et le réinstaller.
Autres Indications Autres Les différentes fonctions et conditions du caméscope devraient s’afficher sur l’écran. : Autonomie de la batterie • Lorsque la batterie est faible, l’indication change. Lorsque la batterie est complètement déchargée, ( ) clignote. l’indication R0:45: Temps d’enregistrement disponible • Le temps restant sur la cassette est indiqué en minutes. (Lorsqu’il arrive à moins de 3 minutes, l’indication commence à clignoter.) Mode enregistrement sur bande (p.
Autres : GAINUP: (Blanc): La lampe à diode est allumée. (p. 26) Mode de gain (p. 26) Paramétrage DPOF terminé (1 image ou plus) (p. 41) 640 : [640 x 480] format image • Pour ce qui est des images enregistrées sur un appareil autre que ce caméscope, la taille des images est déterminée comme suit en fonction du nombre de pixels horizontaux.
Autres NO CARD (Aucune carte): Aucune carte mémoire n’a été mise en place. NO DATA (Absence de données): Aucun fichier n’a été enregistrée sur la carte mémoire. UNPLAYABLE CARD (Carte mémoire illisible): Les données enregistrées sur la carte mémoire ne peuvent être prises en charge par le caméscope. CARD ERROR (Erreur de carte): La carte mémoire mise en place n’est pas compatible avec le caméscope.
Autres • Lors de l’utilisation d’une carte formatée sur un autre appareil, les intervalles entre les images enregistrées peuvent devenir plus longs. • Si l’enregistrement ou l’effacement d’images est fréquemment répété, les intervalles entre les images peuvent devenir plus longs. Dans une telle éventualité, faire une copie de sauvegarde des données importantes sur le disque dur de l’ordinateur, puis formater la carte sur ce caméscope.
Autres • La fonction MagicPix prolonge de 30 fois la durée de chargement du signal au CCD, ainsi les scènes sombres qui seraient invisibles à l’oeil nu peuvent être enregistrées brillamment. Pour cette raison, des points lumineux peuvent apparaître, mais cela n’est pas un défaut de fonctionnement. • La fonction de stabilisation de l’image ne fonctionne pas. Le cas échéant, l’indication [EIS] clignote. • Les fonctions de carnation et de compensation de contre-jour ne peuvent pas être utilisées.
Autres Dans un tel cas, il n’est pas possible d’utiliser les effets numériques [EFFECT1] du sous-menu [DIGITAL]. • Lorsque le mode MagicPix et la lampe à diode sont activés. (p. 26, 29) Dans les conditions suivantes, il n’est pas possible d’utiliser les effets numériques. • Insertion d’un titre Mode écran multiple • Si on appuie sur la touche [MULTI] lorsque l’auto-enregistrement est utilisé en mode miroir (p.
Autres • Si le nombre d’images qui peut être enregistré sur une carte mémoire est restreint, il ne sera quelquefois pas possible de créer des titres. Insertion d’un titre • Les fonctions d’insertion de titre et d’effets numériques ne peuvent être utilisées simultanément. • Les fonctions d’insertion de titre et de prises de vues en rafale RapidFire ne peuvent être utilisées simultanément. • Lorsqu’un titre est affiché en mode lecture sur bande, le titre n’est pas sorti de la prise DV.
Autres • Si le caméscope est utilisé à proximité de téléphones cellulaires, leur interférence affecteront l’image et le son. • L’enregistrement sur la bande peut être endommagé, ou les images distordues, par le puissant champ électromagnétique créé par des enceintes acoustiques ou un moteur. • Les ondes électromagnétiques engendrées par un microprocesseur peuvent affecter le caméscope en provoquant des perturbations aux images et aux sons.
Autres Clignotement en rouge de [ DEW ] • Le voyant d’alimentation clignote pendant environ 1 minute, puis le caméscope s’arrête automatiquement. Attendre 2 à 3 heures avant de l’utiliser. 3 Établir le contact sur le caméscope, le régler sur le mode enregistrement/lecture sur bande, puis vérifier si l’indication de présence de condensation est toujours affichée. Dans les régions froides, la condensation peut geler.
Autres Précautions de rangement Avant de ranger le caméscope, sortir la cassette et retirer la batterie. Placer tous les composants dans un endroit sec où la température est relativement stable. Température recommandée: de 15 °C à 25 °C (59 °F à 77 °F), Taux d’humidité recommandé: de 40 % à 60 % Caméscope • L’envelopper dans un linge doux à l’abri de la poussière. • Ne pas laisser le caméscope à des endroits qui l’exposeraient à des températures élevées.
Autres Guide de dépannage Le caméscope ne peut être mis en marche. • La source d’alimentation est-elle bien branchée? (p. 16) Autre enregistrement • Ne pas fixer d’autres lentilles de conversion devant le parasoleil; il n’y a pas de monture pour leur fixation.
Autres Bien que le caméscope soit raccordé adéquatement à un téléviseur, aucune image ne s’affiche. L’image n’est pas claire. • Les têtes vidéo du caméscope sont-elles sales? Si oui, l’image ne peut être claire. (p. 67) La lecture ou l’enregistrement est impossible, l’écran demeure figé ou l’affichage a disparu.
Autres Explication des termes Système vidéo numérique Dans un système vidéo numérique, les images et les sons sont transformés en signaux numériques et enregistrés sur une bande. Cet enregistrement numérique complet est en mesure d’enregistrer et lire les images et les sons avec une distorsion minimale. De plus, il enregistre automatiquement les données telles que code temps et date/heure comme signaux numériques.
Autres Spécifications Caméscope numérique Informations pour votre sécurité Source d’alimentation: 7,2/7,8 V c.c.
Autres Accessoires N° de pièce Illustration Description PV-DAC11A-K Adaptateur secteur, câble c.c. et câble c.a. CGR-D08A/1B Bloc-batterie 800 mAh/1 h 30 min CGR-D16A/1B Bloc-batterie 1 600 mAh/3 h CGP-D28A/1B Bloc-batterie 2 800 mAh/5 h CGR-D53A/1K Bloc-batterie 5 300 mAh/9 h PV-DDC9-K Câble d’interface vidéo numérique (i.
Autres Garantie Panasonic Canada Inc. 5770 Ambler Drive, Mississauga, Ontario L4W 2T3 Certificat de garantie limitée Panasonic Panasonic Canada Inc. garantit cet appareil contre tout vice de fabrication et accepte, le cas échéant, de remédier à toute défectuosité pendant la période indiquée ci-dessous et commençant à partir de la date d’achat original.
Autres Index A I N Accessoires ............................73 Activation rapide .....................26 Adaptateur secteur ...........16, 66 Affichage date/heure ..............60 ArcSoft....................................55 Arrêt mémoire.........................71 Autonomie de la batterie ........59 Image fixe numérique .............25 Nettoyage des têtes vidéo numériques...........................67 Nombre d’ouverture................32 C Caméra Web ..........................50 Carte mémoire SD.....
Panasonic Canada Inc. 5770 Ambler Drive, Mississauga, Ontario L4W 2T3 (905) 624-5010 www.panasonic.ca Montréal: 3075 Louis A. Amos, Lachine, Québec H8T 1C4 (514) 633-8684 Toronto: 5770 Ambler Drive, Mississauga, Ontario L4W 2T3 (905) 238-2181 Calgary: 6835 8th Street N.E.