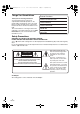
LSQT0861Eng.book 1 ページ 2004年12月22日 水曜日 午後2時34分 Operating Instructions Digital Video Camcorder Model No. PV-GS150 Before connecting, operating or adjusting this product, please read the instructions completely. Spanish Quick Use Guide is included. Guía para rápida consulta en español está incluida. Mini For USA assistance, please call: 1-800-211-PANA(7262) or, contact us via the web at: http://www.panasonic.com/contactinfo For Canadian assistance, please call: 1-800-561-5505 or visit us at www.
LSQT0861Eng.book 2 ページ 2004年12月22日 Things You Should Know Thank you for choosing Panasonic! You have purchased one of the most sophisticated and reliable products on the market today. Used properly, we’re sure it will bring you and your family years of enjoyment. Please take time to fill in the information on the right. The serial number is on the tag located on the underside of your Camcorder. Be sure to retain this manual as your convenient Camcorder information source.
LSQT0861Eng.book 3 ページ 2004年12月22日 水曜日 午後2時34分 FCC Note: This equipment has been tested and found to comply with the limits for a Class B digital device, pursuant to Part 15 of the FCC Rules. These limits are designed to provide reasonable protection against harmful interference in a residential installation. This equipment generates, uses, and can radiate radio frequency energy and, if not installed and used in accordance with the instructions, may cause harmful interference to radio communications.
LSQT0861Eng.book 4 ページ 2004年12月22日 水曜日 午後2時34分 IMPORTANT SAFETY INSTRUCTIONS 1) Read these instructions. 2) Keep these instructions. 3) Heed all warnings. 4) Follow all instructions. 5) Do not use this apparatus near water. 6) Clean only with dry cloth. 7) Do not block any ventilation openings. Install in accordance with the manufacturer’s instructions. 8) Do not install near any heat sources such as radiators, heat registers, stoves, or other apparatus (including amplifiers) that produce heat.
LSQT0861Eng.book 5 ページ 2004年12月22日 Precautions USE & LOCATION WARNING ≥TO AVOID SHOCK HAZARD ... Your Camcorder and power supply should not be exposed to rain or moisture. Do not connect the power supply or operate your Camcorder if it gets wet. Your Camcorder has been designed for outdoor use, however it is not designed to sustain direct exposure to water, rain, sleet, snow, sand, dust, or a direct splashing from a pool or even a cup of coffee.
LSQT0861Eng.book 6 ページ 2004年12月22日 水曜日 午後2時34分 Before opening the CD-ROM package, please read the following. End User License Agreement (for USB Driver, Video Stream Driver and MotionDV STUDIO) You (“Licensee”) are granted a license for the Software defined in this End User Software Agreement (“Agreement”) on condition that you agree to the terms and conditions of this Agreement.
LSQT0861Eng.book 7 ページ 2004年12月22日 水曜日 午後2時34分 Article 5 Reverse Engineering, Decompiling or Disassembly Licensee may not reverse engineer, decompile, or disassemble the Software, except to the extent either of them is permitted under law or regulation of the country where Licensee resides. Matsushita, or its distributors or dealers will not be responsible for any defects in the Software or damage to Licensee caused by Licensee’s reverse engineering, decompiling, or disassembly of the Software.
LSQT0861Eng.book 8 ページ 2004年12月22日 水曜日 午後2時34分 Contents Before using Quick Guide ................................................... Accessories ................................................... Parts identification and handling.................... The one-touch free-style grip belt .................. Using the LCD monitor .................................. Using the viewfinder ...................................... Power supply .................................................
LSQT0861Eng.book 9 ページ 2004年12月22日 Playback mode Playing back tape .......................................... Slow-motion playback/ frame-by-frame playback ............................ Variable-speed search function ..................... Playback on TV.............................................. Playing back card .......................................... Deleting files recorded on a card ................... Formatting a card........................................... Protecting files on a card .........
LSQT0861Eng.book 10 ページ 2004年12月22日 水曜日 午後2時34分 Before using Quick Guide ª Charging the battery 1 Connect the AC main lead to the AC adaptor ª Inserting/removing a card 1 Open the LCD monitor and then open the card slot cover. and the AC main socket. 2 Put the battery on the battery mount by aligning the mark, and then securely plug it in. 2 Insert/remove the card into/from the card slot. ª Fitting the battery Push the battery against the battery holder and slide it until it clicks.
LSQT0861Eng.book 11 ページ 2004年12月22日 水曜日 午後2時34分 Before using ª Playing back tape ≥Set to Tape Playback Mode. ª Recording on a tape ≥Set to Tape Recording Mode. start recording. 2 Press the recording start/stop button again to pause recording. ; PC PC 1 Press the recording start/stop button to 1 Operate with joystick. 1/;: Playback/Pause 6: Rewind/Review playback (Reverts to playback with the 1/; icon.) 5: Fast forward/Cue playback (Reverts to playback with the 1/; icon.
LSQT0861Eng.book 12 ページ 2004年12月22日 水曜日 午後2時34分 Before using Parts identification and handling Before using Accessories ª Camcorder The following are the accessories supplied with this product. (1) (5) (2) (3) 1) (6) PV-DAC14D 2) K2GJ2DZ00018 3) K2CA2CA00025 (4) 4) (7) (8) CR2025 CGA-DU12 5) K2KC4CB00018 N2QAEC000012 N2QCBD000030 6) 7) VFC3506-1A VFA0425B (1) (2) (3) (4) (5) 1) AC adaptor, DC cable, AC cable -16- CAUTION: This unit will operate on 110/120/220/240 V AC.
LSQT0861Eng.book 13 ページ 2004年12月22日 水曜日 午後2時34分 Before using (16) (17) (18) (19) (20) (21) (22) (13) (14) (27) Power LCD button [POWER LCD] -23Power LCD lamp -23(28) Mode select switch [AUTO/MANUAL/ FOCUS] -27-, -38-, -40(29) Card access lamp -19(30) DV terminal [DV] -48(31) Card slot cover -18(32) Card slot -18- (15) (34) (23) S-VIDEO (35) (36) (13) Viewfinder -16-, -75(33) Due to limitations in LCD production technology, there may be some tiny bright or dark spots on the viewfinder screen.
LSQT0861Eng.book 14 ページ 2004年12月22日 水曜日 午後2時34分 Before using 2 2 1 1 (42) (42) Lens hood In order to remove the lens hood, rotate it counter-clockwise 1. In order to fit it, put into slot 2, and then rotate it clockwise. ≥The lens hood has a built-in lens cover. (40) (40) Tripod receptacle This is a hole for attaching the Camcorder to optional tripod. (Please carefully read the operating instructions for how to attach the tripod to the Camcorder.
LSQT0861Eng.book 15 ページ 2004年12月22日 水曜日 午後2時34分 Before using ≥Hold the Camcorder without covering the microphones or the sensors with your hands. ª To restore the strap to the grip belt ≥When returning the grip belt to the grip belt attachment, press the lock cover 1 and check if the grip belt is securely locked. 1 Using the LCD monitor You can record the image while viewing it on the LCD monitor. 1 Put a finger on the LCD monitor release and pull the LCD monitor out in the direction of the arrow.
LSQT0861Eng.book 16 ページ 2004年12月22日 水曜日 午後2時34分 Before using Using the viewfinder ª Extending the viewfinder 1 Pull out the viewfinder and extend it by pulling the extension knob. ª Charging lamp Lights up: Charging Goes off: Charging completed Flashing: The battery is over discharged (discharged excessively). In a while, the lamp will light up and normal charging will start.
LSQT0861Eng.book 17 ページ 2004年12月22日 水曜日 午後2時34分 Before using ª Removing the battery While sliding the [BATT] lever, slide the battery (or the DC input lead) to remove it. BATT ≥Hold the battery with your hand so it does not fall. Charging time and recordable time The times shown in the table below show the times at a temperature of 68oF (25oC) and a humidity of 60%. This is just a guide. If the temperature is higher or lower than the specified value, the charging time will become longer.
LSQT0861Eng.book 18 ページ 2004年12月22日 水曜日 午後2時34分 Before using ª When the cassette holder does not come out ≥Close the cassette cover completely, and then open it again completely. ≥Check if the battery has run down. ª When the cassette holder cannot be housed ≥Set the [OFF/ON] switch to [OFF], then to [ON] again. ≥Check if the battery has run down. ª Inserting/removing the cassette ≥When the cassette holder is in motion, do not touch anything except the [PUSH] mark.
LSQT0861Eng.book 19 ページ 2004年12月22日 水曜日 午後2時34分 Before using ª Card access lamp Using the lens cover For the lens protection, be sure to close the lens shutter when not in use. 1 Rotate the lens cover open/close ring. ≥When the Camcorder accesses the card (reading, recording, playback, erasing, etc.), the access lamp lights up. ≥If the following operations are performed when the access lamp is lit, then the card or the recorded data may be damaged or the Camcorder may malfunction.
LSQT0861Eng.book 20 ページ 2004年12月22日 水曜日 午後2時34分 Before using How to use the joystick Rotate the mode dial to select the desired mode. 1 Rotate the mode dial. ≥Set your desired mode to 1. ª Basic joystick operations Operations on the menu screen and selection of files to be played back on the multi-image display Move the joystick up, down, left, or right to select an item or file, and then push in the center to set it.
LSQT0861Eng.
LSQT0861Eng.book 22 ページ 2004年12月22日 水曜日 午後2時34分 Before using 7 Press the joystick to determine the setting. Using the menu screen For each individual menu, please refer to -61-. 1 Press the [MENU] button. MENU ª To exit the menu screen Press the [MENU] button. ≥The menu corresponding to the mode selected by the mode dial is displayed. ≥Do not switch the mode dial when the menu is displayed. 2 Move the joystick up or down in order to select the top menu.
LSQT0861Eng.book 23 ページ 2004年12月22日 水曜日 午後2時34分 Before using Setting date and time Adjusting LCD monitor/viewfinder If the screen shows the incorrect date/time, then adjust it. ≥Set to Tape Recording Mode or Card Recording Mode. 1 Set [BASIC] >> [CLOCK SET] >> [YES]. ª Adjusting the brightness and color 2 Move the joystick left or right in order to select the item to be set. Then move the joystick up or down to set the desired value. ≥The year will change as follows: 2000, 2001, ..., 2089, 2000, ..
LSQT0861Eng.book 24 ページ 2004年12月22日 水曜日 午後2時34分 Before using ª Changing the picture quality on the Using the remote control LCD monitor 1 Set [SETUP] >> [LCD AI] >> [DYNAMIC] or [NORMAL]. [DYNAMIC]: The image on the LCD monitor becomes clear and vivid. Optimum contrast and brightness are set depending on the scenes recorded. Clear and brilliant images are presented. (The effect will vary depending on the images recorded.) [NORMAL]: Switches to the standard picture quality.
LSQT0861Eng.book 25 ページ 2004年12月22日 水曜日 午後2時34分 Before using (14) Recording start/stop button [START/ STOP] ¢ (15) Playback button [1] (16) Fast forward/cue button [5] (17) Enter button [ENTER] -22¢ means that these buttons function in the same manner as the corresponding buttons on the Camcorder. ª Install a button-type battery Install the button-type battery supplied in the remote control before using it. 1 While pressing the stopper 1, pull out the battery holder.
LSQT0861Eng.book 26 ページ 2004年12月22日 水曜日 午後2時34分 Before using Magic Wire Remote Control with Narration Mic ª About the clip (on the backside) This controller can be used from different high and low angles. It is also handy when a tripod is used. When you do not use the controller, attach the clip to the grip belt. Left-handed users can use this Camcorder more easily.
LSQT0861Eng.book 27 ページ 2004年12月22日 水曜日 午後2時34分 Record mode Record mode Check before recording Check the following by a trial recording before important events such as weddings in order to verify that the image recording and audio recording work properly and that you know how to use the Camcorder. ª Basic Camcorder holding ª About auto mode ≥Set the [AUTO/MANUAL/FOCUS] switch to [AUTO], and color balance (white balance) and focusing will be adjusted automatically.
LSQT0861Eng.book 28 ページ 2004年12月22日 水曜日 午後2時34分 Record mode Recording on a tape ≥Open the lens cover. (-19-) (When the Camcorder is turned on with the lens cover closed, the automatic white balance adjustment may not function properly. Please turn the Camcorder on after opening the lens cover.) ≥Set to Tape Recording Mode. PC 1 Press the recording start/stop button to start recording. 2 Press the recording start/stop button again to pause recording.
LSQT0861Eng.book 29 ページ 2004年12月22日 水曜日 午後2時34分 Record mode Check the recording The last image recorded is played back for 2 to 3 seconds. After checking, the Camcorder will be set to a recording pause. ≥Set to Tape Recording Mode. 1 Press the joystick during the recording pause until the icon 1 appears. 2 Move the joystick down to select the recording check icon [ ]. Recording still pictures onto a card (Photoshot) ≥Set to Card Recording Mode.
LSQT0861Eng.book 30 ページ 2004年12月22日 水曜日 午後2時34分 Record mode ≥For the number of still pictures to be recorded on a card, refer to -78-. ≥The sound cannot be recorded. ≥While data is being recorded on a card, do not operate the mode dial. ≥When the access lamp is lit, do not insert or remove a card. ≥Another product may degrade or not play back data recorded on this Camcorder. ≥If set [PICT. QUALITY] >> [ ], mosaic-pattern noise may appear on a playback image depending on the picture content.
LSQT0861Eng.book 31 ページ 2004年12月22日 水曜日 午後2時34分 Record mode Zoom in/out function You can zoom in up to 10k optically. ≥Set to Tape/Card Recording Mode. 1 Wide-angle recording (zoom out): Push the [W/T] lever towards [W]. Close-up recording (zoom in): Push the [W/T] lever towards [T]. ª To use the zoom microphone function Interlocked with the zooming operation, the microphone will clearly capture sounds far away with the tele-shot or those in the vicinity with the wide-angle shot.
LSQT0861Eng.book 32 ページ 2004年12月22日 水曜日 午後2時34分 Record mode Quick start This Camcorder will be put into standby in approx. 1.7 seconds after the power is turned on. ≥This is only activated in the following cases. ≥A tape or a card is inserted, while the Tape Recording Mode is set. ≥A card is inserted, while the Card Recording Mode is set. 1 Press the [QUICK START] button. QUICK START ≥The quick start recording lamp lights up. (Press the button again to cancel it.) 2 Set the [OFF/ON] switch to [OFF].
LSQT0861Eng.book 33 ページ 2004年12月22日 水曜日 午後2時34分 Record mode MagicPix functions This function allows you to record color subjects in dark locations to stand out against the background. Attach the Camcorder to a tripod, and you can record images free from vibration. ≥Only manual focusing can be used. ≥Recorded scene is seen as if frames were missed. MagicPix function You can record dark locations brightly in color.
LSQT0861Eng.book 34 ページ 2004年12月22日 水曜日 午後2時34分 Record mode Fade in/fade out function Wind noise reduction function Fade in The image and audio gradually appear. Fade out The image and audio gradually disappear. ≥Set to Tape Recording Mode. 1 Press the joystick until the icon 1 appears. 2 Move the joystick left to select the fade icon [ ]. This reduces the wind noise coming into the microphone when recording. ≥Set to Tape Recording Mode. 1 Set [BASIC] >> [WIND CUT] >> [ON].
LSQT0861Eng.book 35 ページ 2004年12月22日 水曜日 午後2時34分 Record mode Using the built-in flash Use the built-in flash in order to record still pictures in dark places. ≥Set to Tape/Card Recording Mode. 1 Set [ADVANCE] >> [FLASH] >> [ß] or [ßA]. ≥If [ßA] is selected, then the flash will automatically flash as necessary. 2 Press the [PHOTO SHOT] button. PHOTO SHOT ≥The flash is activated and the picture will be recorded. ≥You cannot use the built-in flash unless the card is inserted in the Camcorder.
LSQT0861Eng.book 36 ページ 2004年12月22日 水曜日 午後2時34分 Record mode Self-timer recording You can record still pictures on a card using the timer. ≥Set to Card Recording Mode. 1 Set [BASIC] >> [SELF TIMER] >> [YES]. 2 Press the [PHOTO SHOT] button. PHOTO SHOT ≥After the recording lamp and the [ ] indication flashes for approx. 10 seconds, recording will start. After recording, the self-timer will be canceled. ≥You cannot press the [PHOTO SHOT] button half way.
LSQT0861Eng.book 37 ページ 2004年12月22日 水曜日 午後2時34分 Record mode Image stabilizer function RapidFire Consecutive Photoshot Reduces the jitter caused by hand movement when recording. ≥Set to Tape Recording Mode. 1 Set [ADVANCE] >> [EIS] >> [ON]. Records still pictures continuously at a certain interval. ≥Set to Card Recording Mode. 1 Set [BASIC] >> [PICTURE SIZE] >> [640]. 2 Set [ADVANCE] >> [BURST MODE] >> [ON]. EIS ª To cancel the image stabilizer function Set [ADVANCE] >> [EIS] >> [OFF].
LSQT0861Eng.book 38 ページ 2004年12月22日 水曜日 午後2時34分 Record mode Recording in various situations (Scene mode) When you record images in different situations, this mode automatically sets optimum shutter speeds and apertures. ≥Set to Tape/Card Recording Mode. 1 Set the [AUTO/MANUAL/FOCUS] switch to [MANUAL]. AUTO MANUAL FOCUS 2 Set [BASIC] >> [SCENE MODE] >> select the desired mode.
LSQT0861Eng.book 39 ページ 2004年12月22日 水曜日 午後2時34分 Record mode Recording in natural colors (White balance) The automatic white balance function may not reproduce natural colors depending on the scene or lighting conditions. If so, you can adjust the white balance manually. ≥Set to Tape/Card Recording Mode. 1 Set the [AUTO/MANUAL/FOCUS] switch to [MANUAL]. AUTO MANUAL FOCUS 2 Move the joystick down until the white balance indication appears. ([ AWB ] etc.
LSQT0861Eng.book 40 ページ 2004年12月22日 水曜日 午後2時34分 Record mode Manual focus adjustment If auto focusing is difficult due to the conditions, then manual focusing is available. ≥Set to Tape/Card Recording Mode. 1 Set the [AUTO/MANUAL/FOCUS] switch to [MANUAL]. AUTO MANUAL Manual shutter speed/aperture adjustment Shutter Speed Adjust it when recording fast-moving subjects. Aperture Adjust it when the screen is too bright or too dark. ≥Set to Tape/Card Recording Mode.
LSQT0861Eng.book 41 ページ 2004年12月22日 水曜日 午後2時34分 Record mode Manual iris/gain adjustment ≥If the value does not become “OPEN”, you cannot adjust the gain value. ≥If the gain value is increased, the noise on the screen increases. ≥Depending on the zoom magnification, there are iris values that are not displayed. ª Shutter speed range 1/60–1/8000 seconds: Tape Recording Mode 1/30–1/500 seconds: Card Recording Mode The shutter speed closer to 1/8000 is faster. ª Iris/gain value range CLOSE (Closed), F16, ..
LSQT0861Eng.book 42 ページ 2004年12月22日 水曜日 午後2時34分 Playback mode Playback mode Playing back tape ≥Set to Tape Playback Mode. PC 1 Operate with joystick. 1/;: Playback/Pause 6: Rewind/Review playback (Reverts to playback with the 1/; icon.) 5: Fast forward/Cue playback (Reverts to playback with the 1/; icon.) ∫: Stop ≥During cue/review playback, fast-moving images may show noise as a mosaic. ≥Before and after cue/review playback, the screen may become blue for a moment or images may be distorted.
LSQT0861Eng.book 43 ページ 2004年12月22日 水曜日 午後2時34分 Playback mode Frame-by-frame playback 1 During playback, press the [;] button on the remote control. 2 Press the [E] button or the [D] button on the remote control. V /REW PLAY FF/W STILL ADV PAUSE STILL ADV W VOL Variable-speed search function The speed of cue/review playback can be varied. (This operation is only available when using the remote control.) ≥Set to Tape Playback Mode and play back a tape. 1 Press the [VAR.
LSQT0861Eng.book 44 ページ 2004年12月22日 水曜日 午後2時34分 Playback mode Playback on TV ª To display the on-screen information Images recorded by this Camcorder can be played back on a TV. ≥Insert a recorded tape into this Camcorder. 1 Connect the Camcorder to a TV. The information displayed on the LCD monitor or the viewfinder (operation icon, time code and mode indication, etc.), date and time can be displayed on the TV. 1 Press the [OSD] button on the remote control.
LSQT0861Eng.book 45 ページ 2004年12月22日 水曜日 午後2時34分 Playback mode ª To display multiple playback files Multiple files on the card (6 files on 1 screen) are displayed. 1 Move the [s /VOLr] lever to switch the images. Towards [r]: Towards [s]: Full-screen display (Displays 1 image.) Multi-screen display (Displays 6 files on 1 screen.) ≥In the multi-screen display, ≥Move the joystick to select a file (The selected file will be encircled by a yellow frame) and press it.
LSQT0861Eng.book 46 ページ 2004年12月22日 水曜日 午後2時34分 Playback mode Formatting a card Please be aware that if a card is formatted, then all the data recorded on the card will be erased. Store important data on a personal computer, etc. ≥Set to Picture Playback Mode. 1 Set [ADVANCE] >> [CARD FORMAT] >> [YES]. 2 When the confirmation message appears, select [YES] and press the joystick in order to format the card.
LSQT0861Eng.book 47 ページ 2004年12月22日 水曜日 午後2時34分 Edit mode Edit mode Recording from a tape onto a card Still pictures can be recorded on a memory card from scenes that have already been recorded on a cassette. ≥Set to Tape Playback Mode. ≥Insert a tape which already has recorded contents and a card. 1 Start playback. Copying onto a DVD recorder or a VCR (Dubbing) Pictures recorded by the Camcorder can be stored on a DVD-RAM or other such media. Refer to the instructions for the recorder.
LSQT0861Eng.book 48 ページ 2004年12月22日 水曜日 午後2時34分 Edit mode ≥For more information, refer to the operating instructions for your TV set and recorder. ≥When you do not need functional indications or date and time indications, press the [OSD] button on the remote control for no indication. (When you connect the Camcorder and a recorder with the DV cable, these indications may not appear.
LSQT0861Eng.book 49 ページ 2004年12月22日 水曜日 午後2時34分 Edit mode Audio dubbing You can add music or narration to the recorded cassette. ≥Set to Tape Playback Mode. 1 Insert a Magic Wire Remote Control with Narration Mic or an external microphone securely into the [REMOTE/MIC] terminal as far as it will go. REMOTE/MIC ≥If a tape has a non-recorded portion when the tape is dubbed, images and sounds may be disturbed when this portion of the tape is played back.
LSQT0861Eng.book 50 ページ 2004年12月22日 水曜日 午後2時34分 Edit mode Printing pictures by directly connecting to the printer (PictBridge) To print pictures by directly connecting the Camcorder to the printer, use a printer compatible with PictBridge. (Read the operating instructions for the printer.) ≥Insert a card and set to Picture Playback Mode. 1 Connect the Camcorder and the printer with the supplied USB cable. 1 1 USB cable PictBridge ≥The [PictBridge] indication appears on the screen of the Camcorder.
LSQT0861Eng.book 51 ページ 2004年12月22日 水曜日 午後2時34分 With a PC With a PC Using the Camcorder with a PC An image stored on the DV Cassette can be transferred to your personal computer. ª Software Installation 1 Turn on Computer and start up Windows. 2 Insert supplied CD-ROM into the CD-ROM drive. ≥[Setup Menu] appears. 3 Select the software to be installed from [Setup Menu]. ≥USB Driver -51-: The USB driver to be installed is the dedicated Mass Storage Driver for Windows 98SE.
LSQT0861Eng.book 52 ページ 2004年12月22日 水曜日 午後2時34分 With a PC ≥Click [Next] and proceed with installation. ≥After completing the installation, Click [Finish]. 6 After the USB Driver is installed, please restart your computer. ≥Reboot the computer to finish installing USB driver. ≥Installation continues after the computer reboots if you selected additional software. ≥A message indicating a conflict between versions may be displayed during the installation. This will not cause a problem.
LSQT0861Eng.book 53 ページ 2004年12月22日 水曜日 午後2時34分 With a PC Free hard disk space: 250 MB or more Communication Speed: 56 kbps or faster is recommended Interface: USB 1.1 or more Graphic display: High Color (16 bit) or more Desktop resolution of 800k600 pixels or more Other requirements (to send/receive audio): Sound card Speaker or headphones Necessary software: Windows Messenger 5.0 or later (Windows XP) MSN Messenger (Windows 98SE/Me/2000) DirectX 9.
LSQT0861Eng.book 54 ページ 2004年12月22日 水曜日 午後2時34分 With a PC ≥When the Camcorder and personal computer (with Windows 2000) are connected via USB cable, a message, such as the one below, is displayed. However, testing by the manufacturer has confirmed functionality of this Camcorder with Windows 2000. Click [Yes] and proceed. ≥For Windows 98SE/Me users, “USB Audio Device” is required. Click [Next] and proceed. ≥If you use Windows 98SE, the OS installation CD may be required.
LSQT0861Eng.book 55 ページ 2004年12月22日 水曜日 午後2時34分 With a PC ≥For other information about MSN Messenger, please refer to Help. ≥When access is finished, close MSN Messenger, then turn off the Camcorder. Finally, disconnect the USB cable. Using MotionDV STUDIO 6 Click on [Audio Tuning Wizard...] in the [Tools] menu to confirm that equipment is connected correctly. 7 Select [USB Video Device] in the [Camera] menu. 8 Select [DVC] in the [Microphone] menu.
LSQT0861Eng.book 56 ページ 2004年12月22日 水曜日 午後2時34分 With a PC ª Installing Video Stream Driver Install this when your OS is Windows XP SP1 or later, or Windows 2000 SP4 or later. (When your OS is Window XP SP2 or later, installing video stream driver is not needed.) Video Stream Driver must be installed when you connect the Camcorder to the PC with the USB cable and use MotionDV STUDIO. DirectX 9.0b is installed in your PC if it is not installed beforehand. ≥When DirectX 9.
LSQT0861Eng.book 57 ページ 2004年12月22日 水曜日 午後2時34分 With a PC ª To start MotionDV STUDIO If you wish to capture data from a tape, set the Camcorder to Tape Playback Mode and insert the tape. If you wish to capture images from the lens of the Camcorder, set the Camcorder to the Tape Recording Mode and remove the tape and the card. With USB connection cable (supplied) OS: Windows XP SP1 or later Windows 2000 SP4 or later ≥The personal computer should be compatible with USB 2.0 Hi-Speed.
LSQT0861Eng.book 58 ページ 2004年12月22日 水曜日 午後2時34分 With a PC Connecting the Camcorder to a personal computer 1 Set the Mode Dial to Tape Recording Mode or Tape Playback Mode. 2 Set [BASIC] or [ADVANCE] >> [USB FUNCTION] >> [MOTION DV]. ≥You can record the video edited by the PC onto the Tape in the Camcorder. ≥When 2 or more USB devices are connected to a personal computer, or when devices are connected through USB hubs or by using extension cables, proper operation is not guaranteed.
LSQT0861Eng.book 59 ページ 2004年12月22日 水曜日 午後2時34分 With a PC If the above operation is not performed correctly, when data is copied from the personal computer to an SD Memory Card, the copied data may be damaged. When the following operations are performed, the same results will occur as when the USB cable is incorrectly removed (above). Therefore, it is imperative that the above operation is completed before proceeding. ≥When SD Memory Card is removed. ≥When Camcorder power is turned OFF.
LSQT0861Eng.book 60 ページ 2004年12月22日 水曜日 午後2時34分 With a PC ≥If you install the USB Driver or video stream driver while the USB Connecting cable is being connected, or if you do not follow these Operating Instructions, the Camcorder will not be recognized correctly. In this case, delete the USB Driver from [Device Manager] as described below, uninstall the USB Driver, and re-install it.
LSQT0861Eng.book 61 ページ 2004年12月22日 水曜日 午後2時34分 Menu Menu ª [TAPE PLAYBACK MENU] Menu list Menu figures and illustrations are provided for easy-to-understand explanations, and so they are different from the actual menu indications. ª [TAPE RECORDING MENU] 1) [BASIC] [DATE/TIME] -63[AV JACK] -63[USB FUNCTION] -53- 1) [BASIC] [SCENE MODE] -38[REC SPEED] -27[BLANK SEARCH] -29[WIND CUT] -34[CLOCK SET] -232) [ADVANCE] [PICT. QUALITY] -30[FLASH] -35[RED EYE] -35[FLASH LEVEL] -35[EIS] -37[H.
LSQT0861Eng.book 62 ページ 2004年12月22日 水曜日 午後2時34分 Menu ª [CARD RECORDING MENU] 1) [BASIC] [SCENE MODE] -38[PICT.
LSQT0861Eng.book 63 ページ 2004年12月22日 水曜日 午後2時34分 Menu Menus related to taking pictures Menus related to playback ª [H.SHOE MIC] Set to [LOWCUT] and this reduces low sound noise and wind noise hitting the stereo zoom microphone (VW-VMH3; optional) mounted on the smart accessory shoe. ª [AV JACK] This switches among the output settings of the AV/headphone terminal. [OUT/Ë]: Automatically switches between AV and headphone output.
LSQT0861Eng.book 64 ページ 2004年12月22日 水曜日 Menu Other menus ª [INITIAL SET] When there is a menu that cannot be selected depending on a combination of functions, set to [YES] for changing the menu settings back to the initial shipping condition. (Language setting cannot be back to the initial shipping condition.) ª [DEMO MODE] If you set to [DEMO MODE] >> [ON] without inserting a cassette and a card, the Camcorder is automatically set to the demonstration mode for introducing its functions.
LSQT0861Eng.book 65 ページ 2004年12月22日 水曜日 午後2時34分 Others Others LOWCUT : External microphone supporting the smart accessory shoe (LOW CUT) -13Sports mode (Scene mode) -38Portrait mode (Scene mode) -38Low light mode (Scene mode) Indications Various functions and the Camcorder status are shown on the screen. Basic indications r: Remaining battery power 0h00m00s00f: Time code 3:30:45PM: Date/Time indication Recording indications R 0:45: Remaining tape time ≥Remaining tape time is indicated in minutes.
LSQT0861Eng.book 66 ページ 2004年12月22日 水曜日 午後2時34分 Others 100-0001: Folder/File display No.00: File number 1: Number of DPOF Setting -46: Lock setting -46[640k480] Image size 640 : [1280k960] Image size 1280 : [1760k1320] Image size 1760 : ≥For images not recorded with this Camcorder, the size display is determined as follows according to the number of horizontal pixels.
LSQT0861Eng.book 67 ページ 2004年12月22日 水曜日 午後2時34分 Others UNABLE TO A.DUB (LP RECORDED): Audio dubbing cannot be performed because the original recording was in LP mode. UNABLE TO A.DUB: You are attempting to perform audio dubbing on a non-recorded tape. COPY PROTECTED: Images cannot be recorded correctly because the medium is protected by a copy guard. CARD ERROR: This card is not compatible with this Camcorder. You are attempting to format a failed card.
LSQT0861Eng.
LSQT0861Eng.book 69 ページ 2004年12月22日 水曜日 午後2時34分 Others Before requesting repair (Problems and solutions) Power/Body 1: The Camcorder power cannot be turned on. • Is the battery fully charged? Use a fully charged battery. • The battery protection circuit may have operated. Attach the battery to the AC adaptor for 5 to 10 seconds. If the Camcorder still cannot be used, the battery is faulty. 2: The Camcorder power is turned off automatically.
LSQT0861Eng.book 70 ページ 2004年12月22日 水曜日 午後2時34分 Others • There are some recording subjects and surroundings for which the auto focus does not operate correctly. (-76-) If so, use the manual focus mode to adjust the focus. (-40-) • Is the MagicPix function set? When the MagicPix function is working, focusing shifts into the manual mode. Indications 1: A sentence is displayed in red or yellow in the screen center. • Read the contents and respond to them. (-66-) 2: The time code becomes inaccurate.
LSQT0861Eng.book 71 ページ 2004年12月22日 水曜日 午後2時34分 Others • If the terminal for the AV cable is soiled, noises may appear on the screen. Wipe the soil off the terminal with a soft cloth, and then connect the cable to the AV terminal. • Is a picture containing a copyright protection signal (copy guard) being recorded? When a protected picture is played back by the Camcorder, mosaic-like patterns appear on the picture. Card 1: Recorded pictures are not clear. • Have you set [BASIC] >> [PICT.
LSQT0861Eng.book 72 ページ 2004年12月22日 水曜日 午後2時34分 Others Cautions for Use ª About condensation If you turn the Camcorder on when condensation occurs on the head or the tape, condensation Indication [3] (yellow or red) is displayed on the viewfinder or the LCD monitor and the messages [3DEW DETECT] or [3EJECT TAPE] (only when the tape is inserted) appear. If so, follow the procedure below. 3 in yellow: Dew is slightly adhering on the head or the tape. 3 in red: Dew is adhering on the head or the tape.
LSQT0861Eng.book 73 ページ 2004年12月22日 水曜日 午後2時34分 Others ª About the Camcorder ≥When the Camcorder is used for a long time, the Camcorder body becomes warm, but this is not a malfunction. Keep the Camcorder away from magnetized equipment such as a cellular phones, microwave ovens, TVs, and video game equipment. ≥If you use the Camcorder on or near a TV, images or sounds may be disturbed due to electromagnetic wave radiation.
LSQT0861Eng.book 74 ページ 2004年12月22日 水曜日 午後2時34分 Others After use, be sure to take the cassette out and detach the battery from the Camcorder or pull out the AC mains lead from AC mains socket. ≥The battery should be stored in a cool place free from humidity, with as constant temperature as possible. (Recommended temperature: 59oF to 77oF (15oC to 25oC), Recommended humidity: 40% to 60%) ≥Extremely high temperatures or low temperatures will shorten the life of the battery.
LSQT0861Eng.book 75 ページ 2004年12月22日 水曜日 午後2時34分 Others ª Folder structure of the card The folder structure of the card formatted by the Camcorder will be displayed on the PC as the illustration below. 256 ≥Up to 999 pictures can be recorded on 100CDPFP folder etc. ≥Files with the DPOF settings can be recorded on MISC folder. ª LCD monitor/Viewfinder LCD monitor ≥When the LCD monitor gets dirty, wipe it with a dry soft cloth.
LSQT0861Eng.book 76 ページ 2004年12月22日 水曜日 午後2時34分 Others ª White balance The image recorded by the Camcorder may become bluish or reddish under the influence of light sources. To avoid such phenomena, adjust the white balance. White balance adjustment determines the white color under different light sources. By recognizing which is the white color under sunlight and which is the white color under a fluorescent lamp, the Camcorder can adjust the balance among the other colors.
LSQT0861Eng.book 77 ページ 2004年12月22日 水曜日 午後2時34分 Others Specifications Digital Video Camcorder Information for your safety Power source: DC 7.9/7.2 V Power consumption: Recording 5.5 W Recording format: Mini DV (Consumer-use digital video SD format) Tape used: 6.
LSQT0861Eng.book 78 ページ 2004年12月22日 水曜日 午後2時34分 Others Maximum number of still pictures recordable on an SD Memory Card (optional) PICTURE SIZE PICTURE QUALITY [640] [ ] [1280] [ ] [ ] [1760] [ ] [ ] [ ] 32 MB 220 440 47 76 24 40 64 MB 440 880 98 158 52 84 128 MB 880 1760 187 302 100 161 256 MB 1760 3520 390 628 208 335 512 MB 3520 7040 774 1246 414 666 1 GB 7040 14080 1550 2495 831 1334 ≥The numbers shown in the table are approximations.
LSQT0861Eng.book 79 ページ 2004年12月22日 水曜日 午後2時34分 Others Camcorder Accessory System Accessory# Figure Description PV-DAC14 AC adaptor with AC Cable and DC Cables *CGR-DU06A/1B 640 mAh/Rechargeable Lithium Ion Battery Pack *CGA-DU12A/1B 1150 mAh/Rechargeable Lithium Ion Battery Pack *CGA-DU21A/1B 2040 mAh/Rechargeable Lithium Ion Battery Pack PV-DDC9 (For USA) PV-DDC9-K (For Canada) DV Interface Cable (i.
LSQT0861Eng.book 80 ページ 2004年12月22日 水曜日 午後2時34分 Others Camcorder Accessory Order Form (For USA Customers) Please photocopy this form when placing an order. 1. Palmcorder Model # 2. Items Ordered Accessory # Description Price Each Quantity Total Price Subtotal Your State & Local Sales Tax Shipping & Handling 6.95 Total Enclosed 3. Method of payment (check one) Check of Money Order enclosed (NO C.O.D.
LSQT0861Eng.book 81 ページ 2004年12月22日 水曜日 午後2時34分 Others Request for Service Notice (USA Only) Please photocopy this form when making a request for service notice, in the unlikely event this product needs service. Request for Service Notice: •Please include your proof of purchase. (Failure to do so will delay your repair.) •To further speed your repair, please provide an explanation of what is wrong with the unit and any symptom it is exhibiting.
LSQT0861Eng.book 82 ページ 2004年12月22日 水曜日 午後2時34分 Others Limited Warranty (For USA Customers) PANASONIC CONSUMER ELECTRONICS COMPANY, DIVISION OF PANASONIC CORPORATION OF NORTH AMERICA One Panasonic Way, Secaucus, New Jersey 07094 PANASONIC PUERTO RICO, INC. Ave. 65 de Infantería, Km. 9.
LSQT0861Eng.book 83 ページ 2004年12月22日 水曜日 午後2時34分 Others Customer Services Directory Service in Canada: As per Sevicenter listed in Canadian warranty information on page -84-. Obtain Product Information and Operating Assistance; locate your nearest Dealer or Servicenter; purchase Parts and Accessories; or make Customer Service and Literature requests by visiting our Web Site at: http://www.panasonic.com/consumersupport or, contact us via the web at: http://www.panasonic.
LSQT0861Eng.book 84 ページ 2004年12月22日 水曜日 午後2時34分 Others Warranty (For Canadian Customers) Panasonic Canada Inc. 5770 Ambler Drive, Mississauga, Ontario L4W 2T3 PANASONIC PRODUCT – LIMITED WARRANTY Panasonic Canada Inc. warrants this product to be free from defects in material and workmanship and agrees to remedy any such defect for a period as stated below from the date of original purchase.
LSQT0861Eng.book 85 ページ 2004年12月22日 水曜日 午後2時34分 Others Index ª Numerics ªP 0 Lux MagicPix function .................................33 Photoshot ...................................................... 29 PictBridge ...................................................... 50 Portrait Mode ................................................. 38 ªA AC Adaptor ..............................................16, 74 Aperture .........................................................40 Audio Dubbing ..............
LSQT0861Eng.book 86 ページ 2004年12月22日 水曜日 午後2時34分 Others Spanish Quick Use Guide/ Guía española para el uso rápido 4 Sólo cierre la tapa del cassette después de ª Carga de la batería 1 Conecte el cable eléctrico de CA al ª Insertar/quitar una tarjeta 1 Abra el monitor LCD, luego abra la tapa de la ranura de la tarjeta. adaptador de CA y a la toma de la red de CA. 2 Meta la batería en el respectivo soporte alineando la marca, luego encájela. que el respectivo compartimiento esté cabalmente alojado.
LSQT0861Eng.book 87 ページ 2004年12月22日 水曜日 午後2時34分 Others ª Grabación en una cinta ≥Ajuste al modo de grabación de cinta. ª Reproducción de la cinta ≥Ajuste al modo de reproducción de cinta. PC PC 1 Oprima el botón de inicio/parada de la grabación para empezar a grabar. 2 Oprima de nuevo el botón de inicio/parada de la grabación para detener brevemente la grabación. ; ª Grabación de imágenes fijas en una tarjeta (Photoshot) 1 Actúe en la palanca de mando.
LSQT0861Eng.book 88 ページ 2004年12月22日 水曜日 午後2時34分 Panasonic Consumer Electronics Company, Division of Panasonic Corporation of North America One Panasonic Way, Secaucus, NJ 07094 Panasonic Puerto Rico, Inc. Ave. 65 de Infantería, Km. 9.5, San Gabriel Industrial Park, Carolina, Puerto Rico 00985 Panasonic Canada Inc. 5770 Ambler Drive, Mississauga, Ontario, L4W 2T3 P LSQT0861 B S1204Nm1124 © 2004 Matsushita Electric Industrial Co., Ltd.
LSQT0861Fre.book 1 ページ 2004年12月22日 水曜日 午後2時36分 Manuel d’utilisation Caméscope numérique Modèle PV-GS150 Avant de raccorder, régler ou utiliser l’appareil, il est recommandé de lire attentivement le manuel d’utilisation. Mini Pour de I’aide, composez le 1-800-561-5505 ou visitez notre site Internet à www.panasonic.
LSQT0861Fre.book 2 ページ 2004年12月22日 水曜日 午後2時36分 Renseignements Merci d’avoir choisi Panasonic! Vous avez acheté l’un des appareils les plus perfectionnés et les plus fiables actuellement sur le marché. Utilisé selon les directives, il vous apportera ainsi qu’à votre famille des années de plaisir. Veuillez prendre le temps de remplir la case ci-dessous. Le numéro de série se trouve sur l’étiquette située sur le dessous de votre caméscope. Conservez le présent manuel afin de pouvoir le consulter au besoin.
LSQT0861Fre.book 3 ページ 2004年12月22日 水曜日 午後2時36分 Mesures de sécurité Mise en garde: Afin de prévenir tout risque d’incendie ou de chocs électriques, éviter d’exposer cet appareil à la pluie ou à une humidité excessive. Votre caméscope Ò est conçu pour faire l’enregistrement et la lecture en modes standard (SP) et longue durée (LP). Il est recommandé de n’utiliser que des cassettes portant la mention Ò .
LSQT0861Fre.book 4 ページ 2004年12月22日 水曜日 午後2時36分 Directives importantes 1) Lire attentivement ces instructions. 2) Conserver ces instructions. 3) Lire toutes les mises en garde. 4) Suivre toutes les instructions. 5) Ne pas utiliser cet appareil près d’une source d’eau. 6) Nettoyer qu’avec un chiffon sec. 7) Ne pas bloquer les évents d’aération. Installer l’appareil selon les instructions du fabricant.
LSQT0861Fre.book 5 ページ 2004年12月22日 Précautions Utilisation et emplacement AVERTISSEMENT ≥Pour éviter les chocs électriques ... Le caméscope et son bloc d’alimentation ne doivent pas être exposés à la pluie ou à une humidité excessive. Ne pas brancher le bloc d’alimentation ou faire fonctionner le caméscope s’ils sont mouillés.
LSQT0861Fre.book 6 ページ 2004年12月22日 水曜日 午後2時36分 Avant d’ouvrir l’emballage du CD-ROM, veuillez lire ce qui suit. Accord de licence - Utilisateur final (pour pilote USB, pilote Video Stream et MotionDV STUDIO) Il vous est concédé à vous-même (le “Titulaire de licence”) une licence d’utilisation pour le Logiciel défini dans le présent Contrat de licence de logiciel (le “Contrat”) à condition que vous acceptiez les termes et conditions du présent Contrat.
LSQT0861Fre.book 7 ページ 2004年12月22日 水曜日 午後2時36分 Article 5 Analyse par rétrotechnique, décompilation ou désassemblage Le Titulaire de licence ne doit pas analyser par rétrotechnique, décompiler ou désassembler le Logiciel, sauf dans la mesure où l’une de ces opérations est autorisée par la législation ou la réglementation du pays de résidence du Titulaire de licence.
LSQT0861Fre.book 8 ページ 2004年12月22日 水曜日 午後2時36分 Table des matières Avant utilisation Guide sommaire ............................................ Accessoires ................................................... Identification des pièces et manipulation ....... Courroie de la poignée de style libre ............. Utilisation de l’écran à cristaux liquides (ou ACL)...................................................... Utilisation du viseur........................................ Source d’énergie...............
LSQT0861Fre.book 9 ページ 2004年12月22日 Mode lecture Lecture d’une bande ...................................... Lecture au ralenti/lecture image par image ... Fonction de recherche à vitesse variable ...... Lecture sur un téléviseur ............................... Lecture sur carte............................................ Effacement de fichiers enregistrés sur une carte ............................................................ Formatage d’une carte...................................
LSQT0861Fre.book 10 ページ 2004年12月22日 水曜日 午後2時36分 Avant utilisation Guide sommaire ª Recharge de la batterie 1 Branchez le câble CA à l’adaptateur CA et à ª Insertion/retrait d’une carte 1 Ouvrez l’écran ACL puis ouvrez le couvercle de la fente de la carte. la prise secteur CA. 2 Mettez la batterie dans son logement en alignant les repères, puis branchez-la solidement. 2 Insérez/retirez la carte de la fente de la carte.
LSQT0861Fre.book 11 ページ 2004年12月22日 水曜日 午後2時36分 Avant utilisation ª Enregistrement sur une bande ≥Sélectionnez le mode d’enregistrement sur bande. ª Lecture d’une bande ≥Sélectionnez le mode de lecture sur bande. PC PC 1 Appuyez sur la touche de marche/arrêt 1 Utilisez la manette. d’enregistrement pour commencer l’enregistrement. 2 Appuyez sur la touche de marche/arrêt d’enregistrement à nouveau pour mettre l’enregistrement en pause.
LSQT0861Fre.book 12 ページ 2004年12月22日 水曜日 午後2時36分 Avant utilisation Avant utilisation Accessoires Ce qui suit sont les accessoires fournis avec ce produit.
LSQT0861Fre.book 13 ページ 2004年12月22日 水曜日 午後2時36分 Avant utilisation (16) (17) (18) (19) (20) (21) (22) (13) (14) (15) (23) S-VIDEO (24) Écran à cristaux liquides (ou ACL) -16-, -81- À cause de la limitation de la technologie des produits ACL, il peut y avoir quelques minuscules taches lumineuses ou sombres sur l’écran à cristaux liquides. Cependant, ceci n’est pas un mauvais fonctionnement et cela n’affecte pas les images enregistrées.
LSQT0861Fre.book 14 ページ 2004年12月22日 水曜日 午後2時36分 Avant utilisation (41) (39) (41) Attache de la dragonne 1 3 (39) Griffe porte-accessoires intelligente Le microphone stéréo directionnel/VW-VMH3 (optionnel) ou la lampe vidéo CC/VW-LDH3 (optionnelle) devraient être montés ici. ≥Lors de l’utilisation d’un accessoire sur la griffe porte-accessoires intelligente, l’alimentation est fournie par cet appareil.
LSQT0861Fre.book 15 ページ 2004年12月22日 水曜日 午後2時36分 Avant utilisation Courroie de la poignée de style libre ª Pour rétablir la courroie en tant que ª Pour l’utiliser comme une courroie à ≥En remettant la courroie de la poignée à son point d’attache, appuyez sur le couvercle du verrouillage 1 et vérifiez si la courroie de la poignée est sûrement verrouillée.
LSQT0861Fre.book 16 ページ 2004年12月22日 水曜日 午後2時36分 Avant utilisation Utilisation de l’écran à cristaux liquides (ou ACL) Vous pouvez enregistrer l’image pendant que vous la regardez sur l’écran ACL ouvert. 1 Mettez un doigt sur la zone d’ouverture de l’écran ACL et tirez en direction de la flèche. Utilisation du viseur ª Extraction du viseur 1 Tirez le viseur vers l’extérieur et extrayez-le en pinçant le bouton d’extension. OPEN ≥Le viseur s’éteindra. ≥Il peut s’ouvrir jusqu’à 90o.
LSQT0861Fre.book 17 ページ 2004年12月22日 水曜日 午後2時36分 Avant utilisation ª Voyant de recharge Lumière fixe: Recharge en cours Éteint: Recharge terminée Clignotant: La batterie est trop déchargée (recharge excessive). D’ici peu, le voyant s’allumera et la recharge normale commencera. Lorsque la température de la batterie est excessivement haute ou basse, le voyant [CHARGE] clignote et le temps de recharge sera plus long que d’habitude.
LSQT0861Fre.book 18 ページ 2004年12月22日 水曜日 午後2時36分 Avant utilisation ≥Lorsque vous utilisez le viseur et l’écran ACL simultanément tout en pivotant ce dernier face à vous pour vous enregistrer vous-même, en utilisant la fonction MAGICPIX à 0 lux, etc.. ≥Lorsque vous utilisez cet appareil avec l’écran ACL allumé en appuyant sur la touche [POWER LCD].
LSQT0861Fre.book 19 ページ 2004年12月22日 水曜日 午後2時36分 Avant utilisation Insertion/retrait d’une carte Avant l’insertion/retrait d’une carte, assurez-vous de mettre l’alimentation sur [OFF]. ≥Si la carte est insérée ou retirée avec l’appareil en contact, ce caméscope peut mal fonctionner ou les données enregistrées sur la carte peuvent être perdues. 1 Ouvrez l’écran ACL puis ouvrez le couvercle de la fente de la carte. 2 Insérez/retirez la carte de la fente de la carte.
LSQT0861Fre.book 20 ページ 2004年12月22日 水曜日 午後2時36分 Avant utilisation Utilisation du couvercle de l’obturateur Sélection d’un mode Tournez la molette de sélection de mode pour sélectionner le mode désiré. 1 Tournez la molette de sélection de mode. ≥Placez le mode désiré sur 1. 1 PC Pour la protection de l’objectif, assurez-vous de fermer le couvercle de l’obturateur lorsqu’il n’est pas utilisé. 1 Tournez la bague d'ouverture/fermeture du couvercle de l'obturateur.
LSQT0861Fre.book 21 ページ 2004年12月22日 水曜日 午後2時36分 Avant utilisation Comment utiliser la manette ª Opérations élémentaires de la manette Les opérations sur l’écran menu et la sélection des fichiers peuvent être lues avec un affichage multi images. Bougez la manette vers le haut, le bas, la gauche ou la droite pour sélectionner un élément ou un fichier, puis appuyez au centre pour le sélectionner. 2) Mode d’enregistrement sur bande (Le commutateur [AUTO/MANUAL/ FOCUS] est placé sur [MANUAL].
LSQT0861Fre.book 22 ページ 2004年12月22日 水曜日 午後2時36分 Avant utilisation Utilisation de l’écran de menu 5) Mode d’enregistrement sur carte (Le commutateur [AUTO/MANUAL/ FOCUS] est placé sur [MANUAL].) Pour chaque menu individuel, veuillez vous référez à la page -65-. 1 Appuyez sur la touche [MENU].
LSQT0861Fre.book 23 ページ 2004年12月22日 水曜日 午後2時36分 Avant utilisation 6 Bougez la manette vers le haut ou le bas de façon à sélectionner l’élément à régler. 3 Appuyez sur la touche [MENU] pour sortir de l'écran de menu. VAR. SEARCH MENU ENTER Paramétrage de la date et de l’heure 7 Appuyez sur la manette pour définir le réglage. Si l’écran présente une date/heure incorrecte, alors changez-la. ≥Réglez le mode d’enregistrement sur bande ou le mode d’enregistrement sur carte.
LSQT0861Fre.book 24 ページ 2004年12月22日 水曜日 午後2時36分 Avant utilisation Réglage de l’écran ACL/viseur ª Pour augmenter la luminosité de ª Réglage de la luminosité et du niveau l’écran ACL entier 1 Appuyez sur la touche [POWER LCD]. de la couleur 1 Sélectionnez [CONFIGURATION] >> [REGLAGE ACL] ou [REG. VISEUR] >> [OUI]. POWER LCD ≥Le voyant [POWER LCD] s’allume. ≥Si la touche [POWER LCD] est appuyée, l’écran ACL en entier deviendra environ deux fois plus brillant que la normale.
LSQT0861Fre.book 25 ページ 2004年12月22日 水曜日 午後2時36分 Avant utilisation Utilisation de la télécommande ª Télécommande L’utilisation de la télécommande fournie permettra de contrôler à peu près toutes les fonctions de ce caméscope. (12) Touche de pause [;] (13) Touche d’arrêt [∫] (14) Touche de marche/arrêt d’enregistrement [START/STOP] ¢ (15) Touche de lecture [1] (16) Touche d’avance rapide/recherche avant rapide [5] (17) Touche d’entrée [ENTER] -23- (1) (2) OSD DATE/ TIME PHOTO SHOT ¥REC A.
LSQT0861Fre.book 26 ページ 2004年12月22日 水曜日 午後2時36分 Avant utilisation ª Portée d’utilisation de la ª À propos de la pile de type bouton ≥Lorsque la pile de type bouton est épuisée, remplacez-la avec une pile neuve (numéro: CR2025). La pile est normalement prévue pour durer 1 an, mais cela dépend de la fréquence d’utilisation. ≥Tenir la pile de type bouton hors de la portée des enfants.
LSQT0861Fre.book 27 ページ 2004年12月22日 水曜日 午後2時36分 Avant utilisation Télécommande câblée avec microphone de narration ª À propos de la pince (à l’arrière) Cette télécommande peut être employée à partir de différents angles, grands et petits. Elle est aussi pratique quand on utilise un trépied. Lorsque vous n’utilisez pas la télécommande, fixez la pince à la courroie de la poignée. Les gauchers peuvent utiliser ce caméscope plus facilement.
LSQT0861Fre.book 28 ページ 2004年12月22日 水曜日 午後2時36分 Mode enregistrement Mode enregistrement Vérification avant enregistrement Contrôlez ce qui suit en essayant l’enregistrement avant des évènements importants comme un mariage de façon à vérifier que les images et le son enregistrés fonctionnent correctement et que vous savez vous servir du caméscope. ª Manipulation élémentaire du caméscope 1) ≥Réglage de la date/heure (-23-) ≥Réglage de l’écran ACL/viseur (-24-) ≥Préparez la télécommande.
LSQT0861Fre.book 29 ページ 2004年12月22日 水曜日 午後2時36分 Mode enregistrement Enregistrement sur une bande ≥Ouvrez le couvercle de l’obturateur. (-20-) (Lorsque le caméscope est allumé avec le couvercle de l’obturateur fermé, le réglage de la balance des blancs automatique peut ne pas fonctionner correctement. Veuillez allumer le caméscope après avoir ouvert le couvercle de l’obturateur). ≥Sélectionnez le mode d’enregistrement sur bande.
LSQT0861Fre.book 30 ページ 2004年12月22日 水曜日 午後2時36分 Mode enregistrement Enregistrement d’images fixes sur une carte tout en enregistrant les images sur une bande Vous pouvez enregistrer des images fixes pendant l’enregistrement d’images sur une bande. ≥Sélectionnez le mode d’enregistrement sur bande. 1 Appuyez à fond sur la touche [PHOTO SHOT] pendant l’enregistrement d’images sur une bande. Contrôle de l’enregistrement La dernière image enregistrée est lue pendant 2 à 3 secondes.
LSQT0861Fre.book 31 ページ 2004年12月22日 水曜日 午後2時36分 Mode enregistrement Enregistrement d’images fixes sur une carte (PhotoShot) ≥Sélectionnez le mode d’enregistrement sur carte. PC 1 Appuyez à mi-course sur la touche [PHOTO SHOT] afin de régler la mise au point. (Pour mise au point automatique uniquement) ≥Le diaphragme/valeur de gain est fixé et ce caméscope fait la mise au point des sujets automatiquement.
LSQT0861Fre.book 32 ページ 2004年12月22日 水曜日 午後2時36分 Mode enregistrement ª PhotoShot progressif Vous pouvez enregistrer des images fixes avec une plus haute qualité d’image et de photogrammes. (Vous ne pouvez pas activer/ désactiver la fonction PhotoShot progressif.) ≥En mode d’enregistrement sur bande, la fonction PhotoShot progressif peut être inutilisable selon les autres fonctions utilisées.
LSQT0861Fre.book 33 ページ 2004年12月22日 水曜日 午後2時36分 Mode enregistrement ª Fonction zoom numérique Si l’agrandissement du zoom excède 10 fois, alors la fonction de zoom numérique sera activée. La fonction de zoom numérique vous permet un agrandissement de 25k à 700k. 1 Sélectionnez [AVANCE] >> [ZOOM NUM.] >> [25k] ou [700k].
LSQT0861Fre.book 34 ページ 2004年12月22日 水曜日 午後2時36分 Mode enregistrement ª Pour annuler le démarrage rapide lorsque l’alimentation est réglée à [OFF] Appuyez et tenez la touche [QUICK START] enfoncée pendant environ 2 secondes. Le voyant s’éteindra et le caméscope sera complètement éteint. ≥Si la mise en attente dure environ 30 minutes, alors le voyant s’éteindra et le caméscope sera complètement éteint.
LSQT0861Fre.book 35 ページ 2004年12月22日 水曜日 午後2時36分 Mode enregistrement ≥Chaque pression vers le haut commute les modes. Désactivé # Fonction MAGICPIX # Fonction de MAGICPIX à 0 lux # Désactivé 3 (Dans le cas de la fonction MAGICPIX à 0 lux) Tournez l’écran ACL du côté de l’objectif. Mode de carnation Ceci permet à la couleur de la peau d’être enregistrée avec un ton doux. ≥Sélectionnez le mode d’enregistrement sur bande/carte. 1 Appuyez sur la manette jusqu’à ce que l’icône 1 apparaisse.
LSQT0861Fre.book 36 ページ 2004年12月22日 水曜日 午後2時36分 Mode enregistrement Fonction fondu d’ouverture/fondu de fermeture Fondu d’ouverture L’image et le son apparaissent graduellement. Fondu de fermeture L’image et le son disparaissent graduellement. ≥Sélectionnez le mode d’enregistrement sur bande. 1 Appuyez sur la manette jusqu’à ce que l’icône 1 apparaisse. 2 Bougez la manette vers la gauche pour sélectionner l’indicateur de fondu [ ].
LSQT0861Fre.book 37 ページ 2004年12月22日 水曜日 午後2時36分 Mode enregistrement ≥Lorsqu’on sélectionne [FLASH] >> [ßA] et que la vitesse d’obturation, le diaphragme ou le gain est réglé, l’indicateur (soit [ßA], [ßAi], ou [ßAj]) peut disparaître et le flash peut ne pas s’allumer. ≥L’utilisation du flash fixe la vitesse d’obturation à 1/750 s ou plus rapide que 1/500. ≥L’image peut ne plus être mise au point dans un endroit sombre. Dans ce cas, réglez la mise au point manuellement.
LSQT0861Fre.book 38 ページ 2004年12月22日 水曜日 午後2時36分 Mode enregistrement Enregistrement d’images pour téléviseur à grand écran Ceci vous permet d’enregistrer des images compatibles avec un téléviseur à grand écran. Fonction grand écran Les images sont enregistrées au format 16:9. Fonction cinéma Les images sont enregistrées avec une bande noire apparaissant en haut et en bas de l’écran de sorte qu’elles ressemblent à un film de cinéma. ≥Sélectionnez le mode d’enregistrement sur bande.
LSQT0861Fre.book 39 ページ 2004年12月22日 水曜日 午後2時36分 Mode enregistrement Prise de vues en rafale RapidFire Enregistre des images fixes en continu à un certain intervalle. ≥Sélectionnez le mode d’enregistrement sur carte. 1 Sélectionnez [BASE] >> [TAILLE IMAGE] >> [640]. 2 Sélectionnez [AVANCE] >> [RAFALE] >> [EN FONCT.].
LSQT0861Fre.book 40 ページ 2004年12月22日 水曜日 午後2時36分 Mode enregistrement ª Pour annuler la fonction de mode scène Sélectionnez [BASE] >> [MODE SCENE] >> [HORS FONCT] ou placez le commutateur [AUTO/MANUAL/FOCUS] sur [AUTO]. Mode sport ≥Pour la lecture au ralenti ou la pause à la lecture des images enregistrées, ce mode est exempt de secousse. ≥Pendant la lecture normale, le mouvement des images peut ne pas sembler régulier.
LSQT0861Fre.book 41 ページ 2004年12月22日 水曜日 午後2時36分 Mode enregistrement ≥Chaque fois que les conditions d’enregistrement changent, re-sélectionnez la balance des blancs pour un réglage correct. ª Pour régler la balance des blancs manuellement Sélectionnez [ ] à l’étape 3. Puis, tout en visualisant un sujet blanc sur l’écran entier, bougez la manette vers le haut pour sélectionner l’indicateur [ ].
LSQT0861Fre.book 42 ページ 2004年12月22日 水曜日 午後2時36分 Mode enregistrement ª Pour restaurer le réglage automatique Placez le commutateur [AUTO/MANUAL/FOCUS] sur [AUTO]. Réglage manuel de la vitesse d’obturation/ouverture Vitesse d’obturation Réglez-la pour enregistrer des sujets à mouvements rapides. Ouverture Réglez-la lorsque l’écran est trop lumineux ou trop foncé. ≥Sélectionnez le mode d’enregistrement sur bande/carte. 1 Placez le commutateur [AUTO/MANUAL/ FOCUS] sur [MANUAL].
LSQT0861Fre.book 43 ページ 2004年12月22日 水曜日 午後2時36分 Mode lecture Mode lecture Lecture d’une bande ≥Sélectionnez le mode de lecture sur bande. PC 1 Utilisez la manette. 1/;: Lecture/Pause 6: Rebobinage/Repérage arrière (Retour à la lecture avec l’icône 1/;). 5: Avance rapide/Recherche avant rapide (Retour à la lecture avec l’icône 1/;). ∫: Arrêt ≥Pendant la recherche avant rapide/repérage arrière rapide, les images à mouvement rapide peuvent avoir des parasites comme l’effet mosaïque.
LSQT0861Fre.book 44 ページ 2004年12月22日 水曜日 午後2時36分 Mode lecture Lecture au ralenti/ lecture image par image ª Pour revenir à la lecture normale Appuyez sur la touche [1] de la télécommande. ≥Sélectionnez le mode de lecture sur bande. (La lecture au ralenti peut uniquement être exécutée en utilisant la télécommande.) Lecture au ralenti Si l’image est enregistrée en mode SP, alors elle sera lue à une vitesse d’environ 1/5 de la vitesse normale.
LSQT0861Fre.book 45 ページ 2004年12月22日 水曜日 午後2時36分 Mode lecture Lecture sur un téléviseur ª Si l’image ou le son de ce caméscope Les images enregistrées par ce caméscope peuvent être lues sur un téléviseur. ≥Insérez une bande enregistrée dans ce caméscope. 1 Connectez le caméscope au téléviseur. ≥Vérifiez que les prises sont insérées aussi à fond que possible. ≥Vérifiez la prise connectée.
LSQT0861Fre.book 46 ページ 2004年12月22日 水曜日 午後2時36分 Mode lecture ª Pour afficher plusieurs fichiers en Lecture sur carte ≥Sélectionnez le mode de lecture sur carte. PC lecture Plusieurs fichiers d’une carte (6 fichiers sur 1 écran) sont affichés. 1 Bougez le levier [s /VOLr] pour commuter les images. 1 Utilisez la manette. Vers [r]: E: D: 1/∫: Lit l’image précédente. Lit l’image suivante. Amorce/arrêt du diaporama. (Lit les images fixes sur la carte dans l’ordre.
LSQT0861Fre.book 47 ページ 2004年12月22日 水曜日 午後2時36分 Mode lecture Effacement de fichiers enregistrés sur une carte Les fichiers effacés ne peuvent pas être restaurés. ≥Sélectionnez le mode de lecture sur carte. 1 Bougez la manette vers la gauche ou la droite pour sélectionner un fichier à effacer. ≥Vous pouvez sélectionner un fichier dans un affichage multi-écran. Après la sélection du fichier, appuyez sur la manette et affichez l’icône de l’opération. 2 Bougez la manette vers le bas pour sélectionner [ ].
LSQT0861Fre.book 48 ページ 2004年12月22日 水曜日 午後2時36分 Mode lecture Protection des fichiers sur une carte Les fichiers enregistrés sur une carte peuvent être verrouillés de façon à ce qu’ils ne soient pas effacés par erreur. (Même si les fichiers sont verrouillés, ils seront effacés si la carte est formatée.) ≥Sélectionnez le mode de lecture sur carte. 1 Sélectionnez [BASE] >> [PROTEGER] >> [OUI]. 2 Bougez la manette pour sélectionner un fichier à verrouiller, puis appuyez-la.
LSQT0861Fre.book 49 ページ 2004年12月22日 水曜日 午後2時36分 Mode édition Mode édition Enregistrement sur carte à partir d’une cassette Des images fixes peuvent être enregistrées sur une carte mémoire à partir de scènes déjà enregistrées sur une cassette. ≥Sélectionnez le mode de lecture sur bande. ≥Insérez une bande qui est déjà enregistrée et une carte. 1 Démarrez la lecture.
LSQT0861Fre.book 50 ページ 2004年12月22日 水曜日 午後2時36分 Mode édition 6 Bougez la manette vers le bas pour sélectionner l’icône [∫] pour arrêter la lecture. 7 Arrêtez l’enregistrement. ≥Pour plus d’informations, référez-vous aux instructions d’utilisation du téléviseur et de l’enregistreur. ≥Lorsque vous n’avez pas besoin d’indicateurs de fonctionnalités ou de l’indicateur de la date et de l’heure, appuyez sur la touche [OSD] de la télécommande pour n’avoir aucune indication.
LSQT0861Fre.book 51 ページ 2004年12月22日 水曜日 午後2時36分 Mode édition ª Pour annuler le mode veille pour l’enregistrement Lorsque le caméscope est en attente d’enregistrement, bougez la manette vers le bas et sélectionnez l’icône [∫]. ≥Ne branchez ou débranchez pas le câble DV pendant le doublage, ou il peut ne pas être terminé correctement. ≥Si vous avez doublé un film (vidéo bilingue, etc.
LSQT0861Fre.book 52 ページ 2004年12月22日 水曜日 午後2時36分 Mode édition ≥Si une bande a une partie non enregistrée lorsque la bande est doublée, les images et les sons peuvent être brouillés lorsque cette partie de la bande est lue. ª Avant l’enregistrement avec doublage audio ≥Sélectionnez le mode d’enregistrement sur bande. ≥Lorsque vous désirez conserver les sons originaux pris durant l’enregistrement, sélectionnez [CONFIGURATION] >> [ENR. AUDIO] >> [12 bits] pour prendre des images.
LSQT0861Fre.book 53 ページ 2004年12月22日 水曜日 午後2時36分 Mode édition ≥Lorsque [IMPR. DPOF] est sélectionné, les images seront imprimées aussitôt que vous aurez déterminé la taille du papier. 3 Bougez la manette vers la gauche ou la droite pour sélectionner l’image désirée, puis appuyez-la. 4 Sélectionnez le nombre d’impression désiré. ≥Vous pouvez sélectionner jusqu’à 9 impressions. 5 Sélectionnez le réglage de l’impression de la date.
LSQT0861Fre.book 54 ページ 2004年12月22日 水曜日 午後2時36分 Ordinateur personnel Ordinateur personnel Utilisation du logiciel avec un ordinateur Une image mémorisée sur une cassette DV peut être transférée sur un PC. ª Installation du logiciel 1 Allumer l’ordinateur et lancer Windows. 2 Introduire le CD-ROM fourni dans le lecteur de CD-ROM. ≥[Setup Menu] (Menu d’installation) apparaît. 3 Sélectionner le logiciel à installer à partir du [Setup Menu] (Menu d’installation).
LSQT0861Fre.book 55 ページ 2004年12月22日 水曜日 午後2時36分 Ordinateur personnel ª Installation du pilote de périphérique USB Lorsque le système d’exploitation est Windows 98 Deuxième Édition, installer le pilote de périphérique USB avant de raccorder le caméscope à l’ordinateur personnel à l’aide du câble de connexion USB. 1 Démarrer l’ordinateur personnel et lancer Windows. 2 Insérer le CD-ROM fourni dans le lecteur de CD-ROM de l’ordinateur. ≥Quitter toutes les applications.
LSQT0861Fre.book 56 ページ 2004年12月22日 水曜日 午後2時36分 Ordinateur personnel Utilisation comme caméra Web Lorsque le caméscope est raccordé à un ordinateur personnel, il est possible d’envoyer sur le réseau les images captées par le caméscope. Le signal audio peut aussi être échangé si l’ordinateur est configuré correctement. Nota: ≥Ne pas connecter le câble USB avant que le pilote Video Stream n’ait été installé.
LSQT0861Fre.book 57 ページ 2004年12月22日 水曜日 午後2時36分 Ordinateur personnel ≥L’installation de “DirectX 9.0b” terminée, l’ordinateur redémarre. ≥Ne pas retirer le CD-ROM. ≥L’installation peut prendre un certain temps. 4 Suivre les instructions qui s’affichent jusqu’à la fin de l’installation. ≥Cliquer sur [Next] (Suivant), puis lancer l’installation. ≥L’installation terminée, cliquer sur [Finish] (Terminer). 5 Cliquer sur [OK].
LSQT0861Fre.book 58 ページ 2004年12月22日 水曜日 午後2時36分 Ordinateur personnel ≥Si Windows XP est utilisé, les autres correspondants sur le réseau doivent utiliser Windows Messenger sous Windows XP. Si un système autre que Windows XP est utilisé, les autres correspondants reliés au réseau doivent utiliser MSN Messenger sous le même système d’exploitation, autre que Windows XP. ≥Si le caméscope est utilisé comme caméra Web, la qualité du signal vidéo à échanger dépend de l’état de la connexion Internet.
LSQT0861Fre.book 59 ページ 2004年12月22日 水曜日 午後2時36分 Ordinateur personnel 5 Cliquer sur [Audio Tuning Wizard...] (Assistant Ajustement audio…) dans le menu [Tools] (Outils) pour confirmer la connexion adéquate de l’équipement. 6 Sélectionner le microphone raccordé à l’ordinateur dans le menu [Microphone]. 7 Cliquer sur [Web Camera Settings…] (Paramètres de caméra Web…) dans le menu [Tools] (Outils). 8 Confirmer que [Panasonic DVC Web Camera Device] (Caméra Web DVC Panasonic) a été sélectionné.
LSQT0861Fre.book 60 ページ 2004年12月22日 水曜日 午後2時36分 Ordinateur personnel ª Installation de MotionDV STUDIO 1 Insérer le CD-ROM fourni dans le lecteur de CD-ROM de l’ordinateur. ≥Quitter toutes les applications. ≥[Setup Menu] (Menu d’installation) apparaît. 2 Cliquer sur [MotionDV STUDIO]. 3 Cliquer sur [Next] (Suivant). ≥Après avoir lu le contenu affiché, suivre les instructions d’installation. 4 Sélectionner le système vidéo.
LSQT0861Fre.book 61 ページ 2004年12月22日 水曜日 午後2時36分 Ordinateur personnel Si un autre nom que [Microsoft] est affiché ≥Mettre à jour le pilote en procédant comme suit. 1 Cliquer sur [Update Driver...] (Mettre à jour le pilote…). Raccordement du caméscope à un ordinateur personnel 1 Régler la molette de sélection de mode sur le mode d’enregistrement ou de lecture sur bande. 2 Régler [BASE] ou [AVANCE] >> [FONCTION USB] >> [MOTION DV].
LSQT0861Fre.book 62 ページ 2004年12月22日 水曜日 午後2時36分 Ordinateur personnel ≥Lorsqu’au moins 2 dispositifs USB sont connectés à l’ordinateur ou lorsque les dispositifs sont connectés au travers de ports USB ou si vous utilisez des rallonges, le bon fonctionnement n’est pas assuré. ≥Lorsque vous vous connectez à la borne USB du clavier, le fonctionnement normal n’est pas possible. Déconnexion du câble USB Si le câble USB est déconnecté alors que l’ordinateur est en marche, un message d’erreur s’affiche.
LSQT0861Fre.book 63 ページ 2004年12月22日 水曜日 午後2時36分 Ordinateur personnel Remarques ≥Microsoft®, Windows®, ® Messenger® Windows et DirectX sont des marques de commerce ou des marques déposées de Microsoft Corporation aux États-Unis et(ou) dans d’autres pays. ≥Intel®, Pentium® et Celeron® sont des marques déposées ou des marques de commerce de Intel Corporation. ≥Les diverses autres désignations, raisons sociales, marques de produits, etc.
LSQT0861Fre.book 64 ページ 2004年12月22日 水曜日 午後2時36分 Ordinateur personnel ª À propos de la carte mémoire SD Carte mémoire SD La carte mémoire SD est pratiquement de la même taille. Il s’agit d’une carte mémoire externe disponible avec des capacités de mémoire supérieures. Elle dispose d’une languette de protection pour éviter l’enregistrement de données et le formatage de carte, ainsi qu’une fonction de protection des droits d’auteur. ≥Le logo SD est une marque de commerce.
LSQT0861Fre.book 65 ページ 2004年12月22日 水曜日 午後2時36分 Menu Menu ª [MENU DE LECTURE SUR BANDE] Liste de menu Les figures et illustrations du menu sont présentées pour une meilleure compréhension des explications, et en effet elles sont différentes des indications réelles du menu. ª [MENU D’ENREGISTREMENT SUR BANDE] 1) [BASE] [MODE SCENE] -39[VITESSE ENR.] -28[RECH. BLANC] -30[COUPE VENT] -36[REG. HORLOGE] -232) [AVANCE] [QUALITE IMAGE] -32[FLASH] -36[YEUX ROUGES] -37[NIVEAU FLASH] -37[STAB. ELECTRO.
LSQT0861Fre.book 66 ページ 2004年12月22日 水曜日 午後2時36分 Menu ª [MENU D’ENREGISTREMENT SUR CARTE] 1) [BASE] [MODE SCENE] -39[QUALITE IMAGE] -32[TAILLE IMAGE] -32[RETARDATEUR] -37[REG. HORLOGE] -232) [AVANCE] [RAFALE] -39[FLASH] -36[YEUX ROUGES] -37[NIVEAU FLASH] -37[EFFET OBTUR.] -32[DATE/HEURE] -67[REGLAGE INITIAL] -683) [CONFIGURATION] [TEMOIN ENR.] -67[AFFICHAGE] -67[TELECOMMANDE] -26[BIP] -67[ACL-REG. IA] -24[REGLAGE ACL] -24[REG. VISEUR] -24[ECO.
LSQT0861Fre.book 67 ページ 2004年12月22日 水曜日 午後2時36分 Menu Menus liés à la prise de photos ª [GRIFFE MIC] Sélectionnez [PASSE-BAS] et cela réduit les petits parasites sonores et le bruit du vent contre le microphone stéréo directionnel (VW-VMH3; optionnel) monté sur la griffe porte-accessoires intelligente. ª [DATE/HEURE] Ceci commute entre l’indicateur de date et celui de l’heure. ≥Le caméscope enregistre automatiquement la date et l’heure de l’image prise sur la bande.
LSQT0861Fre.book 68 ページ 2004年12月22日 水曜日 午後2時36分 Menu Menus liés à la lecture Autres menus ª [PRISE AV] Ceci commute parmi les réglages de sortie de la prise AV/casque. [SORTIE/Ë]: Commute automatiquement entre la sortie AV et casque. [SORTIE]: Utilisez ce réglage lorsque l’image ou le son n’est pas diffusé correctement en [SORTIE/Ë]. ≥Lorsque vous utilisez le casque, sélectionnez [CONFIGURATION] ou [BASE] >> [PRISE AV] >> [SORTIE/Ë].
LSQT0861Fre.book 69 ページ 2004年12月22日 水曜日 午後2時36分 Autres Autres Indicateurs : Les différentes fonctions et le statut du caméscope sont affichés à l’écran. Indicateurs de base r: Autonomie de la batterie 0h00m00s00f: Code de temps 3:30:45PM: Indicateur Date/Heure Indicateurs d’enregistrement R0:45: Temps de bande restante ≥La durée de bande restante est indiquée en minutes. (Lorsqu’elle atteint moins de 3 minutes, l’indicateur commence à clignoter.
LSQT0861Fre.book 70 ページ 2004年12月22日 水曜日 午後2時36分 Autres (Rouge): Utilisation d’une carte qui ne peut pas être reconnue ( ): Qualité d’image PhotoShot -320: Nombre d’images PhotoShot restant (Lorsque le nombre restant atteint 0, l’indicateur rouge clignote.) : Diaporama -46PictBridge: Mode PictBridge -52100-0001: Affichage dossier/fichier No.
LSQT0861Fre.book 71 ページ 2004年12月22日 水曜日 午後2時36分 Autres CASSETTE ILLISIBLE (AUTRE FORMAT): Vous essayez de lire une partie de bande qui a été enregistrée avec un système de télévision différent. Cette cassette est incompatible. CARTE ILLISIBLE: Vous essayez de lire des données qui ne sont pas compatibles avec ce caméscope. DOUBLAGE AUDIO IMPOSS. (ENREGISTREMENT LP): Le doublage audio ne peut pas être effectué parce que l’enregistrement original a été effectué en mode LP.
LSQT0861Fre.book 72 ページ 2004年12月22日 水曜日 午後2時36分 Autres Fonctions qui ne peuvent pas être utilisées simultanément Certaines fonctions du caméscope ne fonctionnent pas ou ne peuvent pas être sélectionnées à cause de leurs spécifications. Le tableau ci-dessous montre des exemples de fonctions réduites par les conditions. Fonctions Conditions qui rendent inaccessibles les fonctions ≥Progressif ≥Lors d’un enregistrement sur une bande et une carte simultanément.
LSQT0861Fre.book 73 ページ 2004年12月22日 水曜日 午後2時36分 Autres ≥Effacement des ≥Lorsque la languette de fichiers protection d’écriture de la carte est placée sur [LOCK]. ≥Lorsque le fichier est protégé. ≥Formatage ≥Lorsque la languette de protection d’écriture de la carte est placée sur [LOCK]. ≥Doublage audio ≥La section de la bande enregistrée est en mode LP. ≥La section non enregistrée d’une bande. ≥Les sons émis par la prise DV.
LSQT0861Fre.book 74 ページ 2004年12月22日 水曜日 午後2時36分 Autres 5: Le caméscope ne peut pas être utilisé bien qu’il soit sous tension. Le caméscope ne fonctionne pas normalement. • Retirez la cassette et appuyez sur la touche [RESET]. (-76-) Si les conditions normales ne sont toujours pas restaurées, coupez l’alimentation. Puis, environ 1 minute plus tard, rallumez à nouveau. (L’exécution de l’opération ci-dessus lorsque le voyant d’accès est allumé peut détruire les données sur une carte.
LSQT0861Fre.book 75 ページ 2004年12月22日 水曜日 午後2時36分 Autres 4: L’indicateur de temps de bande restante ne correspond pas avec le temps de bande restante réel. • Si des scènes de moins de 15 secondes sont enregistrées en continu, le temps de bande restante ne peut pas être correctement affiché. • Dans certains cas, l’indicateur de temps de bande restante peut afficher un temps de bande restante qui est de 2 à 3 minutes plus court que le temps de bande restante réel.
LSQT0861Fre.book 76 ページ 2004年12月22日 水曜日 午後2時36分 Autres • Est-ce qu’une image contenant un signal de protection de droit d’auteur (protection de copie) est enregistrée? Lorsqu’une image protégée est lue par le caméscope, l’effet mosaïque apparaît sur l’image. Carte 1: Les images enregistrées ne sont pas nettes. • Avez-vous sélectionné [BASE] >> [QUALITE IMAGE] >> [ ]? Si l’enregistrement est fait avec ceci placé sur [ ], les images ayant de fins détails peuvent inclure un effet mosaïque.
LSQT0861Fre.book 77 ページ 2004年12月22日 水曜日 午後2時36分 Autres • Est-ce que le réglage de la télécommande est correct? • Avez-vous essayé de lire une bande sans l’insérer? Insérez une bande. • Avez-vous essayé de lire une bande ayant une protection de droits d’auteur (protection de copie)? Les images de la bande avec une protection de droits d’auteur (protection de copie) ne peuvent pas être affichées sur un ordinateur. (Le son de la bande peut être diffusé.
LSQT0861Fre.book 78 ページ 2004年12月22日 水曜日 午後2時36分 Autres Lorsque l’objectif est embué: Placez l’interrupteur [OFF/ON] sur [OFF] et laissez le caméscope dans ces conditions pendant 1 heure. Lorsque la température de l’objectif sera proche de la température ambiante, la buée disparaîtra naturellement.
LSQT0861Fre.book 79 ページ 2004年12月22日 水曜日 午後2時36分 Autres Pendant le transport du caméscope, ne le faites pas tomber et ne le cognez pas. ≥Un choc fort sur le caméscope peut casser son boîtier, créant un mauvais fonctionnement. N’utilisez jamais de benzène, de solvant ou d’alcool pour nettoyer le caméscope. ≥Avant le nettoyage, retirez la batterie ou retirez le câble CA de la prise. ≥Le boîtier de l’appareil peut être décoloré et la surface de finition écaillée.
LSQT0861Fre.book 80 ページ 2004年12月22日 水曜日 午後2時36分 Autres ª À propos de l’adaptateur CA ≥Si la batterie est chaude, la recharge demande plus de temps que d’habitude. ≥Si la température de la batterie est extrêmement haute ou extrêmement basse, le voyant [CHARGE] peut continuer de clignoter, et la batterie peut ne pas se charger. Après que la température de la batterie ait augmentée ou diminuée suffisamment, la recharge démarre automatiquement. Donc, attendez un moment.
LSQT0861Fre.book 81 ページ 2004年12月22日 水曜日 午後2時36分 Autres ª Écran ACL/Viseur Écran à cristaux liquides (ou ACL) ≥Si l’écran ACL se salit, essuyez-le avec un chiffon doux et sec. ≥Dans des endroits à changement de température radical, de la condensation peut se former sur l’écran ACL. Essuyez-le avec un chiffon doux et sec. ≥Si votre caméscope est extrêmement froid, l’écran ACL est légèrement plus foncé que d’habitude immédiatement après sa mise sous tension.
LSQT0861Fre.book 82 ページ 2004年12月22日 水曜日 午後2時36分 Autres ª Balance des blancs L’image enregistrée par ce caméscope peut devenir bleuâtre ou rougeâtre sous l’influence de sources de lumière. Pour éviter ce genre de phénomène, réglez la balance des blancs. Le réglage de la balance des blancs détermine la couleur blanche sous différentes sources de lumière.
LSQT0861Fre.
LSQT0861Fre.
LSQT0861Fre.book 85 ページ 2004年12月22日 水曜日 午後2時36分 Autres Accessoires du caméscope N°de pièce Illustration Description PV-DAC14 Adaptateur secteur avec câble c.a. et c.c. *CGR-DU06A/1B Bloc-batterie rechargeable au lithium-ion 640 mAh *CGA-DU12A/1B Bloc-batterie rechargeable au lithium-ion 1150 mAh *CGA-DU21A/1B Bloc-batterie rechargeable au lithium-ion 2040 mAh PV-DDC9-K Câble d’interface DV (i.
LSQT0861Fre.book 86 ページ 2004年12月22日 水曜日 午後2時36分 Autres Garantie Panasonic Canada Inc. 5770 Ambler Drive, Mississauga, Ontario L4W 2T3 Certificat de garantie limitée Panasonic Panasonic Canada Inc. garantit cet appareil contre tout vice de fabrication et accepte, le cas échéant, de remédier à toute défectuosité pendant la période indiquée ci-dessous et commençant à partir de la date d’achat original.
LSQT0861Fre.book 87 ページ 2004年12月22日 水曜日 午後2時36分 Autres Index ªA ªM Adaptateur CA .........................................17, 80 Microphone zoom .......................................... 33 Mise au point manuel .................................... 41 Mode de carnation ......................................... 35 Mode éclairage faible .................................... 39 Mode mer et neige ........................................ 39 Mode portrait .................................................
LSQT0861Fre.book 88 ページ 2004年12月22日 R Panasonic Canada Inc. 5770 Ambler Drive, Mississauga, Ontario L4W 2T3 (905) 624-5010 www.panasonic.ca 水曜日 午後2時36分 Montréal: 3075 Louis A. Amos, Lachine, Québec H8T 1C4 (514) 633-8684 Toronto: 5770 Ambler Drive, Mississauga, Ontario L4W 2T3 (905) 238-2181 Calgary: 6835 8th Street N.E., Calgary, Alberta T2E 7H7 (403) 295-3922 Vancouver: 12111 Riverside Way, Richmond, BC V6W 1K8 (604) 278-4211 © 2004 Matsushita Electric Industrial Co., Ltd.