SC-ALL5CD-EGEBGN~RQT0A22.book 1 ページ 2015年4月23日 木曜日 午後4時44分 Operating Instructions Compact Stereo System Model No. SC-ALL5CD Thank you for purchasing this product. Please read these instructions carefully before using this product, and save this manual for future use. Included Installation Instructions (l 2, 3 and 26, 27) The installation work should be done by a qualified installation specialist.
SC-ALL5CD-EGEBGN~RQT0A22.book 2 ページ 2015年4月23日 Caution for AC Mains Lead Before use Remove the connector cover. How to replace the fuse The location of the fuse differ according to the type of AC mains plug (figures A and B). Confirm the AC mains plug fitted and follow the instructions below. Illustrations may differ from actual AC mains plug. 1. Open the fuse cover with a screwdriver. Figure A 2. Replace the fuse and close or attach the fuse cover.
SC-ALL5CD-EGEBGN~RQT0A22.book 3 ページ 2015年4月23日 Battery ≥ Danger of explosion if battery is incorrectly replaced. Replace only with the type recommended by the manufacturer. ≥ Mishandling of batteries can cause electrolyte leakage and may cause a fire. – Remove the battery if you do not intend to use the remote control for a long period of time. Store in a cool, dark place. – Do not heat or expose to flame.
SC-ALL5CD-EGEBGN~RQT0A22.book 4 ページ 2015年4月23日 木曜日 午後4時44分 Control reference guide Top view Side view 1※ 2※ 7 8 5 3※ 9 10 11 12 13 14 15 4※ 5※ 6※ 16 17 18 1 2 3 4 5 Standby/on switch (Í/I) Touch to switch the unit from on to standby mode or vice versa. In standby mode, the unit is still consuming a small amount of power. Open or close the sliding door Basic playback control buttons Adjust the volume (0 (min) to 50 (max)) Select the audio source “CD” ----------. “BLUETOOTH” ----------.
SC-ALL5CD-EGEBGN~RQT0A22.book 5 ページ 2015年4月23日 木曜日 午後4時44分 Connections 1 Connect the antenna. This unit can receive DAB+ and FM stations with the DAB antenna. Adhesive tape (not supplied) Be sure to tighten the nut fully. 2 DAB indoor antenna (supplied) Connect the AC mains lead after all other connections are completed. This unit consumes a small amount of AC power (l 28) even when turned off.
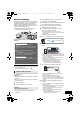
SC-ALL5CD-EGEBGN~RQT0A22.book 6 ページ 2015年4月23日 木曜日 午後4時44分 Inserting media ∫ Connecting a USB device ≥ Insert the USB device directly. Do not use any USB extension cable. ≥ Please disconnect the USB device if you finish using. ≥ Before removing the USB device, select a source other than “USB”. ∫ Inserting a CD The label side ≥ Make sure to tilt the disc so as not to touch the sliding door. ≥ Do not open the sliding door manually. ∫ Charging a device Charging starts when a device (rated value: 5 V/1.
SC-ALL5CD-EGEBGN~RQT0A22.book 7 ページ 2015年4月23日 Network settings You can stream music from an iOS device (iPhone/ iPad/iPod), an AndroidTM device or a PC (Windows) to this system’s speakers by using the Qualcomm® AllPlayTM smart media platform or DLNA feature. To use these features, this system must join the same network as the compatible device. ≥ Please update the system’s software after the network settings are complete.
SC-ALL5CD-EGEBGN~RQT0A22.book 8 ページ 9 2015年4月23日 Select “Connect” to apply the settings. 午後4時44分 ∫ Using the WPS PIN code 1 ●●●●●●●● 木曜日 2 Press [RADIO/EXT-IN] on the remote control repeatedly to select “NETWORK”. To enter “WPS PIN” mode 1 Press [SETUP] on the remote control repeatedly to select “NET SETUP” and then press [OK]. 2 Press [3, 4] on the remote control to select “WPS PIN” and then press [OK]. ≥ On the unit’s display, “SUCCESS” appears when the connection is established.
SC-ALL5CD-EGEBGN~RQT0A22.book 9 ページ 2015年4月23日 To make network-related settings You can change this system's name on the network, and use specific IP address, subnet mask, default gateway, primary DNS, etc. You can also change the name of this system by changing a setting in the app “Panasonic Music Streaming” (version 2.0.8 or later) (l right). For details on the app, refer to the site below. http://panasonic.
SC-ALL5CD-EGEBGN~RQT0A22.book 10 ページ 2015年4月23日 木曜日 午後4時44分 ∫ Using online music services other than Spotify ≥ This system will be displayed as “Panasonic ALL5CD” if the device name is not set. ≥ When playing back music from the DLNA server (PC with Windows 7 or later installed, smartphone, Network Attached Storage (NAS) device, etc.), add the contents and folder to the libraries of the Windows Media® Player, the smartphone, or the NAS device, etc.
SC-ALL5CD-EGEBGN~RQT0A22.book 11 ページ 2015年4月23日 木曜日 午後4時44分 Bluetooth® operations You can listen to the sound from the Bluetooth® audio device from this unit wirelessly. ≥ Refer to the operating instructions of the Bluetooth® device for details. ≥ If you intend to use an NFC (Near Field Communication)-compatible Bluetooth® device, proceed to “One-Touch Connection (Connecting by NFC)”.
SC-ALL5CD-EGEBGN~RQT0A22.book 12 ページ 2015年4月23日 Bluetooth® transmission mode 1 Preparation ≥ Press [ ] to select “BLUETOOTH”. ≥ If a Bluetooth® device is already connected, disconnect it. 2 2 Press [PLAY MENU] repeatedly to select “LINK MODE”. Press [3, 4] to select the mode and then press [OK]. MODE 1: Emphasis on connectivity MODE 2: Emphasis on sound quality ≥ Select “MODE 1” if the sound is interrupted. ≥ The factory default is “MODE 2”.
SC-ALL5CD-EGEBGN~RQT0A22.book 13 ページ 2015年4月23日 木曜日 午後4時44分 Media playback controls The following marks indicate the availability of the feature. CD audio in CD-DA format and a CD that contains MP3 files (l 24) [USB]: USB devices containing MP3 files (l 24) [Bluetooth]: Connected Bluetooth® device (l 11) [Network]: When connected to an AllPlay/DLNA compatible device (l 9) [CD]: Preparation ≥ Turn the unit on. ≥ Insert the media or connect the Bluetooth®/AllPlay/ DLNA compatible device.
SC-ALL5CD-EGEBGN~RQT0A22.book 14 ページ 2015年4月23日 Listening to DAB+ Preparation ≥ Make sure that the DAB antenna is connected. (l 5) ≥ Turn the unit on. ≥ Press [RADIO/EXT-IN] repeatedly to select “DAB+”. Memorising stations To listen to DAB+ broadcasts, the available stations need to be memorised in this unit. ≥ This unit will automatically start the “DAB AUTO SCAN” and memorise the stations that are available in your region if the memory is empty.
SC-ALL5CD-EGEBGN~RQT0A22.book 15 ページ 2015年4月23日 木曜日 午後4時44分 Display Press [DISPLAY] to change the display. The information will scroll through the display. Each time you press the button: Dynamic label: Information about the broadcast PTY display: Programme type Ensemble label: The name of the ensemble Frequency display: The frequency block and frequency is displayed.
SC-ALL5CD-EGEBGN~RQT0A22.book 16 ページ 2015年4月23日 Listening to FM radio 1 Preparation ≥ Make sure that the antenna is connected. (l 5) ≥ Turn the unit on. ≥ Press [RADIO/EXT-IN] repeatedly to select “FM”. 2 Presetting stations automatically 1 2 Press [PLAY MENU] to select “A.PRESET”. Press [3, 4] to select “LOWEST” or “CURRENT” and then press [OK]. LOWEST: To begin auto preset with the lowest frequency (FM 87.50). 午後4時44分 ∫ To improve FM sound quality You can preset up to 30 channels.
SC-ALL5CD-EGEBGN~RQT0A22.book 17 ページ 2015年4月23日 Sound adjustment The following sound effects can be added to the audio output. 1 2 Play timer Preparation Press [3, 4] to select the setting and then press [OK]. Set the clock. “HEAVY” (heavy), “SOFT” (soft), “CLEAR” (clear), “VOCAL” (vocal) or “FLAT” (flat/off). ≥ The factory default is “HEAVY”. “BASS” (Bass) or Adjust the level (j4 to i4). “TREBLE” (Treble) “D.BASS” (Dynamic Bass) “SURROUND” (Surround) 1 2 3 4 “ON D.BASS” or “OFF D.BASS”.
SC-ALL5CD-EGEBGN~RQT0A22.book 18 ページ 2015年4月23日 Others Auto off function As a factory default, this unit will turn to standby mode automatically if there is no sound and it is not being used for approximately 20 minutes. To cancel this function 1 2 Press [3, 4] to select “OFF” and then press [OK]. Bluetooth® standby When “SC-ALL5CD” is selected from a paired Bluetooth® device’s Bluetooth® menu, this unit will turn on automatically from standby mode and establish a Bluetooth® connection.
SC-ALL5CD-EGEBGN~RQT0A22.book 19 ページ 2015年4月23日 Checking the software version Press [SETUP] repeatedly to select “SW VER.” and then press [OK]. The version of the installed software is displayed. ≥ Press [OK] to exit. Network standby This system can turn on automatically from standby mode when this system is selected as the network device’s output speakers. As a factory default, the network standby is off before you connect this system to the home network.
SC-ALL5CD-EGEBGN~RQT0A22.book 20 ページ 2015年4月23日 IP/MAC Address To check this system’s IP address or the Wi-Fi MAC address. 1 2 3 4 Press [RADIO/EXT-IN] repeatedly to select “NETWORK”. Press [SETUP] repeatedly to select “NET INFO” and then press [OK]. Press [3, 4] repeatedly to select “IP ADDR.” or “MAC ADDR.” and then press [OK]. The IP address or the MAC address is partially displayed. Press [3, 4] on the remote control to show the rest of the IP address or the MAC address. ≥ Press [OK] to exit.
SC-ALL5CD-EGEBGN~RQT0A22.book 21 ページ 2015年4月23日 Remote control The remote control does not work properly. ≥ The battery is depleted or inserted incorrectly. (l 4) Disc Incorrect display or play does not start. ≥ Make sure that the disc is compatible with this unit. (l 24) ≥ There is moisture on the lens. Wait for about an hour and then try again. USB No response when [1/;] is pressed. ≥ Disconnect the USB device and then reconnect it. Alternatively, turn the unit off and on again.
SC-ALL5CD-EGEBGN~RQT0A22.book 22 ページ 2015年4月23日 Messages 木曜日 午後4時44分 “NODEVICE” The following messages or service numbers may appear on the unit’s display. ≥ The USB device is not inserted correctly. Read the instructions and try again (l 6). “NO DISC” ≥ Insert the disc to be played (l 6). “--:--” ≥ You plugged the AC mains lead in for the first time or there was a power failure recently. Set the time (l 17). “ADJUST CLOCK” ≥ Clock is not set. Adjust the clock accordingly.
SC-ALL5CD-EGEBGN~RQT0A22.book 23 ページ 2015年4月23日 Unit and media care Pull out the AC mains lead from the outlet before maintenance. ∫ Clean this unit with a soft, dry cloth ≥ When dirt is heavy, wring a wet cloth tightly to wipe the dirt, and then wipe it with a dry cloth. ≥ When cleaning the speaker covers, use a fine cloth. Do not use tissues or other materials that can fall apart. Small pieces may get stuck inside the speaker cover. ≥ Never use alcohol, paint thinner or benzine to clean this unit.
SC-ALL5CD-EGEBGN~RQT0A22.book 24 ページ 2015年4月23日 Playable media Compatible CD ≥ A disc with the CD Logo. ≥ This unit can play back discs that conform to the CD-DA format. ≥ The unit may not be able to play some discs due to the condition of the recording. ≥ Before playback, finalise the disc on the device it was recorded on. ≥ This system can access up to: 99 tracks Compatible USB devices ≥ This unit does not guarantee connection with all USB devices. ≥ FAT12, FAT16 and FAT32 file systems are supported.
SC-ALL5CD-EGEBGN~RQT0A22.book 25 ページ 2015年4月23日 FLAC Decoder Copyright (C) 2000,2001,2002,2003,2004,2005,2006,2007, 2008,2009 Josh Coalson Redistribution and use in source and binary forms, with or without modification, are permitted provided that the following conditions are met: - Redistributions of source code must retain the above copyright notice, this list of conditions and the following disclaimer.
SC-ALL5CD-EGEBGN~RQT0A22.book 26 ページ 2015年4月23日 Attaching the unit to a wall (optional) This unit can be wall mounted using the supplied wall mount brackets, etc. Make sure that the wall and the screws used for securing to the wall are capable of supporting at least 33 kg. The screws and other items are not supplied as the type and size will vary with each installation. ≥ Refer to step 5 of “Wall mount instructions” for details about the required screws.
SC-ALL5CD-EGEBGN~RQT0A22.book 27 ページ 4 2015年4月23日 Measure and mark the position of both sides of the wall mount brackets. 6 ≥ Use figures below to identify the screwing positions. 木曜日 午後4時44分 Hook the unit securely onto the wall mount brackets with both hands. ≥ Connect the antenna and the AC mains lead to the unit before hanging the unit onto the wall.
SC-ALL5CD_RQT0A22~body1_mst.fm 28 ページ 2015年4月28日 Specifications ∫ GENERAL Power consumption 25 W Power consumption in standby mode (When “BLUETOOTH STANDBY” is “OFF”)*1, 2 Approx. 0.3 W (When “BLUETOOTH STANDBY” is “ON”)*1, 2 Approx. 0.4 W (When “NET STANDBY” is “ON”)*1 Approx. 3.5 W Power supply AC 220 V to 240 V, 50 Hz Dimensions (WkHkD) 533 mmk203 mmk98 mm Mass Approx. 2.
SC-ALL5CD-EGEBGN~RQT0A22.book 29 ページ 2015年4月23日 木曜日 午後4時44分 Safety information for customers in the EU English Declaration of Conformity (DoC) Česky Prohlášení o shodě Hereby, “Panasonic Corporation” declares that this product is in compliance with the essential requirements and other relevant provisions of Directive 1999/5/EC. Customers can download a copy of the original DoC to our R&TTE products from our DoC server: http://www.doc.panasonic.
SC-ALL5CD-EGEBGN~RQT0A22.book 30 ページ 2015年4月23日 Slovensky Vyhlásenie o zhode (DoC) “Panasonic Corporation” týmto prehlasuje, že tento výrobok je v zhode so základnými požiadavkami a ďalšími príslušnými ustanoveniami smernice 1999/5/ES. Zákazníci si môžu stiahnuť kópiu pôvodného DoC na naše R&TTE výrobky z nášho servera DoC: http://www.doc.panasonic.
SC-ALL5CD-EGEBGN~RQT0A22.book 31 ページ 2015年4月23日 木曜日 午後4時44分 Limited Warranty (ONLY FOR AUSTRALIA) Panasonic Warranty 1. The product is warranted for 12 months from the date of purchase. Subject to the conditions of this warranty Panasonic or its Authorised Service Centre will perform necessary service on the product without charge for parts or labour, if in the opinion of Panasonic, the product is found to be faulty within the warranty period. 2.
SC-ALL5CD-EGEBGN~RQT0A22.book 32 ページ 2015年4月23日 木曜日 午後4時44分 For the United Kingdom and Ireland customers Sales and Support Information Customer Communications Centre ≥ For customers within the UK: 0344 844 3899 ≥ For customers within Ireland: 01 289 8333 ≥ Monday–Friday 9:00 am - 5:00 pm (Excluding public holidays). ≥ For further support on your product, please visit our website: www.panasonic.co.