
Operating instructions


34
RQT9516
Network settings
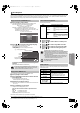
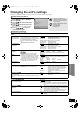
Setting the connection speed
When the connection test results in “Fail” after the IP and DNS-IP
addresses are assigned, perform the following settings.
After performing steps 1–4 (> 33)
5 Press [3, 4] to select “Connection Speed
Auto-Config” and press [2, 1] to select “Off”.
6 Press [3, 4] to select “Connection Speed
Setting” and press [2, 1] to select a
connection speed.
≥Select a connection speed in accordance with the environment of
the network connected.
≥When the settings are changed, the network connection may be
disabled depending on the device.
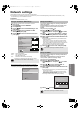
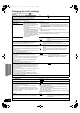
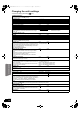
Testing of “Proxy Server Settings”
Always test the connection when new “Proxy Server Settings” have
been made.
1 While stopped
Press [BD/SD] to select “BD/DVD”.
2 Press [SETUP].
3 Press [3, 4] to select “Network Settings” and
press [OK].
4 Press [3, 4] to select “Proxy Server Settings”
and press [OK].
5 Press [3, 4] to select “Connection Test” and
press [OK].
“Testing...”:The test is in progress.
“Pass”: The connection is completed.
Press [RETURN] to exit.
“Fail”: Please check the connection and settings.
RETURN
Proxy Server Settings
Initialize
Proxy Address
Proxy Port Number
OK
0
Connection Test
----
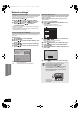
Setting the proxy server
In most cases, default settings can normally be used without
making any changes.
Please use this setting when instructed to by your Internet
service provider.
After performing steps 1–4 (D left)
5 Press [3, 4] to select “Proxy Address” and
press [OK].
≥The text entry screen is displayed.
Text field: shows the text you have entered
6 Press [3, 4, 2, 1] to select a character and
press [OK].
Repeat this step to enter other characters.
≥Press [;PAUSE] to delete.
7 Press [∫STOP] when you complete the entry.
8 Press [3, 4] to select “Proxy Port Number”
and press [OK].
9 Enter numbers with the numbered buttons and
press [OK].
: Press [2, 1] to select “Yes” and press [OK].
≥The specified ports may be blocked and not be able to be
used depending on the network environment.
In order to restore the default settings
After performing steps 1–4 (D left)
1) Press [3, 4] to select “Initialize” and press [OK].
2) Press [2, 1] to select “Yes” and press [OK].
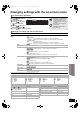
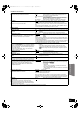
Using the numbered buttons to enter characters
e.g., entering the letter “F”
1) Press [3] to move to the 3rd row.
2) Press [3] twice to highlight “F”.
3) Press [OK].
_
Proxy Address
Space
Finish
Delete
OK
RETURN
1
2
3
4
5
6
7
8
9
0
1234567890
ABC
DEF
abc
def
ghi
jkl
/=
%
+-*
#$&
<>@
mno
[]_
pqrs
()
tuv
{}
\ I
wxyz
“’:;
`^
.,
?!
JKL
MNO
PQRS
TUV
WXYZ
0 -- 9
GHI
~
0
Proxy Port Number
Input HTTP Proxy server port number and
press [OK]. The character below can be
deleted with [CANCEL]. The number will be
set to "0" if all characters are deleted and
[OK] is pressed.
Number
0
-
9
TIPS
3
def
3
def
3
def
34
Advanced operations
SCBT205EP-RQT9457-R.book 34 ページ 2009年5月8日 金曜日 午後3時32分