SC-HT60 Table of contents Operating Instructions Home Theater Audio System Model No. SC-HT40 SC-HT60 Dear customer Thank you for purchasing this product. Please read these instructions carefully before connecting, operating or adjusting this product. Please keep this manual for future reference. SC-HT60 is used in the illustrations unless otherwise mentioned. Before use Safety precautions .........................................2 Supplied accessories ....................................
Safety precautions Placement Set the unit up on an even surface away from direct sunlight, high temperatures, high humidity, and excessive vibration. These conditions can damage the cabinet and other components, thereby shortening the unit's service life. Do not place heavy items on the unit. Safety Precautions Voltage Do not use high voltage power sources. This can overload the unit and cause a fire. Do not use a DC power source.
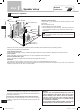
The remote control SC-HT40 SC-HT60 AV Control Receiver SA-HT40 SA-HT60 Front speakers SB-PF41 SB-FS61 Surround speakers SB-PS41 SB-FS62 Center speaker SB-PC40 SB-PC41 Subwoofer SB-W40 SB-W40 Supplied accessories Please check and identify the supplied accessories. 1 AC mains lead 1 FM indoor antenna 1 3 R6/LR6, AA, UM-3 2 2 • Insert so the poles (+ and -) match those in the remote control. • Do not use rechargeable type batteries.
Sticker sheet 2 FRONT R 3 SURROUND L 1 FRONT L FRONT R SURROUND L 4 SURROUND C SUB R (center) (subwoofer) 5 5 4 SURROUND R 3 2 SURROUND L 4 3 FRONT L 2 FRONT R SURROUND L SURROUND R 3 6 C SUB (subwoofer) (center) 1 FRONT L FRONT R 6 2 4 FRONT L 5 1 1 C SUB (subwoofer) (center) 1 1 Supplied accessories Speaker setup 6 Step SURROUND C SUB R (center) (subwoofer) 5 6 Placement of speakers.
2 1 1 2 3 SC-HT60 Front and surround speaker assembly Attaching the stand to the base 22 Thread the speaker cable through the base. Secure the speaker stand to the base. 3 the speaker cable to 3 Fasten the base. Step 1 11 Speaker setup Fasten screw Fasten screws Attaching the speaker to the stand Note Before attaching, check the speaker label. • SB-FS61: Use as front speakers. Attach the stands with the short cables. • SB-FS62: Use as surround speakers.
3 Attach the stickers to the speaker cables.
Other speaker setup options Fitting optional speaker stands SC-HT40 Step 1 e.g. Front and surround speakers 5mm, Pitch 0.8 mm Speaker setup • Use the same screw type for the center speaker. • The stands must be able to support over 10 kg. • The stands must be stable even if the speakers are in a high position. Attaching to a wall Center speaker SC-HT40 30 - 35 mm 200 mm SC-HT60 Ensure that the screws are securely positioned when attaching the speakers to the wall. Wall or pillar 7.5 - 9.4 mm 7.
2 Step Home theater connections Stereo phono cable (not included) Other accessories Optical fibre cable (not included) Coaxial cable (not included) Left Right Turn off all components before making any connections. To connect equipment, refer to the appropriate operating instructions. Step 2 Changing the digital input settings You can change the input settings for the digital terminals if necessary. Note the equipment you have connected to the terminals, then change the settings.
Step 3 Other connections AC mains lead Supplied accessories AM loop antenna FM indoor antenna (x 1) (x 1) For best reception FM indoor antenna (included) Adhesive tape Fix the end of the antenna where reception is best. (x 1) FM outdoor antenna FM outdoor antenna (not included) • Disconnect the FM indoor antenna. • The antenna should be installed by a competent technician.
Step 4 Settings Change the settings to suit your equipment to the environment in which you are using it. Before making any changes, read the descriptions of the settings, note the factory settings and ranges, and refer to the equipment's instructions. DISTANCE Enter the distance of the front, center and surround speakers from the seating position. Select "DISTANCE". Change the distance so that the sound from all the speakers (except for the subwoofer) reaches you at the same time.
MENU SETUP ^ AV SYSTEM TV TV ^ TUNER DVR/DVD-P VOLUME VOLUME BAND Display 1 RETURN TV/AV 2 3 4 5 6 7 8 9 SUBWOOFER -/-- 0 SKIP MUTING VOLUME >10 = SLOW/SEARCH u i t STOP PAUSE g h y PLAY q FUNCTIONS DIRECT NAVIGATOR TOP MENU ENTER MENU SETUP TUNE INPUT SELECTOR SUB MENU/ PLAY LIST VOLUME RETURN ENTER -EFFECT C.FOCUS RETURN OFF -LEVEL TEST -LEVEL TEST %PL MUSIC MOVIE SFC MUSIC PORT Change the setting. TUNE ENTER LR C S Press once to enter. 3.0m 3.
7 SUBWOOFER 8 >10 0 = SKIP SLOW/SEARCH u Basic operations VOLUME 9 i t y STOP PAUSE PLAY g h q FUNCTIONS DIRECT NAVIGATOR TOP MENU ENTER SUB MENU/ PLAY LIST MENU SETUP TUNE RETURN VOLUME INPUT SELECTOR ENTER -EFFECT C.FOCUS RETURN MUSIC PORT OFF -LEVEL TEST MUSIC %PL MOVIE Basic operations SFC 1 2 3 INPUT SELECTOR TUNER FM TUNER AM TV The unit sets the sound mode to suit the input signal. MUSIC PORT GAME/AUX VOLUME Start play of the source. Select input.
Control guide Remote control This page describes the buttons used to control this unit. See the guide at page 22 for the buttons that control other units. Standby/on button. RECEIVER ^ [TUNER, ―BAND] For selecting subwoofer level. [u, 2, i, 1, SKIP] For selecting preset radio channels. 2 3 [-, +] First select [-EFFECT] or [-LEVEL, 3TEST], then press [-] or [+] to adjust. [-LEVEL, ―TEST] Use when adjusting speaker level. Press and hold to start the speaker test signal.
Control guide Main unit [-MENU, ―SETUP, RETURN] Standby indicator [^] • For entering menus to make various settings. • For returning to previous menus. When the unit is connected to the AC mains supply, this indicator lights up in standby mode and goes out when the unit is turned on. Standby/on switch [8] [TUNE, 3, 4] For tuning the radio and selecting menu or setup items. Control guide Press to switch the unit from on to standby mode or vice versa.
INPUT SELECTOR [INPUT SELECTOR, <, >] [VOLUME] For selecting input. Volume control. POWER MENU SETUP TUNE VOLUME INPUT SELECTOR ENTER RETURN Control Guide/Making a recording/The RESET function MUSIC PORT You can record to a unit connected to DVR/DVD-P OUT. You can record any analog source except DVR/DVD-P IN. 1. Press [INPUT SELECTOR < or >] to select the source to be recorded. 2. Begin recording. VOLUME INPUT SELECTOR Follow your recording unit's operating instructions. 3.
MENU operation Display MENU SETUP This is an outline of the operations you can perform with the MENU. TUNE ENTER MENU SETUP TUNE INPUT SELECTOR ENTER RETURN 1 RETURN Press [-MENU] once.
The radio RECEIVER ^ BAND 1 2 5 6 7 8 9 0 -/-- >10 = MENU SETUP 2 3 5 6 7 8 VOLUME INPUT SELECTOR ENTER RETURN MUTING MUSIC PORT VOLUME 9 -/-=>10 0 SKIP i TUNE TV/AV 4 SUBWOOFER SKIP TUNER DIRECT TUNING VOLUME BAND 1 MENU SETUP SLOW/SEARCH u u TV TV ^ TUNER DVR/DVD-P 3 4 AV SYSTEM i t STOP PAUSE g h ENTER y PLAY RETURN q DIRECT NAVIGATOR FUNCTIONS TOP MENU TUNER DIRECT TUNING 1 2 INPUT SELECTOR The radio TUNER TUNE ENTER SUB MENU/ PLAY
The radio (cont.) Sound field RECEIVER Reducing excessive noise ^ SUBWOOFER TV/VIDEO 1 2 3 4 5 6 7 8 SUBWOOFER -/-- 0 SKIP 1. Press [-MENU] to select "TUNER" ➡ "FM MODE". 2. Press [TUNE - or +] to select "MONO" ➡ [ENTER]. MENU SETUP TUNE 9 =>10 t i y STOP PAUSE PLAY g h q DIRECT NAVIGATOR FUNCTIONS TOP MENU TUNER DIRECT TUNING ENTER ENTER SUB MENU/ PLAY LIST RETURN -EFFECT C.FOCUS MENU SETUP TUNE RETURN -LEVEL TEST -EFFECT C.
^ AV SYSTEM TV TV RECEIVER ^ TUNER DVR/DVD-P ^ VOLUME AV SYSTEM TUNER DVR/DVD-P BAND 2 3 4 5 6 7 8 -/-- 0 SKIP VOLUME 9 i 2 3 4 5 6 7 8 SUBWOOFER =>10 t TV/VIDEO 1 MUTING y =>10 SLOW/SEARCH u i t PAUSE PLAY STOP PAUSE PLAY g h q g h q DIRECT NAVIGATOR FUNCTIONS DIRECT NAVIGATOR FUNCTIONS TOP MENU TUNER DIRECT TUNING TOP MENU TUNER DIRECT TUNING ENTER ENTER SUB MENU/ PLAY LIST RETURN -EFFECT C.FOCUS OFF -LEVEL TEST %PL MUSIC -EFFECT C.
Other functions RECEIVER ^ AV SYSTEM TV TUNER DVR/DVD-P Other functions MENU SETUP ENTER 1 MUTING RETURN TV/AV 2 4 5 7 8 SUBWOOFER 0 3 6 -/-- SKIP INPUT SELECTOR VOLUME ENTER 9 MUTING VOLUME =>10 SLOW/SEARCH u TUNE VOLUME BAND TUNE MENU SETUP TV ^ i t y STOP PAUSE PLAY g h q RETURN MUSIC PORT Sleep timer Dimmer The SLEEP timer can turn the unit off after a set time. It does not control any other components.
Other settings MENU SETUP TUNE ENTER RETURN TUNE INPUT SELECTOR VOLUME Other settings MENU SETUP ENTER RETURN MUSIC PORT Setting descriptions A INPUT MODE (Input mode) This unit automatically detects whether input is digital or analog, but you can fix the input mode. AUTO: The unit automatically detects whether input is digital or analog. ANALOG: Select to make the unit accept analog input. DIG: Select to make the unit accept digital input. PCMFIX1: Select to input to PCM.
Remote control operation guide This remote control can operate Panasonic DVD recorders, DVD players, and televisions. Note that this remote control cannot operate some equipment and that it may not be able to perform some operations. Before using a Panasonic DVD recorder or player Remote control operation guide DVD recorder Change the remote control code to match the remote control code of the DVD recorder. 1. Check the remote control code of the DVD recorder. 2.
Specifications (DIN 45 500) g AMPLIFIER SECTION Front speaker (SC-HT60: SB-FS61) RMS output power of each channel driven 10 % total harmonic distortion 1 kHz front CH 90 W per channel (4 Ω) 1 kHz surround CH 90 W per channel (4 Ω) 1 kHz center CH 220 W per channel (6 Ω) 100 Hz subwoofer CH 220 W per channel (6 Ω) Total RMS output power 800 W Rated minimum sine wave RMS power output 1% total harmonic distortion (Dolby Digital mode) 1kHz front CH 50 W per channel (4 Ω) 1kHz surround CH 50 W per channel (4 Ω)
Troubleshooting guide Before requesting service, make the below checks. If you can't fix the unit as described or if something not listed here occurs, contact your dealer. Common problems No power. Pages • Ensure the AC mains lead is connected. 9 • • • • Turn the volume up. Check connections to speakers and other equipment. Select the correct source. Change the DIG INPUT setting to suit the type of connection you have made. • Check that the digital signals can be decoded by this unit.