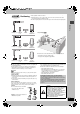
7972en-p01-02.fm Page 1 Monday, August 1, 2005 4:11 PM The illustration shows SC-HT730. OPEN CLOSE POWER INPUT SELECTOR 1 2 3 4 H.BASS DOWN TUNE MODE FM MODE MEMORY DVD Home Theater Sound System Model No. SC-HT730/SC-HT733/ SC-HT930/SC-HT933 DISC SKIP PHONES PROGRESSIVE CD MODE 5 DISC SELECTOR Operating Instructions DISC EXCHANGE VOLUME 5 UP TUNING Advanced progressive scan page 11 Provides a smoother and sharper image.
7972en-p01-02.fm Page 2 Friday, June 10, 2005 2:37 PM Dear customer ≥These operating instructions are applicable to models SC-HT730, SC-HT733, SC-HT930 and SC-HT933 for a variety of regions. ≥Unless otherwise indicated, illustrations in these operating instructions are of SC-HT730 for U.S.A. and Canada. ≥Operations in these instructions are described mainly with the remote control, but you can perform the operations on the main unit if the controls are the same. Thank you for purchasing this product.
7972en-p03-31.fm Page 3 Monday, August 8, 2005 11:40 AM TABLE OF CONTENTS Using navigation menus . . . . . . . . . . . . . . . . . . . . . . . . 22 IMPORTANT SAFETY INSTRUCTIONS . . . . . . . . . . . . . . .3 Simple setup STEP 1 Front speaker assembly . . . . . . . . . . . . . . . . 4 Other speaker setup options . . . . . . . . . . . . . . . . . . .8 STEP 2 STEP 3 STEP 4 STEP 5 STEP 6 STEP 7 Positioning . . . . . . . . . . . . . . . . . . . . . . . . . . . 9 Connecting speakers with the subwoofer. .
HT730.book Page 4 Wednesday, June 1, 2005 8:55 AM Simple setup 1 STEP The supplied stands are specially designed for attachment to Panasonic SB-FS730, SB-FS930 or SB-PF920 front speakers. Use only as indicated in this setup. Front speaker assembly Front speaker assembly Preparation ≥To prevent damage or scratches, lay down a soft cloth and perform assembly on it. ≥For assembly, use a Phillips-head screwdriver.
Page 5 [HT930] Tuesday, June 7, 2005 [Note] To prevent the speaker cables from being pulled out of the pipes, leave the plastic wrap on the pipes while assembling the speaker stands. 2 Front speakers 1 4:18 PM 2 Pipes 2 Bases 4 Long screws 2 Assemble the speaker stands. 1 Thread the speaker cable through the base. For quicker threading, loosely fold the cable in half (do not crease), pass the folded portion through the hole, and then pull the rest of the cable through the base.
7972en-p03-31.fm Page 6 Tuesday, June 14, 2005 4:10 PM Simple setup 1 STEP Front speaker assembly [HT933] Front speaker assembly 2 Front speakers 1 2 Pipes 2 Bases 4 Large screws 4 Small screws ∫ Front speaker height Attach the pipe to the base. (Assembled diagram) 1 Thread the speaker cable through the base. Speaker Lessen excess speaker cable. You can adjust within this range. Thread the speaker cable through here.
4 Page 7 Tuesday, June 7, 2005 4:24 PM Connect the speaker cables. Rear of the speaker Twist off the vinyl tips of the speaker cables. ≥If the speaker cables do not have vinyl tips, directly connect them to the terminals. ∫ Preventing the speakers from falling over Preparation Attach screw eyes (not included) to secure the speakers to the wall (➜ diagram below). ≥You will need to obtain the appropriate screw eyes to match the walls or pillars to which they are going to be fastened.
7972en-p03-31.fm Page 8 Tuesday, June 7, 2005 1:35 PM Other speaker setup options ∫ Attaching to a wall 30–35 mm (13/16q–13/8q) You can attach all of the speakers to a wall. Front speaker assembly 1 Drive a screw (not included) into the wall. 2 Fit the speaker securely onto the screw(s) with the hole(s). ‰3.0–4.0 mm (1/8q– 5/32q) Wall or pillar ‰7.5–9.4 mm (19/64q– 3/8q) 4.0–7.
Page 9 Tuesday, June 7, 2005 2 STEP 7:40 PM Positioning How you set up your speakers can affect the bass and the sound field. Note the following points: ≥Place speakers on flat secure bases. ≥Placing speakers too close to floors, walls, and corners can result in excessive bass. Cover walls and windows with thick curtains. ≥The left and right speakers are the same with respect to the front and surround speaker pairs.
HT730.book Page 10 Wednesday, June 1, 2005 8:55 AM 3 STEP Connecting speakers with the subwoofer ≥Attach the speaker-cable stickers to make connection easier. ≥The terminals of the subwoofer have high output power. Carefully connect the speaker wires. Connecting speakers with the subwoofer 3 Speaker cables ≥1kshort cable: For center speaker ≥2klong cables: For surround speakers Sheet of speaker-cable stickers The illustration shows SC-HT730 for U.S.A. and Canada.
HT730.
HT730.book Page 12 Wednesday, June 1, 2005 8:55 AM 5 STEP Radio and system connections System cable Radio and system connections AM loop antenna FM indoor antenna AC power supply cord \U.S.A.\and\Canada] Power plug adaptor \Areas\except\U.S.A.\and\Canada] \Others] ≥Connect the AC power supply cord after all other connections are complete. ≥Optional antenna connections (➜ page 29). The illustration shows SC-HT730 for U.S.A. and Canada.
HT730.book Page 13 Wednesday, June 1, 2005 8:55 AM 6 STEP The remote control Batteries 2 Insert so the poles (i and j) match those in the remote control. ≥mix old and new batteries. ≥use different types at the same time. ≥heat or expose to flame. ≥take apart or short circuit. ≥attempt to recharge alkaline or manganese batteries. ≥use batteries if the covering has been peeled off. Mishandling of batteries can cause electrolyte leakage which can damage items the fluid contacts and may cause a fire.
7972en-p03-31.fm Page 14 Wednesday, June 1, 2005 9:04 AM Control reference guide See reference pages in brackets. The illustration shows SC-HT730. AV SYSTEM TV Control reference guide Turn the unit on/off (13) Select the disc or show disc information (18) Switch the television’s video input mode (32) DISC Television and Video cassette recorder operations (32) VCR TV/VIDEO TUNER/BAND DVD/CD 1 2 3 4 5 6 7 8 CH Select television channels and disc’s title numbers etc.
HT730.book Page 15 Wednesday, June 1, 2005 8:55 AM Discs that can be played Logo Indication in these operating instructions [RAM] Recorded with devices using Version 1.1 of the Video Recording Format (a unified video recording standard), such as DVD video recorders, DVD video cameras, personal computers, etc. [JPEG] Recorded using the DCF (Design rule for Camera File system) standard Version 1.0. ≥To play JPEG files, select “Play as Data Disc” in Other Menu (➜ page 25).
HT730.book Page 16 Wednesday, June 1, 2005 8:55 AM Basic play 1 3 POWER Power on. OPEN/CLOSE Open the drawer and place the disc(s). Basic play ≥Load double-sided discs so the label for the side you want to play is facing up. ≥To load discs on the other trays, press [DISC SKIP] on the main unit. ≥Play will start from the disc in the front-left position of the tray. ≥[RAM] Remove the disc from its cartridge before use. 2 4 INPUT SELECTOR Select “DVD/CD”. OPEN/CLOSE Close the drawer.
HT730.book Page 17 Wednesday, June 1, 2005 8:55 AM If you are experiencing problems, refer to troubleshooting (➜ page 36, 37). Using the remote control TV DISC Numbered buttons VCR TV/VIDEO TUNER/BAND DVD/CD 1 2 3 4 5 6 2 3 4 5 6 7 8 9 ENTER 0 S10 CH 7 8 CANCEL 0 9 VOLUME ENTER CANCEL 2 1 S10 SLOW/SEARCH SKIP TOP MENU MENU Enter number 6 5 3, 4, 2, 1 ENTER FL DISPLAY SHIFT PLAY LIST DIRECT NAVIGATOR [WMA] [MP3] [JPEG] e.g.
HT730.book Page 18 Wednesday, June 1, 2005 8:55 AM Convenient functions ADVANCED DISC REVIEW AV SYSTEM TV DISC VCR [RAM] [DVD-V] (Except iR/iRW) Allows you to browse the disc contents and start playing from the selected position. You can select either “Intro Mode” or “Interval Mode” in “Advanced Disc Review” in the “Disc” tab (➜ page 26). TV/VIDEO TUNER/BAND DVD/CD DISC 1 5 1 2 3 4 5 6 CH 8 7 9 VOLUME 1 ENTER S10 0 CANCEL Press [ADVANCED DISC REVIEW].
SHIFT Page 19 Wednesday, June 1, 2005 8:55 AM ZOOM CM SKIP [DVD-A] (Motion picture part) [RAM] [DVD-V] [VCD] This feature expands the letterbox picture to fit the screen. During play Press [SHIFT]i[ZOOM] several times to select the preset aspect ratio (Just Fit Zoom) or “Auto”. Functions Just Fit Zoom e.g. SUBTITLE AUDIO Changing the zoom ratio 1.
HT730.book Page 20 Wednesday, June 1, 2005 8:55 AM Convenient functions CD MODE PLAY MODE Program/Random play Program play (up to 32 items) AV SYSTEM TV DISC 1_5 ∫ When CD Mode is off VCR [DVD-A] [DVD-V] [VCD] [CD] [WMA] [MP3] [JPEG] You can program all the items on a disc in the play position. TV/VIDEO TUNER/BAND DVD/CD 1 2 3 4 5 6 1 CH Numbered buttons 8 7 9 ENTER CANCEL S10 0 CANCEL Press the numbered buttons to e.g.
Page 21 Wednesday, June 1, 2005 8:55 AM Manufactured under license from Dolby Laboratories. “Dolby”, “Pro Logic” and the double-D symbol are trademarks of Dolby Laboratories. Random play ∫ When CD Mode is off [VCD] [CD] You can play all the items on a disc in the play position in random order. [DVD-A] [DVD-V] [WMA] [MP3] [JPEG] You can play selected item(s) on a disc in the play position in random order. 1 [DVD-A] [DVD-V] [WMA] [MP3] [JPEG] Press the numbered buttons to select a group or a title. e.g.
HT730.book Page 22 Wednesday, June 1, 2005 8:55 AM Using navigation menus 1 2 3 4 5 6 7 8 ≥Press [SHIFT]i[ANGLE/PAGE] to skip page by page in the group or content field. ≥To enjoy listening to WMA/MP3 contents while showing a JPEG image on the screen Select a JPEG file first, and then select audio contents. (The opposite order is not effective.) ≥To exit the screen Press [MENU].
Page 23 Wednesday, June 1, 2005 8:55 AM TOP MENU MENU Playing HighMATTM discs DIRECT NAVIGATOR Press [TOP MENU]. Playing the programs Press [3, 4, 2, 1] to select the item, 1 then press [ENTER]. ≥Repeat this step if necessary. e.g. New Playlist Item Long Name Display Te Menu1 P l ay l i s t 2 2 Prev PAG E 1 / 3 P l ay l i s t 1 Menu2 Menu3 P l ay l i s t 3 3Return Next 1 e.g. No.
HT730.book Page 24 Wednesday, June 1, 2005 8:55 AM Using on-screen menus Items shown differ depending on the type of disc.
7972en-p03-31.fm Page 25 Tuesday, June 7, 2005 4:26 PM Other Settings ∫ Picture Menu Picture Adjustment Enhances audio output to produce a warm hall-like Sound sound. Enhancement On ,------. Off ∫ Display Menu Information [JPEG] Off, Date, Details Subtitle Position 0 to s60 (in 2 unit steps) Subtitle Brightness Auto, 0 to s7 To select how to show images made for 4:3 aspect screens on a 16:9 aspect television Contrast Brightness Sharpness Color Gamma: Adjusts the brightness of dark parts.
HT730.book Page 26 Wednesday, June 1, 2005 8:55 AM Changing the player settings 1 AV SYSTEM TV DISC VCR SHIFT TV/VIDEO TUNER/BAND DVD/CD 1 2 3 4 5 6 7 8 2 CH Numbered buttons SETUP MUTING Show the Setup menu. If you have not set QUICK SETUP (➜ page 13), the QUICK SETUP screen appears. Select the tab.
HT730.book Page 27 Wednesday, June 1, 2005 8:55 AM Select to suit the type of television. ≥Standard (Direct View TV) ≥Projection TV Time Delay ≥0ms TV Type ≥20ms ≥CRT Projector ≥Plasma TV ≥40ms ≥LCD TV/Projector ≥60ms ≥80ms ≥100ms When connected with a Plasma display, adjust if you notice the audio is out of sync with the video. ≥Automatic ≥Field: The picture is not blurred, but picture quality is lower. ≥Frame: Overall quality is high, but the picture may appear blurred.
HT730.book Page 28 Wednesday, June 1, 2005 8:55 AM The radio Selecting the preset channels AV SYSTEM TV DISC VCR 1 TV/VIDEO TUNER/BAND DVD/CD TUNER/BAND 1 2 3 4 5 6 7 8 “AM”. CH CH Numbered buttons 2 VOLUME 9 ENTER 0 CANCEL Press [TUNER/BAND] to select “FM” or Press the numbered buttons to select the S10 channel. SLOW/SEARCH Alternatively, press [W CH X]. To select a 2-digit number e.g.
HT730.book Page 29 Wednesday, June 1, 2005 8:55 AM ∫ FM frequency step Main unit only You can change the FM step. The step is factory-set to 0.2 MHz, but you can change it to receive broadcasts allocated in 0.1-MHz steps. 1 Press [INPUT SELECTOR] to select “FM”. 2 Press and hold [INPUT SELECTOR]. After a few seconds the display changes to show the current minimum frequency. Continue to hold the button down. The minimum frequency changes and the step is changed.
HT730.book Page 30 Wednesday, June 1, 2005 8:55 AM Sound field and sound quality TV DISC VCR DVD/CD 1 2 3 4 5 6 CH 7 8 0 9 Center Focus (Discs where the dialogue is recorded in the center channel) You can make the sound of the center speaker seem like it is coming from within the television. TV/VIDEO TUNER/BAND DVD/CD CANCEL C.FOCUS SFC SHIFT AV SYSTEM Press [SHIFT]i[C.FOCUS]. VOLUME ENTER S10 VOLUME SLOW/SEARCH SKIP DISC DIGITAL TUNED T G S.SRND D.
HT730.book Page 31 Wednesday, June 1, 2005 8:55 AM Other useful functions Subwoofer level You can adjust the amount of bass. The unit automatically selects the most suitable setting according to the type of playing source. Press [SUBWOOFER LEVEL]. ≥When another source is selected SUB W 2 (factory preset)>SUB W 3>SUB W 4>SUB W 1 ^--------------------------------------------------------------------------} DISC TUNED T G S.SRND D.
HT730.book Page 32 Wednesday, June 1, 2005 8:55 AM Operating other equipment ∫ Connection example The illustration shows SC-HT930 for U.S.A. and Canada. Television (not included) AUDIO OUT VIDEO IN L R 1 2 To show video from the video cassette recorder Select “VIDEO 2” input on your television in this example.
7972en-p32-40.fm Page 33 Friday, June 10, 2005 7:09 PM Specifications Aim the remote control at the equipment. While pressing [TV] or [VCR] Press a numbered button to enter the first digit, and then the second digit. The remote control outputs the on/off signal. If the code is correct, the equipment turns on or off. If it doesn’t, try entering another code. [Note] Reenter the codes after you change the batteries.
7972en-p32-40.
Page 35 Friday, June 10, 2005 7:09 PM [HT930] [Front\speakers\SB-FS930] Type 2 way, 3 speaker system (Bass reflex) Speaker unit(s) Impedance 6 ≠ 1. Woofer 8 cm (31/8z) Cone type 2. Woofer 8 cm (31/8z) Cone type 3. Tweeter 6 cm (23/8z) Ring shaped dome type Input power (IEC) 170 W§2 (Max) Output sound pressure 84 dB/W (1.0 m) Cross over frequency 7 kHz Frequency range 75 Hz–50 kHz (j16 dB) 90 Hz–45 kHz (j10 dB) Dimensions (WtHtD) 260 mmk1234 mmk270 mm (101/4zk4819/32zk1021/32z) Mass 4.35 kg (9.
HT730.book Page 36 Wednesday, June 1, 2005 8:55 AM Troubleshooting guide Before requesting service, make the following checks. If you are in doubt about some of the check points, or if the solutions indicated in the chart do not solve the problem, refer to the “Customer Services Directory” on page 39 if you reside in the U.S.A., or refer to the “Product information” on page 38 if you reside in Canada. In other areas, consult your dealer. Power Page No power.
HT730.book Page 37 Wednesday, June 1, 2005 8:55 AM Menus The Setup menu cannot be accessed. Page ≥Select “DVD/CD” as the source. ≥Cancel program and random play. — 20 Picture abnormal or unviewable Picture distorted. ≥Ensure that the unit is connected directly to the television, and is not connected through a video cassette recorder. 11 Picture size doesn’t fit the screen. ≥Change “TV Aspect” in the “Video” tab. ≥Use the television to change the aspect.
HT730.book Page 38 Wednesday, June 1, 2005 8:55 AM Product Service Glossary 1. Damage requiring service—The unit should be serviced by qualified service personnel if: (a) The AC power supply cord or AC adaptor has been damaged; or (b) Objects or liquids have gotten into the unit; or (c) The unit has been exposed to rain; or (d) The unit does not operate normally or exhibits a marked change in performance; or (e) The unit has been dropped or the cabinet damaged. 2.
HT730.book Page 39 Wednesday, June 1, 2005 8:55 AM Limited Warranty (ONLY FOR U.S.A.) Panasonic Consumer Electronics Company, Division of Panasonic Corporation of North America One Panasonic Way Secaucus, New Jersey 07094 Panasonic Puerto Rico, Inc. Ave. 65 de Infantería, Km. 9.
7972en-p32-40.fm Page 40 Monday, August 1, 2005 4:13 PM Listening caution EST. 1924 Selecting fine audio equipment such as the unit you’ve just purchased is only the start of your musical enjoyment. Now it’s time to consider how you can maximize the fun and excitement your equipment offers. This manufacturer and the Electronic Industries Association’s Consumer Electronics Group want you to get the most out of your equipment by playing it at a safe level.