SD-Jukebox Ver. 3.0 Operating Instructions 
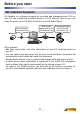
Before listening to music with the SD Multi AV Device Be sure to follow the instructions in these Operating Instructions to transfer music to an SD Memory Card. For information on the basic operations in Windows and how to use your computer and peripheral devices, see the Operating Instructions included with your system. Thank you for purchasing SD-Jukebox.
Important SD-Jukebox usage information SD-Jukebox incorporates copyright protection technology using encryption technology in order to protect copyrights, to ensure the healthy development of music culture, and to protect the rights of valid purchasers. • SD-Jukebox records music data in encrypted form onto your hard disk drive. Encrypted music cannot be moved/copied to other folders, drives, and other PCs for use.
Contents Checking out tracks to an SD Memory Card ......................23 Checking in tracks from an SD Memory Card to the PC.......25 Preparations System Requirements ......................4 Before you start ................................5 • SD-Jukebox Features........................5 • Recorded tracks are stored in compressed form on your PC ............6 • Transferring data between a PC and SD Memory Card ...............6 Editing.............................................
System Requirements In order to use SD-Jukebox, you need an IBM PC/AT-compatible personal computer satisfying the system requirements shown below. Compatible PC: IBM PC/AT-compatible personal computers with one of the following operating systems preinstalled SD-Jukebox does not run on Macintosh systems.
Before you start SD-Jukebox Features SD-Jukebox is a software program for recording and managing music CDs on your PC and transferring recorded tracks to an SD Memory Card so you can enjoy the music on an SD Multi AV Device or an SD Audio Player. Write tracks (music data) to an SD Memory Card Record tracks from music CDs Music CD Enjoying the music on an SD Multi AV Device, etc. PC Other features: • Edit titles, track order, and other information on your PC, and play tracks on your PC.
Before you start Recorded tracks are stored in compressed form on your PC Music data compression ↓ Save the compressed music data to your hard disk. ↓ Check it out to an SD Memory Card. To play music on an SD Multi AV Device or SD Audio Player, you must use the compression format compatible with your SD Multi AV Device or SD Audio Player.
Connecting an SD Memory Card Attach the SD Memory Card to your SD Multi AV Device and then connect it to the PC. For connection details, consult your SD Multi AV Device user’s guide. See page 52 for instructions on removing the SD Memory Card. You can also access the SD Memory Card through a connection with an optional USB Reader/Writer for the SD Memory Card.
Starting SD-Jukebox • Double-click the icon on the desktop.
The appears after the . NOTE • If the icon does not appear on the desktop, then from the Start menu, select [All Programs] → [Panasonic] → [SD-JukeboxV3] → [SD-JukeboxV3]. • SD-Jukebox version information To check which version you have, start SD-Jukebox and right-click the SD-Jukebox icon on the task tray. Next, select "About SD-Jukebox".Playlists A playlist is a collection of tracks like an album. By selecting and playing a playlist, you can listen to the tracks in the playlist. When you record tracks on your PC, a playlist is automatically created. You can also make new playlists collecting your favorite recorded tracks. PC Library of all tracks(HDD) Creating a playlist Recording Playlist Playlist Playlist When you check out tracks to your SD Memory Card, a playlist is also created automatically on the SD Memory Card.
Playlists Selecting a playlist When selecting a track to listen to with SD-Jukebox or to check out, choose the playlist from the right window. • Click [ ] to display the nested playlist below. (Click [ ] to restore the previous display.) • Click on a playlist name to display the tracks it includes. [HDD] When you record a track on your hard disk, the track is added to the [HDD] library. Click [HDD] to display all the tracks recorded on your PC.
Recording CDs to your PC Insert a CD in your PC's CD-ROM drive. If the CD starts playing automatically as soon as you insert it in the CDROM drive (CD-EXTRA or an application with an auto-play function), close the auto-playing program. You will not be able to use SD-Jukebox until the auto-playing program is closed. Click [CD>>>PC]. The appears. After you enter or revise CD track information, you can send the information to CDDB to register it on their server.
Recording CDs to your PC Enter names for [Album title] and [Artist]. • In cases where music information is registered at the CDDB, the album title, the artist name and title information will be downloaded automatically. ( page 53) (In order to use CDDB function, you must set up an Internet connection for your PC and establish separate contracts with individual service providers.) • When no information is available, the creation date and track number are assigned.
Recording CDs to your PC Selecting the recording method and audio quality Before clicking [CD>>>PC], you can choose the format of data compression for recording and the level of audio quality. 1. Click to display . 2. Click on the [Record setting] tab. 3. In [Recording format (CD/WAV)], select AAC or Secure WMA. Next, select the audio quality level from the pulldown menu. The higher the number, the better the quality. However, better quality requires more memory.
Importing audio data to SD-Jukebox Follow these steps to import the MP3, WMA, and WAV music data files saved on your hard disk to SD-Jukebox. Click [IMPORT]. The appears. Deactivates track assignment by Music Sommelier. Click [Browse]. The appears. Select the folder containing the MP3, WAV, or WMA files and click [OK]. File names are displayed on the .
Importing audio data to SD-Jukebox Modify the file import method and audio quality as necessary. ( page 16) The default settings are as follows: WAV→AAC, MP3→Secure MP3, and WMA→Secure WMA. NOTE Copyright-protected WMA files cannot be imported. Select the (checkbox) next to the track you want to import. • appears next to the selected track.(Click again to remove the check mark.) • Click [Check All] to import all of the tracks.
Importing audio data to SD-Jukebox Selecting the importing method and audio quality Before clicking [Import], you can select the import method (the compression format) and the level of audio quality. • For WAV files, you can choose between AAC and Secure WMA. • For MP3 files, you can choose between Secure MP3 and AAC. Normally, Secure MP3 is selected. Select AAC if necessary for the SD Multi AV Device or the SD Audio Player you are using. • Compression format and bit rate are not changed for WMA files.
Creating a playlist You can make a playlist for groups of your favorite tracks. In the , right-click on [User playlist]. Click "Create new playlist…". • A new playlist is created. • We recommend changing the playlist name to your preferred name so that you can recognize the contents. ( page 27) Select tracks from the list and drag them to your new playlist folder.
Creating a playlist You can use Music Sommelier to create a playlist When you use SD-Jukebox to record tracks on your PC, Music Sommelier automatically forms an impression of the track. The impressions can be used as the basis for creating a playlist. You can create groups of tracks for playlists that tend to give a certain impression by selecting the impression instead of selecting the tracks individually. You can also create random track groups by simply selecting patterns for track progression.
Creating a playlist Music Sommelier: Selecting impressions to group tracks When you select an impression to match your mood, such as "POP" or "Healing" music, the tracks on your PC that match the impression are automatically selected. Click . The is displayed. Select the impression and click it. The items with tracks that tend to match the impression are marked with a . Click [Select]. • A list of tracks that tend to match is displayed.
Creating a playlist Music Sommelier: Grouping tracks of similar impression After you select one track from a list, you can group others that resemble it. In the , click [(New Keyword)], and then [Edit]. The is displayed. From the list, choose a representative track as the basis for the impression and double-click it. • The representative track title appears in the .
Creating a playlist Music Sommelier: Auto track selection For the overall progression (track pattern) of all tracks on your playlist, when you make a selection like "Easygoing tracks to energetic tracks" or "Energetic tracks to easygoing tracks to energetic tracks", the designated number of tracks will be selected in an order matching the progression. Track selection is random, so different tracks are chosen each time even if you use the same pattern.
Creating a playlist Searching by track title, artist name, and more You can create a playlist of tracks that fulfill the criteria you set. Click . The is displayed. Enter your requirements. • Enter your search criteria for title, artist, album, genre, and track play time. • Select [OR] to search for tracks that fulfill any individual requirement. Select [AND] to search for tracks that fulfill all requirements. Click [Search].
Checking out tracks to an SD Memory Card Select the desired track from the PC's library and use SD-Jukebox to check out the track to an SD Memory Card. If an image is attached to the track you are checking out, the image will be recorded on the SD Memory Card at the same time. Connect an SD Memory Card. Click [PC>>>SD]. The is displayed. Select the player you will use. Select the playlist name containing the track you want to check out.
Checking out tracks to an SD Memory Card Enter a name in [List to be created]. We recommend changing the name in [List to be created] to your preferred name so that you can recognize the contents. Click [PC>>>SD]. • The check out process starts. • After all the tracks have been checked out, the is displayed. Click [OK]. • Click [Cancel] to cancel check out. (If you cancel partway through a track, check out will stop at the next track.
Checking in tracks from an SD Memory Card to the PC When you check in a track from an SD Memory Card, the track is returned to the PC and its check out count is increased. Use the same PC as you used for checking out the track. Click [SD>>>PC]. The is displayed. Click [SD]. Select the (checkbox) next to the track being checked in. • appears next to the selected track.(Click again to remove the check mark.) • To check in all tracks, click [Check All].
Editing You can edit with the . Changing title, artist names and album title 1. Right-click the track to be changed. 2. Click "Edit track information…". The
Editing You can edit with the . Changing the name of playlists 1. Right-click the playlist name to be changed. 2. Click "Change name of playlist...". 3. Change the name. Deleting tracks 1. Right-click the track to be deleted. 2. Click "Delete" or "Delete from playlist". • If you select [Delete], the audio data itself will be deleted. • If you select [Delete from playlist], the track is removed from the playlist, but the audio data itself is not deleted.
Listening to music on the PC You can use this software to listen to CD tracks, tracks stored on the PC, and tracks on an SD Memory Card. Click [PC LIBRARY]. The is displayed. Select the playlist you want to play. Click . • Playing starts from the first track. When all the tracks on the playlist (or CD) have been played, playing stops automatically. • You can start the play from a particular track by double-clicking the track.
Listening to music on the PC Function Button(s) to click Pause Click Stop Click while playing (click to start playing) while playing Queue song : Queue previous song Fast forward Drag the slider to the right Rewind Drag the slider to the left Volume adjustment :Decrease volume :Increase volume (Volume can also be adjusted using the volume adjustment slider) Mute (Activating Mute displays this icon: : Queue next song ) Click it again to restore sound.
Images During play, image files that are attached to the track are displayed. You can attach your own favorite still image files saved on your PC. ( page 31) • If there are multiple images, they are switched at set intervals just like a slide show. (You can change the interval time by accessing .) • Double-click on the image to display it in another window. You can switch between images using .
Images Attaching images You can attach up to 20 images to a single track. In the , click [HDD]. Right-click on the track for the image, and then click "Edit track information…". The is displayed. Drag and drop images to the "Image" window. • Drag and drop attached images to change their order. • Delete attached images by right-clicking on them, and then clicking [Delete]. Click [OK].
Modifying the sound with the equalizer You can easily modify the sound to match the type of music. Even more detailed adjustments are possible to suit your tastes. Automatic selection to match tracks For automatic selection of the preset equalizer that best matches the track. 1. Click [EQUALIZER]. The is displayed. 2. Click the non-indented [ON] button to activate the equalizer functions. 3 4 3. Click [AUTO]. 4. Click .
Modifying the sound with the equalizer Selecting the equalizer that suits your tastes 1. Click [EQUALIZER]. 2. Click the non-indented [ON] button to activate the equalizer functions. 3. Make sure that [AUTO] is OFF (so that the button is not shown pressed). 3 4 5 If it is ON, click [AUTO] to switch it OFF. 4. From the "Preset" pulldown menu, select your preferred preset equalizer. 5. Click .
Modifying the sound with the equalizer For more detailed adjustment By saving your preferred equalizer settings, you can select them from the "Preset" pulldown menu. 1. Click [EQUALIZER]. 2. Click the non-indented [ON] button to activate the equalizer functions. 3. Make sure that [AUTO] is OFF (so that the button is not shown pressed). 3 4, 5 7 8 6 If it is ON, click [AUTO] to switch it OFF. Low High 4. In the "Preset" pulldown menu, select "New preset". 5. Name your preset. 6.
Names and functions of the screen elements These buttons are always displayed. 1 2 3 4 5 6 7 8 9 10 11 1 2 3 4 5 6 7 8 9 Displays the . Displays the . Displays the . Displays the . Displays the . Displays the . Displays the . Establishes an Internet connection. Displays the .
Names and functions of the screen elements 1 2 3 4 5 6 7 8 9 10 11 12 13 14 1 Fast-forwards and rewinds. 2 Click a column to sort the list according to that column. Right-click to select items for display. 3 Displays the title, and so on. Double-click a track to start playback. 4 Displays the audio input level during play. 5 Displays the . 6 Displays the images attached to the track that is playing. Double-click it to view the image in another window.
Names and functions of the screen elements 1 4 1 2 3 4 5 6 7 8 9 10 11 12 13 5 2 6 3 7 8 9 10 11 12 13 Displays the recording status. For input of the album title and artist name. Right-click to select items for display. Selects all tracks. Displays the memory required to record the selected track, as well as the available memory on your PC. Deselects all selected tracks.
Names and functions of the screen elements 1 4 5 2 3 6 7 8 9 10 1 Displays the file import status. 2 Used to select the folder containing the music data (file) to be imported. 3 Click a column to sort the list according to that column. Right-click to select items for display. 4 Selects all files. 5 Displays the memory required to import the selected files, as well as the available memory on your PC. 6 Deselects all selected files.
Names and functions of the screen elements 1 2 5 6 1 2 3 4 5 6 7 8 9 10 3 7 4 8 9 10 Used to select the PC playlist to be checked out to SD Memory Card. Displays the check out status. A new playlist name to be created on SD Memory Card is entered here. Click a column to sort the list according to that column. Right-click to select items for display. Selects all tracks.
Names and functions of the screen elements 1 3 4 2 5 6 7 1 Displays the check in status. 2 Click a column to sort the list according to that column. Right-click to select items for display. 3 Selects all tracks. 4 Displays the memory that would become available on your SD Memory Card when you check in the selected track. 5 Deselects all selected tracks. 6 Starts check in. 7 Displays the tracks on the SD Memory Card.
Names and functions of the screen elements 1 2 6 7 3 8 4 5 9 10 1 Edits a new impression. Also used to change existing impressions. 2 For selection of impressions. 3 Clears the impression map. 4 Deletes the impression. 5 For input of the playlist name. 6 For auto track selection. 7 Adds to the playlist. 8 Selects the track. 9 For setting the number of tracks in auto track selection. 10 Lists the track selection results.
Names and functions of the screen elements 1 2 3 5 6 7 1 2 3 4 5 6 7 8 9 10 11 4 8 9 10 11 Sets the track play time. Sets the genre. Sets the title, artist, and album. For input of the playlist name. Adds to the playlist. For searching tracks matching any search requirement. Clears search results. Starts search. For searching tracks matching all search requirements. Lists the search results. Click a column to sort the list according to that column.
Names and functions of the screen elements 1 9 2 3 4 5 10 6 7 8 11 1 Displays the . 2 Sets the base file name which is to be set by default. (Up to 200 single-byte characters) 3 Displays the for the recording method and audio quality settings. 4 Formats the SD Memory Card. 5 Sets CD-related functions.
Names and functions of the screen elements 1 1 2 3 4 2 3 4 Sets the recording method for CD recording and WAV file importing. Sets the audio quality level for CD recording and WAV file importing. Sets the recording method for MP3 file importing. Sets the audio quality level for converting MP3 to AAC. 1 2 3 1 Sets the image display during play. 2 Sets the number of tracks to be found when searching in the .
Names and functions of the screen elements 1 2 3 4 5 1 Specifies whether or not CDDB is used. 2 Specifies the Internet connection settings. If you plan to use CDDB, be sure to complete the proxy settings correctly. 3 If you use proxy server, enter the IP address and the port number. 4 Specifies the settings for the database of track names to be stored on the computer. 5 Establishes a connection to the CDDB website.
Formatting an SD Memory Card When an SD Memory Card is formatted, all data on the card is erased. CAUTION • When an SD Memory Card is formatted, tracks checked out using SD-Jukebox as well as all other data are erased. Before formatting an SD Memory Card, be sure to check its contents. • Only use the procedure shown below to format an SD Memory Card. Check out and playback may not work properly if other formatting procedures are used.
Supported formats • Music CDs : CD-DA, CD-EXTRA, CD TEXT • MP3 : MPEG-1 layer3, MPEG2 layer3 low sampling frequency • WMA : Windows Media Audio 32 /44.1 /48 kHz, 64–160 kbps • WAV : PCM 44.1 kHz 16 bits (2-channel stereo) Conversion table Output format AAC (2-channel stereo) 64 kbps Input format 32 kHz 96 kbps 44.1 kHz CD-DA 48 kHz 128 kbps 44.1 kHz 48 kHz Secure MP3 (2-channel stereo) Secure WMA ( ) mono32 /64/96 /128 /160 Music CD CD-EXTRA 16/22.
Uninstalling SD-Jukebox Removing the SD-Jukebox application from your PC to discontinue use is called "uninstalling" it. Before uninstalling it, disconnect the SD Multi AV Device. From the Windows [Start] menu, select [Control Panel]. Select [Add or Remove Programs]. The is displayed. Click [SD-JukeboxV3], and then click [Change/Remove]. Click [OK]. SD-JukeboxV3 is deleted, and a confirmation screen is displayed. Click [Finish].
Troubleshooting Before requesting service, make the below checks. (If the steps presented here do not solve your difficulty, check your PC's operating manual as well.) Problems during installation and startup At these times Check here for problem Unable to start SD- • Did you install SD-Jukebox onto the hard disk drive? Jukebox SD-Jukebox cannot be started directly from the installation CD-ROM.
Troubleshooting Problems during playback operations See the SD Multi AV Device's Operating Instructions for information on playback using the SD Multi AV Device. At these times Unable to play Check here for problem • CD: Has a CD been inserted? If a CD has been properly inserted, click [CD] on the . • PC: Is there music data on the PC? • Does the CD-ROM drive support digital playback and recording? The CD-ROM drive must support digital playback and recording.
Troubleshooting Problem related to SD Memory Card Check whether the SD Memory Card can be played on the SD Multi AV Device. The SD Memory Card may have been damaged if it cannot be played on the SD Multi AV Device.You may be able to use the SD Memory Card if you reformat it, but all of the data on the card will be erased. At these times SD Memory Card is not recognized. [SD] is not displayed on the .
Removing the SD Memory Card When using Windows 98 SE/Me 1 Close the software program that is using the SD Multi AV Device. 2 Check to see the access lamp on the SD Multi AV Device is off, and then remove the SD Memory Card. When using Windows 2000/XP 1 Close the software program that is using the SD Multi AV Device. 2 Click the card icon displayed in the system tray on the lower right of the screen. 3 Select "Stop USB Mass Storage Device" and click it.
Index and glossary AAC ..........................................................6 AAC, which stands for Advanced Audio Coding, is an audio compression system used with MPEG-2 and MPEG-4. This system enables high-quality audio playback with a high compression rate. Artist name .......................................12,26 Auto track selection .............................21 CDDB ..................................................
· Panasonic assumes no liability for damaged music data or cases where music cannot be recorded due to problems with this product or your PC. · This product and the contents of this document are subject to change without prior notice. · This document presents examples of the operating screens that appear on a system running Windows XP. The illustrations and screens in this document may be somewhat different from those on an actual screen. · SD logo is a trademark.