OPERATING INSTRUCTIONS MODE D’EMPLOI BEDIENUNGSANLEITUNG KULLANIM KILAVUZU TX-24LSW484 LED TV Téléviseur LED You can find instructions for your TV’s features in the E-Manual. To access the E-Manual, enter Settings menu, select Manuals and press OK. For quick access press Home/Menu button and then Info button. e-MANUAL Vous pouvez accéder aux instructions relatives aux fonctions de votre téléviseur à partir du E-Manuel.
VGA Input Typical Display Modes........................ 27 Table of Contents Safety Information.................................................. 2 IMPORTANT - Please read these instructions fully before installing or operating.................................. 2 Markings on the Product........................................ 2 Maintenance.......................................................... 4 Display panel, Cabinet, Pedestal........................... 4 Mains plug.....................................
• Do not expose the TV to direct sunlight or do not place open flames such as lit candles on the top of or near the TV. • Do not place any heat sources such as electric heaters, radiators, etc. near the TV set. Safety Information CAUTION RISK OF ELECTRIC SHOCK DO NOT OPEN • Do not place the TV on the floor and inclined surfaces. CAUTION: TO REDUCE THE RISK OF ELECTRIC SHOCK DO NOT REMOVE COVER (OR BACK). NO USER-SERVICEABLE PARTS INSIDE. REFER SERVICING TO QUALIFIED SERVICE PERSONNEL.
WARNING Do not ingest the battery, Chemical Burn Hazard This product or the accessories supplied with the product may contain a coin/button cell battery. If the coin/ button cell battery is swallowed, it can cause severe internal burns in just 2 hours and can lead to death. Keep new and used batteries away from children. If the battery compartment does not close securely, stop using the product and keep it away from children.
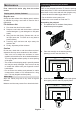
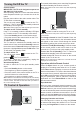
Assembling / Removing the pedestal Maintenance Preparations First, remove the mains plug from the mains socket. Display panel, Cabinet, Pedestal Take out the pedestal(s) and the TV from the packing case and put the TV onto a work table with the screen panel down on the clean and soft cloth (blanket, etc.) • Use a flat and firm table bigger than the TV. Regular care: Gently wipe the surface of the display panel, cabinet, or pedestal by using a soft cloth to remove dirt or fingerprints.
Removing the pedestal from the TV Accessories Included Be sure to remove the pedestal in the following way when using the wall-hanging bracket or repacking the TV. • Remote Control • Put the TV onto a work table with the screen panel down on the clean and soft cloth. Leave the stand(s) protruding over the edge of the surface. • Instruction Book • Unsrew the screws that fixing the stand(s). • Batteries: 2 x AAA • Detachable stand • Stand mounting screws (M4 x 12) • Remove the stand(s).
High Dynamic Range (HDR) / Hybrid LogGamma (HLG) Using this feature the TV can reproduce greater dynamic range of luminosity by capturing and then combining several different exposures. HDR/HLG promises better picture quality thanks to brighter, more realistic highlights, more realistic colour and other improvements. It delivers the look that filmmakers intended to achieve, showing the hidden areas of dark shadows and sunlight with full clarity, colour and detail.
Other Connections If you want to connect a device to the TV, make sure that both the TV and the device are turned off before making any connection. After the connection is done, you can turn on the units and use them.
The control switch allows you to control the Programme and Quick Standby-On functions of the TV. Turning On/Off the TV Connect power IMPORTANT: The TV set is designed to operate on 220-240V AC, 50 Hz socket. After unpacking, allow the TV set to reach the ambient room temperature before you connect the set to the mains. Plug the power cable to the mains socket outlet. The TV will switch on automatically. ” located on the TV Turn on the main switch “ position “|”.
Remote Control 1. 2. 3. 4. 5. 6. 7. 28 27 8. 9. 10. 11. 12. 13. 14. 15. 16. 17. Note: Other Panasonic devices cannot be operated with this remote. Inserting the Batteries into the Remote Remove the screw that secures the battery compartment cover on the back side of the remote control first. Lift the cover gently. Insert two 1.5V size AAA batteries. Make sure the (+) and (-) signs match (observe correct polarity). Do not mix old and new batteries. Replace only with same or equivalent type.
5. Network Connection Initial Setup Wizard Note: Follow the on-screen instructions to complete the initial setup process. Use the directional buttons and the OK button on the remote to select, set, confirm and proceed. When turned on for the first time, a welcome screen will be displayed. Select your language and press OK. Follow the on-screen instructions to setup your TV and install channels. The installation wizard will guide you through the setup process.
also view Terms of Service, Privacy Policy and Play Terms of Service on this screen. To display the content an internet connection is needed. A message will be displayed mentioning the web site address on which this information can also be viewed, in case internet access is not available. 8. Location On the next screen, you can allow or disallow Google and third party apps to use your TV’s location information. Select Yes to confirm and press OK.
DVBS Configuration Setting screen will be displayed next. First Antenna type(*) should be set. Universal, Single Cable and Jess Singlecable options are available. Set the Antenna Type as Universal for Direct and DiSEqC satellite systems. If you set the antenna type as Universal, press the Right directional button to proceed to the next step.
Not Connected according to the current connection status), Settings and the current time will be displayed. You can configure your date and time preferences using the Date & time menu options from the Settings>Device Preferences menu. First row will be the Apps row. Live TV and Multi Media Player apps will be available alongside with other apps. Highlight Live TV and press OK to switch to Live TV mode.
HBBTV Settings HBBTV Support: Turn the HBBTV function on or off. Do Not Track: Set your preference regarding the tracking behaviour for HBBTV services. Cookie Settings: Set your cookie setting preference for HBBTV services. Persistent Storage: Turn the Persistent Storage function on or off. If set as On cookies will be stored with an expiry date in the persistent memory of the TV. Block Tracking Sites: Turn the Block Tracking Sites function on or off. Device ID: Turn the Device ID function on or off.
Channel Channels Options of this menu may change or become inactive depending on the Channel Installation Mode selection. Channel Installation Mode - Antenna Automatic Channel Search: Start a scan for analogue and digital channels. You can press the Back button to cancel the scan. The channels that have already been found will be stored in the channel list. Update Scan: Search for updates. Previously added channels will not be deleted, but any newly found channels will be stored in the channel list.
Channel Swap: Replace the positions of the two selected channels in the channel list. Highlight the desired channels on the list and press OK to select. When the second channel is selected, the position of this channel will be replaced with the position of the first selected channel. You should set the LCN option to Off or Default in order to enable this feature. Channel Move: Move a channel to the position of another channel. Highlight the channel you want to move and press OK to select.
Channels Blocked: Select channel/s to be blocked from the channel list. Highlight a channel and press OK to select/unselect. To watch a blocked channel PIN should be entered first. Programme Restrictions: Block programmes according to the age rating information that is being broadcasted with them. You can turn on or off restrictions, set rating systems, restriction levels and age limits using the options of this menu. Inputs Blocked: Prevent access to the selected input source content.
Auto Power On Time: Available if the Power On Time Type is enabled. Set the desired time for your TV to come on from standby using the directional buttons and press OK to save the new set time. Power Off Time Type: Set your TV to turn off by itself. Set this option as On or Once to enable a power off timer to be set, set as Off to disable. If set as Once the TV will turn off only once at the defined time in Auto Power Off Time option below.
to keep up with video games that have fast frame rates. Turn the Game Mode function on or off. PC Mode: PC Mode is the mode which cuts down some of the picture processing algorithms to keep signal type as it is. It can be usable especially for RGB inputs. Turn the PC Mode function on or off. HDMI RGB Range: This setting should be adjusted according to input RGB signal range on HDMI source. It can be limited range (16-235) or full range (0-255). Set your HDMI RGB range preference.
Location: You can allow the use of the wireless connection to estimate the location, see the recent location requests and allow or restrict the listed apps to use your location information. Usage & Diagnostics: Automatically send usage data and diagnostic information to Google. Set according to your preference.
nel>Channels menu. You can access the Settings menu from the Home Screen or from the TV options menu in Live TV mode. Note: The options Channel Swap, Channel Move and Channel Edit may not be available and appear as grayed out depending on the operator selection and operator related settings. You can turn off the LCN setting in the Settings>Channel menu, as it prevents channel editing. This option might be set to On by default depending on the selected country during the initial setup process.
You might be able to connect your TV to a network wall socket depending on your network’s configuration. In that case, you can connect your TV directly to the network using an Ethernet cable. 1 Then highlight the Sign in to Wi-Fi network notification and press OK. Enter your credentials to log in. A Wireless-N router (IEEE 802.11a/b/g/n/ac) with simultaneous 2.4 and 5 GHz bands is designed to increase bandwidth.
will be displayed. If there isn’t any media files of the selected type, the folder will be assumed as empty. In Recursive Parser mode the source will be searched for all available media files of the selected type and the found files will be listed. Press the Back/Return button to close this menu. In order to activate photo frame feature select Photo as the media type. Then press the Menu button, highlight Photo Frame and press OK.
in the storage device, depends on the viewing style, will be repeatedly played back or displayed. Shuffle On/Off: Turn the shuffle option on or off. Press OK to change the setting. Duration: Set the interval between the slides. Highlight an option and press OK to change the setting. You can also press the Green button to set. This option will not be available if the slide show is paused. Rotate: Rotate the image. The image will be rotated 90 degrees clockwise each time you press OK.
Devices must support HDMI CEC and must be connected with an HDMI connection. In order to make use of the CEC functionality the related option in the menu should be switched on. To check, switch on or off the CEC function, do the following: • Enter the Settings>Device Preferences>Inputs menu on the Home Screen or TV options>Settings>Device Preferences>Inputs menu in Live TV mode. • Scroll down to Consumer Electronic Control (CEC) section. Check if the HDMI control option is switched on.
HBBTV System Software Update HbbTV (Hybrid Broadcast Broadband TV) is a standard that seamlessly combines TV services delivered via broadcast with services delivered via broadband and also enables access to Internet only services for consumers using connected TVs and set-top boxes.
No picture / distorted picture • Make sure that the antenna is properly connected to the TV. • Make sure that the antenna cable is not damaged. • Make sure that the correct device is selected as the input source. VGA Input Typical Display Modes The following table is an illustration of some of the typical video display modes. Your TV may not support all resolutions. • Make sure that the external device or source is properly connected.
AV and HDMI Signal Compatibility Source Supported Signals PAL Composite / Back AV SECAM NTSC4.43 NTSC3.58 Component / YPbPr HDMI 480i, 480p 60Hz 576i, 576p 50Hz 720p 50Hz,60Hz 1080i 50Hz,60Hz 480i 60Hz 480p 60Hz 576i, 576p 50Hz 720p 50Hz,60Hz 1080i 50Hz,60Hz 1080p 24Hz, 25Hz, 30Hz, 50Hz, 60Hz In some cases a signal on the TV may not be displayed properly. The problem may be an inconsistency with standards from the source equipment (DVD, Set-top box, etc. ).
Supported File Formats for USB Mode Video Video Codec VP9 Resolution 1920x1080@60fps Bit Rate 40Mbps Profile Profile0,2 Main/Main10 HEVC/H.265 1920x1080@60fps 50Mbps Profile, High Tier @Level 4.1 MPEG1/2 1920x1080@60fps • Simple Profile • Advanced Simple Profile@Level 5 • GMC is not supported MP4 (.mp4, .mov), 3GPP (.3gpp, .3gp), AVI (.avi), MKV (.mkv), WebM (.webm), ASF (.asf), WMV (.wmv),FLV (.flv), OGM (.ogm), MPEG transport stream (.ts, .trp, .tp),MPEG program stream (.DAT, .VOB, .MPG, .
Video Codec Resolution Bit Rate Profile Container Motion JPEG 640x480@30fps 10Mbps AVI (.avi), 3GPP (.3gpp, .3gp), MP4 (.mp4, .mov), MKV (.mkv), WebM (.webm), FLV (.flv), OGM (.ogm) VP8 1920x1080@60fps 20Mbps MKV (.mkv), WebM (.webm), FLV (.flv), 3GPP (.3gpp, .3gp), MP4 (.mp4, .mov), AVI (.avi), OGM (.ogm) RV30/RV40 1920x1080@60fps 40Mbps RM (.rm, .rmvb), MKV (.mkv), WebM (.webm) Audio Audio Codec MPEG1/2 Layer1 MPEG1/2 Layer2 MPEG1/2/2.
Audio Codec Sample rate Channel Bit Rate AAC-LC: 12kbps~ 576kbps AAC-LC, HEAAC 8KHz ~ 48KHz Up to 5.1 V1 6kbps ~ 288kbps V2: 3kbps ~ 144kbps WMA WMA 10 Pro M0 WMA 10 Pro M1 WMA 10 Pro M2 VORBIS 8KHz ~ 48KHz Up to 2 128bps ~ 320Kbps Up to 2 < 192kbps 8KHz ~ 48KHz Up to 5.1 < 384kbps ASF (.asf), WMV (.wma, .wmv), AVI (.avi), 3GPP (.3gpp, .3gp), MP4 (.mp4, .mov) 8KHz ~ 96KHz Up to 5.1 < 768kbps ASF (.asf), WMV (.wma, .wmv), AVI (.avi), 3GPP (.3gpp, .3gp), MP4 (.mp4, .
Audio Codec Sample rate Channel Bit Rate Container 8KHz LBR (cook) 11.025KHz, Up to 5.1 22.05KHz, 44.1KHz MKV (.mkv, .mka), WebM (.webm), FLAC (.flac) 6Kbps ~ MKV (.mkv, .mka) 510Kbps WebM (.webm) 1 4.75 ~ 12.2Kbps 3GPP (.3gpp, .3gp) 1 6.6 ~ 23.85Kbps 3GPP (.3gpp, .3gp), MP4 (.mp4, .mov, m4a) 8KHz~96KHz Up to 7.1 OPUS 8KHz ~ 48KHz Up to 6 AMR-WB 8KHz 16KHz RM (.rm, .rmvb, .ra) 128Kbps < 1.6Mbps FLAC AMR-NB 6Kbps ~ MP4 (.mp4, .
External File Extension .srt Subtitle Parser Remark SubRip SubStation Alpha .ssa/ .ass Advanced SubStation Alpha .smi SAMI .sub MicroDVD SubIdx (VobSub) .txt TMPlayer Supported DVI Resolutions When connecting devices to your TV’s connectors by using DVI converter cable(DVI to HDMI cable - not supplied), you can refer to the following resolution information.
Wireless LAN Transmitter Specifications Specification Frequency Ranges Max Output Power TV Broadcasting PAL BG/I/DK SECAM BG/DK 2400 - 2483,5 MHz (CH1-CH13) < 100 mW Receiving Channels VHF (BAND I/III) - UHF (BAND U) - HYPERBAND 5150 - 5250 MHz (CH36 - CH48) < 200 mW 5250 - 5350 MHz (CH52 - CH64) < 200 mW Digital Reception Fully integrated digital terrestrial-cable-satellite TV(DVB-T-C-S) (DVB-T2, DVB-S2 compliant) 5470 - 5725 MHz (CH100 - CH140) < 200 mW Number of Preset Channels 12 200
Notice Licences DVB / Data broadcasting / IPTV functions • This TV is designed to meet the standards (as of March 2021) of DVB-T / T2 (MPEG2, MPEG4AVC(H.264) and HEVC(H.265)) digital terrestrial services, DVB-C (MPEG2, MPEG4-AVC(H.264) and HEVC(H.265)) digital cable services and DVB-S (MPEG2, MPEG4-AVC(H.264) and HEVC(H.265)) digital satellite services. Consult your local dealer for availability of DVB-T / T2 or DVB-S services in your area.
Disposal of Old Equipment and Batteries Declaration of Conformity (DoC) Only for European Union and countries with recycling systems These symbols on the products, packaging, and/or accompanying documents mean that used electrical and electronic products and batteries must not be mixed with general household waste. For proper treatment, recovery and recycling of old products and batteries, please take them to applicable collection points in accordance with your national legislation.
Table des matières Audio.................................................................... 70 Consignes de sécurité......................................... 38 Sous-titre.............................................................. 72 IMPORTANT - Veuillez lire attentivement ces instructions avant d'installer ou de faire fonctionner votre appareil....................................................... 38 Symboles sur le produit....................................... 39 Entretien.......................
Consignes de sécurité ATTENTION RISQUE DE CHOC ÉLECTRIQUE : NE PAS OUVRIR ATTENTION: POUR ÉVITER TOUT RISQUE DE CHOC ÉLECTRIQUE, NE RETIREZ PAS LE COUVERCLE (OU L’ARRIÈRE). L’ENTRETIEN DES PIÈCES INTERNES EST INTERDIT AUX UTILISATEURS. VEUILLEZ CONFIER L'ENTRETIEN À UN PERSONNEL QUALIFIÉ. Pendant des phénomènes météorologiques extrêmes (tempêtes, foudre) et de longues périodes d'inactivité (aller en vacances), débranchez le téléviseur du secteur.
Symboles sur le produit Les symboles suivants sont utilisés sur le produit pour marquer les instructions relatives aux restrictions, aux précautions et à la sécurité. Chaque explication se rapporte uniquement à l’endroit du produit portant le symbole correspondant. Veuillez en tenir compte pour des raisons de sécurité. Équipement de classe II : Cet appareil, de par sa conception, ne nécessite pas de branchement sécurisé à un système électrique de mise à la terre.
AVERTISSEMENT • En faisant recourt à d’autres supports de fixation murale ou en en installant un par vous-même, vous courrez le risque de vous blesser ou d’endommager l’appareil. Pour une performance et une sécurité optimales de l’appareil, pensez à vous rapprocher de votre magasin ou d’un technicien agréé pour la fixation des supports. Tout dommage provoqué à la suite d’une installation effectuée par des mains inexpertes annulera votre garantie.
Retrait du socle du téléviseur Montage/Retrait du socle Préparations Retirez le(s) socle(s) de l'emballage et posez le téléviseur sur une table de travail, avec le panneau de l'écran couché sur un tissu propre et doux (couverture, etc.) • Utilisez une table plate et solide, plus grande que le téléviseur. • Ne tenez pas le panneau de l'écran. • Posez le téléviseur sur une table de travail, avec le panneau de l'écran couché sur un tissu propre et doux.
Introduction Nous vous remercions d’avoir choisi notre produit. Vous allez bientôt profiter de votre nouveau téléviseur. Veuillez lire attentivement ces consignes. Elles contiennent des informations importantes qui vous aideront à tirer le meilleur parti de votre téléviseur et vous assureront une installation et un fonctionnement sûrs et corrects.
Autres Connexions Si vous souhaitez connecter un appareil au téléviseur, assurez-vous que le téléviseur et l’appareil sont hors tension avant de les relier. Une fois les connexions terminées, vous pouvez allumer les différents dispositifs et les utiliser.
Remarque : Lorsque le téléviseur est mis en mode veille, la LED de veille peut clignoter pour indiquer que des fonctions telles que la recherche de veille ou la minuterie sont actives. Le voyant à LED peut également clignoter lorsque vous allumez le téléviseur à partir du mode veille. Mise sous/hors tension du téléviseur Branchement à l’alimentation IMPORTANT : Le téléviseur a été conçu uniquement pour fonctionner avec une prise de 220-240 V CA, 50 Hz.
Fonctionnement de la TV à l'aide de la télécommande Appuyez sur le bouton Menu de votre télécommande pour afficher le menu Réglages TV en direct une fois dans Mode TV en direct. Appuyez sur le bouton Accueil pour afficher ou retourner à l’écran d’accueil du téléviseur Android.
Télécommande 1. 2. 3. 4. 5. 6. 7. 28 27 8. 9. 10. 11. 12. 13. 14. Remarque : Les autres appareils Panasonic ne peuvent pas être utilisés avec cette télécommande. Insertion des piles dans la télécommande Retirez au préalable la vis qui fixe le couvercle du compartiment des piles sur le côté arrière de la télécommande. Soulevez délicatement le couvercle. Insérez deux piles 1,5 V de taille AAA. Assurez-vous que les signes (+) et (-) correspondent (respectez la polarité).
étapes peuvent être ignorées en fonction des réglages effectués à cette étape. Assistant de configuration initiale Remarque : Suivez les instructions qui s’affichent à l’écran pour achever le processus d’actualisation. Utilisez les boutons de direction et le bouton OK de la télécommande pour sélectionner, configurer, confirmer et poursuivre. Lors de la première mise en marche, un écran de bienvenue s’affiche. Sélectionnez la langue de votre choix et appuyez sur OK.
que votre téléviseur. Ouvrez le site Web donné (androidtv.com/setup, suivez les instructions à l’écran pour l’URL à jour du site Web) dans le navigateur de votre téléphone ou de votre ordinateur et entrez le code que vous voyez sur votre écran de télévision dans le champ de saisie correspondant. Suivez ensuite les instructions sur votre appareil et terminez le processus.
Remarque : Si le pays sélectionné n’a pas d’émissions en mode analogique, l’option de recherche analogique peut ne pas être disponible. Câble Si l’option Câble est sélectionnée, le téléviseur recherche les diffusions numériques par câble et analogiques. Le cas échéant, les options d’opérateur disponibles s’affichent sur l’écran Sélectionner l’opérateur. Dans le cas contraire, cette étape est ignorée. Vous pouvez sélectionner uniquement un opérateur à partir de la liste.
Recherche pour continuer sans effectuer la recherche et terminez la configuration initiale. L’écran Configurer la recherche DVBS s’affiche ensuite si l’option Recherche est sélectionnée. Les options ci-après seront disponibles : Mode Recherche et Chaînes. Vous pouvez choisir d’effectuer une recherche complète ou une recherche du réseau. Réglez le Mode de Recherche en conséquence.
Live TV depuis la ligne Apps et appuyer sur OK sur l’Écran d’accueil. Chaînes Ajouter à mes favoris : Ajoutez la chaîne en cours de visionnage à la liste de favoris sélectionnée précédemment. Guide de programme : Ouvrez le guide électronique des programmes. Reportez-vous à la section Guide du programme pour plus d’informations. Nouvelles chaînes disponibles : Commencez une recherche de nouvelles chaînes. Sélectionnez l’application ou le syntoniseur de la source de chaîne.
Paramètres des cookies : Définissez votre préférence de paramétrage de cookie pour les services HBBTV. Stockage persistant : Activez ou désactivez la fonction Stockage Persistant. S’ils sont réglés sur Activé, les cookies seront stockés avec une date d’expiration dans la mémoire permanente du téléviseur. Bloquer les sites de suivi : Activez ou désactivez la fonction Bloquer les Sites de Suivi. ID de l’appareil : Activez ou désactivez la fonction ID de l’appareil.
Wow: Activez et désactivez cette fonction. Cette fonction vous permet d'allumer ou de réveiller votre téléviseur via le réseau sans fil. Wol: Activez et désactivez cette fonction. Cette fonction vous permet d'allumer ou de réveiller votre téléviseur via le réseau. Ethernet Connecté/Non connecté: Affiche l'état de la connexion Internet via les adresses Ethernet, IP et MAC. Paramètres du proxy: Définissez manuellement un proxy HTTP pour le navigateur.
numériques. Les options d’opérateur s’affichent, si disponible. Sélectionnez la langue souhaitée et appuyez sur OK. Les options Mode de Balayage, Type de Balayage des Chaînes, Fréquence et ID Réseau peuvent être disponibles. Les options peuvent varier en fonction de l’opérateur et des sélections du Mode Recherche. Réglez le Mode Recherche sur Complète si vous ne savez pas comment configurer d’autres options. Sélectionnez Recherche et appuyez sur OK pour lancer la recherche.
pas être disponible selon le pays sélectionné lors du processus de configuration initial. Saut de Chaîne : Réglez les chaînes à sauter lorsque vous parcourez les chaînes à l’aide des boutons Programme +/- de la télécommande. Mettez les chaînes souhaitées de la liste en surbrillance et appuyez sur OK pour les sélectionner/désélectionner. Échange de Chaînes : Modifiez les positions des deux chaînes sélectionnées dans la liste des chaînes.
répertorié dans la section Choisir les applications synchronisées et appuyez sur OK pour activer/ désactiver la synchronisation des données. Sélectionnez Sync Maintenant et appuyez sur OK pour synchroniser tous les services en même temps. Ajouter un compte : Ajoutez un nouveau compte aux comptes disponibles en vous y connectant. Applications En se servant des options de ce menu, vous pouvez gérer les applications sur votre téléviseur.
TV>Options avancées pour plus de fonctions liées à la puissance. Minuteur de mise en veille : Définissez une période d’inactivité après laquelle vous voulez que votre téléviseur passe automatiquement en mode veille. Cool, Standard et Chaud seront disponibles. Vous pouvez ajuster manuellement les valeurs de gain du rouge, du vert et du bleu. Si l’une de ces valeurs est modifiée manuellement, l’option Température de Couleur devient Utilisateur, si elle n’est pas déjà définie comme Utilisateur.
Plage RGB HDMI : Ce réglage doit être ajusté en fonction de la plage du signal RVB d’entrée sur la source HDMI. Il peut être à portée limitée (16-235) ou complète (0-255). Définissez votre préférence de plage RGB HDMI. Les options Auto, Complet et Limite seront disponibles. Cet élément ne sera pas disponible si la source d’entrée n’est pas réglée sur HDMI.
téléviseur seront configurés pour l’environnement du magasin et les fonctions prises en charge seront affichées à l’écran. Une fois activés, les paramètres de la messagerie de stockage seront disponibles. Réglez selon vos préférences. Il est recommandé de ne pas activer le mode de mémorisation pour une utilisation à domicile.
Vous pouvez appuyer sur le bouton Rouge pour faire défiler la liste page par page, ou appuyer sur le bouton Vert pour la faire défiler vers le bas. Si vous le souhaitez, vous pouvez filtrer ou trier les chaînes ou trouver une chaîne dans la liste des chaînes. Appuyez sur le bouton Jaune pour afficher les options Sélectionner Plus. Les options disponibles sont Sélectionner le Type, Trier et Rechercher.
la date de début et de fin, le type de l’événement en surbrillance et une brève information à son sujet sont affichés au bas de l’écran. Appuyez sur le bouton Bleu pour filtrer les événements. En raison de la grande variété d’options de filtre, vous pouvez trouver des événements du type souhaité plus rapidement. Appuyez sur le bouton Jaune pour voir les informations détaillées sur l'événement en surbrillance.
Certains réseaux peuvent avoir un système d’autorisation qui nécessite une deuxième connexion comme dans un environnement de travail. Dans ce cas, après vous être connecté au réseau sans fil auquel vous souhaitez vous connecter, mettez en surbrillance les Notifications situées en haut à droite de l’Écran d’accueil et appuyez sur OK. Mettez ensuite en surbrillance la notification Se connecter au réseau Wi-Fi et appuyez sur OK. Saisissez vos informations d’identification pour vous connecter.
Avance rapide : Lancez la lecture en avance rapide. Appuyez consécutivement sur cette touche pour régler la vitesse de lecture avant. Précédent/Retour : Retour à l'écran du lecteur multimédia. Arrêter : Arrêtez la lecture et revenez à l'écran du lecteur multimédia. Dossiers sur la musique Une fois que vous avez appuyé sur le bouton OK, le diaporama démarre et tous les fichiers photos du dossier en cours ou du périphérique de stockage, selon le style de visualisation, s’affichent dans l'ordre.
Effet : Appliquez divers effets au diaporama. Mettez une option en surbrillance et appuyez sur OK pour modifier le paramètre. Vous pouvez également appuyer sur le bouton Jaune pour régler. Cette option ne sera pas disponible si le diaporama est mis en pause. Zoom : Zoom sur l'image qui est actuellement affichée. Mettez une option en surbrillance et appuyez sur OK pour modifier le paramètre. Vous pouvez également appuyer sur le bouton Jaune pour faire un zoom avant.
téléviseur en sélectionnant l’un des noms prédéfinis ou en saisissant un nom personnalisé à l’aide des options du menu Nom de l’appareil. Lorsque la connexion est établie avec succès, le fichier multimédia sélectionné est lu/affiché sur votre téléviseur. CEC Grâce à la fonction CEC de votre téléviseur, vous pouvez utiliser un appareil connecté à l’aide de la télécommande du téléviseur. Cette fonction communique avec les appareils connectés à l’aide du HDMI CEC (Commande d’électronique grand public).
3. Sélectionnez le téléviseur sur lequel vous voulez lancer la l’application fonctionner sur une application télétexte où les chiffres indiquent les pages de télétexte. Si l’application mobile est compatible avec l’affichage, à l’instar de Youtube, Dailymotion, Netflix, vous pouvez afficher votre application sur votre téléviseur. Sur l’application mobile, appuyez sur l’icône Google Cast. Les appareils disponibles seront détectés et répertoriés.
Dépannage et astuces Le téléviseur ne s’allume pas. • Assurez-vous que le câble d’alimentation est correctement branché dans la prise de courant. • Débranchez le câble d'alimentation de la prise de courant. Attendez une minute puis rebranchez-le. • Appuyez sur le bouton Veille/Marche du téléviseur. Le téléviseur ne répond pas à la télécommande. la qualité de la réception.
Modes d’affichage typiques de l’entrée VGA Compatibilité des signaux AV et HDMI Le tableau ci-après est une illustration de quelques modes d’affichage vidéo typiques. Votre téléviseur ne peut pas prendre en charge toutes les résolutions.
Formats de fichier pris en charge pour le mode USB Vidéo Code vidéo VP9 Résolution 1920x1080@60fps Taux binaire 40Mbps Profilo Profile0,2 Main/Main10 HEVC/H.265 1920x1080@60fps 50Mbps Profil, niveau élevé @Level 4.1 MPEG1/2 1920x1080@60fps • Profil Simple • Profil Simple Avancé@Niveau 5 • GMC n'est pas supporté MP4 (.mp4, .mov), 3GPP (.3gpp, .3gp), AVI (.avi), MKV (.mkv), WebM (.webm), ASF (.asf), WMV (.wmv),FLV (.flv), OGM (.ogm), flux de transport MPEG (.ts, .trp, .tp),flux de programme MPEG (.
Code vidéo Résolution Taux binaire Profilo Support Motion JPEG 640x480@30fps 10Mbps AVI (.avi), 3GPP (.3gpp, .3gp), MP4 (.mp4, .mov), MKV (.mkv), WebM (.webm), FLV (.flv), OGM (.ogm) VP8 1920x1080@60fps 20Mbps MKV (.mkv), WebM (.webm), FLV (.flv), 3GPP (.3gpp, .3gp), MP4 (.mp4, .mov), AVI (.avi), OGM (.ogm) RV30/RV40 1920x1080@60fps 40Mbps RM (.rm, .rmvb), MKV (.mkv), WebM (.webm) Audio Code audio MPEG1/2 Couche 1 MPEG1/2 Couche 2 MPEG1/2/2.
Code audio Taux d'échantillon Chaîne Taux binaire AAC-LC: 12kbps~ AAC-LC, HEAAC 8KHz ~ 48KHz Jusqu'à 5,1 576kbps V1 6kbps ~ 288kbps V2 : 3kbps ~ 144kbps WMA WMA 10 Pro M0 WMA 10 Pro M1 WMA 10 Pro M2 VORBIS DTS 8KHz ~ 48KHz Jusqu'à 2 < 192kbps 8KHz ~ 48KHz Jusqu'à 5,1 < 384kbps ASF (.asf), WMV (.wma, .wmv), AVI (.avi), 3GPP (.3gpp, .3gp), MP4 (.mp4, .mov) 8KHz ~ 96KHz Jusqu'à 5,1 < 768kbps ASF (.asf), WMV (.wma, .wmv), AVI (.avi), 3GPP (.3gpp, .3gp), MP4 (.mp4, .
Code audio Taux d'échantillon Chaîne Taux binaire Support 8KHz LBR (cook) 11,025KHz Jusqu'à 5,1 22,05KHz, 44,1KHz FLAC 8KHZ~96KHz Jusqu'à 7,1 OPUS 8KHz ~ 48KHz Jusqu'à 6 AMR-NB AMR-WB 8KHz 16KHz 6Kbps ~ RM (.rm, .rmvb, .ra) 128Kbps < 1.6Mbps MKV (.mkv, .mka), WebM (.webm), FLAC (.flac) 6Kbps ~ MKV (.mkv, .mka) 510Kbps WebM (.webm) 1 4.75 ~ 12.2Kbps 3GPP (.3gpp, .3gp) 1 6.6 ~ 23.85Kbps 3GPP (.3gpp, .3gp), MP4 (.mp4, .mov, m4a) MP4 (.mp4, .
Externe Extension du fichier .srt Analyseur de sous-titre Remarque SubRip Sous-station Alpha .ssa/ .ass Sous-station Alpha avancée .smi SAMI .sub MicroDVD SubIdx (VobSub) .txt TMPlayer Résolutions DVI prises en charge Reportez-vous aux résolutions suivantes au moment de raccorder des périphériques à votre téléviseur à l’aide des câbles convertisseurs DVI (DVI à HDMI - non fournis).
Spécifications du transmetteur LAN sans fil Spécifications Télédiffusion PAL BG/I/DK SECAM BG/DK Réception des chaînes VHF (BAND I/III), UHF (BAND U), HYPERBAND Réception numérique TV satellite numérique terrestre intégré/câble (DVB-T-C-S)(DVB-T2, DVB-S2 conforme) Gammes de fréquences Puissance max de sortie 2400 - 2483,5 MHz (CH1-CH13) < 100 mW 5150 - 5250 MHz (CH36 - CH48) < 200 mW 5250 - 5350 MHz (CH52 - CH64) < 200 mW 5470 - 5725 MHz (CH100 - CH140) < 200 mW Restrictions pays Cet appare
Remarque Licences DVB / Diffusion des données / Fonctions IPTV • Ce téléviseur a été conçu (à la date Mars 2021) suivant les normes de télévision numérique terrestre DVB-T / T2 (MPEG2, MPEG4-AVC(H.264) et HEVC(H.265)), les normes de télévision numérique par câble DVB-C (MPEG2, MPEG4-AVC(H.264) et HEVC(H.265)), et les normes de télévision numérique par satellite DVB-S (MPEG2, MPEG4AVC(H.264) et HEVC(H.265)).
Mise au rebut des vieux équipements et des piles Déclaration de conformité (DoC) Uniquement pour les pays européens possédant des systèmes de recyclage Ces symboles sur les produits, emballages, et/ou documents joints signifient que les appareils et batteries électriques et électroniques ne doivent pas être mélangés avec le reste de vos ordures ménagères.
Inhaltsverzeichnis Beim USB Modus unterstützte Dateiformate..... 109 Sicherheitsinformationen..................................... 78 Audio.................................................................. 110 Bitte lesen Sie diese Anleitung vollständig vor der Installation oder Inbetriebnahme durch................ 78 Kennzeichnungen auf dem Gerät........................ 79 WARTUNG........................................................... 80 Bildschirm, Gehäuse, Ständer.............................
Sicherheitsinformationen VORSICHT STROMSCHLAGGEFAHR NICHT ÖFFNEN VORSICHT: UM DAS RISIKO AUF EINEN ELEKTRISCHEN SCHOCK ZU REDUZIEREN, DEN DECKEL (ODER DAS RÜCKTEIL) NICHT ENTFERNEN IN DIESEM GERÄT BEFINDEN SICH KEINE TEILE, DIE VOM BENUTZER GEWARTET WERDEN KÖNNEN. WENDEN SIE SICH AN QUALIFIZIERTES SERVICEPERSONAL.
Kennzeichnungen auf dem Gerät Die folgenden Symbole werden auf dem Gerät als Kennzeichnungen für Einschränkungen und Vorsichtsmaßnahmen sowie Sicherheitshinweise verwendet. Jede Kennzeichnung ist nur dann zu beachten, wenn diese auf dem Gerät angebracht worden ist. Beachten Sie diese Informationen aus Sicherheitsgründen. Gerät der Schutzklasse II: Dieses Gerät ist so gebaut, das es keinen Schutzleiter (elektrische Erdung) für die Verbindung zum Stromnetz erfordert.
WARNUNG • Der Einsatz anderer Halterungen für die Wandmontage oder eine eigenständige Installation der Halterung kann zu Verletzungen und Sachschäden führen. Um das Betriebsbereitschaft des Geräts zu gewährleisten sowie aus Sicherheitsgründen müssen Sie die Montage unbedingt durch den entsprechenden qualifizierten Kundendiensts des Händlers oder eine geeigneten Fachmann durchführen lassen.
Entfernen des Standfußes vom TV-Gerät Montage / Entfernen der Standfüße Vorbereitung Nehmen Sie den/die Standfüße und das TV-Gerät aus der Verpackung und legen Sie das Gerät auf eine ebene Arbeitsfläche mit der Bildschirmseite nach unten, die auf ein sauberes und weiches Tuch gelegt werden muss (Decke usw.). • Die Ablagefläche muss größer als das TV-Gerät sein. • Halten Sie das Gerät nicht an der Bildschirmplatte. • Achten Sie darauf, das TV-Gerät weder zu zerbrechen noch zu zerkratzen.
Einleitung Vielen Dank, dass Sie sich für unser Gerät entschieden haben. Sie werden bald Ihren neues TV-Gerät genießen. Bitte lesen Sie diese Anleitungen sorgfältig. Sie enthalten wichtige Informationen, die Ihnen helfen werden, das Beste aus Ihrem TV-Gerät zu bekommen und eine sichere und korrekte Installation und Betrieb zu gewährleisten.
Andere Verbindungen Wenn Sie ein externes Gerät an das TV-Gerät anschließen wollen, vergewissern Sie sich, dass sowohl der Fernseher als auch das externe Gerät ausgeschaltet sind. Nachdem Sie alle Geräte angeschlossen haben, können Sie die Geräte wieder anschalten.
• Drücken Sie die Mitte des Steuerschalters am TV-Gerät und halten Sie ihn einige Sekunden lang gedrückt. Ein- / Ausschalten des TV-Geräts Stromanschluss WICHTIG: Das Gerät ist nur für den Betrieb mit 220-240V Wechselspannung bei einer Frequenz von 50 Hz ausgelegt. Geben Sie Ihrem Gerät nach dem Auspacken genug Zeit, sich der Raumtemperatur der Umgebung anzupassen, bevor Sie es einstecken. Stecken Sie das Netzkabel in eine Netzsteckdose. Das TV-Gerät schaltet sich automatisch ein.
Das TV-Gerät einschalten: Drücken Sie die Mitte des Steuerschalters hinein, um das TV-Gerät einzuschalten. Hinweis: Live-TV-Einstellungsmenü OSD im Live-TV-Modus kann nicht über den Steuerschalter angezeigt werden. Bedienung mit der Fernbedienung Drücken Sie die Menü-Taste auf Ihrer Fernbedienung, um im Live-TV-Modus das Live-TV-Einstellungsmenü anzuzeigen. Drücken Sie die Home-Taste, um den Startbildschirm von Android TV anzuzeigen oder zum Startbildschirm zurückzukehren.
Fernbedienung 1. 2. 3. 28 27 4. 5. 6. 7. 8. 9. 10. 11. 12. 13. Hinweis: Andere Panasonic-Geräte können mit dieser Fernbedienung nicht bedient werden. Einlegen der Batterien in die Fernbedienung Nehmen Sie zuerst die kleine Abdeckung des Batteriefachs auf der Rückseite der Fernbedienung ab. Heben Sie die Abdeckung vorsichtig an. Legen Sie zwei 1,5 V AAA - Batterien ein. Vergewissern Sie sich, dass die (+) und (-) Zeichen sich einander entsprechen (korrekte Polarität).
diesem Schritt vorgenommenen Einstellungen können einige Schritte übersprungen werden. Ersteinrichtungsassistent Hinweis: Befolgen Sie die Anweisungen auf dem Bildschirm, um die Ersteinrichtung abzuschließen. Verwenden Sie die Richtungstasten und die OK-Taste auf der Fernbedienung, um auszuwählen, einzustellen, zu bestätigen und fortzufahren. Wenn das Gerät zum ersten Mal eingeschaltet wird, wird ein Willkommensbildschirm angezeigt. Wählen Sie die gewünschte Sprache aus und drücken Sie OK.
Option und drücken Sie die Taste OK. Auf dem Fernsehbildschirm wird ein Code angezeigt. Stellen Sie sicher, dass sich Ihr Telefon oder Computer im selben Netzwerk wie Ihr Fernsehgerät befindet. Öffnen Sie die angegebene Website (androidtv. com/setup, befolgen Sie die Anweisungen auf dem Bildschirm für die aktuelle Website-URL) im Browser Ihres Telefons oder Computers und geben Sie den Code, den Sie auf Ihrem Fernsehbildschirm sehen, in das entsprechende Eingabefeld ein.
Wenn die Option Antenne ausgewählt ist, sucht das TV-Gerät nach digitalen terrestrischen und analogen Sendungen. Markieren Sie im nächsten Bildschirm die Option Scannen und drücken Sie OK, um die Suche zu starten, oder wählen Sie Scan überspringen, um fortzufahren, ohne eine Suche durchzuführen. Hinweis: Wenn das ausgewählte Land keine analogen Sendungen hat, ist die analoge Suchoption möglicherweise nicht verfügbar.
der vorprogrammierten Kanalliste gestartet. Wenn für die SatcoDX-Installation nicht der richtige Satellit ausgewählt wurde, wird ein Warndialog auf dem Bildschirm angezeigt. Der Satellit/die Satelliten, die ausgewählt werden können, wird/werden aufgelistet. Drücken Sie OK, um den Dialog zu schließen, und stellen Sie den Satelliten entsprechend ein. Der Kanalsuchlauf-Bildschirm wird als nächstes angezeigt.
Internet zu surfen, benötigen Sie eine InternetbrowserAnwendung. Führen Sie eine Suche durch oder starten Sie die Google Play App, suchen Sie einen Browser und laden Sie ihn herunter. Geräteeinstellungen und die Option Auto Sleep im Menü TV-Optionen> Erweiterte Optionen, für mehr leistungsbezogene Funktionen. Menüinhalt des Live-TV-Modus Ausschalttimer: Definieren Sie eine Wartezeit, nach der Ihr TV-Gerät automatisch in den Ruhemodus wechseln soll.
HBBTV-Unterstützung: Schalten Sie die HBBTVFunktion ein oder aus. Nicht verfolgen: Legen Sie Ihre Präferenzen hinsichtlich des Tracking-Verhaltens für HBBTVDienste fest. Cookie-Einstellungen: Legen Sie die CookieEinstellungen für HBBTV-Dienste fest. Dauerspeicher: Schalten Sie die DauerspeicherFunktion ein oder aus. Bei Einstellung auf Einwerden Cookies mit einem Ablaufdatum im dauerhaften Speicher des TV-Geräts gespeichert.
Scannen immer verfügbar: Sie können den Ortungsdienst und andere Apps nach Netzwerken suchen lassen, auch wenn die WLAN-Funktion deaktiviert ist. Drücken Sie OK, um es ein- und auszuschalten. in Übereinstimmung mit einer erkennbaren Kanalnummernsequenz organisiert (wenn verfügbar). Wow: Schalten Sie diese Funktion ein und aus. Mit dieser Funktion können Sie Ihr TV-Gerät über ein drahtloses Netzwerk einschalten oder aufwecken. Kanal-Speichertyp: Stellen Sie Ihre Geschäftstyp-Präferenz ein.
OK, um fortzufahren. Markieren Sie Abbrechen und drücken Sie OK, um abzubrechen. Kanalinstallationsmodus - Kabel Automatischer Kanalsuchlauf: Starten Sie eine Suche nach analogen und digitalen Kabelkanälen. Sofern verfügbar, werden die Bedieneroptionen aufgelistet. Wählen Sie die gewünschte aus und drücken Sie OK. Möglicherweise sind Optionen für den Suchmodus, den Kanalsuchtyp, die Frequenz und die Netzwerk-ID verfügbar. Die Optionen können je nach Bediener und Auswahl des Scanmodus variieren.
Satellite Manual Tuning: Starten Sie einen manuellen Satellitensuchlauf. Lieblingsnetzwerk Auswahl: Wählen Sie Ihr Lieblingsnetzwerk. Diese Menüoption ist aktiv, wenn mehr als ein Netzwerk verfügbar ist. Diese Option ist je nach ausgewähltem Land während der Ersteinrichtung möglicherweise nicht verfügbar. Kanal überspringen: Stellen Sie die zu überspringenden Kanäle ein, wenn Sie die Kanäle mit den Programm +/--Tasten auf der Fernbedienung umschalten.
Konten & Anmelden Google: Diese Option ist verfügbar, wenn Sie sich in Ihrem Google-Konto angemeldet haben. Sie können Ihre Einstellungen für die Datensynchronisierung konfigurieren oder Ihr registriertes Konto auf dem TV-Gerät entfernen. Markieren Sie einen Dienst, der im Abschnitt Synchronisierte Apps auswählen aufgeführt ist, und drücken Sie OK, um die Datensynchronisierung zu aktivieren / deaktivieren.
Strom: Dieses Menü hat die gleichen Optionen wie im Menü TV-Optionen> Netzstrom. Überprüfen Sie die Optionen Timer und Bildschirmschoner im Menü Einstellungen> Geräteeinstellungen und die Option Auto Sleep im Menü TV-Optionen> Erweiterte Optionen, für mehr leistungsbezogene Funktionen. Ausschalttimer: Definieren Sie eine Wartezeit, nach der Ihr TV-Gerät automatisch in den Ruhemodus wechseln soll. Bild aus: Wählen Sie diese Option und drücken Sie OK, um den Bildschirm auszuschalten.
Spiel Modus: Der Spielemodus ist der Modus, der einige der Bildverarbeitungsalgorithmen reduziert, um mit Videospielen mit hohen Bildraten Schritt zu halten. Schalten Sie den Spielemodus ein oder aus. PC Modus: Der PC-Modus ist der Modus, in dem einige Bildverarbeitungsalgorithmen reduziert werden, um den Signaltyp beizubehalten. Es kann insbesondere für RGB-Eingänge verwendet werden. Schalten Sie die PC-Modus-Funktion ein oder aus.
Speicher: Falls verfügbar, zeigen Sie den gesamten Speicherplatzstatus des TV-Geräts und der angeschlossenen Geräte an. Um detaillierte Informationen zu den Verwendungsdetails anzuzeigen, markieren Sie und drücken Sie OK. Es gibt auch Optionen zum Auswerfen und Formatieren der angeschlossenen Speichergeräte. Startbildschirm: Passen Sie Ihren Startbildschirm an. Wählen Sie Kanäle aus, die auf dem Startbildschirm angezeigt werden.
erkannt und aufgelistet, oder die Paarung-Anfrage wird angezeigt. Wählen Sie Ihr Gerät aus der Liste aus und drücken Sie OK oder markieren Sie OK und drücken Sie OK, um die Paarung zu starten. Angeschlossene Geräte werden ebenfalls hier aufgelistet. Um ein Gerät zu entkoppeln, markieren Sie dieses und drücken Sie OK. Markieren Sie dann die Option Paarung aufheben und drücken Sie OK. Wählen Sie dann OK und drücken Sie erneut OK, um das Gerät vom TV-Gerät zu entkoppeln.
Programmführer Mit Hilfe der EPG-Funktion (Electronic Program Guide) Ihres TV-Geräts können Sie den Veranstaltungsplan der aktuell installierten Sender in Ihrer Senderliste durchsuchen. Es hängt von der entsprechenden Sendung ab, ob diese Funktion unterstützt wird oder nicht. Um auf den elektronischen Programmführer auf dem Startbildschirm zuzugreifen, drücken Sie die Guide-Taste auf der Fernbedienung. Der elektronische Programmführer ist auch im LiveTV-Modus verfügbar.
Informationen finden Sie im Abschnitt Netzwerk & Internet unter dem Titel Einstellungen. Maximalwerte für die Wireless Standards. Sie sind nicht die tatsächlichen Geschwindigkeiten der Datenübertragung. Welcher Ort die beste Übertragungsqualität bietet, hängt von den jeweiligen Bedingungen ab. 1 Die Wireless Funktion des TV Geräts unterstützt Modems des Typs 802.11 a, b, g, n und ac. Es wird dringend empfohlen, dass Sie das IEEE 802.
Wenn Sie die Option Ein Fotomodus auswählen und OK drücken, wird das Bild, das Sie zuvor als Fotorahmenbild festgelegt haben, angezeigt, wenn die Fotorahmenfunktion aktiviert ist. Wenn Sie die Option USB-Speichergerät auswählen, wird die erste Datei (im rekursiven Parser-Modus) angezeigt. Um das Fotorahmenbild einzustellen, drücken Sie die Menü-Taste, während die Fotodatei Ihrer Wahl angezeigt wird, markieren Sie das Fotorahmenbild und drücken Sie OK.
Zurück/Rückgabe: Stoppen Sie die Diashow und kehren Sie zum Media Player-Bildschirm zurück. wiedergegeben, wenn die Fotorahmenfunktion aktiviert ist. Menüoptionen Spektrum aus- / einblenden: Falls verfügbar, Spektrum aus- / einblenden. Drücken Sie die Menü-Taste, um die verfügbaren Optionen während der Wiedergabe oder Anzeige von Mediendateien anzuzeigen. Der Inhalt dieses Menüs unterscheidet sich je nach Mediendateityp.
Taste OK. Befolgen Sie die Anweisungen auf dem Bildschirm, um weitere Informationen zu anderen verfügbaren Tastenfunktionen zu erhalten. • Scrollen Sie nach unten zum Abschnitt Consumer Electronic Control (CEC). Überprüfen Sie, ob die HDMI-Steuerungsoption aktiviert ist. Hinweis: Warten Sie jeweils etwas vor dem Anschließen bzw. Trennen, da der Player eventuell noch Daten ausliest. Andernfalls können Schäden am USB-Player und USBGerät verursacht werden.
4. Google Cast Mit der integrierten Google Cast-Technologie können Sie Inhalte von Ihrem Mobilgerät direkt auf Ihren Fernseher übertragen. Wenn Ihr Mobilgerät über die Google Cast-Funktion verfügt, können Sie den Bildschirm Ihres Geräts drahtlos auf Ihr TV-Gerät spiegeln. Wählen Sie die Option Bildschirmdarstellung auf Ihrem Android-Gerät. Verfügbare Geräte werden erkannt und aufgelistet. Wählen Sie Ihr Fernsehgerät aus der Liste aus und tippen Sie darauf, um die Übertragung zu starten.
Modus jeden Morgen um 05:00 Uhr nach neuen oder fehlenden digitalen Kanälen. Wenn die Option Automatische Kanalaktualisierung im Menü Einstellungen> Kanal aktiviert ist, wird das TV-Gerät innerhalb von 5 Minuten nach dem Umschalten in den Schnellbereitschaftsmodus und der Suche nach Kanälen aktiviert. Die Standby-LED blinkt während dieses Vorgangs. Sobald die Standby-LED nicht mehr blinkt, ist der Suchvorgang abgeschlossen. Alle neu gefundenen Kanäle werden der Kanalliste hinzugefügt.
• Stellen Sie sicher, dass die Lautstärke nicht stummgeschaltet oder auf Null gestellt ist. Erhöhen Sie die zu überprüfende Lautstärke. Index Auflösung Frequenz 21 «1400x1050 60Hz • Stellen Sie sicher, dass der Audioausgang des TV-Geräts mit dem Audioeingang des externen Soundsystems verbunden ist. 22 «1400x1050 75Hz 23 «1440x900 60Hz • Es könnte sein, dass der Ton nur aus einem Lautsprecher kommt Überprüfen Sie die BalanceEinstellung im Ton-Menü.
Beim USB Modus unterstützte Dateiformate Video Video-Codec VP9 Auflösung 1920x1080@60fps Bitrate 40Mbps Profil Profile0,2 Haupt/Haupt 10 HEVC/H.265 1920x1080@60fps 50Mbps Profil, High Tier @Stufe 4.1 MPEG1/2 1920x1080@60fps • Einfaches Profil • Erweitertes einfaches Profil auf Stufe 5 • GMC wird nicht unterstützt MP4 (.mp4, .mov), 3GPP (.3gpp, .3gp), AVI (.avi), MKV (.mkv), WebM (.webm), ASF (.asf), WMV (.wmv),FLV (.flv), OGM (.ogm), MPEG transportstream (.ts, .trp, .tp),MPEG programstream (.
Video-Codec Auflösung Bitrate Profil Behälter Motion JPEG 640x480@30fps 10Mbps AVI (.avi), 3GPP (.3gpp, .3gp), MP4 (.mp4, .mov), MKV (.mkv), WebM (.webm), FLV (.flv), OGM (.ogm) VP8 1920x1080@60fps 20Mbps MKV (.mkv), WebM (.webm), FLV (.flv), 3GPP (.3gpp, .3gp), MP4 (.mp4, .mov), AVI (.avi), OGM (.ogm) RV30/RV40 1920x1080@60fps 40Mbps RM (.rm, .rmvb), MKV (.mkv), WebM (.
Audio-Codec Sample-Rate Kanal Bitrate Behälter Hinweis AAC AAC (.aac), AVI (.avi), MKV (.mkv, .mka), WebM (.webm), 3GPP (.3gpp, .3gp), MP4 (.mp4, .mov, 576kbps m4a), MPEG Transportstream (.ts, Bis zu 5,1 V1 6kbps ~ .trp, .tp), MPEG Programmstream (.DAT, .VOB, .MPG, .MPEG), FLV 288kbps (.flv), RM (.rm, .rmvb, .ra), WAV V2: 3kbps ~ (.wav), WMV (.wmv), ASF (.asf), OGM (.ogm) 144kbps 12kbps~ AAC-LC, HEAAC .
Audio-Codec Sample-Rate Kanal Bitrate Behälter 8KHz LBR (cook) 11.025KHz, Bis zu 5,1 22,05KHz, 44,1KHz 6Kbps ~ RM (.rm, .rmvb, .ra) 128Kbps FLAC 8KHz~96KHz Bis zu 7,1 < 1.6Mbps OPUS 8KHz ~ 48KHz Bis zu 6 AMR-NB AMR-WB 8KHz 16KHz MKV (.mkv, .mka), WebM (.webm), FLAC (.flac) 6Kbps ~ MKV (.mkv, .mka) 510Kbps WebM (.webm) 1 4.75 ~ 12.2Kbps 3GPP (.3gpp, .3gp) 1 6.6 ~ 23.85Kbps 3GPP (.3gpp, .3gp), MP4 (.mp4, .mov, m4a) MP4 (.mp4, .
Externe Dateinamenserweiterung .srt Untertitel-Parser Hinweis SubRip SubStation Alpha .ssa/ .ass Fortgeschrittenes SubStation Alpha .smi SAMI .sub MicroDVD SubIdx (VobSub) .txt TMPlayer Unterstützte DVI-Auflösungen Wenn Sie Zusatzgeräte über das DVI-Adapterkabel (DVI zu HDMI, nicht im Lieferumfang enthalten) an die Anschlüsse Ihres TV-Gerätes anschließen, können Sie die folgenden Auflösungsrichtwerte verwenden.
Spezifikationen des drahtloses LANTransmitters (WLAN)** Technische Daten TV-Übertragung PAL BG/I/DK SECAM BG/DK Frequenzbereiche Max.
Hinweis Lizenzen DVB / Datenübertragung / IPTV-Funktionen • Dieser Fernseher entspricht den Standards (Stand März 2021) von DVB-T / T2 (MPEG2, MPEG4-AVC (H.264) und HEVC (H.265)) digitalen terrestrischen Diensten, DVB-C (MPEG2, MPEG4-AVC (H.264) und HEVC (H.265)) digitalen Kabeldiensten und DVB-S (MPEG2, MPEG4-AVC (H.264) und HEVC (H.265)) digitalen Satellitendiensten. Fragen Sie Ihren Händler nach der Verfügbarkeit von DVB-T / T2 oder DBV-S-Programmen in Ihrer Gegend.
Entsorgung von Altgeräten und Akkus Konformitätserklärung (DoC) Hiermit erklärt Panasonic Marketing Europe GmbH, dass dieses TV-Gerät die grundlegenden Anforderungen und anderen relevanten Vorschriften der Richtlinie 2014/53/EU einhält. Nur für die Europäische Union und Staaten mit Recyclingsystemen Diese Symbole auf den Produkten, Verpackungen und/oder begleitenden Dokumenten bedeuten, dass Elektround Elektronikgeräte sowie Batterien nicht in den normalen Hausmüll entsorgt werden dürfen.
İçindekiler USB Modunda Desteklenen Dosya Formatları.. 145 Güvenlik Bilgileri................................................ 118 Ses..................................................................... 146 ÖNEMLİ - Kurulum veya çalıştırma öncesinde bu talimatları tam olarak okuyunuz......................... 118 Ürün üzerindeki İşaretler.................................... 118 Bakım................................................................. 120 Gösterge paneli, Kabin, Sehpa........................
kapların TV üzerine yerleştirilmesine (örn. ünitenin üzerindeki raflara) izin vermeyiniz. • TV'nin doğrudan güneş ışığına maruz kalmasına izin vermeyiniz veya yanan mumlar gibi açık alevleri TV'nin üzerine veya yakınlarına yerleştirmeyiniz. • TV setinin yanına elektrikli ısıtıcılar, radyatörler, vb. gibi ısı kaynakları yerleştirmeyiniz. Güvenlik Bilgileri DİKKAT ELEKTRİK ÇARPMASI RİSKİ AÇMAYINIZ • TV'yi yere veya eğimli yüzeylere yerleştirmeyiniz.
CLASS 1 LASER PRODUCT Sınıf 1 Lazer Ürün: Bu ürün, öngörülen çalışma koşullarında makul ölçüde güvenli olan Sınıf 1 lazer kaynağı içermektedir. UYARI Pili yutmayınız, Kimyasal Yanma tehlikesi Bu ürün veya birlikte verilen aksesuarlar bir pul/düğme tipi pil içerebilir. Eğer düğme tipi pil yutulursa, sadece 2 saat içerisinde vücudunuzun içinde ciddi yanmalara ve ölüme neden olabilir. Yeni ve kullanılmış pilleri çocuklardan uzak tutunuz.
Sehpanın Takılması / Sökülmesi Bakım Hazırlıklar Sehpa(lar)ı ve TV'yi ambalajdan çıkarınız ve TV'yi ekran paneli temiz ve yumuşak bir beze (battaniye, vb.) gelecek şekilde bir çalışma masasına koyunuz. Önce, elektrik fişini prizden çekin. Gösterge paneli, Kabin, Sehpa Düzenli bakım: Kirleri ve parmak izlerini temizlemek için gösterge panelinin, kabinin ve sehpanın yüzeylerini yumuşak bir bez kullanarak nazikçe siliniz. İnatçı kirler için: 1. Önce yüzeydeki tozları temizleyiniz. 2.
Sehpanın TV'den sökülmesi Duvara askı aparatı kullanılması veya TV'nin yeniden ambalajına konulması durumunda sehpanın sökülmesi gereklidir. • Ekran paneli aşağı bakacak şekilde TV'yi temiz ve yumuşak bir bez üzerine koyunuz. Sehpa(lar)ı yüzeyin kenarından çıkacak şekilde bırakınız. • Sehpa(lar)ı sabitleyen vidaları sökünüz. Giriş Ürünümüzü satın aldığınız için teşekkür ederiz. Kısa zamanda yeni TV'nizin keyfini çıkaracaksınız. Lütfen bu açıklamaları dikkatli bir şekilde okuyunuz.
Yüksek Dinamik Aralık (HDR) / Hibrit KayıtGama (HLG): Bu özelliğin kullanılmasıyla, TV birkaç farklı poz yakalayarak ve bunları birleştirerek TV daha geniş bir dinamik aralıkta parlaklık üretebilir. HDR/HLG daha parlak, daha gerçekçi vurgular, daha gerçekçi renkler ve diğer iyileştirmeler ile daha iyi resim kalitesi vaat eder. Film yapımcılarının elde etmek istedikleri görünümü sağlar, karanlık gölgelerin gizli bölgelerini güneş ışığını tam netlikte, renkte ve detaylı biçimde gösterir.
Diğer Bağlantılar TV'nize bir cihaz bağlamak isterseniz, herhangi bir bağlantı yapmadan önce hem TV'nin hem de cihazın kapalı olduğundan emin olunuz. Bağlantı yapıldıktan sonra, üniteleri açabilir ve kullanabilirsiniz.
TV'nin açılması/kapatılması Güç bağlantısını yapınız ÖNEMLİ: TV seti, 220-240V AC, 50 Hz prizde çalışacak şekilde tasarlanmıştır. Kutuyu açtıktan sonra elektrik şebekesine bağlamadan önce TV'nin oda sıcaklığına kadar çıkmasını bekleyiniz. Güç kablosunu, ana soket çıkışına takınız. TV otomatik olarak açılacaktır. ”anahtarını “|” konumuna TV üzerinde bulunan “ alınız. TV bekleme moduna geçecek ve bekleme LED’i yanacaktır. Kontrol düğmesi, TV'nin Program ve Hızlı Bekleme işlevlerini kontrol etmenizi sağlar.
Uzaktan Kumanda 1. 2. 3. 4. 5. 6. 7. 28 27 8. 9. 10. 11. 12. 13. 14. 15. 16. 17. Not: Diğer Panasonic cihazları bu uzaktan kumanda ile çalıştırılamaz. Pilleri Uzaktan Kumandanıza Yerleştiriniz Önce uzaktan kumandanın arka tarafında bulunan pil yuvasının kapağını sabitleyen vidayı sökünüz. Kapağı yavaşça kaldırınız. İki adet 1,5 V’luk AAA pil yerleştiriniz. (+) ve (-) işaretlerinin eşleştiğinden emin olunuz (doğru kutuplara dikkat ediniz). Eski ve yeni pilleri karıştırmayınız.
Başlangıç Ayarları Sihirbazı Not: İlk kurulum işlemini tamamlamak için ekrandaki verilen açıklamaları uygulayın. Seçim yapmak, ayarlamak, onaylamak ve ilerlemek için yön tuşlarını ve OK tuşunu kullanınız. İlk defa açıldığında, karşılama ekranı görüntülenecektir. Dilinizi seçin ve Tamam'a basın. TV'nizi ayarlamak ve kanalları kurmak için ekrandaki talimatları takip edin. Kurulum sihirbazı kurulum sürecince size rehberlik edecektir.
onaylamak ve devam etmek için uzaktan kumandadaki OK tuşuna basın. Ayrıca bu ekranda Hizmet Koşullarını, Gizlilik Politikasını ve Play Hizmet Koşullarını da görüntüleyebilirsiniz. Bu içerikleri görüntülemek için bir internet bağlantısı gereklidir. Eğer internet bağlantısı bulunmuyorsa, bu bilgilerin görüntülenebileceği internet adresini belirten bir mesaj görüntülenecektir. olsa bile TV'nizi Cast komutlarına yanıt vermek için uyandırmaları mümkün olacaktır. 8.
Eğer Tercih Edilen Uydu seçimi yapılırsa, sonraki ekran Operatör Seçimi ekranı olacaktır. Listeden sadece bir operatör seçebilirsiniz. İstediğiniz operatörü seçiniz ve ilerlemek için OK veya Sağ yön tuşuna basınız. Bu adımda, seçilen operatöre bağlı olarak aşağıdaki seçeneklerden bazıları önceden tanımlanmış olabilir. İlerlemeden önce parametreleri kontrol ediniz ve eğer gerekirse ayarlayınız. D a h a s o n r a D V B S Ya p ı l a n d ı r m a Ay a r l a r ı ekranı görüntülenecektir.
odaklanmak için hareket ediniz. Bir seçim yapmak veya bir alt menüye girmek için OK tuşuna basınız. Ekranın sol üst köşesinde, arama araçları bulunacaktır. Sanal klavye aracılığıyla bir kelime girerek bir arama başlatabilir ya da eğer uzaktan kumandanızda tümleşik bir mikrofon bulunuyorsa, aramayı başlatmak için sesli arama seçeneğini kullanabilirsiniz. İstediğiniz ögeye odaklanmak için hareket ediniz ve ilerlemek için OK tuşuna basınız.
ve seçim yapmak için OK tuşuna basın. Seçilen kanal, TV herhangi bir bekleme modundan çıkıp her açıldığında görüntülenir. Seçim Modu Son Durum olarak ayarlanmışsa, izlenen son kanal görüntülenecektir. Etkileşim Kanalı: Etkileşim Kanalı fonksiyonunu açın veya kapatın. Bu özellik yalnızca İngiltere ve İrlanda'da kullanışlıdır. MHEG PIN Koruması: MHEG PIN koruma fonksiyonunu açın veya kapatın. Bu ayar MHEG uygulamalarının bazılarına erişimi etkinleştirir veya devre dışı bırakır.
Tarama her zaman kullanılabilir: WLAN işlevi kapalı olsa bile konum hizmetinin ve diğer uygulamaların ağları taramasına izin verebilirsiniz. Açmak ve kapatmak için OK düğmesine basın. Wow: Bu işlevi açın ve kapatın. WLAN üzerinden uyandırma fonksiyonu TV'nizin kablosuz ağ aracılığıyla açılmasına veya uyandırılmasına olanak sağlar. Wol: Bu işlevi açın ve kapatın. Bu fonksiyon, TV'nizin ağ aracılığıyla açılmasına veya uyandırılmasına olanak sağlar.
rilecektir. Arama seçeneğini işaretleyiniz ve aramayı başlatmak için OK tuşuna basınız. Bulunan kanallar kanal listesine kaydedilecektir. LCN: LCN tercihinizi ayarlayın. LCN, mevcut yayınları tanınabilir bir kanal numarası sırasına (varsa) göre düzenleyen Mantıklı Kanal Numarası sistemidir. Kanal Tarama Türü: Arama türü tercihinizi ayarlayın. Kanal Hafızası Türü: Hafıza türü tercihinizi ayarlayın. Favori Ağ Seçimi: Favori ağınızı seçin.
Kanal Kurulum Modu Açık Kaynak Lisansları Bu seçeneği Anten, Kablo, Tercih Edilen Uydu, Genel Uydu veya Uydu olarak ayarlayabilirsiniz. Otomatik Kanal Güncelleme Otomatik kanal güncelleme fonksiyonunu açar veya kapatır. Kanal Güncelleme Mesajı Kanal güncelleme mesajı fonksiyonunu açar veya kapatır. Kanal Kurulum Modu seçimine bağlı olarak bu öge görünmeyebilir. Yetişkin Kontrolleri (*) Bu menüye girmek için, önce PIN girilmelidir. Varsayılan PIN 1234’dır.
Cihaz Tercihleri Hakkında: Sistem güncellemelerini kontrol edin, cihazın adını değiştirin, TV'yi yeniden başlatın ve ağ adresleri, seri numaraları, sürümler gibi sistem bilgilerini görüntüleyin. Ayrıca yasal bilgileri görüntüleyebilir, reklamları yönetebilir, reklam kimliğinizi görüntüleyebilir ve sıfırlayabilir ve ilgi alanlarınıza göre kişiselleştirilmiş reklamları açabilir/kapatabilirsiniz. Netflix ESN: ESN numaranızı görüntüler.
Kullanıcı olarak ayarlanmadıysa, Renk Sıcaklığı seçeneği Kullanıcı olarak değiştirilecektir. Ekran Modu: Ekranın en-boy oranını ayarlar. Tercihinize göre önceden tanımlanmış seçeneklerden birini seçin. HDR: HDR fonksiyonunu açar veya kapatır. HDR içeriği algılanırsa bu öğe kullanılabilir. Gelişmiş Video DNR: Dinamik Gürültü Azaltma (Dynamic Noise Reduction, DNR) dijital veya analog sinyaldeki gürültüyü azaltma işlemidir.
Dolby Ses İşleme: Dolby Ses İşleme ile TV'nizin ses kalitesini yükseltebilirsiniz. Seçenekleri görmek ve ayarlamak için OK tuşuna basın. Diğer bazı ses seçenekleri kullanılamayabilir ve burada yapılan ayarlara bağlı olarak gri renkte görünebilir. Dolby Ses İşleme: Bu seçeneği vurgulayın ve bu fonksiyonu açmak/kapatmak için OK düğmesine basın. Ses Modu: Dolby Ses İşleme seçeneği açıksa, Ses Modu seçeneği ayarlanabilecektir.
OK düğmesine basın veya OK seçeneğini işaretleyin ve eşleştirmeye başlamak için OK düğmesine basın. veya Canlı TV modunda TV seçenekleri menüsünden erişebilirsiniz. Bağlı cihazlar da burada listelenecektir. Bir cihazın eşleştirmesini sonlandırmak için, bu cihazı işaretleyiniz ve OK tuşuna basınız. Ardından Eşleştirmeyi Kaldır seçeneğini işaretleyin ve OK düğmesine basın. Ardından OK seçimini yapınız ve cihazın TV ile arasındaki eşleştirmeyi sonlandırmak için OK tuşuna yeniden basınız.
Program rehberinde gezinmek için yön tuşlarını kullanınız. Listede bir önceki/sonraki kanala geçiş yapmak için Yukarı/Aşağı yön tuşlarını ya da Program +/- tuşlarını ve halihazırda işaretlenmiş kanalda istenilen bir programı seçmek için Sol/Sağ yön tuşlarını kullanabilirsiniz. Eğer kullanılabilir durumda ise işaretlenmiş programın tam adı, başlangıç-bitiş zamanı, türü ve program hakkında kısa bir bilgi ekranın alt kısmında görüntülenecektir. 1. Geniş Bant ISP bağlantısı 2. LAN (Ethernet) kablosu 3.
olabilir. Böyle bir durumda, bağlanmak istediğiniz kablosuz ağa bağlandıktan sonra Ana Ekran’ın sağ üstünde yer alan Bildirimler’i vurgulayın ve OK’a’a basın. Ardından Kablosuz Ağa Giriş Yapın bildirimini vurgulayın ve OK’a basın. Giriş yapmak için kullanıcı bilgilerinizi girin. Bant genişliğini artırmak için aynı anda 2.4 ve 5 GHz bantlarına sahip bir Kablosuz-N yönlendirici (IEEE 802.11a/b/g/n/ac) tasarlanmıştır.
Oynat/Duraklat: Oynatmayı duraklatır ve devam ettirir. Geri Sarma: Geri sarmak için basın ve basılı tutun. Hızlı İleri Sarma: Hızlı ileri sarmak için basın ve basılı tutun. Durdur: Oynatmayı durdurun. Program +: Sonraki dosyaya geçin. Program -: Önceki dosyaya geçin. Geri/Geri Dön: Medya oynatıcı ekranına geri dönün. Önce oynatmayı durdurmadan Back/Return düğmesine basarsanız, multimedya oynatıcıda gezinirken oynatma devam eder. Oynatmayı kontrol etmek için medya oynatıcı düğmelerini kullanabilirsiniz.
Lyric Options: Varsa şarkı sözü seçeneklerini görüntüleyin. Görüntü kapalı: TV’nizin güç menüsüne girin. Ekranı kapatmak için buradaki Picture off (Resim kapalı) seçeneğini kullanabilirsiniz. Ekranı yeniden açmak için uzaktan kumanda veya TV üzerindeki bir tuşa basınız. Picture Settings: Resim ayarları menüsünü görüntüleyin. Sound Settings: Ses ayarları menüsünü görüntüleyin. Audio Settings: Birden fazla mevcutsa film müziği seçeneğini ayarlayın.
Bağlanmış olan HDMI kaynağı seçildikten sonra TV uzaktan kumandası otomatik olarak bu cihazı kontrol edebilir. Ancak tüm tuşların işlevleri cihaza yönlendirilmeyecektir. Sadece CEC Uzaktan Kumanda fonksiyonunu destekleyen cihazlar TV uzaktan kumandasına yanıt verecektir. TV, ARC ( S es Dönüş Kanal ı) özelliğini de desteklemektedir. Bu özellik, TV ile ses sistemleri (A/V alıcı veya hoparlör sistemi) arasındaki kablo bağlantılarının yerine kullanılan bir ses bağlantısıdır.
Not: Bu özelliği Canlı TV modunda TV Seçenekleri>Gelişmiş Seçenekler> HBBTV Ayarları menüsünden etkinleştirebilir veya devre dışı bırakabilirsiniz. Hızlı Bekleme Arama Eğer daha önceden bir otomatik arama yapılmışsa, TV'niz hızlı bekleme modunda iken her sabah saat 05:00'te yeni veya eksik dijital kanallar için arama yapacaktır. Ayarlar>Kanal menüsündeki Otomatik Kanal Güncelleme seçeneği etkinleştirildiyse TV hızlı bekleme moduna geçtikten ve kanal aradıktan sonra 5 dakika içinde uyanacaktır.
• TV'nin ses çıkışının harici ses sisteminin ses girişine bağlanmış olduğundan emin olunuz. Dizin Çözünürlük Frekans • Ses, hoparlörlerin sadece birinden geliyor. Ses menüsünden dengeleme ayarlarını kontrol ediniz. 23 *.1440x900 60Hz 24 *.1440x900 75Hz 25 *.1600x1200 60Hz 26 *.1680x1050 59Hz 27 *.1680x1050 60Hz 28 *.1920x1080 60Hz Giriş kaynakları - seçilemez • Cihazın TV'ye düzgün takılmış olduğundan emin olunuz. • Tüm kabloların doğru bağlanmış olduğundan emin olunuz.
USB Modunda Desteklenen Dosya Formatları Video Video Şifrelemesi VP9 Çözünürlük 1920x1080@60fps Bit değeri 40Mbps Profil Profil 0,2 Ana/Ana10 HEVC/H.265 1920x1080@60fps 50Mbps Profil, Yüksek Katman @Seviye 4.1 MPEG1/2 1920x1080@60fps WebM (.webm) MP4 (.mp4, .mov), 3GPP (.3gpp, .3gp), MPEG taşıma akışı (.ts, .trp, .tp), MKV (.mkv), WebM (.webm), FLV (.flv), AVI (.avi), H265 (.265) 80Mbps MP@HL • Basit Profil • Gelişmiş Basit Profil @Seviye 5 • GMC desteklenmez MP4 (.mp4, .mov), 3GPP (.3gpp, .
Video Şifrelemesi Çözünürlük Bit değeri Profil Taşıyıcı Hareketli JPEG 640x480@30fps 10Mbps AVI (.avi), 3GPP (.3gpp, .3gp), MP4 (.mp4, .mov), MKV (.mkv), WebM (.webm), FLV (.flv), OGM (.ogm) VP8 1920x1080@60fps 20Mbps MKV (.mkv), WebM (.webm), FLV (.flv), 3GPP (.3gpp, .3gp), MP4 (.mp4, .mov), AVI (.avi), OGM (.ogm) RV30/RV40 1920x1080@60fps 40Mbps RM (.rm, .rmvb), MKV (.mkv), WebM (.webm) Ses Ses Şifrelemesi MPEG1/2 Katman 1 MPEG1/2 Katman 2 MPEG1/2/2.
Ses Şifrelemesi Örnek oranı Kanal Bit değeri AAC-LC: 12kbps~ AAC-LC, HEAAC 8KHz ~ 48KHz 5,1’ya kadar 576kbps V1 6kbps ~ 288kbps V2: 3kbps ~ 144kbps WMA WMA 10 Pro M0 WMA 10 Pro M1 WMA 10 Pro M2 VORBIS DTS 8KHz ~ 48KHz 2’ya kadar < 192kbps 8KHz ~ 48KHz 5,1’ya kadar < 384kbps ASF (.asf), WMV (.wma, .wmv), AVI (.avi), 3GPP (.3gpp, .3gp), MP4 (.mp4, .mov) 8KHz ~ 96KHz 5,1’ya kadar < 768kbps ASF (.asf), WMV (.wma, .wmv), AVI (.avi), 3GPP (.3gpp, .3gp), MP4 (.mp4, .
Ses Şifrelemesi Örnek oranı Kanal Bit değeri Taşıyıcı 8KHz LBR (cook) 11.025KHz, 22,05KHz, 44,1KHz 5,1’ya kadar FLAC 8KHz~96KHz 7,1’ya kadar OPUS 8KHz ~ 48KHz 6’ya kadar AMR-NB AMR-WB 8KHz 16KHz 6Kbps ~ RM (.rm, .rmvb, .ra) 128Kbps < 1.6Mbps MKV (.mkv, .mka), WebM (.webm), FLAC (.flac) 6Kbps ~ MKV (.mkv, .mka) 510Kbps WebM (.webm) 1 4,75 ~ 12,2Kbps 3GPP (.3gpp, .3gp) 1 6,6 ~ 23,85Kbps 3GPP (.3gpp, .3gp), MP4 (.mp4, .mov, m4a) MP4 (.mp4, .
Harici Dosya Uzantısı .srt Altyazı Ayrıştırıcı Not SubRip SubStation Alpha .ssa/ .ass Gelişmiş Alt İstasyon Alfa .smi SAMI .sub MicroDVD SubIdx (VobSub) .txt TMPlayer Desteklenen DVI Çözünürlükleri Cihazı DVI dönüştürme kablosu (DVI - HDMI kablosu - tedarik edilmemiştir) ile TV’nizin konektörüne bağladığınızda, aşağıdaki çözülüm bilgilerine başvurabilirsiniz. 56Hz 66Hz 70Hz x *.640x480 *.800x600 60Hz x x *.1280x768 x *.1280x960 x *.1360x768 x *.1366x768 x *.1280x1024 x *.
Kablosuz LAN İletici Özellikleri Özellikler TV Yayını PAL BG/I/DK/ SECAM BG/DK Frekans Aralıkları Maksimum Çıkış Gücü Alınan Kanallar VHF (BANT I/III) - UHF (BANT U) - HİPERBANT 2400 - 2483,5 MHz (Kanal 1-Kanal 13) < 100 mW Tam entegre dijital karasalkablolu-uydu yayınları alan TV (DVB-T-C-S) (DVB-T2, DVB-S2 uyumlu) 5150 - 5250 MHz (Kanal 36-Kanal 48) < 200 mW Dijital Alış 5250 - 5350 MHz (Kanal 52-Kanal 64) < 200 mW 5470 - 5725 MHz (Kanal 100-Kanal CH140) < 200 mW Kayıtlı Kanalların Sayısı
Uyarı Lisanslar DVB / Veri yayını / IPTV fonksiyonları • Bu TV (Mart 2021 itibariyle) DVB-T / T2 (MPEG2, MPEG4-AVC(H.264) ve HEVC(H.265)) dijital karasal hizmetler, DVB-C (MPEG2, MPEG4-AVC(H.264) ve HEVC(H.265)) dijital kablo hizmetleri ve DVB-S (MPEG2, MPEG4-AVC(H.264) ve HEVC(H.265)) dijital uydu hizmetleri standartlarını karşılamak üzere tasarlanmıştır. Bölgenizde DVB-T / T2 veya DVB-S yayınlarının mevcudiyeti için yetkili satıcılarımızdan bilgi alabilirsiniz.
Eski Ekipmanların ve Pillerin Bertaraf Edilmesi Uygunluk Beyanı (DoC) Sadece Avrupa Ülkeleri ile geri dönüşüm sistemlerine sahip ülkeler için Ürünlerin, ambalajlarının ve/veya birlikte verilen dokümanların üzerinde bulunan bu semboller, kullanılan elektrikli ve elektronik bileşenler ile pillerin genel evsel atıklar ile karıştırılmaması gerektiği anlamına gelmektedir.