
Operating Instructions
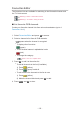
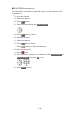

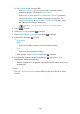
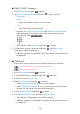
Table Of Contents
- Read first
- Home
- Watching
- Recording
- Media Player
- Network
- Internet content
- Home network
- Network connections
- Network settings
- Network Connection
- Custom - Wireless
- Custom - Wired
- Custom - Wireless Access Point
- Network Status
- TV Name
- TV Remote App Settings
- Network Link Settings
- Smart Speaker Settings
- DVB-via-IP Server Settings
- Mirroring Settings
- Control4 Settings
- VOD Content Refresh
- Software Update
- New Software Message
- IPv6
- Terms of Service and Settings
- Samba Interactive TV Settings
- Photos
- Videos
- Music
- Supported format
- Functions
- Settings
- Support

2) Set Satellite for the selected LNB.
– Select No Satellite if you do not know the connected satellite.
(Available satellite is searched in Auto Setup.)
– Select User defined to set Test Transponder Frequency manually.
– If you set to Single Cable, additional settings are required. Set
SingleCable Version and User Band Frequency. For details, read
the manual of the Single Cable router.
Watching > Tuning and editing channels > Selectable satellites
5. Press BACK to store.
6. Select Auto Setup and press OK to access.
7. Select Search Mode / Scan Mode and press OK to access.
8. Set the item and press OK to store.
●
Scan Mode
Quick:
Scans the suitable frequency for the selected satellite.
Full:
Scans the whole frequency range.
●
After settings, select Start scan and press OK to search.
9. A confirmation screen is displayed and press OK to start Auto Setup.
(Settings are made automatically.)
●
When the operation is completed, the channel at the lowest position will
be displayed.
= Note =
●
Set Dual Tuner Mode to On to select DVB-S signal for DVB-via-IP server
function.
- 138 -