
Operating Instructions
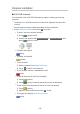
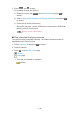
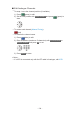

Table Of Contents
- Read first
- Home
- Watching
- Recording
- Media Player
- Network
- Internet content
- Home network
- Network connections
- Network settings
- Network Connection
- Custom - Wireless
- Custom - Wired
- Custom - Wireless Access Point
- Network Status
- TV Name
- TV Remote App Settings
- Network Link Settings
- Smart Speaker Settings
- DVB-via-IP Server Settings
- Mirroring Settings
- Control4 Settings
- VOD Content Refresh
- Software Update
- New Software Message
- IPv6
- Terms of Service and Settings
- Samba Interactive TV Settings
- Photos
- Videos
- Music
- Supported format
- Functions
- Settings
- Support

■ DVB-C, DVB-T, Analogue
1. Select Auto Setup and press OK to access.
2. Set DVB-C Auto Setup Settings and press OK to store. (DVB-C)
●
Scan Mode
Quick:
Scans the suitable frequency in your country.
Full:
Scans the whole frequency range.
●
Normally set Frequency, Symbol Rate and Network ID to Auto. If Auto
is not displayed or if necessary, enter each value specified by your
cable provider with Numeric buttons.
●
After settings, select Start scan and press OK to search.
3. A confirmation screen is displayed and press OK to start Auto Setup.
(Settings are made automatically.)
●
When the operation is completed, the channel at the lowest position will
be displayed.
■ DVB-via-IP
●
Ensure the network connections and network settings are completed.
Functions > DVB-via-IP > DVB-via-IP client connection
Network > Network settings
1. Select Auto Setup and press OK to access.
2. A confirmation screen is displayed and press OK to access.
3. Select a server from Server List.
4. Select Client Settings and press OK to access.
●
Select Unicast Environment to use in a home network.
●
Select Multicast Environment to use in multi family housing units, hotel,
hospital, etc. (All servers are selected automatically.)
5. Select Search Channels and press OK to access.
6. Set DVB-via-IP Search Mode and select Start Auto Setup.
●
Set DVB-via-IP configuration to tune DVB channels.
●
When the operation is completed, the channel at the lowest position will
be displayed.
- 139 -