OPERATING INSTRUCTIONS MODE D’EMPLOI BEDIENUNGSANLEITUNG TX-43HXW704 / TX-43HXW714 TX-50HXW704 / TX-50HXW714 TX-55HXW704 / TX-55HXW714 TX-65HXW704 / TX-65HXW714 LED TV Téléviseur LED LED TV You can find instructions for your TV’s features in the E-Manual. To access the E-Manual, enter Settings menu, select Manuals and press OK. For quick access press Home/Menu button and then Info button. e-MANUAL Vous pouvez accéder aux instructions relatives aux fonctions de votre téléviseur à partir du E-Manuel.
Remote & Accessories......................................... 21 Table of Contents Safety Information.................................................. 2 IMPORTANT - Please read these instructions fully before installing or operating.......................2 Markings on the Product........................................ 2 Maintenance.......................................................... 4 Display panel, Cabinet, Pedestal........................... 4 Mains plug...........................................
• Do not expose the TV to direct sunlight or do not place open flames such as lit candles on the top of or near the TV. • Do not place any heat sources such as electric heaters, radiators, etc. near the TV set. Safety Information CAUTION RISK OF ELECTRIC SHOCK DO NOT OPEN • Do not place the TV on the floor and inclined surfaces. CAUTION: TO REDUCE THE RISK OF ELECTRIC SHOCK DO NOT REMOVE COVER (OR BACK). NO USER-SERVICEABLE PARTS INSIDE. REFER SERVICING TO QUALIFIED SERVICE PERSONNEL.
WARNING Do not ingest the battery, Chemical Burn Hazard This product or the accessories supplied with the product may contain a coin/button cell battery. If the coin/ button cell battery is swallowed, it can cause severe internal burns in just 2 hours and can lead to death. Keep new and used batteries away from children. If the battery compartment does not close securely, stop using the product and keep it away from children.
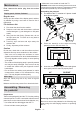
• Make sure not to scratch or break the TV. Maintenance First, remove the mains plug from the mains socket. Display panel, Cabinet, Pedestal CAUTION: Please refrain from inserting pictured screws to the TV body when not using the TV stand e.g. wall hanging. Inserting screws without pedestal may cause a damage of the TV. Assembling the pedestal 1. Regular care: The stand of the TV consists of 4 pieces. Install these pieces together.
• Put the TV onto a work table with the screen panel down on the clean and soft cloth. Leave the stand(s) protruding over the edge of the surface. • Unsrew the screws that fixing the stand(s). • Remove the stand(s). When using the wall-hanging bracket Introduction Thank you for choosing our product. You’ll soon be enjoying your new TV. Please read these instructions carefully.
2160 (4K:2K). It equals 4 times the resolution of Full HD TV by doubling the pixel count of the Full HD TV both horizontally and vertically. Ultra HD contents are supported from HDMI, some of the Over-the-Top (OTT) services, USB inputs and over DVB-T2 and DVB-S2 broadcasts. High Dynamic Range (HDR) / Hybrid LogGamma (HLG) Using this feature the TV can reproduce greater dynamic range of luminosity by capturing and then combining several different exposures.
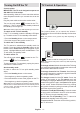
Other Connections If you want to connect a device to the TV, make sure that both the TV and the device are turned off before making any connection. After the connection is done, you can turn on the units and use them.
Turning On/Off the TV TV Control & Operation Connect power IMPORTANT: The TV set is designed to operate on 220-240V AC, 50 Hz socket. After unpacking, allow the TV set to reach the ambient room temperature before you connect the set to the mains. Plug the power cable to the mains socket outlet. ” located on the TV Turn on the main switch “ position “|”. The TV will switch into standby mode and the standby LED will light up. Note: Main switch position may differ depending on the model.
Operation with the Remote Control Press the Menu button on your remote control to display Live TV settings menu when in Live TV mode. Press Home button to display or return to the Home Screen of the Android TV. Use the directional buttons to move the focus, proceed, adjust some settings and press OK to make selections in order to make changes, set your preferences, enter a sub-menu, launch an application etc. Press Return/Back to return to the previous menu screen.
Remote Control 1. 2. 1 3. 2 3 26 25 4 24 4. 5. 6. 7. 5 8. 6 7 23 8 22 9 21 10 20 11 12 13 14 15 9. 10. 11. 12. 19 18 17 13. 16 14. 15. 16. 17. Note: Other Panasonic devices cannot be operated with this remote. 18. Inserting the Batteries into the Remote 19. Remove the screw that secure the battery compartment cover on the back side of the remote control first. Lift the cover gently. Insert two 1.5V - size AAA batteries.
Initial Setup Wizard Note: Follow the on-screen instructions to complete the initial setup process. Use the directional buttons and the OK button on the remote to select, set, confirm and proceed. When turned on for the first time, a search for accessories will be performed before the initial setup starts. Follow the on-screen instructions to pair your remote control (depends on the model of the remote control) and other wireless accessories with your TV.
later using the Settings>Device Preferences>Usage & Diagnostics menu on the Home Screen. Information on Google services and some features of your TV will be displayed next. You can turn on personal results for Assistant by choosing the related option when prompted. Press OK consecutively to proceed. 8. Country In the next step select your Country from the list and press OK to continue. 9.
satellite and to enable scan this option should be set as On first. Press Back button and select next satellite you want to set. After you completed the configuration changes, press the Right directional button to proceed. (*) If you have a Direct satellite system, DiSEqC Set option should be set as DiSEqC A. Channel Scan screen will be displayed next. Select Scan and press OK or the Right directional button to proceed with the scanning configurations.
Live TV Mode Menu Content Switch the TV to Live TV mode first and then press the Menu button on the remote to see Live TV menu options. To switch to Live TV mode you can either press the Exit button or highlight the Live TV app from the Apps row and press OK on the Home Screen. Channels Add to My Favorites: Add the channel that is currently being watched to the previously selected favourite list. Program Guide: Open the electronic programme guide.
Subtitle Tracks: Set your subtitle track preference, if any available. Analog Subtitle: Set this option as Off, On or Mute. If Mute option is selected, the analogue subtitle will be displayed on the screen but the speakers will be muted simultaneously. Digital Subtitle Language: Set one of the listed language options as first digital subtitle language preference. 2nd Digital Subtitle Language: Set one of the listed language options as second digital subtitle language preference.
Channel Channels Options of this menu may change or become inactive depending on the Channel Installation Mode selection. Channel Installation Mode - Antenna Channel Scan: Start a scan for analogue and digital channels. You can press the Back button to cancel the scan. The channels that have already been found will be stored in the channel list. Update Scan: Search for updates. Previously added channels will not be deleted, but any newly found channels will be stored in the channel list.
this channel will be replaced with the position of the first selected channel. Channel Move: Move a channel to the position of another channel. Highlight the channel you want to move and press OK to select. Then do the same for a second channel. When the second channel is selected, the first selected channel will be moved to the position of that channel. Channel Edit: Edit channels in the channel list.
ratings systems, restriction levels and age limits using the options of this menu. Inputs Blocked: Prevent access to the selected input source content. Highlight the desired input option and press OK to select/unselect. To switch to a blocked input source password should be entered first. Change PIN: Change the default PIN. Highlight this option and press OK. You will need to enter the old PIN first. Then new password entry screen will be displayed. Enter the new password twice for confirmation.
TV to go to standby using the directional buttons and press OK to save the new set time. Brightness: Adjust the brightness value off the screen. Language: Set your language preference. Contrast: Adjust the contrast value off the screen. Keyboard: Select your keyboard type and manage keyboard settings. Colour: Adjust the colour saturation value off the screen.
will not be available if Game Mode or PC Mode is turned on. Equalizer Detail: Adjust the equalizer values according to your preferences. Blue Stretch: Human eye perceives cooler whites as brighter white, Blue Stretch feature changes White balance of mid-high grey levels to cooler colour temperature. Turn the Blue Stretch function on or off. Speakers: To hear the TV audio from the connected compatible audio device set as External Audio System.
to your preferences. It is recommended not to activate store mode for home use. Google Assistant: Select your active account, view permissions, select which apps to include in search results, activate safe search filter, active offensive word blocking and view open source licenses. Screen saver: Set screensaver and sleep mode options for your TV. You can choose a screensaver, set wait time for the screensaver, set when the TV goes into sleep mode or start the screensaver mode.
Editing the Channels and the Channel List You can edit the channels and the channel list using the Channel Skip, Channel Sort, Channel Move and Channel Edit options under the Settings>Channel>Channels menu. You can access the Settings menu from the Home Screen or from the TV options menu in Live TV mode. Note: The options Channel Sort, Channel Move and Channel Edit may not be available and appear as grayed out depending on the operator selection and operator related settings.
You might be able to connect your TV to a network wall socket depending on your network’s configuration. In that case, you can connect your TV directly to the network using an Ethernet cable. increase bandwidth. These are optimized for smoother and faster HD video streaming, file transfers and wireless gaming. Use a LAN connection for quicker data transfer between other devices like computers.
the found files will be listed. Press the Back/Return button to close this menu. In order to activate photo frame feature select Photo as the media type. Then press the Menu button, highlight Photo Frame and press OK. If you select One Photo mode option and press OK the image that you set as photo frame image earlier will be displayed when photo frame feature is activated. If you select the USB storage device option the first file (in Recursive Parser mode) will be displayed.
Duration: Set the interval between the slides. Highlight an option and press OK to change the setting. You can also press the Green button to set. This option will not be available if the slide show is paused. You can view your photos, text documents or play your music and video files installed on a connected USB storage device on the TV. Plug in the USB storage device to one of the USB inputs on the TV. Rotate: Rotate the image. The image will be rotated 90 degrees clockwise each time you press OK.
CEC With CEC function of your TV you can operate a connected device with the TV remote control. This function uses HDMI CEC (Consumer Electronics Control) to communicate with the connected devices. Devices must support HDMI CEC and must be connected with an HDMI connection. The TV comes CEC function switched on. Make sure that all CEC settings are properly set up on the connected CEC device. The CEC functionality has different names on different brands. CEC function might not work with all devices.
HBBTV System Software Update HbbTV (Hybrid Broadcast Broadband TV) is a standard that seamlessly combines TV services delivered via broadcast with services delivered via broadband and also enables access to Internet only services for consumers using connected TVs and set-top boxes.
No picture / distorted picture • Make sure that the antenna is properly connected to the TV. • Make sure that the antenna cable is not damaged. • Make sure that the correct device is selected as the input source. VGA Input Typical Display Modes The following table is an illustration of some of the typical video display modes. Your TV may not support all resolutions. • Make sure that the external device or source is properly connected.
AV and HDMI Signal Compatibility Source Supported Signals PAL Composite / Back AV SECAM NTSC4.43 NTSC3.58 Component / YPbPr 480i, 480p 60Hz 576i, 576p 50Hz 720p 50Hz,60Hz 1080i 50Hz,60Hz 480i 60Hz 480p 60Hz 576i, 576p 50Hz 720p 50Hz,60Hz 1080i 50Hz,60Hz 1080p 24Hz, 25Hz, 30Hz, 50Hz, 60Hz 3840x2160p 24Hz, 25Hz, 30Hz, 50Hz, 60Hz 4096x2160p 24Hz, 25Hz, 30Hz, 50Hz, 60Hz HDMI In some cases a signal on the TV may not be displayed properly.
Supported File Formats for USB Mode Video Video Codec Resolution Bit Rate Profile Container MPEG program stream (.DAT, .VOB, .MPG, .MPEG), MPEG transport stream (.ts, .trp, .tp), MP4 (.mp4, .mov), 3GPP (.3gpp, .3gp), AVI (.avi), MKV (.mkv), ASF (.asf) MPEG 1/2 1080P@ 60fps 80Mbps MP@HL MPEG4 1080P@60fps 40Mbps • Simple Profile MPEG program stream (.MPG, .MPEG), • Advanced Simple MP4 (.mp4, .mov), 3GPP (.3gpp, .3gp), Profile@Level 5 AVI (.avi), MKV (.mkv), ASF (.
Audio Codec MPEG1/2 Layer2 Sample rate 16KHz ~ 48KHz MPEG1/2 Layer3 16KHz ~ 48KHz AC3 32KHz, 44.1KHz, 48KHz EAC3 32KHz, 44.1KHz, 48KHz Channel Bit Rate Container 8Kbps ~ 384Kbps Movie: AVI (.avi), ASF (.asf), Matroska (.mkv), MPEG transport stream (.ts, .trp, .tp), MPEG program stream (.DAT, .VOB, .MPG, .MPEG) Music: MP3 (.mp3), WAV (.wav) Up to 2 8Kbps ~ 320Kbps Movie: AVI (.avi), ASF (.asf), Matroska (.mkv), 3GPP (.3gpp, .3gp), MP4 (.mp4, .mov), MPEG transport stream (.ts, .trp, .
Audio Codec Sample rate Channel Bit Rate Container LPCM 8KHz ~ 48KHz Up to 5.1 64Kbps ~ 1.5Mbps Movie: AVI (.avi), Matroska (.mkv), 3GPP (.3gpp, .3gp), MP4 (.mp4, .mov), MPEG transport stream (.ts, .trp, .tp), MPEG program stream, (.DAT, .VOB, .MPG, .MPEG) Music: WAV (.wav), MP4 (.m4a) IMA-ADPCM MS-ADPCM 8KHz ~ 48KHz Up to 2 384Kbps Movie: AVI (.avi), Matroska (.mkv), 3GPP (.3gpp, .3gp), MP4 (.mp4, .mov) Music: WAV (.wav), MP4 (.
Subtitle Internal File Extension Container Subtitle Codec dat, mpg, mpeg, vob MPG, MPEG DVD Subtitle ts, trp, tp TS DVB Subtitle mp4 MP4 mkv MKV avi AVI(1.0, 2.0), DMF0, 1, 2 DVD Subtitle UTF-8 Plain Text ASS SSA UTF-8 Plain Text VobSub DVD Subtitle XSUB XSUB+ External File Extension Subtitle Parser .srt SubRip .ssa/ .ass SubStation Alpha .smi SAMI .sub SubViewer MicroDVD DVDSubtitleSystem SubIdx (VobSub) .txt TMPlayer Remark SubViewer 1.0 & 2.
Specification TV Broadcasting PAL BG/I/DK SECAM BG/DK Receiving Channels VHF (BAND I/III) - UHF (BAND U) - HYPERBAND Digital Reception Fully integrated digital terrestrial-cable-satellite TV (DVB-T-C-S) (DVB-T2, DVB-S2 compliant) Number of Preset Channels 12 200 Channel Indicator On Screen Display RF Aerial Input 75 Ohm (unbalanced) Operating Voltage 220-240V AC, 50Hz. Audio DTS HD Headphone 3.
Wireless LAN Transmitter Specifications Frequency Ranges Max Output Power 2400 - 2483,5 MHz (CH1-CH13) < 100 mW 5150 - 5250 MHz (CH36 - CH48) < 200 mW 5250 - 5350 MHz (CH52 - CH64) < 200 mW 5470 - 5725 MHz (CH100 - CH140) < 200 mW Consult your local dealer for availability of DVB-T / T2 or DVB-S services in your area. Consult your cable service provider for availability of DVB-C services with this TV.
For DTS patents, see http://patents.dts.com. Manufactured under license from DTS Licensing Limited. DTS, the Symbol, DTS and the Symbol together, DTS-HD, and the DTS-HD logo are registered trademarks or trademarks of DTS, Inc. in the United States and/or other countries. © DTS, Inc. All Rights Reserved.
Table des matières Télécommande & Accessoires............................. 60 Consignes de sécurité......................................... 38 Guide de programme........................................... 61 IMPORTANT - Veuillez lire attentivement ces instructions avant d'installer ou de faire fonctionner votre appareil.................................38 Symboles sur le produit....................................... 39 Liste des chaînes.................................................
Consignes de sécurité MISE EN GARDE RISQUE DE CHOC ÉLECTRIQUE NE PAS OUVRIR MISE EN GARDE: TO REDUCE THE RISK OF ELECTRIC SHOCK DO NOT REMOVE COVER (OR BACK). L’ENTRETIEN DES PIÈCES INTERNES EST INTERDIT AUX UTILISATEURS. VEUILLEZ CONFIER L'ENTRETIEN À UN PERSONNEL QUALIFIÉ. Pendant des phénomènes météorologiques extrêmes (tempêtes, foudre) et de longues périodes d'inactivité (aller en vacances), débranchez le téléviseur du secteur.
Symboles sur le produit Les symboles suivants sont utilisés sur le produit pour marquer les instructions relatives aux restrictions, aux précautions et à la sécurité. Chaque explication se rapporte uniquement à l'endroit du produit portant le symbole correspondant. Veuillez en tenir compte pour des raisons de sécurité. Équipement de classe II : Cet appareil, de par sa conception, ne nécessite pas de branchement sécurisé à un système électrique de mise à la terre.
AVERTISSEMENT • En faisant recourt à d’autres supports de fixation murale ou en en installant un par vous-même, vous courrez le risque de vous blesser ou d’endommager l’appareil. Pour une performance et une sécurité optimales de l’appareil, pensez à vous rapprocher de votre magasin ou d’un technicien agréé pour la fixation des supports. Tout dommage provoqué à la suite d’une installation effectuée par des mains inexpertes annulera votre garantie.
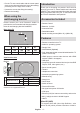
3. Montage/Retrait du socle Préparations Insérez les vis fournies(M4 x 12) , puis serrez-les tout doucement jusqu’à ce que le support soit correctement fixé. Retirez le(s) socle(s) de l'emballage et posez le téléviseur sur une table de travail, avec le panneau de l'écran couché sur un tissu propre et doux (couverture, etc.) 43” 50/55/65” • Utilisez une table plate et solide, plus grande que le téléviseur. • Ne tenez pas le panneau de l'écran. • Évitez de rayer ou de briser le téléviseur.
Lors de l'utilisation de la fixation murale Introduction Veuillez contacter votre vendeur Panasonic local pour l'achat de la fixation murale recommandée. Orifices pour l'installation de la fixation murale ; Dos du téléviseur Nous vous remercions d’avoir choisi notre produit. Vous allez bientôt profiter de votre nouveau téléviseur. Veuillez lire attentivement ces consignes.
Ultra HD (UHD) Le téléviseur prend en charge la fonction Ultra HD (Ultra Haute Définition - également appelée 4K) qui offre une résolution de 3840 x 2160 (4K :2K). Elle équivaut à 4 fois la résolution d'un téléviseur Full HD par le double du nombre de pixels du téléviseur Full HD sur les plans horizontal et vertical. Les contenus Ultra HD sont pris en charge par HDMI, certains services OTT (Over-the-Top), les entrées USB et les diffusions sur DVB-T2 et DVB-S2.
Autres Connexions Si vous souhaitez connecter un appareil au téléviseur, assurez-vous que le téléviseur et l'appareil sont hors tension avant de les relier. Une fois les connexions terminées, vous pouvez allumer les différents dispositifs et les utiliser.
Mise sous/hors tension du téléviseur Commande et fonctionnement du téléviseur Branchement à l’alimentation IMPORTANT : Le téléviseur a été conçu uniquement pour fonctionner avec une prise de 220-240 V CA, 50 Hz. Après le déballage, laissez le téléviseur atteindre la température ambiante de la pièce avant de le brancher sur la prise secteur. Branchez le câble d’alimentation à la prise secteur. » se trouvant Mettez le commutateur principal « sur le téléviseur - dans la position « | ».
Fonctionnement de la TV à l'aide de la télécommande Appuyez sur le bouton Menu de votre télécommande pour afficher le menu Réglages TV en direct une fois dans Mode TV en direct. Appuyez sur le bouton Accueil pour afficher ou retourner à l’écran d’accueil du téléviseur Android.
Télécommande 1 1. 2. 2 3. 3 26 25 4 24 4. 5. 6. 7. 5 6 7 23 8 22 9 21 10 20 11 12 13 14 15 8. 9. 10. 11. 19 18 17 12. 16 13. 14. Remarque : Les autres appareils Panasonic ne peuvent pas être utilisés avec cette télécommande. Insertion des piles dans la télécommande Retirez au préalable la vis qui fixe le couvercle du compartiment des piles sur le côté arrière de la télécommande. Soulevez délicatement le couvercle. Insérez deux piles 1,5 V de taille AAA.
Paramètres de l'écran d'accueil ou dans le menu Options TV en mode TV en direct. Assistant de configuration initiale Remarque : Suivez les instructions qui s’affichent à l’écran pour achever le processus d’actualisation. Utilisez les boutons de direction et le bouton OK de la télécommande pour sélectionner, configurer, confirmer et poursuivre. Lors de la première mise sous tension, une recherche d'accessoires sera effectuée avant le démarrage de la configuration initiale.
message comportant l’adresse du site internet et sur lequel ces informations peuvent également être consultées s’affiche, au cas où l’accès à Internet ne serait pas disponible. 6. Emplacement Sur l'écran suivant, vous pouvez autoriser ou interdire à Google et aux applications tierces d'utiliser les informations de localisation de votre téléviseur. Sélectionnez Oui pour confirmer et appuyez sur OK. Pour ignorer cette étape, sélectionnez Non et appuyez sur le bouton OK pour continuer.
Satellite Si l’option Satellite est sélectionnée, l’écran Type de Satellite s’affiche ensuite. Les options Satellite préféré et Satellite général seront disponibles. Sélectionnez l'une d'elles et appuyez sur OK pour continuer. Remarque : Les options Satellite Préféré et Satellite Général peuvent ne pas être disponibles selon le pays sélectionné. Dans ce cas, l'écran de Paramètres de Configuration DVBS s'affiche après avoir sélectionné le mode du tuner comme Satellite.
Le Menu d’accueil constitue le centre de votre téléviseur. Appuyez sur le bouton Accueil pour afficher l’Écran d'accueil. Tout application peut être démarrer à partir du Menu d’accueil, passer à une chaîne TV, regarder un film ou ouvrir un périphérique connecté. En fonction de la configuration de votre téléviseur et du pays sélectionné lors de la configuration initiale, le Menu d’accueil pourrait présenter des éléments différents. Les options disponibles à l’Écran d’accueil sont présentées dans des lignes.
menu Options TV>Options avancées pour plus de fonctions liées à la puissance. Minuteur de Mise en Veille: Définissez une période d'inactivité après laquelle vous voulez que votre téléviseur passe automatiquement en mode veille. Image éteinte : Sélectionnez cette option et appuyez sur OK pour éteindre l'écran. Appuyez sur n'importe quelle touche de la télécommande ou sur le téléviseur pour allumer l'écran à nouveau. Notez que vous ne pouvez pas allumer l'écran via les boutons Volume +/-, Muet et Veille.
Clé BISS: Le message « Cliquer pour ajouter la clé Biss » s’affiche. Appuyez sur le bouton OK pour ajouter une clé Biss. Les paramètres Fréquence, Débit de symboles (KSym/s), Polarisation, ID de Programme et Clé CW peuvent être réglés. Une fois les réglages terminés, sélectionnez Enregistrer la clé et appuyez sur OK pour enregistrer la clé Biss et l’ajouter.
Mise à Jour Manuelle du Service : Lancez une mise à jour de service manuellement. LCN: Définissez votre préférence pour LCN. LCN est le système du numéro de chaîne logique qui sélectionne des émissions disponibles, conformément à une séquence de chaînes reconnaissables (si disponible). Type de Balayage des Chaînes : Définissez votre préférence de type de balayage. Type de Magasin de Chaîne : Définissez votre préférence pour le type de magasin. Sélection de Réseau Favori: Sélectionnez votre réseau préféré.
chaîne de la chaîne sélectionnée et affichez les informations relatives au Nom de Réseau, à la Fréquence, au Système de Couleur, au Système Audio, à la Modulation et au Débit de Symboles de cette chaîne. Selon la chaîne, d'autres options peuvent également être éditées. Vous pouvez appuyer sur le bouton Bleu pour supprimer la chaîne en surbrillance. Réglage Fin des Chaînes Analogiques : Affinez le réglage d'une chaîne analogique. Une liste de chaînes analogiques disponibles s’affiche.
Chaînes Bloquées: Sélectionner la/les chaîne/s à verrouiller dans la liste des chaînes. Sélectionner une chaîne et appuyer sur OK pour sélectionner/désélectionner. Pour regarder une chaîne verrouillée, un mot de passe doit d’abord être saisi. Restrictions du Programme: Verrouillez les programmes en fonction des informations liées à la classification par âge diffusées à l’écran.
environnement et de vos préférences. Désactivez cette option en réglant sur Off si vous souhaitez modifier la date et l’heure manuellement. Ensuite, définissez la date, l'heure, le fuseau horaire et les options de format d'heure. Minuterie Type de Temps de Mise Sous Tension : Réglez votre téléviseur pour qu'il s'allume tout seul. Réglez cette option sur Activer ou Unique pour activer la minuterie de mise sous tension, Réglez sur Désactiver pour la désactiver.
Gamma: Définissez votre préférence gamma. Les options Foncé, Moyen et Lumineux seront disponibles. élément ne sera pas disponible si le mode Jeu ou le mode PC est activé. Blue Stretch: L'œil humain perçoit les blancs plus froids comme des blancs plus brillants, la fonction d'Étirement Bleu change la balance des Blancs des niveaux de gris mi-haut à une température de couleur plus froide. Activez ou désactivez la fonction Blue Stretch. Température de Couleur : Réglez votre température de couleur préférée.
peuvent devenir indisponibles en fonction de la sélection. Balance : Réglez la balance de volume gauche et droite des haut-parleurs et des écouteurs. Son Surround : Avec Son Surround, vous pouvez enrichir (étendre et approfondir) la qualité sonore des enceintes TV. Activez ou désactivez cette option en appuyant sur OK. Détail de l'Égaliseur : Ajustez les valeurs de l'égaliseur en fonction de vos préférences.
Haut-parleur: Activez cette option lorsque vous souhaitez écouter le commentaire audio via les haut-parleurs du téléviseur. Écouteur : Activez cette option lorsque vous souhaitez acheminer le son du commentaire audio vers la sortie casque du téléviseur. Volume : Réglez le niveau de volume du commentaire audio. Panoramique et Atténuation: Activez cette option lorsque vous souhaitez écouter le commentaire audio plus clairement, quand il est disponible par diffusion.
Gestion des Listes de Chaînes Préférées Vous pouvez créer quatre listes différentes de vos chaînes préférées. Ces listes comprennent uniquement les chaînes de votre choix. Appuyez sur la touche OK pour afficher la liste des chaînes. Appuyez ensuite sur le bouton Bleu pour accéder aux listes de favoris. Si l'une des listes s'affiche à l'écran, vous pouvez appuyer sur le bouton Jaune pour ouvrir le menu de Sélection des Listes Favorites afin de passer d'une liste à une autre.
pouvez connecter votre téléviseur directement au réseau via un câble Ethernet. plus claire et plus rapide et un transfert de fichiers et jeux sans fil faciles. Utilisez une connexion LAN pour un partage plus rapide de données avec d’autres appareils comme les ordinateurs. 1 La vitesse de transmission varie selon la distance et le nombre d'obstructions entre les produits de la transmission, la configuration de ces produits, l'état des ondes radio, la bande et les produits utilisés.
multimédia sélectionné dans le dossier racine s’affiche. Si aucun fichier multimédia du type sélectionné n’est présent, le dossier est considéré comme vide. En mode Analyseur récursif, la source de tous les fichiers multimédia disponibles du type sélectionné est recherchée et les fichiers trouvés sont affichés. Appuyez sur le bouton Retour/Précédent pour fermer ce menu. Afin d'activer la fonction de cadre photo, sélectionnez Photo comme type de média.
Programme- : Passez au dossier précédent. Boutons directionnels (bas ou droite / haut ou gauche) : Passez à la page suivante. / Passer à la page précédente. Précédent/Retour : Arrêtez le diaporama et revenez à l'écran du lecteur multimédia. Options Menu Appuyez sur le bouton Menu pour voir les options disponibles lors de la lecture ou de l'affichage des fichiers multimédia. Le contenu de ce menu diffère selon le type de fichier média. Lecture / Pause : Pause et reprise de la lecture ou du diaporama.
endommager le lecteur USB et le périphérique USB lui-même. Ne déconnectez pas votre périphérique USB au cours de la lecture d’un fichier. la télécommande, appuyez sur le bouton Source toujours fonctionnelle de la télécommande et passez à une autre source. À partir d’un appareil mobile via DMR La télécommande du téléviseur peut automatiquement commander le dispositif après avoir sélectionné la source HDMI connectée. Cependant, tous les boutons ne sont pas transmis à l’appareil.
téléviseur à partir du menu Paramètres>Préférences d'Appareil>À propos de l’Écran d’Accueil. Nom de l’appareil sera l’un des éléments affichés. Vous pouvez également modifier le nom de votre téléviseur. Sélectionnez Nom de l’appareil et appuyez sur OK. Puis sélectionner Modifier et appuyez à nouveau sur OK. Vous pouvez sélectionner l’un des noms prédéfinis ou entrer un nom qui vous convient. Pour afficher l’écran de votre appareil sur l’écran du téléviseur... 1.
Aucune chaîne disponible Mise à Jour du Logiciel Votre TV peut rechercher et effectuer automatiquement des mises à jour de microprogramme via Internet. Pour profiter de la meilleure utilisation de votre téléviseur et bénéficier des dernières améliorations, assurez-vous que votre système est toujours à jour. Mise à jour du logiciel via Internet Sur l'écran d'accueil, entrez dans le menu Paramètres>Préférences de l'appareil>À propos afin de mettre à jour la version de votre système Android.
Modes d’affichage typiques de l’entrée VGA Compatibilité des signaux AV et HDMI Le tableau ci-après est une illustration de quelques modes d’affichage vidéo typiques. Votre téléviseur ne peut pas prendre en charge toutes les résolutions.
Formats de fichier pris en charge pour le mode USB Vidéo Code vidéo Résolution Taux binaire Profilo Support MPEG 1/2 1080P@ 60fps 80Mbps MP@HL Flux de programme MPEG (.DAT, .VOB, .MPG, .MPEG), flux de transport MPEG (.ts, .trp, .tp), MP4 (.mp4, .mov), 3GPP (.3gpp, .3gp), AVI (.avi), MKV (.mkv), ASF (.asf) MPEG4 1080P@60fps 40Mbps • Profil Simple • Profil Simple Avancé@ Niveau 5 • GMC n'est pas supporté Flux de programme MPEG (.MPG, .MPEG), MP4 (.mp4, .mov), 3GPP (.3gpp, .3gp), AVI (.
Audio Code audio MPEG1/2 Layer1 MPEG1/2 Layer2 MPEG1/2 Layer3 AC3 EAC3 Taux d'échantillon 16KHz ~ 48KHz 16KHz ~ 48KHz 16KHz ~ 48KHz 32KHz, 44,1KHz, 48KHz 32KHz, 44,1KHz, 48KHz Chaîne Taux binaire Support Jusqu'à 2 32 Kbps ~ 448 Kbps Film: AVI (.avi), ASF (.asf), Matroska (.mkv), flux de transport MPEG (.ts,.trp,.tp), flux de programme MPEG (.DAT,.VOB,. MPG,.MPEG) Musique : MP3 (.mp3), WAV (.wav) Jusqu'à 2 8 Kbps ~ 384 Kbps Film: AVI (.avi), ASF (.asf), Matroska (.
Taux d'échantillon Chaîne VORBIS Jusqu'à 48 KHz Jusqu'à 2 DTS Jusqu'à 48 KHz Jusqu'à 5.1 Code audio Taux binaire Support Remarque Film: Matroska (.mkv), WebM (.webm), 3GPP (.3gpp, .3gp), MP4 (.mp4, .mov) Musique: MP4 (.m4a), OGG (.ogg) Prise en charge du décodage stéréo uniquement < 1.5Mbps Film: MPEG flux de transport (.ts, .trp, .tp), MPEG flux de programme (.DAT, .VOB, .MPG, .MPEG), MP4 (.mp4, .mov), Matroska (.mkv) LPCM 8KHz ~ 48KHz Jusqu'à 5.1 64 Kbps ~ 1,5 Mbps Film: AVI (.
Sous-titre Interne Extension du fichier Support Sous-titre Codec dat, mpg, mpeg, vob MPG, MPEG Sous-titrage DVD ts, trp, tp TS Sous-titrage DVB mp4 MP4 MKV MKV avi AVI(1.0, 2.0), DMF0, 1, 2 Sous-titrage DVD UTF-8 Texte complet ASS SSA UTF-8 Texte Plein VobSub DVD Sous-titres XSUB XSUB+ Externe Extension du fichier Analyseur de sous-titre .srt SubRip .ssa/ .ass Sous-station Alpha .smi SAMI .sub SubViewer MicroDVD DVDSystème Sous-titres SubIdx (VobSub) .
Spécifications Télédiffusion PAL BG/I/DK/ SECAM BG/DK Réception des chaînes VHF (BAND I/III), UHF (BAND U), HYPERBAND Réception numérique TV satellite numérique terrestre intégré/câble (DVB-T-C-S)(DVB-T2, DVB-S2 conforme) Nombre de chaînes prédéfinies 12 200 Indicateur de chaîne Affichage à l'écran Entrée d'antenne RF 75 Ohm (déséquilibrée) Tension de fonctionnement 220-240 V CA, 50 Hz.
Spécifications du transmetteur LAN sans fil Gammes de fréquence Puissance max de sortie 2400 - 2483, 5 MHz (CH1-CH13) < 100 mW 5150 - 5250 MHz (CH36 - CH48) < 200 mW 5250 - 5350 MHz (CH52 - CH64) < 200 mW 5470 - 5725 MHz (CH100 - CH140) < 200 mW Restrictions pays Cet appareil est destiné à un usage domestique et de bureau dans tous les pays de l’UE (ainsi que d’autres pays qui appliquent les directives européenne en la matière) sans restriction, sauf pour les pays ci-dessous mentionnés.
vous ignorez la mise à niveau, vous ne pourrez pas accéder au contenu qui requiert une mise à niveau. Licences Les termes HDMI, Interface multimédia haute définition HDMI et le logo HDMI sont des marques de commerce ou des marques déposées de HDMI Licensing Administrator, Inc. Dolby, Dolby Vision, Dolby Audio, et le symbole du double D sont des marques déposées de Dolby Laboratories Licensing Corporation. Fabriqué sous licence de Dolby Laboratoires Ouvrages confidentiels non publiés.
Déclaration de conformité (DoC) « Par la présente, Panasonic Corporation déclare que le téléviseur est en conformité avec les exigences essentielles et d’autres dispositions pertinentes de la directive 2014/53/CE. » Si vous souhaitez obtenir un exemplaire de la DoC originale de ce téléviseur, visitez le site Web suivant : http://www.ptc.panasonic.eu/doc Représentant autorisé : Panasonic Testing Centre Panasonic Marketing Europe GmbH Winsbergring 15, 22525 Hamburg, Germany Site Internet : http://www.
Kanalliste........................................................... 100 Inhalt Sicherheitsinformationen..................................... 78 Bitte lesen Sie diese Anleitung vollständig vor der Installation oder Inbetriebnahme durch......78 Kennzeichnungen auf dem Gerät........................ 79 WARTUNG........................................................... 80 Bildschirm, Gehäuse, Ständer............................. 80 Netzstecker..........................................................
Sicherheitsinformationen VORSICHT STROMSCHLAGGEFAHR NICHT ÖFFNEN HINWEIS: TO REDUCE THE RISK OF ELECTRIC SHOCK DO NOT REMOVE COVER (OR BACK). IN DIESEM GERÄT BEFINDEN SICH KEINE TEILE, DIE VOM BENUTZER GEWARTET WERDEN KÖNNEN. WENDEN SIE SICH AN QUALIFIZIERTES SERVICEPERSONAL.
Kennzeichnungen auf dem Gerät Die folgenden Symbole werden auf dem Gerät als Kennzeichnungen für Einschränkungen und Vorsichtsmaßnahmen sowie Sicherheitshinweise verwendet. Jede Kennzeichnung ist nur dann zu beachten, wenn diese auf dem Gerät angebracht worden ist. Beachten Sie diese Informationen aus Sicherheitsgründen. Gerät der Schutzklasse II: Dieses Gerät ist so gebaut, das es keinen Schutzleiter (elektrische Erdung) für die Verbindung zum Stromnetz erfordert.
WARNUNG • Der Einsatz anderer Halterungen für die Wandmontage oder eine eigenständige Installation der Halterung kann zu Verletzungen und Sachschäden führen. Um das Betriebsbereitschaft des Geräts zu gewährleisten sowie aus Sicherheitsgründen müssen Sie die Montage unbedingt durch den entsprechenden qualifizierten Kundendiensts des Händlers oder eine geeigneten Fachmann durchführen lassen.
3. Montage / Entfernen der Standfüße Setzen Sie die mitgelieferten Schrauben ein (M4 x 12)und ziehen Sie sie vorsichtig an, bis der Standfuß richtig sitzt. Vorbereitung 43” Nehmen Sie den/die Standfüße und das TV-Gerät aus der Verpackung und legen Sie das Gerät auf eine ebene Arbeitsfläche mit der Bildschirmseite nach unten, die auf ein sauberes und weiches Tuch gelegt werden muss (Decke usw.). • Die Ablagefläche muss größer als das TV-Gerät sein. • Halten Sie das Gerät nicht an der Bildschirmplatte.
Bei der Verwendung einer Wandhalterung. Einleitung Bitte wenden Sie sich an Ihren örtlichen PanasonicHändler, um die empfohlene Wandhalterung zu kaufen. Löcher für die Installation der Wandhalterung; Rückseite des TV-Geräts a Vielen Dank, dass Sie sich für unser Gerät entschieden haben. Sie werden bald Ihren neues TV-Gerät genießen. Bitte lesen Sie diese Anleitungen sorgfältig.
Ultra HD (UHD) Das TV-Gerät unterstützt Ultra HD (Ultra High Definition - auch als 4K bezeichnet), das eine Auflösung von 3840 x 2160 (4K:2K) bietet. Dies entspricht 4 der vierfachen Full HD TV-Auflösung, indem die Pixelzahl sowohl horizontal als vertikal verdoppelt wird. Ultra HD-Inhalte werden durch HDMI,einige der Over-the-Top-Dienste (OTT), USB-Anschlüsse sowie über DVB-T2- und DVB-S2-Sender unterstützt.
Andere Verbindungen Wenn Sie ein externes Gerät an das TV-Gerät anschließen wollen, vergewissern Sie sich, dass sowohl der Fernseher als auch das externe Gerät ausgeschaltet sind. Nachdem Sie alle Geräte angeschlossen haben können Sie die Geräte wieder anschalten.
Ein- / Ausschalten des TV-Geräts Stromanschluss WICHTIG: Das Gerät ist nur für den Betrieb mit 220-240V Wechselspannung bei einer Frequenz von 50 Hz ausgelegt. aktiv sind. Die LED kann auch blinken, wenn Sie das TV-Gerät aus dem Standby-Modus einschalten. TV-Steuerung & Betrieb Geben Sie Ihrem Gerät nach dem Auspacken genug Zeit, sich der Raumtemperatur der Umgebung anzupassen, bevor Sie es einstecken. Stecken Sie das Netzkabel in eine Netzsteckdose.
So schalten Sie das TV-Gerät aus (Standby): Das TV-Gerät kann nicht über den Joystick in den StandbyModus geschaltet werden. Das TV-Gerät einschalten: Drücken Sie die Mitte des Joysticks und das TV-Gerät schaltet sich ein. Bedienung mit der Fernbedienung Drücken Sie die Menü-Taste auf Ihrer Fernbedienung, um im Live-TV-Modus das Live-TV-Einstellungsmenü anzuzeigen. Drücken Sie die Home-Taste, um den Startbildschirm von Android TV anzuzeigen oder zum Startbildschirm zurückzukehren.
Fernbedienung 1. 2. 1 3. 2 3 26 25 4 24 4. 5. 6. 7. 6 7 23 8 22 8. 9 21 10 20 5 11 12 13 14 15 9. 19 18 17 10. 11. 16 12. 13. Hinweis: Andere Panasonic-Geräte können mit dieser Fernbedienung nicht bedient werden. Einlegen der Batterien in die Fernbedienung Nehmen Sie die kleine Abdeckung des Batteriefachs auf der Rückseite der Fernbedienung ab. Heben Sie die Abdeckung vorsichtig an. Legen Sie zwei 1,5 V AAA - Batterien ein.
Ersteinrichtungsassistent Hinweis: Befolgen Sie die Anweisungen auf dem Bildschirm, um die Ersteinrichtung abzuschließen. Verwenden Sie die Richtungstasten und die OK-Taste auf der Fernbedienung, um auszuwählen, einzustellen, zu bestätigen und fortzufahren. Beim erstmaligen Einschalten wird vor Beginn der Ersteinrichtung nach Zubehör gesucht.
stimmen Sie den Nutzungsbedingungen von Google, den Datenschutzbestimmungen von Google und den Nutzungsbedingungen von Google Play zu. Markieren Sie Akzeptieren und drücken Sie OK auf der Fernbedienung, um zu bestätigen und fortzufahren. Auf diesem Bildschirm können Sie auch die Nutzungsbedingungen, die Datenschutzbestimmungen und die Nutzungsbedingungen von Play anzeigen. Zur Anzeige des Inhalts wird eine Internetverbindung benötigt.
Frequenz (KHz), Modulation, Symbolrate (Ksym / s), Netzwerk-ID-Optionen müssen möglicherweise eingestellt werden. Um einen vollständigen Scan durchzuführen, stellen Sie den Scan-Modus auf Vollständig / Erweitert ein, falls verfügbar. Je nach ausgewähltem Bediener und / oder Scanmodus stehen einige Optionen möglicherweise nicht zur Verfügung. Wenn Sie mit dem Einstellen der verfügbaren Optionen fertig sind, drücken Sie die Richtungstaste Rechts, um fortzufahren.
Der Startbildschirm wird angezeigt. Sie können Live TV-App markieren und OK drücken, um in den LiveTV-Modus zu wechseln und TV-Kanäle anzusehen. Startbildschirm Um die Vorteile Ihres Android-Fernsehgeräts nutzen zu können, muss Ihr TV-Gerät mit dem Internet verbunden sein. Schließen Sie das TV-Gerät über eine Hochgeschwindigkeits-Internetverbindung an ein Heimnetzwerk an. Sie können Ihr TV-Gerät drahtlos oder kabelgebunden mit Ihrem Modem / Router verbinden.
Anzeigemodus: Stellen Sie das Seitenverhältnis des Bildschirms ein. Wählen Sie eine der vordefinierten Optionen nach Ihren Wünschen. Lautsprecher: So hören Sie das TV-Audio von einem angeschlossenen kompatiblen Audiogerät, das als externes Audiosystem eingestellt ist. Stellen Sie als TV-Lautsprecher ein, um die Lautsprecher Ihres TVGeräts für die Tonausgabe zu verwenden. Strom: Dieses Menü hat die gleichen Optionen wie im Menü Einstellungen>Geräteeinstellungen> Netzstrom.
werden gehörlosen und schwerhörigen Zuschauern Untertiteldienste mit zusätzlichen Beschreibungen angeboten. Teletext Digitale Teletextsprache: Stellen Sie die Videotextsprache für digitale Sendungen ein. Dekodierung der Seitensprache: Stellen Sie die Sprache der Dekodierungsseite für die Videotextanzeige ein. Biss Schlüssel: Die Meldung "Click To Add Biss Key" wird angezeigt. Drücken Sie die OKTaste, um einen biss-Schlüssel hinzuzufügen.
die Startfrequenz ein und wählen Sie dann Scan Up oder Scan Down. Wenn ein Sender gefunden wurde, wird der Suchlauf abgeschlossen und der gefundene Sender in der Senderliste gespeichert. Einzel-RF-Scan: Wählen Sie den RF-Kanal mit den Richtungstasten Rechts / Links. Der Signalpegel und die Signalqualität des ausgewählten Kanals werden angezeigt. Drücken Sie OK, um den Suchlauf auf dem ausgewählten RF-Kanal zu starten. Die gefundenen Sender werden in der Senderliste gespeichert.
ieren Sie die gewünschten Kanäle in der Liste und drücken Sie zur Auswahl OK. Wenn der zweite Kanal ausgewählt wird, wird die Position dieses Kanals durch die Position des ersten ausgewählten Kanals ersetzt. Kanal verschieben: Verschieben Sie einen Kanal an die Position eines anderen Kanals. Markieren Sie den Kanal, den Sie verschieben möchten, und drücken Sie zur Auswahl OK. Machen Sie dasselbe für einen zweiten Kanal.
Automatische Kanalaktualisierung Schalten Sie die automatische Kanalaktualisierung ein oder aus. Kanalaktualisierungsnachricht Schalten Sie die Kanalaktualisierungsfunktion ein oder aus. Dieses Element ist je nach Auswahl des Kanalinstallationsmodus möglicherweise nicht sichtbar. Kindersicherung (*) Zur Eingabe dieses Menüs muss zuerst die PIN eingegeben werden. Das Standardkennwort ist auf 1234 gesetzt.
• Stellen Sie das TV-Gerät so ein, dass es vor der Installation von Apps, die Schäden verursachen können, keine oder nur Warnungen ausgibt. Geräteeinstellungen Über: Suchen Sie nach Systemaktualisierungen, ändern Sie den Gerätenamen, starten Sie das TV-Gerät neu und zeigen Sie Systeminformationen wie Netzwerkadressen, Seriennummern, Versionen usw. an.
Automatische Hintergrundbeleuchtung: Stellen Sie Ihre automatische Hintergrundbeleuchtung ein. Aus, Niedrig, Mittel und Öko sind verfügbar. Zum Deaktivieren auf Aus stellen. Hintergrundbeleuchtung: Stellen Sie die Hintergrundbeleuchtung manuell ein. Dieser Menüpunkt ist nicht verfügbar, wenn die automatische Hintergrundbeleuchtung nicht ausgeschaltet ist. Helligkeit: Stellen Sie den Helligkeitswert außerhalb des Bildschirms ein. Kontrast: Stellen Sie den Kontrastwert außerhalb des Bildschirms ein.
Markieren Sie Aktivieren und drücken Sie OK, um diese Funktion einzuschalten. 11-Punkt-Weißabgleichkorrektur: Die Weißabgleichfunktion kalibriert die Farbtemperatur des FTV-Geräts in detaillierten Graustufen. Durch visuelle Darstellung oder Messung kann die Graustufengleichmäßigkeit verbessert werden. Passen Sie die Stärke der Farben Rot, Grün, Blau und Verstärkung manuell an. Markieren Sie Aktivieren und drücken Sie OK, um diese Funktion einzuschalten.
Google-Assistent: Wählen Sie Ihr aktives Konto aus, zeigen Sie Berechtigungen an, wählen Sie aus, welche Apps in die Suchergebnisse aufgenommen werden sollen, aktivieren Sie den sicheren Suchfilter, aktivieren Sie das Blockieren anstößiger Wörter und zeigen Sie Open-Source-Lizenzen an. Bildschirmschoner: Legen Sie Bildschirmschonerund Schlafmodusoptionen für Ihr TV-Gerät fest.
Um die Kanäle zu sortieren, markieren Sie Sortieren und drücken Sie die Taste OK. Wählen Sie eine der verfügbaren Optionen und drücken Sie erneut OK. Die Kanäle werden nach Ihrer Auswahl sortiert. Um einen Kanal zu suchen, markieren Sie Suchen und drücken Sie die Taste OK. Die virtuelle Bildschirmtastatur wird angezeigt. Geben Sie den Namen oder die Nummer des zu suchenden Kanals ganz oder teilweise ein, markieren Sie das Häkchensymbol auf der Tastatur und drücken Sie OK.
Netzwerk und Internet konfiguriert werden. Sie können auch das Symbol Verbunden / Nicht verbunden auf dem Startbildschirm markieren und OK drücken, um auf dieses Menü zuzugreifen. Weitere Informationen finden Sie im Abschnitt Netzwerk und Internet unter dem Titel Startbildschirm. werden angezeigt. Weitere Informationen finden Sie im Abschnitt Netzwerk & Internet> WLAN unter dem Titel Startbildschirm. 1 Kabelgebundene Verbindung Verbinden Sie Ihr TV-Gerät mit Ihrem Modem / Router über ein Ethernet-Kabel.
802.11n-Kommunikationsprotokoll nutzen, um Probleme bei der Videowiedergabe zu vermeiden. angezeigt wird, markieren Sie das Fotorahmenbild und drücken Sie OK. Sie müssen die SSID Ihres Modems ändern, wenn in der Umgebung andere Modems mit der gleichen SSID vorhanden sind. Sonst können Verbindungsprobleme auftreten. Wenn Sie Probleme mit der drahtlosen Verbindung haben, benutzen Sie eine Kabelverbindung.
Player browsen. Mit den Media Player-Tasten können Sie die Wiedergabe steuern. Die Wiedergabe wird beendet, wenn Sie den Media Player verlassen oder den Medientyp auf Video umschalten. Fotodateien Drücken Sie OK, um die markierte Fotodatei wiederzugeben. Wenn Sie die Wiedergabetaste drücken, wird die Diashow gestartet und alle Fotodateien im aktuellen Ordner oder auf dem Speichergerät werden je nach Anzeigestil der Reihe nach angezeigt.
den Bildschirm auszuschalten. Drücken Sie eine Taste auf der Fernbedienung oder am TV-Gerät, um den Bildschirm wieder einzuschalten. Bildeinstellungen: Bildeinstellungsmenü an. Zeigen Sie das To n e i n s t e l l u n g e n : Toneinstellungsmenü an. Zeigen Sie das Audio Einstellungen: Stellen Sie die SoundtrackOption ein, wenn mehr als eine verfügbar ist.
Das TV-Gerät unterstützt auch die Funktion ARC (Audio Return Channel). Diese Funktion ist ein AudioLink, um andere Kabel zwischen dem TV-Gerät und der Audioanlage (A/V-Receiver oder LautsprecherSystem) zu ersetzen. Schließen Sie das Audiosystem an den HDMI2-Eingang des TV-Geräts an, um die ARC-Funktion zu aktivieren. Um die ARC-Funktion zu aktivieren, muss die Option Lautsprecher als Externes Audiosystem eingestellt sein.
Personalisierung, Abstimmungen, Spiele, soziale Netzwerke und andere Multimedia-Anwendungen. HbbTV-Apps sind in den Kanälen verfügbar und werden durch den jeweiligen Sender vorgestellt. Die HbbTV-Anwendungen werden in der Regel durch Drücken einer farbigen Taste auf der Fernbedienung gestartet. Im Allgemeinen wird ein kleines rotes Schaltflächensymbol auf dem Bildschirm angezeigt, um den Benutzer darüber zu informieren, dass sich auf diesem Kanal eine HbbTV-Anwendung befindet.
• Stellen Sie sicher, dass die richtige Senderliste ausgewählt ist. • Stellen Sie sicher, dass Sie die richtige Kanalfrequenz eingegeben haben, wenn Sie manuell abgestimmt haben. Kein Bild / verzerrtes Bild • Stellen Sie sicher, dass die Antenne richtig an das TV-Gerät angeschlossen ist. Typische Anzeigemodi für den VGA-Eingang In der folgenden Tabelle werden einige der üblichen Video Display-Modi dargestellt. Unter Umständen unterstützt Ihr TV-Gerät keine verschiedenen Auflösungen.
AV- und HDMISignalkompatibilität Quelle Unterstützte Signale PAL. Composite / Rückseiten AV Komponente / YPbPr SECAM «NTSC4.43 «NTSC3.
Beim USB Modus unterstützte Dateiformate Video Video-Codec MPEG 1/2 Auflösung 1080P@ 60fps Bitrate Profil Behälter «80Mbps MP@HL MPEG Programmstream (.DAT, .VOB, .MPG, .MPEG), MPEG Transportstream (.ts, .trp, .tp), MP4 (.mp4, .mov), 3GPP (.3gpp, .3gp), AVI (.avi), MKV (.mkv), ASF (.asf) • Einfaches Profil • Erweitertes einfaches Profil auf Stufe 5 • GMC wird nicht unterstützt MPEG Programmstream (.MPG, .MPEG), MP4 (.mp4, .mov), 3GPP (.3gpp, .3gp), AVI (.avi), MKV (.mkv), ASF (.
Audio Audio-Codec MPEG1/2 Layer1 Sample-Rate 16KHz ~ 48KHz Kanal Bis zu 2 Bitrate 32Kbps ~ 448Kbps Behälter Hinweis Film: AVI (.avi), ASF (.asf), Matroska (.mkv), MPEGTransportstrom (.ts, .trp, .tp), MPEG-Programmstrom (.DAT, .VOB, .MPG, .MPEG) Musik: MP3 (.mp3), WAV (.wav) MPEG1/2 Layer2 16KHz ~ 48KHz Bis zu 2 8Kbps ~ 384Kbps Film: AVI (.avi), ASF (.asf), Matroska (.mkv), MPEGTransportstrom (.ts, .trp, .tp), MPEG-Programmstrom (.DAT, .VOB, .MPG, .MPEG) Musik: MP3 (.mp3), WAV (.
Audio-Codec WMA 10 Pro M1 Sample-Rate 48KHz Kanal Bitrate Bis zu 5,1 384kbps Behälter Hinweis Film: ASF (WMV, ASF), AVI (AVI), Matroska (MKV) Musik: ASF (.wma) WMA 10 Pro M2 96KHz Bis zu 5,1 768kbps Film: ASF (WMV, ASF), AVI (AVI), Matroska (MKV) Musik: ASF (.wma) VORBIS Bis zu 48KHz Film: Matroska (.mkv), WebM (.webm), 3GPP (.3gpp, .3gp), MP4 Unterstützt nur (.mp4, .mov) Stereodecodierung Bis zu 2 Musik: MP4 (.m4a), OGG (.ogg) DTS LPCM Bis zu 48KHz 8KHz ~ 48KHz Bis zu 5,1 1.
Bild Bild JPEG PNG Auflösung (Breite x Höhe) Foto Baseline Progressiv non-interlace Interlace 15360x8640 (1920x8 x 1080x8) «1024x768 «9600x6400 «1200x800 «9600x6400 15360x8640 (1920x8 x 1080x8) «1024x768 6400x4800 (800x8 x 600x8) BMP MPO Baseline Progressiv GIF Untertitel Intern Dateinamenserweiterung Behälter Untertitel-Codec dat, mpg, mpeg, vob MPG, MPEG DVD-Untertitel ts, trp, tp TS DVB-Untertitel «mp4 «MP4 mkv MKV avi AVI(1.0, 2.
Unterstützte DVI-Auflösungen Wenn Sie Zusatzgeräte über das DVI-Adapterkabel (DVI zu HDMI, nicht im Lieferumfang enthalten) an die Anschlüsse Ihres TV-Gerätes anschließen, können Sie die folgenden Auflösungsrichtwerte verwenden.
Technische Daten TV-Übertragung PAL BG/I/DK SECAM BG/DK Empfang von Kanälen VHF (BAND I/III) - UHF (BAND U) - HYPERBAND Digitaler Empfang Vollintegriertes Digital-/Kabel/Satelliten TV (DVB-T-C-S) (DVB-T2, DVB-S2 kompatibel) Anzahl der voreingestellten Kanäle 12 200 Kanalanzeige Bildschirmanzeige RF-Antenneneingang 75 Ohm (nicht geregelt) Betriebsspannung 220-240V AC, 50Hz. Audio DTS HD Kopfhörer 3.
Spezifikationen des drahtloses LANTransmitters (WLAN)** Hinweis Frequenzbereiche Max. Ausgangsleistung 2400–2483,5 MHz (CH1-CH13) < 100 mW 5150–5250 MHz (CH36–CH48) < 200 mW 5250–5350 MHz (CH52–CH64) < 200 mW 5470–5725 MHz (CH100–CH140) < 200 mW Länderbeschränkungen Dieses Gerät ist für Nutzung im Haushalt bzw. Büro in allen EU-Ländern (und weiteren Ländern, sofern diese die entsprechende EU-Richtlinie anwenden) ohne etwaige Einschränkungen mit Ausnahme der unten aufgelisteten gedacht.
Sie nicht auf Inhalte zugreifen, für die ein Upgrade erforderlich ist. Lizenzen Die Begriffe HDMI und HDMI High-Definition Multimedia Interface sowie das HDMI- Logo sind Marken oder eingetragene Marken von HDMI Licensing Administrator, Inc. Dolby, Dolby Vision, Dolby Audio und das Doppel-DSymbol sind Warenzeichen der Dolby Laboratories Licensing Corporation. Hergestellt unter der Lizenz der Dolby Laboratories. Vertrauliches, nicht veröffentlichtes Material. Copyright ©1992-2020 Dolby Laboratories.
Konformitätserklärung (DoC) Hiermit erklärt Panasonic Marketing Europe GmbH, dass dieses TV-Gerät die grundlegenden Anforderungen und anderen relevanten Vorschriften der Richtlinie 2014/53/EU einhält. Wenn Sie eine Kopie der originalen Konformitätserklärung zu diesem TV-Gerät wünschen, gehen Sie bitte auf die folgende Website: http://www.ptc.panasonic.eu/doc Bevollmächtigter Vertreter: Panasonic Testing Centre Panasonic Marketing Europe GmbH Winsbergring 15, 22525 Hamburg, Germany Website: http://www.