Operating Instructions OLED TV English Nederlands Model No. TX-55HZW1004 TX-65HZW1004 TX-55HZC1004 TX-65HZC1004 (image: TX-65HZW1004) For more detailed instructions, please refer to [eHELP] (Built-in Operating Instructions). How to use [eHELP] (p. 23) Thank you for purchasing this Panasonic product. Please read these instructions carefully before operating this product and retain them for future reference. Please carefully read the “Safety Precautions” of this manual before use.
Contents Be Sure to Read Important Notice··················································· 3 Safety Precautions ··············································· 5 Accessories ························································ 9 Installing the TV ··················································· 9 Installing the wall-hanging bracket ··························12 Connections ·······················································13 Cable arrangement ··············································18 Ide
The terms HDMI and HDMI High-Definition Multimedia Interface, and the HDMI Logo are trademarks or registered trademarks of HDMI Licensing Administrator, Inc. in the United States and other countries. Important Notice Dolby, Dolby Vision, Dolby Atmos, Dolby Audio, and the double-D symbol are trademarks of Dolby Laboratories. Do not display any still part of the image for a long period Manufactured under license from Dolby Laboratories.
Notice for DVB / Data broadcasting / IPTV functions This TV is designed to meet the standards (as of August, 2019) of DVB-T / T2 (MPEG2, MPEG4AVC(H.264) and MPEG HEVC(H.265)) digital terrestrial services, DVB-C (MPEG2, MPEG4AVC(H.264) and MPEG HEVC(H.265)) digital cable services and DVB-S (MPEG2, MPEG4-AVC(H.264) and MPEG HEVC(H.265)) digital satellite services. Consult your local dealer for availability of DVB-T / T2 or DVB-S services in your area.
The recording and playback of content on this or any other device may require permission from the owner of the copyright or other such rights in that content. Panasonic has no authority to and does not grant you that permission and explicitly disclaims any right, ability or intention to obtain such permission on your behalf. It is your responsibility to ensure that your use of this or any other device complies with applicable copyright legislation in your country.
Take care Warning Do not remove covers and never modify the TV yourself as live parts are accessible and risk of electric shock when they are removed. There are no user serviceable parts inside. Do not expose the TV to rain or excessive moisture. This TV must not be exposed to dripping or splashing water and objects filled with liquid, such as vases, must not be placed on top of or above the TV. Do not insert foreign objects into the TV through the air vents.
Suffocation / Choking Hazard Warning The packaging of this product may cause suffocation, and some of the parts are small and may present a choking hazard to young children. Keep these parts out of reach of young children. Pedestal Warning Do not disassemble or modify the pedestal. Caution Do not use any pedestal other than the one provided with this TV. Do not use the pedestal if it becomes warped or physically damaged. If this occurs, contact your nearest Panasonic dealer immediately.
Moving the TV Battery for the Remote Control Caution Caution Before moving the TV, disconnect all cables. At least two people are required to move the TV to prevent injury that may be caused by the tipping or falling of TV. Do not hold the screen part as shown below when moving the TV. This may cause malfunction or damage. How to carry the TV. (p. 10) Incorrect installation may cause battery leakage, corrosion and explosion. Replace only with the same or equivalent type.
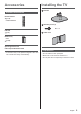
Accessories Installing the TV Pedestal Standard accessories Remote Control (p. 19) N2QAYA000219 Assembly screw (4) M4 × 15 Pedestal (p. 9) Cable cover Batteries (2) R03 (p. 20) Operating Instructions Pan European Guarantee Card Preparations Accessories may not be placed all together. Take care not to throw them away unintentionally. Do not hold the screen panel part. Make sure not to scratch or break the TV. Do not place the TV temporarily on the floor or desk.
Assembling the pedestal Attaching the cable cover Insert the pedestal firmly, otherwise it may come off when setting up the TV. Do not assemble the pedestal by any method other than those specified below. Be careful not to nip the cables between the TV and the cable cover. Do not apply load to the cable cover.
To remove from the TV: Removing the pedestal C Be sure to remove the pedestal in the following procedures when you use the wall-hanging bracket or repack the TV. 1 Remove the cable cover . 2 Remove the assembly screws from the pedestal. 3 Pull out the pedestal from the TV. Adjusting the panel to your desired angle Do not place any objects within the full rotation range.
Installing the wallhanging bracket Holes for wall-hanging bracket installation Rear of the TV 55-inch model a: 400 mm a Please contact your local Panasonic dealer to purchase the recommended wall-hanging bracket.
Connections Basic connections Mains lead External equipment and cables shown are not supplied with this TV. Please ensure that the unit is disconnected from the mains socket before attaching or disconnecting any cables. Check the terminal type and cable plugs are correct for connection. Use a fully wired HDMI compliant cable. Keep the TV away from electronic equipment (video equipment, etc.
Single Tuner TV DVB-via-IP client connection This TV has DVB-via-IP client function and can connect to DVB-via-IP server or SAT>IP compatible servers to receive broadcast streaming. It is recommended to connect to DVB-via-IP server with a LAN cable. Wired connection TV Satellite cable Cable Satellite dish To ensure your satellite dish is correctly installed, please consult your local dealer. Also consult the received satellite broadcasting companies for details.
AV devices Network DVD Recorder / Blu-ray Recorder, etc. TV A broadband network environment is required to be able to use internet services. If you do not have any broadband network services, please consult your retailer for assistance. Prepare the internet environment for wired connection or wireless connection. Setup of the network connection will start when first (p. 21) using the TV.
Connections for 4K / HDR compatible equipment TV Other connections DVD Player / Camcorder / Game equipment (VIDEO equipment) TV (Viewing) (Listening) HDMI cable 4K / HDR compatible equipment Reproduces the image more precisely with the expanded colour gamut when connecting the 4K-compatible equipment. Mode2 is a mode that supports higher definition signals than Mode1. Set to Mode1 when the image or sound in HDMI input is not played properly.
If connecting to an amplifier without eARC / ARC function, use DIGITAL AUDIO. TV Common Interface Turn the TV off with Mains Power On / Off switch whenever inserting or removing the CI module. If a smart card and a CI module come as a set, first insert the CI module, then insert the smart card into the CI module. Insert or remove the CI module completely in the correct direction as shown. Normally encrypted channels will appear.
Cable arrangement Fixing the cables using the cable clamp Fix the cables using the cable tie, cable clamp, etc. and then attach the cable cover to the TV.
Identifying Controls 6 OK Confirms selections and choices. Press after selecting channel positions to quickly change channel. Remote Control 7 [Option Menu] Easy optional setting for viewing, sound, etc. 8 NETFLIX Accesses NETFLIX service directly. A broadband network environment is required in order to fully use this function. This service may be stopped or changed without notice.
25 Last view Switches to previously viewed channel or input mode. 26 Operations for contents, connected equipment, etc. Installing / Removing batteries 4 Select [Mode2] select access Press and hold [OK]/[MUTE]/[2]* (numeric buttons) buttons for at least 3 seconds, then press the OK button. To set to [Mode1], set to “1”, to set to [Mode3], set to “3”, to set to [Mode4], set to “4”. Pull open When using the remote control mode 1, set the TV and the remote control to mode 1 respectively.
2 Ambient sensor Senses brightness to adjust picture quality when [Ambient Sensor] in the Picture Menu is set to [On]. 3 Power LED Red: Standby Green: On Depending on the ambient brightness, adjusts the brightness of LED to easy-to-view levels automatically. Orange: Standby with some functions (recording, etc.) active or panel maintenance in progress The LED blinks when the TV receives a command from the remote control.
Tick the TV signal mode to tune, and then select [Start Auto Setup] Auto Setup screen varies depending on the country and the signal mode you select. [DVB-S Antenna Setup] Ensure the satellite connections are completed (p. 13) and select the tuner mode ([Dual Tuner] / [Single Tuner]). [DVB-C Network Settings] Watching TV 1 (TV) or Normally set [Frequency] and [Network ID] to [Auto]. (Remote Control) Mains power On / Off switch should be on. (p.
How to Use eHELP [eHELP] is the detailed operating instructions built into the TV, and gives a more detailed explanation for a better understanding of the operation of each feature.
FAQs Before requesting service or assistance, please follow these simple guides to solve the problem. For details, refer to [eHELP] (Support > FAQs). It takes several seconds to display the image after turning the TV on When turning the TV on, the panel adjustment is performed. It is not a malfunction. The TV does not switch on Check the mains lead is plugged into the TV and the mains socket. The TV goes into Standby mode Auto power standby function is activated.
The panel maintenance notification is displayed when turning the TV off with Standby On / Off switch of the TV’s remote control. Perform the panel maintenance. Select [Turn the TV off now] and press OK button to start the panel maintenance. The panel maintenance is interrupted when selecting [Don’t start panel maintenance this time] or turning the TV off while the notification is displayed.
Specifications Card slot TV ETHERNET Common Interface slot (complies with CI Plus) × 2 RJ45, IEEE802.3 10BASE-T / 100BASE-TX Model No. 55-inch model : TX-55HZW1004, TX-55HZC1004 65-inch model : TX-65HZW1004, TX-65HZC1004 Dimensions (W × H × D) 55-inch model USB 1 / 2 / 3 5 V, Max. 900 mA [SuperSpeed USB 1: DC USB (USB 3.0)] USB 2 / 3: DC 5 V, Max. 500 mA [Hi-Speed USB (USB 2.
Built-in wireless LAN Standard compliance and Frequency range*1 IEEE802.11a/n/ac 5.180 GHz - 5.320 GHz, 5.500 GHz - 5.700 GHz IEEE802.11b/g/n 2.412 GHz - 2.472 GHz Security WPA2-PSK (TKIP/AES) WPA-PSK (TKIP/AES) WEP (64 bit/128 bit) Bluetooth® wireless technology*2 Standard Compliance Bluetooth 4.2 Frequency Range 2.402 GHz - 2.480 GHz 1: The frequency and channel differ depending on the country. 2: Not all the Bluetooth compatible devices are available with this TV.
Disposal of Old Equipment and Batteries Only for European Union and countries with recycling systems These symbols on the products, packaging, and/or accompanying documents mean that used electrical and electronic products and batteries must not be mixed with general household waste. For proper treatment, recovery and recycling of old products and used batteries, please take them to applicable collection points in accordance with your national legislation.
Gebruiksaanwijzing OLED-tv Nederlands Modelnr. TX-55HZW1004 TX-65HZW1004 TX-55HZC1004 TX-65HZC1004 (afbeelding: TX-65HZW1004) Raadpleeg [eHELP] (ingebouwde bedieningsinstructies) voor gedetailleerde instructies. Gebruik van [eHELP] (p. 23) Hartelijk dank voor de aankoop van dit Panasonic-product. Lees deze instructies aandachtig voordat u het product gebruikt en bewaar ze zodat u ze later opnieuw kunt raadplegen.
Inhoudsopgave Belangrijke informatie Belangrijke kennisgeving ······································· 3 Veiligheidsmaatregelen ········································· 5 Accessoires ························································ 9 De tv installeren ··················································· 9 De muurbevestigingssteun monteren ······················12 Verbindingen ······················································13 Kabels organiseren ··············································18 B
De begrippen HDMI, HDMI High-Definition Multimedia Interface en het HDMI-logo zijn handelsmerken of geregistreerde handelsmerken van HDMI Licensing Administrator, Inc. in de Verenigde Staten en andere landen. Dolby, Dolby Vision, Dolby Atmos, Dolby Audio en het dubbele-D-symbool zijn handelsmerken van Dolby Laboratories. Geproduceerd onder licentie van Dolby Laboratories. Vertrouwelijke, niet-gepubliceerde werken. Copyright © 2012-2019 Dolby Laboratories. Alle rechten voorbehouden.
Kennisgeving over DVB/datatransmissie/ IPTV-functies Deze tv is ontworpen om te voldoen aan de normen (stand augustus 2019) van DVB-T/T2 (MPEG2, MPEG4-AVC(H.264) en MPEG HEVC(H.265)) digitale aardse services, DVB-C (MPEG2, MPEG4AVC(H.264) en MPEG HEVC(H.265)) digitale kabelservices en DVB-S (MPEG2, MPEG4AVC(H.264) en MPEG HEVC(H.265)) digitale satellietservices. Raadpleeg uw lokale dealer voor de beschikbaarheid van DVB-T-/T2- of DVB-S-services in uw gebied.
Het opnemen en afspelen van content op dit of elk ander apparaat kan de toestemming vereisen van de eigenaar van de auteursrechten of andere soortgelijke rechten in die content. Panasonic heeft geen bevoegdheid om u deze toestemming te geven en verleent u deze ook niet, en wijst uitdrukkelijk alle rechten, mogelijkheden of intenties af om een dergelijke toestemming in uw naam te verkrijgen.
Voorzichtig zijn Waarschuwing Verwijder de afdekplaten van de tv niet en breng geen wijzigingen aan de tv aan, anders kunt u in contact komen met onderdelen die onder spanning staan en loopt u risico op een elektrische schok. Er bevinden zich geen door de gebruiker repareerbare onderdelen aan de binnenkant. Stel de tv niet bloot aan regen of hoge vochtigheid. De tv mag niet blootgesteld worden aan druppelend of spattend water.
Gevaar voor verstikking/inslikken Waarschuwing De verpakking van dit product kan verstikking veroorzaken, en sommige onderdelen zijn klein en gevaarlijk als ze door kinderen worden ingeslikt. Houd deze onderdelen buiten het bereik van jonge kinderen. Standaard Waarschuwing De standaard niet demonteren of er wijzigingen in aanbrengen. Let op Gebruik alleen de standaard die u bij deze tv hebt ontvangen. De standaard niet gebruiken als deze verbogen, gebarsten of anderszins beschadigd is.
De tv verplaatsen Let op Let op Verwijder alle kabels voordat u de tv verplaatst. De tv dient door ten minste twee personen te worden verplaatst om letsel te voorkomen dat kan worden veroorzaakt doordat met struikelt of valt met de tv. Tijdens het verplaatsen van de tv mag u niet het schermgedeelte vastpakken, zoals hieronder afgebeeld. Dit kan storing of beschadiging veroorzaken. De tv dragen. Batterij voor de afstandsbediening (p.
Accessoires De tv installeren Standaard Standaardaccessoires Afstandsbediening (p. 19) N2QAYA000219 Montageschroef (4) M4 × 15 Standaard (p. 9) Kabelbescherming Batterijen (2) R03 (p. 20) Gebruiksaanwijzing Europese Garantie Voorbereidingen De accessoires mogen niet allemaal samen worden geplaatst. Zorg dat u ze niet per ongeluk weggooit. Houd het schermonderdeel niet vast. Zorg dat u de tv niet bekrast of breekt. Plaats de tv niet tijdelijk op de vloer of een tafel.
De standaard monteren De kabelafdekking bevestigen Bevestig de standaard stevig, anders kan deze loskomen bij het plaatsen van de tv. Monteer de standaard niet volgens een andere methode dan die hieronder wordt aangegeven. Let op dat de kabels niet tussen de tv en het kabelpaneel klem komen te zitten. Leg niets op het kabelpaneel.
Van de tv verwijderen: De standaard verwijderen C Verwijder de standaard aan de hand van de volgende procedures wanneer u de muurbevestigingssteun gebruikt of de tv opnieuw inpakt. 1 Verwijder de kabelafdekking . 2 Verwijder de montageschroeven van de standaard. 3 Trek de standaard weg van onder de tv. De stand van het paneel aanpassen Plaats geen voorwerpen binnen de draaicirkel van de tv.
De muurbevestigingssteun monteren Gaten voor installatie met de muurbevestigingssteun Achterzijde van de tv 55 inch-model a: 400 mm a Neemt contact op met uw plaatselijke Panasonicdealer als u de aanbevolen muurbevestigingssteun wilt aanschaffen.
Verbindingen Basisaansluitingen Netsnoer De afgebeelde externe apparatuur en kabels worden niet bij de tv meegeleverd. Zorg ervoor dat de stekker van de tv niet in het stopcontact zit als u kabels aansluit of loskoppelt. Controleer of u de juiste aansluitingen en connectoren gebruikt voor de verbinding. Gebruik een HDMI-kabel met volledige bedrading. Houd de tv uit de buurt van elektronische apparaten (videoapparatuur enz.
Enkele tuner TV Satellietkabel Satellietschotel DVB-via-IP-clientverbinding Deze tv is voorzien van een DVB-via-IP-clientfunctie en kan verbonden worden met een DVB-via-IP-server of SAT>IP-compatibele servers om gestreamde content te ontvangen. Het wordt aanbevolen om een LAN-kabel te gebruiken voor verbinding met een DVB-via-IPserver. Bekabelde verbinding TV Neem contact op met uw lokale leverancier om te controleren of uw satellietschotel correct is geïnstalleerd.
AV-apparaten Netwerk Voor gebruik van internetdiensten is een breedbandnetwerk vereist. Raadpleeg uw leverancier voor hulp als u geen breedbandnetwerkservices hebt. Zorg dat de internetomgeving gereed is voor het aansluiten van een bekabelde of draadloze verbinding. Het instellen van de netwerkverbinding start bij het (p. 21) eerste gebruik van de tv. Dvd-speler/Blu-ray-speler enz.
Aansluitingen voor 4K/HDRcompatibele apparatuur TV Andere verbindingen DVD-speler / Camcorder / Spelsysteem (VIDEO-apparatuur) TV (Kijken) (Luisteren) HDMI-kabel 4K/HDR-compatibele apparatuur Reproduceert het beeld preciezer met het uitgebreide kleurengamma wanneer de met 4K compatibele apparatuur wordt aangesloten. Modus 2 is een modus die signalen met een hogere definitie ondersteunt dan Modus 1. Stel in op Modus 1 als beeld of geluid op de HDMI-ingang niet goed wordt afgespeeld.
Gebruik DIGITAL AUDIO als u een versterker zonder eARC / ARC-functie aansluit. TV Algemene interface (CI) Zet de tv altijd met de hoofdschakelaar uit wanneer u de CI-module plaatst of verwijdert. Als u een gecombineerde smartcard en CI-module hebt, plaatst u eerst de CI-module en vervolgens steekt u de smartcard in de CI-module. Plaats of verwijder de CI-module altijd volledig en in de aangegeven richting. Gewoonlijk worden gecodeerde kanalen weergegeven.
Kabels organiseren De kabels bevestigen met de kabelklem Zet de kabels met de kabelbinder, de kabelklem, enz. vast en bevestig daarna het kabelpaneel op de tv. De hoofdkabel bevestigen met behulp van de kabelbinder Houd het lipje ingedrukt Lipje Bundel de kabel Instellen Bevestig de kabelbinder Steek de kabelbinder van de kabel in een gat Gat Bundel de kabels Schuif de punt onder de geleiders Haken Losmaken: Houd de knop ingedrukt Knop Bevestig de kabels als nodig.
Bedieningsonderdelen 6 OK Bevestigt selecties en keuzes. Schakelt over naar de geselecteerde kanaalpositie. Afstandsbediening 7 [Menu Opties] Eenvoudige optionele instellingen voor weergave, geluid enz. 8 NETFLIX Directe toegang tot de Netflix-service. Voor volledig gebruik van deze functie is een breedbandnetwerk vereist. Deze service kan zonder kennisgeving gestopt of gewijzigd worden.
23 Ondertitels Geeft ondertitels weer. 4 Selecteer [Modus 2] selecteren 24 Kanaal omhoog/omlaag 25 Laatst bekeken Schakelt terug naar het vorige kanaal of de vorige invoermodus. 26 Handelingen voor inhoud, aangesloten apparatuur enz. openen Houd de knoppen [OK]/[MUTE]/[2]* (cijfertoetsen) gedurende minimaal 3 seconden ingedrukt en druk vervolgens op de knop OK.
2 Sensor omgevingslicht Detecteert helderheid voor aanpassing van de beeldkwaliteit als [Omgevings sensor] in het menu Beeld is ingesteld op [Aan]. 3 Voedingslampje Rood: Standby Groene: Aan Past de helderheid van de led automatisch aan, afhankelijk van de omgevingsverlichting, naar een prettig kijkniveau. Oranje: Stand-by met een aantal actieve functies (opname enz.) of tijdens onderhoud aan het beeldscherm Het lampje knippert wanneer de tv een opdracht van de afstandsbediening ontvangt.
Vink het tv-signaal aan waarop u wilt afstellen en selecteer [Start auto set-up] Het instelscherm verschilt afhankelijk van het geselecteerde land en tv-signaal. [DVB-S-antenne instellen] Zorg dat de satellietverbindingen zijn voltooid (p. 13) en selecteer de tunermodus ([Dual tuner] / [Enkele tuner]). [DVB-C Netwerkinstellingen] Tv kijken 1 (TV) of Gewoonlijk stelt u [Frequentie] en [Netwerk ID] in op [Auto].
eHELP gebruiken Terugkeren naar het vorige scherm/veld. [eHELP] is de naam van de gedetailleerde, ingebouwde bedieningsinstructies van de tv. Hier vindt u gedetailleerde uitleg over de bediening van de verschillende functies.
Veelgestelde vragen Probeer eerst het probleem op te lossen aan de hand van de volgende eenvoudige richtlijnen voordat u hulp inroept. Raadpleeg [eHELP] (Ondersteuning > Veelgestelde vragen) voor details. Als het probleem zich blijft voordoen, initialiseert u alle instellingen. [Fabrieksinstellingen] in [Systeemmenu] (menu Instellingen) Na het aanzetten van de tv duurt het enkele seconden tot het beeld wordt weergegeven Wanneer de tv wordt aangezet, wordt de paneelafstelling uitgevoerd.
De melding van het schermonderhoud wordt weergegeven wanneer de tv wordt uitgeschakeld met de Stand-bytoets op de afstandsbediening van de tv. Voer het schermonderhoud uit. Selecteer [Ga naar tv uitschakelen] en druk op de OK-toets om het schermonderhoud te starten. Het schermonderhoud wordt onderbroken wanneer [Schermonderhoud niet starten] wordt geselecteerd of wanneer de tv wordt uitgeschakeld terwijl de melding wordt weergegeven.
Specificaties Kaartsleuf TV ETHERNET CI-sleuf (conform CI Plus) × 2 RJ45, IEEE802.3 10BASE-T / 100BASE-TX Modelnr. 55 inch-model : TX-55HZW1004, TX-55HZC1004 65 inch-model : TX-65HZW1004, TX-65HZC1004 Afmetingen (B × H × D) 55 inch-model USB 1 / 2 / 3 5 V, Max. 900 mA [SuperSpeed USB 1: DC USB (USB 3.0)] USB 2 / 3: DC 5 V, Max. 500 mA [Hi-Speed USB (USB 2.
Ingebouwd draadloos LAN Standaardcompliantie en frequentiebereik*1 IEEE802.11a/n/ac 5,180 GHz - 5,320 GHz, 5,500 GHz - 5,700 GHz IEEE802.11b/g/n 2,412 GHz - 2,472 GHz Beveiliging WPA2-PSK (TKIP/AES) WPA-PSK (TKIP/AES) WEP (64 bit/128 bit) Bluetooth® draadloze technologie*2 Standaardcompliantie Bluetooth 4.2 Frequentiebereik 2,402 GHz - 2,480 GHz 1: Frequenties en kanalen verschillen naargelang het land. 2: Niet alle Bluetooth-compatibele apparaten kunnen met deze tv gebruikt worden.
Verwijdering van oude apparatuur en batterijen. Alleen voor de Europese Unie en landen met recycle systemen. Deze symbolen op de producten, verpakkingen en/of begeleidende documenten betekenen dat gebruikte elektrische en elektronische producten en batterijen niet samen mogen worden weggegooid met de rest van het huishoudelijk afval.
^ ` @ TX-55HZW1004 TX-65HZW1004 TX-55HZC1004 TX-65HZC1004 !"#$% & ' * +; @ ^ "@ & ; =?+ ! " # $ & ' $ " & = " @ $\ = ^ *" " !" " # < ! " # $& ' $ " & *" " ^ " @ _` {
@ \ ^ _ ' * ` { " ' " 9 ¡ " ^ " ^ ¡ " ^ 3 ' " 9 \" $ " <* ¢ # ~ $ ¢ $ " " ^ ^ ^ @ ^ 19 21 22 @ ^ "@ 23 ¤ " ^ { ^ ¥ ¡= { ¦ = * = " = 18 ! " £^" " 12 13 $ ¥ " ¥
¦ { §¨ §¨ ª«¬ §¯± ²³ ¨ ´¬ µ " §¨ ^ <" " ^ { " ^ { " ^ { §¨ ª ¶³² ´ ´& ¨ ^ {= ¸" " = = " = ` \ { | \ * \ _ \ * ' * { ¹ ^ ±º»& ±º» ¼ & ±º» ¶² & ±º» ¶¯³ ^ ^ $ $ ~ ^ $ ^ <" " ^{ ±º» º ´ ´ ^ # } * ^ ' { * " ~ ' $ " ^ <" " {$
{ { * * _ ' * $ * " # " ^ "^ * " " < ^ " ¥¿ " " # ½ ^{= {= '~ ¼À Ô ¥ § Â¥ § ¶¼Ã ¥ §  ¼Ã ¥& # ½ ^{= ~ @ {= '~ ¼Àà § Â¥ § ¶¼Ã ¥ §  ¼Ã ¥& " ' # ½ ^{= " ^{= '~ ¼ÀÁ § Â¥ § ¶¼Ã ¥ §  ¼Ã ¥ @" $" @ ^ " { ^ " " '~ ¼À
Ë ^ ^ " " @< ~ " $ "^ ' " ~ "@ \ ^ @# ^" = = ^& $ "^ < = ^ " \ "^ " "^ < " " ¹ ~ ' { !" * & " ^ " " \ & " ' * " {^ " " <~{= ^& ^ ' " $ * "@ " \ " \ @ ^ <~ " $ "^ { " "^ " "^ "@ ~ < $ "^ <
\ \ ¹ $" {\ ^ " ^ " # < " ^ " " @ & ^ " ^ * ^ ' " " * " & = ' & ! " * " = " " ^ " " $& " ~ < = ~ ' ^ @ ^ " ¹ ^ $" " ^ ^ $ "^ < ' * $ ^ ' " ¹ " ^ @ "@ {& ' ' "@& ^ { ¹ " ^ $" " ^ < < " < ^
^ ' * { ÁÁ¨ Ù !" ^ & ' ~ ^ $ " * {= \ ¹ ^ ~ ^ $ " ' " ^ " \ <& " " " " ~ ^ "@ {= " @ { " & ~ = * $ " " Þ " !" " " & *" ~{ ~{ " { @ = " $ { * \ ¹ ~ $" " ^ ^ " ^ " # < \
{ * _ \ ' * "@ " ^ & " " "@ ^ ~ ~ ' " ^ " ^ "@ ' { ^ * ^ Ö " ' "@ ! " ^ & " ^ ' Ì" ' " ^ " ^ ' < " $ "^ ^ " ^ & ; + ¹ @ $" ^ " ~ " $ {= " ^ & * { # ^{ ~ " $ ¹ @ $" ' { ~ " $ ß Ã³
\ @ * * _ \ * ' * & ; + ߥã¶ä¶¥¿ @ * &+ * & &=+ ÏÓ & § å ; + ; =+ * * @ ' & ^ ' " {^ <" ^ " @" ^ " @ {& *" ~{ * $ = ^{~ "@ ' * ¹ ' " " ^ ! @" " ' {& *" ~{ # "@
@ * * " " " ^ & * " "@ " ^ " ^ ¹ ~ $" " ^ " & " * { {= ' ' " " @" ^ " @ {& *" ~{ ' "@ ~ ' " ^ ~ @ $ {\ $ ¹ {^ $" ~ @ $ {\ C A C C B 10 $ C
* _ ¡ C * ~= ^ "@ " ^ " \" $ & " " ^ ^ < "@ " 1 " {\ ~ @ = { " "@ ~ * { ^ "{ " ^ ? {" "@ " ^ " ^ ' * \ { ' ' ¹ $" " "{ ^ = ^ $ $ 15° 15° ^ = $ 11
* ' ¢"^ " " Ö @ " ^ ` º Ó ` º @ Ò º ^ ~ ** * { * ¡ ` 1 { { {¡ ¢ {{ \ & + { { {¡ ? {{ =¡ | _ ' &=+ { { {¡ {{ A { { {¡ ? {{ { ' @ Ò ^ " \" $ & ' $ " & ~ $" @ " \" $ * *
^ * } ~ ' ^ \ ~ ^ ~ " ^ <" !" " ^ " <~{= ~ $ ~ " @& ' $ " & ^ " & *" " " " " ^ $ " ¡~ " @& *" \" { ~ $ Û = " ^{ <* } @ $" "@< ! ^ {$ §¨ ^ " {$ ~ @ " " & *" ~{ " ^ = ' @\ " ! " ~ ^ ^ ~ ^ " ~ ^ ½
^ ¦ ^ _$ Ì" " " ^ " ½ # < " ¼À* ¨ ' " <* "@ ^ ¼À* ¨ ^ & ^ " { Á¶Ð¨ & * {=& ^ {= ^ = " ^ $ * {= <* ^ ¼À* ¨ " ^{ "@ @< ~ @ $ " " ^{$ ~ @ " ^ " ¤" ~{ " ^ "@ " ^ < " ' ~ & @" $" @ ^ " { " & ' $ " &
* ® ¶ * ¶ * @ * * ·¨¸ ; ; ¦ ^ Ë @ ^ " " ~= \ " ^ ' " " \ { " ^{ '~ & ~ " " @ ^ " ~@<" @< " ^@" " " ' ^ ~ ^ <* ¡ " ^ " ^ <* * " ^ @ ^ " ^ & ; ==+ * ¦ ^ } " " ' ¤ ~ @
* \ * ¹ !¯ ' ' * { ' * * ¦ ^ ~ ^ ^{= ¼¨ ¦ ^ ~ @ §¨ ~ {& ' ^ < Î Ô Ï " * ^ ^ ~ ' ~ \ #^ " ^ " @ <* Î ^ " ~ ^ < ' ¥ ' ^ " { ~ ^{ \ & *" ' ¡ " ^ " ' & ~ ' ^ ^= §¨ ^ ^ " ' ~
<* " < ~ ½ # ¶ÏÃ Ô ¶Ïà @ $" Û ¨Â¨¶ ¶Ê¨ ¦ ^ ¢ " * $ ~ @ | & ¡ " @ " $ ^ Ë @ ^ \ ^ " ^ " {= \ ^ ¹ \ Ë * ½ # " $ = ^{= Û \ ^ ~ " " @ ½ # Ð ¹ " $ Ð Ö^ ¦ ^ ' {$ " è ^{ <* $" " ^ @< <* " ^ <* Ô ^{ <*
¼ ^ ' _ _ * { {{ Ö ½ $" ~ @< ~ @ $ " ' & ½ " ~ $ " & " " ^ " ~ @ < {\ " ^ ¼ { \ ¹ ' $" {* Ý {* ¶ ¡ " ^ " \ " ^@" ~ @ < " ' \ " ^ "^ " ¢"^ " ½ { ¾ ¶ @" # ^ <* <* ¡ ¹ ' Ö ½ $" ~ "^ " "^ < ~
^_ { { { * ' * ± { ¢" ~ ' " ½ # < ² ¹ "^ ' " ^{~ ¹ ' " ^{~ # $ ^& *" ~{ ~{ " "@ ¦ { % ¡ ~ " @ " ^ " $ " & ¢ °"À#Á ¢~ * ^ " $ " ^ ßͨ Ë # @ ^ $ ½ # ~= \ " ^ ' Ë $ "^ $ ' " ~{"@
== ^ ³~^ @`¶ @ @^ Ö " ' " " ~ ' " ^ 4 {~ =? @ ¢" ~ ' " ~" " { = * * =± { <* " { $ ' =² * { * { ; ; " ' ^{~ * _* ¤" ~{ "@ ' & ' " # ½ ÑÒ& *" ~{ "@ ' Ó& ' " # ½ ÑÓÒ& *" ~{ "@ ' & ' " # ½ ÑÒ @ ^ ' Ë¡ &
= \ " "@< ^ * "^ ~ ' & Ë "* ^ " ^ < ~ ' " ^ ³* * { _ * ? @* ¡ ' ' ¶ ¡ <* " Ý "@ ^ * ^ " ^" " * ^ ^ " " " ' < ^ ^ \ * ¡ £ " ^ ^ ' ' " {= ½ # $ " ^{ " " = * ~ ' ^ ^ ^ <* " ^ ^" " * ^{
* * ' ^ " " ^{~ $ " { ^{~ " ^ $ = " ¨ß ½ # ~ ^ " " $ ÑÒ = "@ ^ ' ^ { \ { * _ ' ' { _ { * | ¨* % Ì ^" " $ ' " " * "@ ^ ^ " " ^{~ $ " { ¹ " $ " { ¼ÀÁ { * _ 1 ` ¦ ^ @" " # ^ <* " @ ^ <* Ô ^{ <* " ^
_ * !"#$ è !" " @ " # ! " # & " ^ ^ " ^ & " " ~ ~ ~Û ' $ ½ # & ~ "^ *\ < 1 ^ ¤" ~{ ^ "@ { $ ! Ô { Ë " " #{ ^{ _ !"#$% ¤" ~{ " {"@ ^ @ * % !"#$% " ^ <* " ^ { ' @ ^ ½ # < & " ~ " " ~
_ * { * " ~ "@ " = ~ ' ^ @<& ~ " " @& ' $ " & !" "{ ^ " & *" ~{ \ "@ ~ Ë * ~ $ ½ # ~ " " @ ' Ð ¤ " ^ { ^ { * * _ * _ \ ; ^ <* " ^ = " " $ Ì" ^ " ^ "@< ~ * _ * ^ @" & <* \ " " ^ ^ " ^ \" @ ^
* { { \ * \ * * _ { * * \ { \ * _ ; { " " = * ~ ' ^ {~ " $" ^{ " ^ ' " Î& *" ~{ * "@ " = * ~ ' ^ ¦ = * ~ ' ^ ~ " ^ ^{~ ¹ ~ $* ^{ <* " ^ " ~ ' ^ ¡^ " ~ ' " ^ < ^{ <
~ @ ~ * _ "!"¯°" " ~ " ½ $ ^ " è ±¯ å ¥ Ïí& ¨â¥ Ó À¶ÁÔÀ¶Á à ` @ Ò ` @ Ò ` ©ª = ? & à & à ÊÁÀ " ¦ & ¿ £ Á¯Ä´Áij ÊÁÀ ÊÁÀ Ó _{ & Ä ` Ä + ÊÁÀ ¥ Ô Ó " ¦ & £ Áij ÊÁÀ ÊÁÀ ¥ @ Ò ¥¥â å áᥠå Ó ¥¥â å ᥠå â ` " ^ $
` * * @ * * { _ *1 ¨â¥ Ô Ô &â ÚÚ# Ù &Ó¥ ÚÚ#& & ÚÚ# Ù &á ÚÚ# ¨â¥ ºÔªÔ ¥&¥ ÚÚ# Ù ¥&ᥠÚÚ# _ ¶¥ ÁΠΨ Ô¶Á ¶ ÁΠΨ Ô¶Á ~ " Ô¥â ~ " * ' ®*2 @ * * { À±¯ « ¥ _ ¥&¥ ÚÚ# Ù ¥&â ÚÚ# ¤ " " " * <" ^ ^ " { " " ¥ ¹ ^ ^ " { À±¯ « " $ "^ ~ " <" { " ^ ¢
_ * ' _ * ~ * ' @ _ ' * _ * * ' _ * Ì" ^ { " =& ^ = Ô ^ " @ {= " = * <"& *" ^{ ~ " ^\ ^ $ ! " * ! " { "{ ~ " @ \ ^ "@ ~{" ^{ "= Ë ' $ ~ ~ " & " # ~ " ^{\ \ " ~ ~ ^ @ ^ {= ~ " $& ' $ " & ^ $" = ^