Operating Instructions OLED TV English Nederlands Model No. TX-55GZ2000E TX-65GZ2000E (image: TX-65GZ2000E) For more detailed instructions, please refer to [eHELP] (Built-in Operating Instructions). How to use [eHELP] (p. 22) Thank you for purchasing this Panasonic product. Please read these instructions carefully before operating this product and retain them for future reference. Please carefully read the “Safety Precautions” of this manual before use.
Contents Be Sure to Read Important Notice··················································· 3 Safety Precautions ··············································· 5 Accessories ························································ 8 Installing the TV ··················································· 9 Installing the wall-hanging bracket ··························13 Connections ·······················································14 Identifying Controls ··············································19
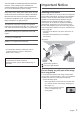
The terms HDMI and HDMI High-Definition Multimedia Interface, and the HDMI Logo are trademarks or registered trademarks of HDMI Licensing Administrator, Inc. in the United States and other countries. Important Notice Dolby, Dolby Vision, Dolby Atmos, Dolby Audio, and the double-D symbol are trademarks of Dolby Laboratories. Installing environment Manufactured under license from Dolby Laboratories. Confidential unpublished works. Copyright © 2013-2015 Dolby Laboratories. All rights reserved.
To avoid image retention, the screen saver may be activated (OLED logo moves) or the on-screen message may move after a few minutes if no signals are sent or no operations are performed. Set [Logo Luminance Control] to [Max] to avoid image retention. [eHELP] (Settings > Picture > Screen Settings > Logo Luminance Control) To avoid image retention, the screen may become dim when the motionless image is displayed. This is not a malfunction.
The recording and playback of content on this or any other device may require permission from the owner of the copyright or other such rights in that content. Panasonic has no authority to and does not grant you that permission and explicitly disclaims any right, ability or intention to obtain such permission on your behalf. It is your responsibility to ensure that your use of this or any other device complies with applicable copyright legislation in your country.
Do not expose the TV to rain or excessive moisture. This TV must not be exposed to dripping or splashing water and objects filled with liquid, such as vases, must not be placed on top of or above the TV. Do not insert foreign objects into the TV through the air vents. If the TV is used in an area where insects may easily enter the TV. It is possible for insects to enter the TV, such as small flies, spiders, ants, etc.
Built-in wireless LAN Moving the TV Caution Caution Do not use the built-in wireless LAN to connect to any wireless network (SSID*) for which you do not have usage rights. Such networks may be listed as a result of searches. However, using them may be regarded as illegal access. *SSID is a name for identifying a particular wireless network for transmission. Do not subject the built-in wireless LAN to high temperatures, direct sunlight or moisture.
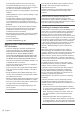
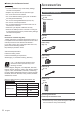
Battery for the Remote Control Caution Incorrect installation may cause battery leakage, corrosion and explosion. Replace only with the same or equivalent type. Accessories Standard accessories Do not mix old and new batteries. Do not mix different battery types (such as alkaline and manganese batteries). Do not use rechargeable batteries (Ni-Cd, etc.). Remote Control (p. 19) N2QAYA000152 Do not burn or break up batteries.
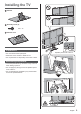
Installing the TV Pedestal Assembly screw (4) M4 × 15 Pedestal cover Preparations Do not hold the screen panel part. A Speaker part in front of this TV Make sure not to scratch or break the TV. Do not place the TV temporarily on the floor or desk. Assembling the pedestal Insert the pedestal firmly, otherwise it may come off when setting up the TV. Do not apply any strong force to the speaker part in front of this TV.
Connecting the cables Removing the terminal cover Be sure to remove the terminal cover before connecting or disconnecting cables. When the connections are completed, attach the (p. 11) terminal cover / pedestal cover. Cable arrangement Fix the cables using the cable clamp, cable tie, etc. and then attach the terminal cover / pedestal cover to the TV. The terminal cover / pedestal cover may not be attached depending on the number of cables.
Fixing the cables using the cable tie Attach the cable tie Insert the cable tie in a hole Hole Bundle the cables Cable clamp Set the tip in the hooks Hooks To loosen: Keep pushing the knob Knob To remove from the TV: Snaps Keep pushing both side snaps Fix cables as necessary. When using the optional accessory, follow the option’s assembly manual to fix cables.
Terminal cover C C To remove from the TV: C 12 English
Be sure to remove the pedestal in the following procedures when you use the wall-hanging bracket or repack the TV. Installing the wallhanging bracket 1 Remove the pedestal cover . 2 Remove the assembly screws from the pedestal. 3 Pull out the pedestal from the TV. Please contact your local Panasonic dealer to purchase the recommended wall-hanging bracket.
9 USB 2 - 3 port This symbol indicates DC operation. Connections 10 HDMI3 - 4 External equipment and cables shown are not supplied with this TV. Please ensure that the unit is disconnected from the mains socket before attaching or disconnecting any cables. Check the terminal type and cable plugs are correct for connection. Use a fully wired HDMI compliant cable. 11 AV IN (COMPONENT / VIDEO) (p. 17) 12 DIGITAL AUDIO (p. 17) To watch content in 4K format, use HDMI terminal. (p.
Dual Tuner (DiSEqC) TV LAN cable (Shielded) Use Shielded Twist Pair (STP) LAN cable. Hub / Router DVB-via-IP client (Panasonic TV, etc.) This function may not be available depending on network condition and broadcast. Dual tuner function (watching or recording 2 programmes simultaneously, etc.) is not available while using DVB-via-IP server function. For details, refer to [eHELP] (Search by Purpose > Functions > DVB-via-IP).
Wireless connection AV devices DVD Recorder / Blu-ray Recorder, etc. Internet environment TV Built-in wireless LAN (Rear of the TV) Access point Connections for 4K / HDR compatible equipment Cable TV RF cable HDMI cable HDMI cable DVD Recorder / Blu-ray Recorder, etc. 4K / HDR compatible equipment Connect the 4K compatible equipment to HDMI terminal using a 4K compatible cable and you can watch content in 4K format.
Amplifier (listening with external speakers) Other connections To enjoy multi-channel sound from external equipment (e.g. Dolby Digital 5.1ch), connect the equipment to the amplifier. For information about the connections, read the manuals of the equipment and amplifier.
Subwoofer USB HDD (for recording) To use the subwoofer, set [Headphone Terminal Output] to [Sub Woofer]. For information about the headphone terminal output settings, refer to [eHELP] (Search by Purpose > Settings > Sound). Use USB 1 port for connecting the USB HDD. For details, refer to [eHELP] (Search by Purpose > Functions > VIERA Link “HDAVI Control™”). Audio cable (3.
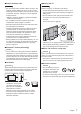
Identifying Controls Press after selecting channel positions to quickly change channel. 7 [Option Menu] Easy optional setting for viewing, sound, etc. Remote Control 8 Netflix Accesses NETFLIX service directly. A broadband network environment is required in order to fully use this function. This service may be stopped or changed without notice. 9 Sound Mute On / Off 10 Teletext button 11 Volume Up / Down 12 Numeric buttons Changes channel and teletext pages. Sets characters.
Installing / Removing batteries Pull open 3 Remote control signal receiver Do not place any objects between the TV remote control signal receiver and remote control. 4 Input mode selection Press repeatedly until you reach the desired mode. [Main Menu] Press and hold for about 3 seconds to display main menu.
First time Auto Setup When the TV is turned on for the first time, it will automatically search for available TV channels and give options to set up the TV. These steps are not necessary if the setup has been completed by your local dealer. Please complete connections (p. 14 - 18) and settings (if necessary) of the connected equipment before starting Auto Setup. For information about the settings for the connected equipment, read the manual of the equipment.
Watching TV How to Use eHELP 1 [eHELP] is the detailed operating instructions built into the TV, and gives a more detailed explanation for a better understanding of the operation of each feature. Turn power on (TV) 1 or (Remote Control) Mains power On / Off switch should be on. (p. 20) 2 or Select the mode TV Selection DVB-S DVB-C DVB-T DVB-via-IP Analogue Selectable modes vary depending on the channels stored.
To scroll the description (if more than 1 page) While the description is highlighted To open the reference screen ( ) To display the menu related to the description (only for some descriptions) (red) To check the features of this TV Search by Purpose > Read first > Features English 23
FAQs Before requesting service or assistance, please follow these simple guides to solve the problem. For details, refer to [eHELP] (Support > FAQs). It takes several seconds to display the image after turning the TV on When turning the TV on, the panel adjustment is performed. It is not a malfunction. The TV does not switch on Check the mains lead is plugged into the TV and the mains socket. The TV goes into Standby mode Auto power standby function is activated.
A white horizontal line appears in Standby mode. A white horizontal line may appear on the screen for a while to adjust the panel. This is not a malfunction. Maintenance First, remove the mains plug from the mains socket. Display panel, Cabinet, Pedestal Regular care: Gently wipe the surface of the display panel, cabinet, or pedestal by using a soft cloth to remove dirt or fingerprints. For stubborn dirt: (1) First clean the dust from the surface.
Specifications TV Model No. 55-inch model : TX-55GZ2000E HDMI 1 / 2 / 3 / 4 input TYPE A Connectors HDMI1 / 3 / 4: 4K, Content Type, Deep Colour, x.v.Colour™ HDMI2: 4K, Content Type, Audio Return Channel, Deep Colour, x.v.Colour™ This TV supports “HDAVI Control 5” function.
PAL D, K SECAM D, K VHF R1 - R2 VHF R3 - R5 VHF R6 - R12 UHF E21 - E69 PAL 525/60 Note Design and Specifications are subject to change without notice. Mass and Dimensions shown are approximate. For information about the power consumption, display resolution, etc., refer to Product Information Sheet. For information about the open source software, refer to [eHELP] (Search by Purpose > Read first > Before use > Licence). Playback of NTSC tape from some PAL Video recorders (VCR) M.
Disposal of Old Equipment and Batteries Only for European Union and countries with recycling systems These symbols on the products, packaging, and/or accompanying documents mean that used electrical and electronic products and batteries must not be mixed with general household waste. For proper treatment, recovery and recycling of old products and used batteries, please take them to applicable collection points in accordance with your national legislation.
Gebruiksaanwijzing OLED-tv Nederlands Modelnr. TX-55GZ2000E TX-65GZ2000E (afbeelding: TX-65GZ2000E) Raadpleeg [eHELP] (ingebouwde bedieningsinstructies) voor gedetailleerde instructies. Gebruik van [eHELP] (p. 22) Hartelijk dank voor de aankoop van dit Panasonic-product. Lees deze instructies aandachtig voordat u het product gebruikt en bewaar ze zodat u ze later opnieuw kunt raadplegen. Lees vóór gebruik aandachtig het gedeelte “Veiligheidsmaatregelen” in deze handleiding.
Inhoudsopgave Belangrijke informatie Belangrijke kennisgeving ······································· 3 Veiligheidsmaatregelen ········································· 5 Accessoires ························································ 8 De tv installeren ··················································· 9 De muurbevestigingssteun monteren ······················13 Verbindingen ······················································14 Bedieningsonderdelen ··········································19 Aut
De begrippen HDMI, HDMI High-Definition Multimedia Interface en het HDMI-logo zijn handelsmerken of geregistreerde handelsmerken van HDMI Licensing Administrator, Inc. in de Verenigde Staten en andere landen. Dolby, Dolby Vision, Dolby Atmos, Dolby Audio en het dubbele-D-symbool zijn handelsmerken van Dolby Laboratories. Geproduceerd onder licentie van Dolby Laboratories. Vertrouwelijke, niet-gepubliceerde werken. Copyright © 2013-2015 Dolby Laboratories. Alle rechten voorbehouden.
Om inbranden van het beeld te voorkomen, kan de screensaver (bewegend OLED-logo) geactiveerd worden of kan de tekst op het scherm geanimeerd worden als gedurende enkele minuten geen signaal wordt verzonden en geen handeling wordt verricht. Stel [Logo helderheidscontrole] in op [Max] om inbranden van het beeld te voorkomen.
Het opnemen en afspelen van content op dit of elk ander apparaat kan de toestemming vereisen van de eigenaar van de auteursrechten of andere soortgelijke rechten in die content. Panasonic heeft geen bevoegdheid om u deze toestemming te geven en verleent u deze ook niet, en wijst uitdrukkelijk alle rechten, mogelijkheden of intenties af om een dergelijke toestemming in uw naam te verkrijgen.
Stel de tv niet bloot aan regen of hoge vochtigheid. De tv mag niet blootgesteld worden aan druppelend of spattend water. Plaats geen voorwerpen gevuld met vloeistof, zoals vazen, op de tv of erboven. Laat geen vreemde voorwerpen in de tv komen door de ventilatiegaten. Als de tv wordt gebruikt in een gebied waar insecten gemakkelijk in de tv kunnen komen. Het is mogelijk dat insecten in de tv komen, zoals kleine vliegen, spinnen, mieren enz.
De tv mag op geen enkele wijze worden gedemonteerd of gewijzigd. Ingebouwd draadloos LAN Let op Gebruik de ingebouwde draadloze LAN-functie niet om toegang de verkrijgen tot een draadloos netwerk (SSID*) waarvoor u geen toegangsrecht hebt. Dergelijke netwerken kunnen wel bij de zoekresultaten staan. Maar het gebruik van zulke netwerken kan illegaal zijn. *De SSID is de naam van een draadloos netwerk voor gegevensoverdracht.
Gooi gebruikte batterijen weg volgens de voorschriften voor afvalverwijdering. Verwijder de batterij uit het apparaat als u het gedurende langere tijd niet gaat gebruiken om lekken, corrosie en explosie van de batterij te voorkomen. Accessoires Standaardaccessoires OLED-tv Verklaring van Overeenstemming (vvo) “Hierbij verklaart Panasonic Corporation dat deze tv in overeenstemming is met de essentiële vereisten en andere relevante bepalingen van Richtlijn 2014/53/EU.
De tv installeren Standaard Montageschroef (4) M4 × 15 Standaardkap Voorbereidingen Houd het schermonderdeel niet vast. A Het luidsprekergedeelte voor deze tv. Zorg dat u de tv niet bekrast of breekt. Plaats de tv niet tijdelijk op de vloer of een tafel. De standaard monteren Bevestig de standaard stevig, anders kan deze loskomen bij het plaatsen van de tv. Oefen geen krachtige druk uit op het luidsprekergedeelte voor deze tv.
De kabels aansluiten De afdekking aansluiting verwijderen Verwijder het aansluitpaneel voordat u de kabels aansluit of loskoppelt. Bevestig, als de aansluitingen zijn voltooid, het aansluitpaneel/de standaardkap. (p. 11) Kabels organiseren Zet de kabels met de kabelklem, de kabelbinder enz. vast en bevestig daarna de aansluitpaneel/standaardkap op de tv. De aansluitpaneel/standaardkap kan niet bevestigd zijn, afhankelijk van het aantal kabels.
Zet de kabels met de kabelbinder vast Bevestig de kabelbinder Steek de kabelbinder in een opening Gat Bundel de kabels Kabelklem Schuif de punt onder de geleiders Haken Losmaken: Houd de knop ingedrukt Knop Van de tv verwijderen: Ontgrendelknoppen Houd beide ontgrendelknoppen ingedrukt Bevestig de kabels als nodig. Volg bij gebruik van optionele accessoires de handleiding bij de accessoire voor informatie over het bevestigen van kabels.
Aansluitpaneel C C Van de tv verwijderen: C 12 Nederlands
De standaard verwijderen Verwijder de standaard aan de hand van de volgende procedures wanneer u de muurbevestigingssteun gebruikt of de tv opnieuw inpakt. 1 Verwijder de standaardkap . 2 Verwijder de montageschroeven van de standaard. 3 Trek de standaard weg van onder de tv. De muurbevestigingssteun monteren Neemt contact op met uw plaatselijke Panasonicdealer als u de aanbevolen muurbevestigingssteun wilt aanschaffen.
9 USB 2 - 3-poort Dit symbool geeft gelijkstroomwerking aan. Verbindingen 10 HDMI3 - 4 De afgebeelde externe apparatuur en kabels worden niet bij de tv meegeleverd. Zorg ervoor dat de stekker van de tv niet in het stopcontact zit als u kabels aansluit of loskoppelt. Controleer of u de juiste aansluitingen en connectoren gebruikt voor de verbinding. Gebruik een HDMI-kabel met volledige bedrading. Houd de tv uit de buurt van elektronische apparaten (videoapparatuur enz.
Dual tuner (DiSEqC) TV LAN-kabel (afgeschermd) Gebruik een afgeschermde dubbeldraadse (getwist paar, STP) LAN-kabel. Hub / router Satellietkabels met Multischakelaar Satellietschotel Dual tuner (Enkele kabel) TV DVB-via-IP-client (Panasonic TV, enz.) Deze functie is wellicht niet beschikbaar afhankelijk van de netwerkomstandigheden en de uitzending. De dual tuner-functie (2 programma’s tegelijkertijd bekijken of opnemen enz.
Gebruik een afgeschermde dubbeldraadse (getwist paar, STP) LAN-kabel. Raadpleeg [eHELP] (Zoeken op doel > Functies > DVB-via-IP) voor details. Draadloze verbinding AV-apparaten Dvd-speler/Blu-ray-speler enz. TV Internetomgeving Ingebouwd draadloos LAN (Achterzijde van de tv) Toegangspunt Aansluitingen voor 4K/HDRcompatibele apparatuur Kabel TV RF-kabel HDMI-kabel HDMI-kabel Dvd-speler/Blu-ray-speler enz.
Versterker (luisteren met externe luidsprekers) Andere verbindingen Als u wilt genieten van meerkanaals geluid van een extern apparaat (bijvoorbeeld Dolby Digital 5.1-kanaals), sluit u het apparaat aan op de versterker. Raadpleeg de handleiding van het apparaat en de versterker voor informatie over de aansluitingen.
Subwoofer USB HDD (voor opname) Om een subwoofer te gebruiken, stelt u [Hoofdtelefoonaansluiting] in op [Subwoofer]. Voor meer informatie over de uitgangsinstellingen van de hoofdtelefoonaansluiting raadpleegt u [eHELP] (Zoeken op doel > Instellingen > Geluid). Gebruik de USB 1-poort voor verbinding met de USB HDD. Raadpleeg [eHELP] (Zoeken op doel > Opnemen) voor details. TV VIERA Link Gebruik HDMI1 - 4 voor VIERA Link-verbinding.
Bedieningsonderdelen Afstandsbediening Schakelt over naar de geselecteerde kanaalpositie. 7 [Menu Opties] Eenvoudige optionele instellingen voor weergave, geluid enz. 8 Netflix Directe toegang tot de Netflix-service. Voor volledig gebruik van deze functie is een breedbandnetwerk vereist. Deze service kan zonder kennisgeving gestopt of gewijzigd worden.
25 Laatst bekeken Schakelt terug naar het vorige kanaal of de vorige invoermodus. 26 Handelingen voor inhoud, aangesloten apparatuur enz. De batterijen plaatsen/verwijderen Opentrekken 2 Sensor omgevingslicht Detecteert helderheid voor aanpassing van de beeldkwaliteit als [Omgevings sensor] in het menu Beeld is ingesteld op [Aan]. 3 Ontvanger voor afstandsbedieningssignalen Plaats geen voorwerpen tussen de signaalontvanger van de afstandsbediening op de tv en de afstandsbediening.
Automatisch instellen bij het eerste gebruik Wanneer de tv voor het eerst wordt aangezet, zoekt hij automatisch naar beschikbare tv-kanalen en verschijnen opties om de tv in te stellen. U mag deze stappen overslaan als uw dealer de tv al heeft ingesteld. Voltooi alle verbindingen (p. 14 - 18) en instellingen (indien nodig) van de externe apparatuur voordat u de automatische instelling uitvoert. Raadpleeg de handleiding van het aangesloten apparaat voor informatie over de instellingen ervan.
Tv kijken 1 Schakel de tv in (TV) of eHELP gebruiken [eHELP] is de naam van de gedetailleerde, ingebouwde bedieningsinstructies van de tv. Hier vindt u gedetailleerde uitleg over de bediening van de verschillende functies. 1 Geef [eHELP] weer (Afstandsbediening) De hoofdschakelaar moet aan staan. (p. 20) 2 Selecteer de stand of [Help] TV keuze DVB-S DVB-C DVB-T DVB-via-IP Analoog De selecteerbare standen zijn afhankelijk van de opgeslagen kanalen.
De beschrijving scrollen (indien langer dan één pagina) Wanneer de beschrijving wordt gemarkeerd Het referentiescherm openen ( ) Het menu bij de beschrijving weergeven (alleen bij bepaalde beschrijvingen) (Rode) De functies van deze tv bekijken Zoeken op doel > Lees dit eerst > Functies Nederlands 23
Veelgestelde vragen Probeer eerst het probleem op te lossen aan de hand van de volgende eenvoudige richtlijnen voordat u hulp inroept. Raadpleeg [eHELP] (Ondersteuning > Veelgestelde vragen) voor details. Na het aanzetten van de tv duurt het enkele seconden tot het beeld wordt weergegeven Wanneer de tv wordt aangezet, wordt de paneelafstelling uitgevoerd. Dit duidt niet op een storing. De tv gaat niet aan Controleer of de stekker van het netsnoer in de tv en in het stopcontact zit.
Het schermonderhoud wordt onderbroken wanneer [Schermonderhoud niet starten] wordt geselecteerd of wanneer de tv wordt uitgeschakeld terwijl de melding wordt weergegeven. De melding wordt opnieuw weergegeven wanneer de tv, de volgende keer, wordt uitgeschakeld met de Stand-bytoets op de afstandsbediening van de tv. Voor meer informatie “Beeldschermonderhoud” (p. 20) In stand-bymodus verschijnt er een witte horizontale lijn.
Specificaties TV Modelnr. 55 inch-model : TX-55GZ2000E HDMI 1 / 2 / 3 / 4-ingang TYPE A-aansluitingen HDMI1 / 3 / 4: 4K, Content-type, Deep Colour, x.v.Colour™ HDMI2: 4K, Content-type, Audio Return Channel, Deep Colour, x.v.Colour™ De tv ondersteunt “HDAVI Control 5”-functionaliteit. 65 inch-model : TX-65GZ2000E Afmetingen (B × H × D) Kaartsleuf CI-sleuf (conform CI Plus) × 2 55 inch-model 1 225 mm × 783 mm × 310 mm (met standaard) 1 225 mm × 761 mm × 78 mm (alleen tv) ETHERNET RJ45, IEEE802.
PAL D, K SECAM D, K VHF R1 - R2 VHF R3 - R5 VHF R6 - R12 UHF E21 - E69 PAL 525/60 Opmerking Ontwerp en specificaties kunnen zonder voorafgaande kennisgeving worden gewijzigd. Gewicht en afmetingen bij benadering. Raadpleeg het productinformatieblad voor informatie over het energieverbruik, de schermresolutie enz. Raadpleeg [eHELP] (Zoeken op doel > Lees dit eerst > Voordat u het product gebruikt > Licentie) voor informatie over de openbronsoftware.
Verwijdering van oude apparatuur en batterijen. Alleen voor de Europese Unie en landen met recycle systemen. Deze symbolen op de producten, verpakkingen en/of begeleidende documenten betekenen dat gebruikte elektrische en elektronische producten en batterijen niet samen mogen worden weggegooid met de rest van het huishoudelijk afval.
Manual de utilizare \*^* $_`= `^*{ " TX-55GZ2000E TX-65GZ2000E \'&_* !" # $% " | }~\`= !&% ''$ !" # $
Cuprins * 3 " } 8 $ \ 9 $ 13 14 $ 19
\ {"$ {"$ '{ " $ {"$ {"$ ^ } $ + & { { { } { } '{ { ^ Mediul de instalare { ^ ^ ' { ^ \ " @ ®
£ `^*{ @ £ | £ |" | }~\`= $ £ @ } ^
*
{ ' } & & & =
+ = = | ® * } !&% $ \ \
| & " ' }
" { Piedestal !$ " ´ Capac piedestal } @ A { \ & $ ¨ \
* \ & & = } ' @ § !&% ;;$ § * §
# ? $ £ & ' ` * £ @ @ @ = µ # } } £ @ & & capacului pentru piedestal } }
C C # C ;' = @
` & } ' @ @ ; 2 { 3 * Instalarea & prindere pe perete &
+ !&% ;$ * | ' = `*% * } ' {"$ µ
!` *$ ^} * ^} \ \ § = { $ \ * £ £ { $ | }~\`= { $
* ` & # { `{` } & @ | % " $ \ ^} ª * & & & }` * \ = {"$ = { { § ' ` {"$ * ¸§{= ¸ {"$ ¸ ¸
& = `{` `" `*\ { { \ \ } {"$ } * * { { * } & &
| `` !& = ª |$ | ª | }~\`= \ = ` § @ $ { $ @ $ $ $
" = " = } & + = } *\^$ }
22 APPS } |} 23 } 24 * } ^*{' ¤ @ ¤ 25 # # \ 26 & & % " & } \ ' # {
$ !# ^ \ } ' ¦
{ # & { ; # # eAJUTOR | }~\`= \ ; = \ § !&% '_$ 2 { `{| `{|* `{| `{| & " " 3
§ @ ( } = @ 23
\ = | }~\`= } * & @ ! $ " & & & `" | {"$ " |" !&% ;$ " & & & { ^
\ & # % } \ @ & # % = piedestalul \ ¶ & @ & " @ @
` " `" ; } ' } } \$ } {"$ § § ¸ \ { {"$ ¸ \ = } { # % Model de 55 inci \'&_* } !{} $ # Model de 65 inci \'&_* ` ! ¡ @ ¡ $ Model de 55 inci $ £ ¤ $ ´ ´ ¯¦ ´ ´ ¯ ´ ¯
` * ` = ' = = ' = = ' = * ' *¥ '}_ = \ }^ { { ª ' | }~\`= }
` & & ` & & & } §