ENG.book 1 ページ 2003年3月20日 木曜日 午後4時49分 DVD Video Camera/Recorder Operating Instructions Model No. VDR-M30EG Before use, please read these instructions completely. Web Site: http://www.panasonic-europe.
ENG.book 2 ページ 2003年3月20日 木曜日 午後4時49分 Important Information English For Your Safety The power switch turns the DVD video camera/recorder on and off, leaving the date/time feature unaffected. If the camera/ recorder is to be left unattended for a long period of time, turn it off . WARNING : TO PREVENT FIRE OR SHOCK HAZARD, DO NOT EXPOSE THIS UNIT TO RAIN OR MOISTURE. WARNING : TO PREVENT FIRE OR SHOCK HAZARD, USE THE RECOMMENDED ACCESSORIES ONLY.
ENG.book 3 ページ 2003年3月20日 木曜日 午後4時49分 Important Information.......................................... 2 For Your Safety................................................... 2 Precautions......................................................... 2 Table of Contents ............................................... 3 Checking Provided Accessories ......................... 6 Names of Parts ................................................... 7 About This Manual............................................
ENG.book 4 ページ 2003年3月20日 木曜日 午後4時49分 Advanced Techniques English Understanding Flow of Menu............................ 65 Setting Up Camera Functions........................... 67 Changing Title of Programme (Title) ................... 101 Play List .......................................................... 103 Switching Movie Quality (VIDEO Mode)................73 Switching Quality of Still Image (Quality)...............74 Self-Timer ..............................................................
ENG.book 5 ページ 2003年3月20日 木曜日 午後4時49分 Subsidiary Information English Cleaning.......................................................... 131 Changing Setting of Demonstration................ 132 No DVD Video Camera/Recorder Operation Check the Following: .................................... 133 Trouble Messages .......................................... 135 Troubleshooting .............................................. 142 System Reset .................................................
ENG.book 6 ページ 2003年3月20日 木曜日 午後4時49分 English Checking Provided Accessories Make sure that you have all the following accessories in package: Battery (model CGA-DU14): Portable power supply for this DVD video camera/recorder. Charge it before use. AC adapter/charger (model VSK0631): Used to power the DVD video camera/ recorder from AC outlet, or charge battery. Mains lead: Infrared remote control Connect between household AC outlet and (model VEQ3993): AC adapter/charger.
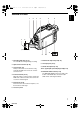
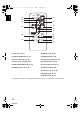
ENG.book 7 ページ 2003年3月20日 木曜日 午後4時49分 1 7 2 3 4 5 English Names of Parts 6 8 A/V MIC (Inside the cover) 11 9 1 Recording indicator (P. 79) The red indicator will light during recording. 10 BATTERY EJECT (Bottom) 7 External microphone jack (P. 43) 8 AV output jack (P. 61) 2 Optical 10× zoom lens (P. 46) 9 Stereo microphone (P. 43) 3 Lens hood (P. 47) Always remove this lens hood when using generally available tele-conversion or wideconversion lens. 4 Infrared receiver (P.
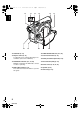
ENG.book 8 ページ 2003年3月20日 12 13 木曜日 午後4時49分 14 15 16 17 English ACCES S/PC DISC EJEC T REC 18 19 20 21 22 12 Viewfinder (P. 37) 16 CARD ACCESS indicator (P. 8, 44) 13 Dioptre control (P. 37) To adjust the focus of image appearing in the viewfinder. (Pull out the viewfinder.) 17 Card insertion block (P. 35) 14 ACCESS/PC indicator (P. 8, 41, 44) Will blink or light while the DVD video camera/ recorder is operating. 19 Record button (REC) (P. 41) 15 DISC EJECT button (P.
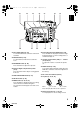
ENG.book 9 ページ 2003年3月20日 24 午後4時49分 25 26 27 28 29 English 23 木曜日 30 31 32 23 FULL AUTO button (P. 52) To switch the DVD video camera/recorder to full automatic 24 FOCUS button (P. 48) To switch between manual focus and autofocus. 25 EXPOSURE button (P. 50) Press this button to adjust the exposure. 26 BLC (backlight compensation) button (P. 51) Press this button when subject is being lighted from rear. 33 34 35 30 Screen display button (DISPLAY) (P.
ENG.book 10 ページ 2003年3月20日 木曜日 English REC 午後4時49分 DIGITAL ZOOM ZOOM 36 42 37 T W 38 43 39 44 45 46 DISC NAVIGATION DISPLAY 47 40 MENU SELECT DELETE 41 48 49 50 36 REC button (P. 41) 42 ZOOM T button (P. 46) 37 DIGITAL ZOOM button (P. 71) 43 ZOOM W button (P. 46) 38 Reverse skip button (P. 58) 44 Forward search button (P. 57) 39 Reverse search button (P. 57) 45 Play/pause button (P. 56) 40 DISC NAVIGATION button (P. 81) 46 Forward skip button (P. 58) 41 MENU button (P.
ENG.book 11 ページ 2003年3月20日 木曜日 午後4時49分 English About This Manual lDisplays in this manual Understand that the displays are different from those you will actually see in the viewfinder or on the LCD screen. lNotation of cancel button Press the stop/cancel button to stop your operation midway, or return the menu screen to the preceding one. The expression “press the B button” will be used in this text.
ENG.
ENG.book 13 ページ 2003年3月20日 木曜日 午後4時49分 You cannot record a still on DVD-R disc, or delete any recorded images or data. For optimum recording on DVD-R disc, this DVD video camera/recorder writes control data to the disc in order to automatically make adjustments when it is inserted and ejected accompanying recording. If the disc has no area to be written for adjustment, recording may not be possible. To prevent this, do not insert or eject a DVD-R disc accompanying recording more than 50 times.
ENG.book 14 ページ 2003年3月20日 木曜日 午後4時49分 Handling Discs English lUsing discs lStoring discs DVD-RAM and DVD-R discs are very delicate recording media. Carefully read the following cautions and observe them: • When using disc on this DVD video camera/ recorder, be sure to keep it in Round DVD Holder. • Always use a brand new disc when recording important material. • Be sure not to touch the disc exposed portion, and be careful that no dirt adheres to it.
ページ 2003年3月20日 木曜日 午後4時49分 How to Remove Disc 1 Hold the Round DVD Holder with SIDE A facing up. While pushing the two release levers in the direction of arrows (1) marked on holder, slowly open SIDE A of the holder in the direction of arrows (2), taking care not to drop the disc. When the Hinge of Round DVD Holder Comes off Release levers 1 1 Push the hinged portion of the holder piece marked SIDE A with thumb and middle finger, and warp it in the direction of arrows (4).
ENG.book 16 ページ 2003年3月20日 木曜日 午後4時49分 Available Cards English SD memory card and multimedia card can be used on this DVD video camera/recorder. lHandling card • Do not use cards other than the designated ones. • Be sure to use a brand new card when recording vital images. • Do not touch the card terminal or allow it to touch metal. • Do not paste anything other Terminal than exclusive label on label pasting portion. • Do not subject card to impact, bend or drop it.
ENG.book 17 ページ 2003年3月20日 木曜日 午後4時49分 English Storage Capacity on Disc or Card Recordable Time of Movie (Video) The recordable time will vary depending on the recording quality: See page 73 for the setting of recording quality. Movie recordable time on one disc (on single side) (when recording only movies) Recording quality Note: • No movie can be recorded on SD memory card or multimedia card. • The movie quality mode can be changed for recordings on DVD-RAM disc, but not on DVD-R disc.
ENG.book 18 ページ 2003年3月20日 木曜日 午後4時49分 Recordable Stills (Photos) English lRecordable stills on one DVD-RAM disc (single side) (when recording only still): Up to 999 If the disc still has free space after recording 999 stills on it, movies can also be recorded on it. lRecordable stills on one blank card: The number of recordable stills will vary depending on the recording quality: See page 74 for the setting of recording quality. Capacity Recording quality FINE NORM ECO 8 MB Approx. 45 Approx.
ENG.book 19 ページ 2003年3月20日 木曜日 午後4時49分 English Features of DVD Video Camera/Recorder Versatile Functions Available This DVD video camera/recorder has numerous useful functions. However, the functions that can be used will vary depending on whether DVD-RAM disc, DVD-R disc or card is used.
ENG.book 20 ページ 2003年3月20日 木曜日 午後4時49分 Disc Navigation Functions: English Disc used DVD-RAM DVD-R Function Scene Delete Edit Thumbnail Skip Fade Combine Divide Move Copy Select Start →Current Current →End All Detail PlayList Switch Play Create Edit Title Delete Program Switch Play Title Go To Top End Disc Capacity Protect Disc Format Disc Update Control Info.
ENG.book 21 ページ 2003年3月20日 木曜日 午後4時49分 Card Navigation Functions: Scene Go To Card Slide Show Reference page Start →Current Current →End All Detail Top End Capacity Format Card All DPOF English Function Delete Lock DPOF Select 87 96 97 98 98 98 99 111 111 112 113 117 117 Recording on Disc Recording Movie and Still You can use both 8 cm DVD-RAM and DVD-R discs on this DVD video camera/recorder for recording.
ENG.book 22 ページ 2003年3月20日 木曜日 午後4時49分 Immediate Reviewing of Recorded Image English You can check the recorded movie or still in the viewfinder or on the LCD screen. Editing in Various Ways on DVD Video Camera/Recorder Alone This DVD video camera/recorder is provided with a useful editing/playback tool. Disc Navigation allows you to easily attach a title or special video effect to the recorded movie or still.
ページ 2003年3月20日 木曜日 午後4時49分 Setups This section explains preparations for recording - setting up the DVD video camera/recorder and battery. Setting Up the DVD Video Camera/Recorder Holding DVD Video Camera/Recorder Insert your right hand from the bottom of DVD video camera/recorder up to the base of your thumb. Put your hand in a position where you can easily operate the REC button and the Zoom lever.
ENG.book 24 ページ 2003年3月20日 木曜日 午後4時49分 Attaching Shoulder Strap English Be sure to pass through the 2 slots. Pass the shoulder strap through the shoulder strap attachments.
ENG.book 25 ページ 2003年3月20日 木曜日 午後4時49分 Inserting Battery into Remote Control 1 Slide the cover to remove it. 2 Insert the lithium battery with the positive R terminal facing up. English Insert the provided lithium battery into remote control. 3 Slide the cover to close it. Note: The life of lithium battery is approximately one year. If the battery is discharged, no operation is possible with remote control: Replace the battery.
ENG.book 26 ページ 2003年3月20日 木曜日 lUsing Remote Control English Point the remote control to the infrared receiver on the DVD video camera/recorder. The remote controllable distance is up to 5 m. 10˚ 10˚ 15˚ Infrared receiver 15˚ pr Ap 26 QR34653 . ox 5m 午後4時49分 Note: • When using the remote control, make sure that the infrared receiver on DVD video camera/recorder is not exposed to direct sunlight or any intense light.
ページ 2003年3月20日 木曜日 午後4時49分 Setting Up the Battery The CGA-DU14 battery provided with this DVD video camera/recorder has not been charged at purchase time: Charge it before using the DVD video camera/recorder. Note: • Be sure to use the CGA-DU14/CGA-DU21 battery for the DVD video camera/recorder: Using other batteries could cause the DVD video camera/recorder to malfunction, or result in fire.
ENG.book 28 ページ 2003年3月20日 木曜日 午後4時49分 Attaching Battery to DVD Video Camera/Recorder English 1 Fit the battery to the battery attachment platform on this DVD video camera/recorder and slide it upward until a click is heard. Note: • Make sure that the battery is in the correct orientation. • Make sure that the battery is securely attached: Incomplete attachment could cause the battery to fall, resulting in damage. Terminal must face up.
ページ 2003年3月20日 木曜日 午後4時49分 lRecordable time with fully charged battery (with no zoom operation, etc.
ENG.book 30 ページ 2003年3月20日 木曜日 午後4時49分 Battery Remaining Level Indicator English When the battery is used to power the DVD video camera/recorder, the battery remaining level appears in the viewfinder or on the LCD screen as follows: Fully charged Nearly empty (Blinks) White portion shows remaining level Note: The remaining level indicator “w” may be displayed for an extended period, and “x” or “y” may be displayed for a shorter period.
ENG.book 31 ページ 2003年3月20日 木曜日 午後4時49分 It is recommended that you use the AC adapter/charger to power the DVD video camera/recorder from household AC outlet when you perform settings on it, play back or edit images, or use it indoors. Note: Be sure to use the specified AC adapter/charger (VSK0631) to power the DVD video camera/recorder. Using other AC adapter/chargers could cause electric shock or result in fire.
ENG.book 32 ページ 2003年3月20日 木曜日 午後4時49分 English Inserting and Removing Disc Inserting Disc 1 Press down the DISC EJECT button once and release it. A few moments after the ACCESS/PC indicator blinks, the cover of disc insertion block will open slightly. If the disc is not correctly inserted, the cover will not close. Never try to forcibly close the cover: This could cause damage. Reinsert the disc properly. Correct orientation Incorrect orientation 2 Gently open the cover by hand until it stops.
ページ 2003年3月20日 木曜日 午後4時49分 Note: • Disc cannot be inserted or removed unless the battery or AC adapter/charger is connected to DVD video camera/ recorder. • See page 75 for how to set disc in Round DVD Holder. • If there is some delay before recording starts, refer to page 133. • The disc insertion orientation is predetermined: Forcibly inserting a disc in wrong orientation could damage the DVD video camera/recorder or Round DVD Holder of disc.
ENG.book 34 ページ 2003年3月20日 木曜日 午後4時49分 Removing Disc English 1 Set the power switch to “POWER OFF” to turn the DVD video camera/ recorder off. 2 Press down the DISC EJECT button once and release it. In a moment, the cover of disc insertion block will open slightly. DISC EJECT 3 Gently open the cover until it stops. When the cover is fully open, the disc will slightly come out from the disc guide, and stop. 4 Remove the disc. Hold disc Hold the top around this of Round portion.
ページ 2003年3月20日 木曜日 午後4時49分 Inserting and Removing Card Before inserting or removing card, set the power switch to “POWER OFF” to turn the DVD video camera/recorder off. 1 Open the cover of card insertion block with power turned off. Removing Card Push the centre of card edge: The card will come out so that it can be held by fingers. 2 Insert card with its terminal inward until it locks. 3 Close the cover of card insertion block. 35 QR34653 English ENG.
ENG.book 36 ページ 2003年3月20日 木曜日 午後4時49分 English Basic Techniques This section explains about recording of movies and still images, and also basic settings on DVD video camera/recorder.
ENG.book 37 ページ 2003年3月20日 木曜日 午後4時49分 1 Pull out the viewfinder. 2 Turn the dioptre control knob to adjust the focus English Viewing Subject through Viewfinder Dioptre control to suit your eyesight. Note: • If the LCD monitor is open approximately 90°, the viewfinder will be off. • Focusing will not be correct unless the viewfinder is pulled out. Pull out the viewfinder. Viewing Image on LCD Monitor Screen If you open the LCD monitor, you can monitor subject image on the LCD screen.
ENG.book 38 ページ 2003年3月20日 木曜日 午後4時49分 Closing LCD Monitor English Before closing the LCD monitor, be sure to reset it at right angles to the DVD video camera/recorder. Replace the LCD monitor on the DVD video camera/recorder with the LCD screen facing inward until a click is heard. 38 QR34653 Note: • Be sure to return the LCD monitor at right angles to the DVD video camera/recorder before closing it or replacing it on the DVD video camera/recorder with its screen facing outside.
ページ 2003年3月20日 木曜日 午後4時49分 Setting Date and Time Set the current date and time so that the date and time you make a recording can be recorded correctly. The following procedure can also be used to correct the date and time you have already set. Tilt up/down and to left/right to select, and then press A to designate. 1 Turn the DVD video camera/recorder on. 2 Press the MENU button. The menu screen will appear. 3 Use the joystick to choose “Date Setup” and then “Date Set”.
ENG.book 40 ページ 2003年3月20日 木曜日 午後4時49分 Changing Display Format of Date and Time English You can select one of three date display formats: day/month/year or month/day/year, year/month/day. Associated with the selected date display, the time display format will also change as follows: Display format Example of display D/M/Y 17:00 30/9/2003 M/D/Y 5:00PM 9/30/2003 Y/M/D PM5:00 2003/9/30 1 Press the MENU button.
ENG.book 41 ページ 2003年3月20日 木曜日 午後4時49分 12 English Recording Movie Insert a recordable DVD-RAM or DVD-R disc into this DVD video camera/recorder. ACCESS/PC indicator Pressing REC once will start recording; pressing it once again will temporarily stop recording. Power switch 1 Turn the DVD camera/recorder on. Set the power switch to “O VIDEO” to turn the DVD video camera/recorder on.
ENG.book 42 ページ 2003年3月20日 木曜日 午後4時49分 lPower save and discharge of battery English If, when “Power Save: On” is specified, the DVD video camera/recorder is left in the recording pause status for approximately 5 minutes, it will automatically turn off. To restart recording, set the power switch to “POWER OFF”, and then set it to “O VIDEO”. To set or release power save, see “Turning DVD Video Camera/Recorder Off Automatically (Power Save)” on page 78.
ENG.book 43 ページ 2003年3月20日 木曜日 午後4時49分 Connect external microphone (generally available) to the external microphone jack of this DVD video camera/recorder. Clearer sound can be recorded. Turn on the switch on microphone and start recording. For details on microphone, see “Major Specifications” on page 150. To external microphone jack A/V MC Note: • If the AV/S output cable is plugged in, you cannot use external microphone: Unplug the AV/S output cable to use the external microphone.
ENG.book 44 ページ 2003年3月20日 木曜日 午後4時49分 13 English Recording Stills Note: Recording of still images is possible on DVD-RAM disc and card. ACCESS/PC indicator CARD ACCESS indicator 1 Turn the DVD camera/recorder on.
ページ 2003年3月20日 木曜日 午後4時49分 lStill recording quality The DVD video camera/recorder can record JPEG stills of 640×480 pixels. Although still images are recorded on DVD-RAM disc only in the FINE mode, the quality mode can be chosen when recording stills on card. Note: • The DVD video camera/recorder automatically sets the shutter speed between 1/800 and 1/30 second (between 1/800 and 1/10 second if Program AE has been set to Low Light) depending on the subject brightness.
ENG.book 46 ページ 2003年3月20日 木曜日 午後4時49分 123 English Zooming This DVD video camera/recorder allows you to record using optical 10-power zoom and digital zoom. Move the zoom lever to “T” control side, and the subject image will gradually become telescopic: Move the zoom lever to “W” control side, and the image will widen. Recording in wide area If Dig. Zoom 40× or 240× is specified, moving the zoom lever to “T” control side will engage the digital zoom midway (See page 71).
ENG.book 47 ページ 2003年3月20日 木曜日 午後4時49分 Use the macro function when recording a small object from close-up position: You can shoot the subject as close as approximately 2 cm from the lens surface, magnifying the image to fill the screen. 1 Aim the DVD video camera/recorder at the subject, and press the zoom lever to “W” control side. Note: • Zoom can be used, but the subject may not be focused, depending on the distance to the subject. In this case, move the zoom to “W” control side to focus.
ENG.book 48 ページ 2003年3月20日 木曜日 午後4時49分 123 English Manually Focusing Subject The DVD video camera/recorder measures the distance to a subject viewed at the centre of screen and automatically focuses on it. If it is difficult to automatically focus the subject, adjust the focus manually. Focusing During Recording This DVD video camera/recorder automatically focuses a subject at the centre of screen (auto-focus). When the DVD video camera/recorder is turned on, auto-focus will always be set.
ENG.book 49 ページ 2003年3月20日 木曜日 午後4時49分 Objects not in the centre of screen Objects with little variation in brightness, such as white wall Objects that are far and near at the same time Objects moving rapidly Objects lit by neon sign, spotlight, etc. which glares or emits strong light Dark objects Object behind glass with water droplets, dirt on it Night view English Manually focus the following objects, which may not be automatically focused.
ENG.book 50 ページ 2003年3月20日 木曜日 午後4時49分 123 English Adjusting Exposure Manually This DVD video camera/recorder measures the subject brightness and automatically adjusts the exposure. You can also adjust the exposure manually. 1 Press the EXPOSURE button during recording. The exposure indicator will appear on the screen. 0:00:00 REM 3 0 MIN Exposure indicator FINE 17:00 3 0 / 9 / 2 00 3 2 Use the S R buttons to adjust the exposure, while viewing the image in the viewfinder or on the LCD screen.
ENG.book 51 ページ 2003年3月20日 木曜日 午後4時49分 Compensating for Backlight When subject is lighted from rear, this function will compensate for lighting so that the subject is not too dark. 1 Press the BLC button during recording. 0:00:00 REM 3 0 MIN Backlight correction icon FINE 17:00 3 0 / 9 / 2 00 3 The backlight correction icon will appear. Note: • Pressing the BLC button will alternate between backlight setting between on and off.
ENG.book 52 ページ 2003年3月20日 木曜日 午後4時49分 123 English Using Full Auto Function Pressing the FULL AUTO button will fully automate the camera functions. 1 Press the FULL AUTO button. The following settings will reset to defaults: Function When setting full auto Program AE Auto White balance Auto Exposure Auto Backlight compensation Off Focus Auto EIS On MIC.
ENG.book 53 ページ 2003年3月20日 木曜日 午後4時49分 123 English On-Screen Information Various types of information will appear in the viewfinder or on the LCD screen during recording. Information Display During Recording 1 7. Self-timer (only in still recording mode) 7 10 9 10 11 REC 0:00:00 REM 6 3 MIN 8 15 16 17 DISC ACCESS 12 13 14 2 3 456 FINE 17 : 0 0 30/ 9 / 2 00 3 18 19 The above screen is an example for explanation: It is different from the actual display. 1.
ENG.book 54 ページ 2003年3月20日 木曜日 午後4時49分 14. Movie recording quality (only when using disc) XTRA English FINE STD : Highest quality (only when using DVD-RAM disc) : High quality : Standard Still recording quality (only when using card) FINE : High quality NORM : Standard ECO : Number of recordable stills is prioritised 15. Movie recording time (only in movie recording mode) 16.
ENG.book 55 ページ 2003年3月20日 木曜日 午後4時49分 lSwitching the information display mode English You can switch the display mode of on-screen information: Press the DISPLAY button. The full and minimum display modes will alternate. • Full display mode: All types of information will appear. • Minimum display mode: The recording mode (see 1 on page 53) and recording status (see 8 on page 53) will appear. If the DVD video camera/recorder has warning information, a warning message will appear.
ENG.book 56 ページ 2003年3月20日 木曜日 午後4時49分 English Playing Back 123 Immediately Checking Recorded Scene You can check your recording immediately on the spot. Tilt up/down and to left/ right to select, and then press A to designate. 1 Press A button in the recording pause status. The DVD video camera/recorder will enter the playback mode, and the scene you have recorded last will be played back.
ENG.book 57 ページ 2003年3月20日 木曜日 午後4時49分 123 English Playback from Start of Disc or Card Use the Go To function (P. 59) or Disc Navigation function (P. 81) to play back from the start of disc or card. 12 Search Playback of Movie During playback, tilt the joystick to right or left and hold it: Search playback will start.
ENG.book 58 ページ 2003年3月20日 木曜日 午後4時49分 12 English Skip Playback of Movie During playback, tilt the joystick up or down to locate the start of desired scene. L Tilt once : To skip to the first image of the scene following the one being played back, and start playback. I Tilt once : To return to the first image of the scene being played back, and start playback. L Tilt and hold : To continuously locate the beginnings of scenes, starting from the scene following the scene being played back.
ENG.book 59 ページ 2003年3月20日 木曜日 午後4時49分 1 Press the MENU button Top Go T o during playback. To p En d Spec i f y 2 Choose the option (point you want to go to), and then press the A button. ENTER RETURN RAM :To go to the start, and enter playback pause. End :To go to the end of last scene, and enter playback pause. Specify :To go to a specified point and enter playback pause. See the following for details.
ENG.book 60 ページ 2003年3月20日 木曜日 午後4時49分 123 English On-Screen Information Display Information Display during Playback Various types of information on recording will be superimposed on playback image you are viewing. No display Playback information display lSwitching the information display mode Press the DISPLAY button: You can switch the display mode of on-screen information. When using disc: Recording mode*1 Scene No.
ENG.book 61 ページ 2003年3月20日 木曜日 午後4時49分 English Playback on Other Devices This section explains about playback on another AV device, such as TV. 123 Connecting to a TV Use the provided AV/S output cable to connect the DVD video camera/recorder to a TV as follows: To AV output jack To S-VIDEO input jack* To video/ audio input jacks White Yellow AV/S output cable (provided) Red * If your TV has an S-VIDEO input jack, you can connect the S-VIDEO plug to it.
ENG.book 62 ページ 2003年3月20日 木曜日 午後4時49分 123 English Viewing on TV Screen 1 Turn the TV on and set the input selector to “VCR” whichever applicable Video input. Refer to the TV instruction manual for how to switch the TV input. 2 Turn the DVD video camera/recorder on. The image that the DVD video camera/recorder is seeing will appear on the TV screen. You can also monitor the image on the LCD screen or viewfinder of the DVD video camera/ recorder. 3 Perform playback, recording or editing.
ENG.book 63 ページ 2003年3月20日 木曜日 午後4時49分 You can play back finalised DVD-R discs on DVD players or other devices that conform to 8 cm DVD-R disc. However, DVD-R discs may not be usable on all those devices. 1 Finalise a recorded DVD-R disc. 3 Insert the disc into the DVD player and play it back. You need to finalise a disc to play it back on DVD player: See page 115. No further data can be recorded on finalised disc.
ENG.book 64 ページ 2003年3月20日 木曜日 午後4時49分 1 English Playback on DVD Video Recorder/Player You can use a DVD video recorder or DVD player that conforms to DVD-RAM to play back DVD-RAM discs recorded on this DVD video camera/recorder 1 Remove the disc from Round DVD Holder. 2 Insert the disc into the DVD video recorder/ player and play it back. See the instruction manual for DVD video recorder/player.
ページ 2003年3月20日 木曜日 午後4時49分 Advanced Techniques This section explains about various settings to further extend the usefulness of this DVD video camera/ recorder. Understanding Flow of Menu Press the MENU button during recording pause: The “Camera Functions Setup” menu screen will appear. Tilt the joystick up, down, to left or right to select a menu item, and then press the A button to choose the option. The screens used here to explain are displayed when DVD-RAM disc is used.
ENG.book 66 ページ 2003年3月20日 木曜日 午後4時49分 lFlow of Menu Refer to page indicated for details of each function. English Date Setup Camera Functions Setup Program AE (P. 67) Came r a Fun c t i ons Se t up White balance (P. 68) P r o g r am AE : Au t o Wh i t e Ba l . : Au t o EIS (P. 70) EIS : On D i g . Zoom : 4 0 x Digital zoom (P. 71) M IC . F i l t e r : O f f 16:9 : Of f Microphone filter (P. 72) ENTER RETURN RAM 16:9 (P. 72) Display format (P. 40) Date setting (P.
ENG.book 67 ページ 2003年3月20日 木曜日 午後4時49分 123 English Setting Up Camera Functions Selecting Shooting Mode to Match the Subject (Switching Programme AE Mode) This DVD video camera/recorder automatically sets the shutter speed and aperture according to the subject brightness for optimum recording: You can also specify one of six modes depending on the subject conditions, recording environment or purpose of filming.
ENG.book 68 ページ 2003年3月20日 木曜日 午後4時49分 Adjusting Colour (White Bal.) English This DVD video camera/recorder automatically adjusts the tint to match the conditions of subject. However, it may not allow user to deliver natural tint, depending on the weather or status of light source. In this case, change the white balance setting according to the situation.
ENG.book 69 ページ 2003年3月20日 木曜日 午後4時49分 1 Point the DVD video 3 Press the A button: The camera/recorder at a white object so that it fills the screen. Use an object that is not transparent. “h“ indicator will change from blinking to a steady light: The steady light indicates that the white balance setting is complete. (White shirt or thick paper) 2 Press the MENU button, choose “White Bal.”, “Set”, and then press the A button.
ENG.book 70 ページ 2003年3月20日 木曜日 午後4時49分 Using the Electronic Image Stabiliser (EIS) English This DVD video camera/recorder is equipped with an electronic image stabiliser function: When you use zoom to record a magnified subject image, it will correct fuzziness in the recorded image. 1 Press the MENU button, choose “EIS” on the “Camera Functions Setup” menu screen, and then press the A button. Came r a F u nc t i on s Se t u p P r o g r am AE Wh i t e Ba l . On EIS D i g . Zo om Of f M IC .
ENG.book 71 ページ 2003年3月20日 木曜日 午後4時49分 When the zoom lever is moved to “T” control side with Dig. Zoom 40× or 240× specified, digital zoom will automatically kick in when optical 10× zoom range is exceeded. You can set the digital zoom to 40× or 240× for movie recording, or 40× for still recording. 1 Press the MENU button, choose “Dig. Zoom” on the “Camera Functions Setup” menu screen, and then press the A button. Came r a F u nc t i on s Se t u p P r o g r am AE Wh i t e Ba l . EIS 240x D i g .
ENG.book 72 ページ 2003年3月20日 木曜日 午後4時49分 Reducing Wind Noise during Recording (MIC.Filter) English When recording sound from the microphone built into this DVD video camera/recorder, you can reduce wind noise in recording. If “MIC.Filter: ON” is specified, the low-frequency components in the sound picked up by microphone will be cut off during recording: This makes it easier to hear the target voice or sound during playback. 1 Press the MENU button, choose “MIC.
ページ 2003年3月20日 木曜日 午後4時49分 Setting Up Record Functions 12 Switching Movie Quality (VIDEO Mode) Choose the movie quality from “XTRA” (only with DVD-RAM disc), “FINE” and “STD”. It is recommended that you record critical subjects in the “XTRA” or “FINE” when you are using a DVDRAM disc, or in the “FINE” with a DVD-R disc. 1 Press the MENU button, choose “VIDEO Mode” on the “Record Functions Setup” menu screen, and then press the A button.
ENG.book 74 ページ 2003年3月20日 木曜日 午後4時49分 English Block-like noise may appear in recorded image, or the outline of subject image is distored under the recording conditions listed below: Pan the DVD video camera/recorder as slowly as possible.
ENG.book 75 ページ 2003年3月20日 木曜日 午後4時49分 You can record stills of yourself alone or with your family, friends, etc., using the self-timer function, as with ordinary cameras. A still will be recorded approximately 10 seconds after the REC button is pressed. 1 Press the MENU button, choose “Self Timer” on the “Record Functions Setup” menu screen, and then press the A button. 4 Press the REC button.
ENG.book 76 ページ 2003年3月20日 木曜日 午後4時49分 123 English Setting On-Screen Display Output On or Off (OSD Output) If you connect this DVD video camera/recorder to a TV to view images on TV screen, you can switch off the on-screen information (displayed in the viewfinder or on the LCD screen) from the TV screen. 1 Press the MENU button, 3 Press the MENU button to end the setting.
ENG.book 77 ページ 2003年3月20日 木曜日 午後4時49分 LCD Setup This function allows you to adjust the brightness and colour density of LCD screen during recording and playback. Setting Brightness of LCD Screen (Brightness) 2 Use the joystick for adjustment. K: The screen becomes dimmer J: The screen becomes brighter 3 Press the MENU button to Tilt up/down and to left/ right to select, and then press A to designate.
ENG.book 78 ページ 2003年3月20日 木曜日 午後4時49分 123 English Initial Settings Switching Operating Sound On or Off (Beep) This DVD video camera/recorder will emit a sound when the power switch is changed over, the REC button is pressed to record a movie, or other operations are engaged. If you do not need operating sound, you can switch it off. 2 Select “On” or “Off”, and then press the A Setting button.
ENG.book 79 ページ 2003年3月20日 木曜日 午後4時49分 Turning Record LED On or Off (Record LED) English You can switch off the recording indicator on the front of DVD video camera/recorder even during recording. Setting Content On The recording indicator will light red to show that the DVD video camera/recorder is recording. Off The recording indicator will not light even during recording. 2 Select “On” or “Off”, and then press the A button. 3 Press the MENU button to end the setting.
ENG.book 80 ページ 2003年3月20日 木曜日 午後4時49分 Resetting Menu Settings to Defaults (Reset) English You can restore menu settings to defaults (initial settings at the factory (P. 149) ). (Note, however, that the date/time, brightness and colour density of LCD monitor will not be reset.) 1 Press the MENU button, choose “Reset” on the “Initial Setup” menu screen, and then press the A button. 3 Press the MENU button to end the setting.
ページ 2003年3月20日 木曜日 午後4時49分 Disc Navigation 123 Using Disc Navigation Starting Disc Navigation Disc Navigation is a tool for editing scenes recorded on this DVD video camera/recorder. Here is an explanation on “scene” and “programme”, so that you will be able to make most use of Disc Navigation function. The screens in this instruction manual are basically those that will appear when DVD-RAM disc is used: Some items will not appear when DVD-R disc or card is used, but the operation is the same.
ENG.book 82 ページ 2003年3月20日 木曜日 午後4時49分 The following screen will appear when DVD-RAM disc is used: Some display components will not appear when DVD-R disc or card is used. English Thumbnail *1 A l l Pr og r ams 0 01 / 014 Selected scene number*2/ Number of all scenes Cursor Current page position*5 Bar graph Still image icon*3 Operation guide*4 *1 *2 *3 *4 *5 *6 PLAY RAM Disc type icon*6 The displayed thumbnail will be the first image that you recorded.
ENG.book 83 ページ 2003年3月20日 木曜日 午後4時49分 1 Press the DISC NAVIGATION button. A l l Pr og r ams Disc Navigation will be terminated and the DVD video camera/recorder will enter the recording pause status. You can also press the B button to end Disc Navigation. PLAY 0 01 / 014 RAM 0:00:00 REM 3 0 MIN FINE 17:00 3 0 / 9 / 2 00 3 Playing Back from Disc Navigation Screen 1 Press the DISC NAVIGATION button. 2 Use the joystick to select the desired scene.
ENG.book 84 ページ 2003年3月20日 木曜日 午後4時49分 Selecting Multiple Scenes English 1 Press the DISC NAVIGATION button. 2 Use the joystick to select the desired scene. 3 Press the SELECT button once: To cancel a selected scene, select the scene to be cancelled, and then press the SELECT button. To cancel all selected scenes, press the B button. Note: Although scenes can be randomly selected, playback will always start from the lowest scene number. The selected scene will be framed in red and yellow.
ENG.book 85 ページ 2003年3月20日 木曜日 午後4時49分 English Disc Navigation Menu Functions Available with Disc Navigation Disc Navigation allows you to do the following: Available function Deletion of scenes Disc or card used 13 Contents You can delete unnecessary scenes. Reference page 87 Editing of scenes 1 You can attach fade and skip to a scene, combine scenes, or divide one scene.
ENG.book 86 ページ 2003年3月20日 木曜日 午後4時49分 Understanding Flow of Disc Navigation Menu English Press the MENU button on the Disc Navigation screen: The menu screens for Disc Navigation and menu screens for disc and card will appear. See pages 65-66 and 82 for how to interpret the screen. Refer to pages indicated for details of settings. lWhen using DVD-RAM disc Scene Delete Edit Copy Select Detail (P.87) (P.89) (P.95) (P.98) (P.99) Thumbnail (P.89) Skip (P.90) Fade (P.91) Combine (P.93) Divide (P.
ページ 2003年3月20日 木曜日 午後4時49分 Scene 13 Deleting Scenes (Delete) 1 Press the DISC NAVIGATION button. 2 Select the scene to be deleted. All Programs 7 Press the B button to quit. ENTER PLAY DESELECT ALL RAM Scene to be deleted “Scene” menu screen, and then press the A button. 5 The “Delete Scene” Sc ene De l e t e Ed i t Copy Se l e c t De t a i l ETC ENTER RETURN RAM screen will appear: If you are sure you want to delete the selected scene, press the A button.
ENG.book 88 ページ 2003年3月20日 木曜日 午後4時49分 lEditing using submenu Press the MENU button before pressing the A button in step 5 (See page 87): The submenu will appear. English Ed i t Se l e c t Ex i t De l e t e ENTER RETURN Edit Select Go To Go To S t a r t – Cu r r en t Cu r r en t – End All RAM ENTER RETURN To p En d RAM ENTER RETURN RAM Exit..................... To restore the Disc Navigation screen Delete ................ To delete selected scenes Start→Current.....
ENG.book 89 ページ 2003年3月20日 木曜日 午後4時49分 The thumbnail refers to a reduced image displayed on Disc Navigation to help distinguish recorded scenes. Normally, the first image of the recorded scene is displayed as a thumbnail: You can choose another image of the scene for thumbnail. If you set a vivid image to thumbnail, you can know what you recorded from a glance at the Disc Navigation screen. Original thumbnail You can use this image as thumbnail. ● ● ● ● 1 Press the DISC NAVIGATION button.
ENG.book 90 ページ 2003年3月20日 木曜日 午後4時49分 1 English Playing Back by Skipping Scenes (Edit - Skip) You can specify “Skip” for scenes you do not want to play back: The selected scenes will be skipped. 1 Press the DISC NAVIGATION button. 2 Select the scene to be skipped. 3 Press the MENU button. 4 Choose “Scene”, “Edit”, “Skip”, and then press the A button.
ENG.book 91 ページ 2003年3月20日 木曜日 午後4時49分 1 English Adding Special Effects (Edit - Fade) You can add fading to the beginning and/or end of scene. There are three types of special effects: Fade Out Fade Out Fade Out Fade In Fade In Wipe: Fades in from black screen to vertical direction of screen Fades out from vertical direction of screen to black screen White: Fades in from white screen Fades out to white screen 1 Press the DISC NAVIGATION button. 2 Select the scene for adding special effects.
ENG.book 92 ページ 2003年3月20日 木曜日 午後4時49分 When playing back English Note: • Setting fade will interlock with sound. • Fading can also be set to either “IN” or “OUT”. • Any registered fade can be changed at any time using the same procedure as above. • Fade can also be added to on-screen information displayed during playback. • Adding fade to multiple scenes is also possible. • If the playback time of scene is short, fade will cut off midway.
ENG.book 93 ページ 2003年3月20日 木曜日 午後4時49分 You can combine multiple scenes into one. If you have recorded numerous short scenes, combining them will be facilitated by the use of Disc Navigation. Be sure to select consecutive multiple scenes. Combining scenes is possible only when “Category: All” is specified. Stills cannot be combined. 1 Press the DISC NAVIGATION button. 2 Select the consecutive multiple scenes to be combined. 3 Press the MENU button.
ENG.book 94 ページ 2003年3月20日 木曜日 午後4時49分 1 English Dividing Movies (Edit - Divide) You can divide a scene into two parts. To delete unnecessary portion of scene, first divide the scene, and then delete the unnecessary portion. You can also cut out a part of scene and use it in the play list. 1 Press the DISC NAVIGATION button. 2 Select the scene to be divided. 3 Press the MENU button. 4 Choose, “Scene”, “Edit”, “Divide” and then press the A button.
ENG.book 95 ページ 2003年3月20日 木曜日 午後4時49分 You can copy stills recorded on DVD-RAM disc to card. 1 Set the power switch to “O VIDEO” or Note: • No movie can be copied. • If you press the MENU button before pressing the A button in step 6, the submenu screen will appear (P.88). • See “Category ” (P.116) to check the stills recorded on DVD-RAM disc. • You can also select multiple scenes (P.84). • Even if all scenes, including movies, are selected to be copied, only stills will be copied.
ENG.book 96 ページ 2003年3月20日 木曜日 午後4時49分 3 English Locking Scenes on Card (LOCK) You can lock each photo recorded on card so that it will not be deleted or edited by mistake. 1 Set the power switch to “P PHOTO”. 2 Press the DISC NAVIGATION button. 3 Select the scene to be locked. 4 Press the MENU button. 5 Choose “Lock” on the “Scene” menu screen, and then press the A button.
ENG.book 97 ページ 2003年3月20日 木曜日 午後4時49分 You can use DPOF to set print information, including selection of the scenes to be printed, so that you will be able to use it on a system conforming to DPOF. Note: DPOF stands for digital print order format. DPOF is used to ask a print lab to print recorded stills. 1 Set the power switch to “P PHOTO”. 2 Press the DISC NAVIGATION button. 3 Select the scene to which DPOF is to be set. 4 Press the MENU button.
ENG.book 98 ページ 2003年3月20日 木曜日 午後4時49分 123 English Selecting Scenes Using Menu Screen (Select) Using the Disc Navigation menu screen, you can simultaneously select consecutive scenes. This function is useful when there are numerous scenes. 1 Press the DISC NAVIGATION button. 2 Select the first scene to be selected. 3 Press the MENU button. 4 Choose “Select” on the “Scene” menu screen. 5 Choose “Start →Current”, “Current →End” or “All” and then press the A button.
ENG.book 99 ページ 2003年3月20日 木曜日 午後4時49分 You can display various information for a scene: the recording mode, recording date/time and length, special effects and movie quality mode. 1 Press the DISC NAVIGATION button. 2 Select the scene whose information you wish to know. If you have selected multiple scenes, the information shown below will appear. Pressing the B button will restore the thumbnail display screen. (When using disc) 3 Press the MENU button.
ENG.book 100 ページ 2003年3月20日 木曜日 午後4時49分 English Programme What is “programme”? Programme refers to an assembly of scenes recorded on the same date regardless of whether they are movie or still. Scene No. 1 Movie Scene No. 2 9:00 Movie Scene No. 3 Scene No. 4 11:45 Still 10:20 Still Scene No. 5 13:30 Movie Scene No. 6 17:20 Still 20:00 Programme No.
ENG.book 101 ページ 2003年3月20日 木曜日 午後4時49分 You can play back only the selected programme. 1 Press the DISC NAVIGATION button. 2 Press then the MENU button. 3 Choose “Play” on the “Program” menu screen, and then press the A button. 4 Select the programme to be played back, and then press the A button. Playback will start from the first scene of the selected programme.
ENG.book 102 ページ 2003年3月20日 6 After entering the title, English choose “Enter” and then press the A button. 7 The screen for verifying the change in title will appear: Choose “YES”, and then press the A button. TITLE a t a Par k 1 2 3 4 5 6 7 8 a b c d e f g h n o p q r s t u à è ì ò ù á é í â ê î ô û ä ë ï 2 Enter ENTER DELETE 木曜日 9 i v ó ö 0 j w ú ü SPACE k l m x y z ã ñ õ ç ß Cancel SEL SELECT F i n i s h t i t l e s e t t i ng? NO ENTER Choose “NO” to cancel changing of the title.
ENG.book 103 ページ 2003年3月20日 木曜日 午後4時49分 1 English Play List What is “play list”? You can create a play list on this DVD video camera/recorder by gathering your favourites from the recorded scenes. Since the play list is not created by copying data, you will consume little of the disc capacity by making a play list. On the other hand, deleting scenes on play list will not increase the remaining disc capacity for recording.
ENG.book 104 ページ 2003年3月20日 木曜日 午後4時49分 lEditing on play list English When making settings on play list, such as changing title, adding fade, setting skip, etc., use the same procedure for setting on programme or scenes. Perform these settings, referring to the following reference pages: Setting skip, Adding fade, Combining scenes, Dividing a scene, Changing title, P.90 P.91 P.93 P.94 P.
ENG.book 105 ページ 2003年3月20日 木曜日 午後4時49分 Playing Back a Play List (Play) “PlayList” menu screen, and then press the A button. PlayL i s t Sw i t c h Play Create Ed i t Ti t le ETC Del e te ENTER RETURN S t a r t P layL i s t 4 Use the “Start PlayList” screen to select the play list to be played back, and then press the A button. RAM English 1 Press the DISC NAVIGATION button. 2 Press the MENU button.
ENG.book 106 ページ 2003年3月20日 木曜日 午後4時49分 Adding Scenes to Play List (Editing Play List) English You can later add scenes to the play list. 1 Press the DISC NAVIGATION button. 2 Press the MENU button. 3 Choose “Edit” on the “PlayList” menu screen, and then press the A button. 4 Use the play list select screen to select the play list to which you wish to add scenes, and then press the A button.
ENG.book 107 ページ 2003年3月20日 木曜日 午後4時49分 1 Press the DISC NAVIGATION button. 2 Display the editing screen of the play list to be edited. Perform steps 2−4 on page 106. Ed i t P l a yL i s t A l l P r o g r ams P l a yL i s t N o . 0 2 ADD 4 Press the A button. 004/014 007/007 EX I T 3 Move the cursor to the play list in lower row, and place the cursor on the scene to be deleted. Repeat steps 3 and 4 to delete other scenes.
ENG.book 108 ページ 2003年3月20日 木曜日 午後4時49分 Deleting Scenes Using Submenu for Editing (Editing Play List) English You can delete scenes from play list on the editing screen. 1 Press the DISC NAVIGATION button. 2 Display the editing screen of the play list to be edited. Perform steps 2−4 on page 106. Ed i t P l a yL i s t A l l P r o g r a ms P l a yL i s t No . 0 2 ADD 5 Choose “Delete” on the 001/014 007/007 “Edit” menu screen, and then press the A button.
ENG.book 109 ページ 2003年3月20日 木曜日 午後4時49分 Arranging Order of Scenes (Move) 1 Press the DISC NAVIGATION button. 9 The screen for verifying move will appear: 2 Press the MENU button. Choose “YES”, and then press the A button. 3 Choose “Switch” on the “PlayList” menu screen, and then press the A button. 7 The “Move Scenes” Move Scenes Move sc e n e s? YES NO ENTER Choose “NO” to cancel move. After Yes or No setting, the scene select screen will be restored. Repeat steps 7 - 9 to move another scene.
ENG.book 110 ページ 2003年3月20日 木曜日 午後4時49分 Changing Title of Play List (Title) English The play lists have serial numbers in the order you have created them, along with the created dates/times: You can change this title at any time. 1 Press the DISC NAVIGATION button. 2 Press the MENU button. 3 Choose “Title” on the “PlayList” menu screen, 5 The screen for verifying exit will appear: Choose “YES” and then press the A button.
ENG.book 111 ページ 2003年3月20日 木曜日 午後4時49分 123 English Go To From the Disc Navigation screen, you can jump to the first scene or last scene. Top (End) 1 Press the DISC NAVIGATION button. 2 Press the MENU button. 3 Choose “Top” or “End” on the “Go To” menu screen, and then press the A button.
ENG.book 112 ページ 2003年3月20日 木曜日 午後4時49分 English Disc or Card Management 123 Verifying Remaining Free Space on Disc or Card (Capacity) You can find out how long you will be able to record on one side of disc or on card. 1 Press the DISC NAVIGATION button. 4 Press the B button to quit. 2 Press the MENU button. The Disc Navigation screen will be restored.
ENG.book 113 ページ 2003年3月20日 木曜日 午後4時49分 If you want to erase all data on a recorded disc or card, you can initialise it rather than delete the data: Initialisation is useful in this case, since it takes less time than deleting all data. The initialised disc or card can be used again. 1 Press the DISC NAVIGATION button. 2 Press the MENU button. 3 Choose “Format Disc” or “Format Card” on the “Disc” or “Card” menu screen, and then press the A button.
ENG.book 114 ページ 2003年3月20日 木曜日 午後4時49分 1 English Updating Control Information of DVD-RAM Disc Disc Navigation in this DVD video camera/recorder handles information on scenes, such as skip, fade, in a particular manner. If you use another device to edit a disc recorded on this DVD video camera/recorder, and then use the data again with Disc Navigation in this DVD video camera/recorder, the Disc Navigation may not appear normally.
ENG.book 115 ページ 2003年3月20日 木曜日 午後4時49分 If you want to play back a DVD-R disc recorded on this DVD video camera/recorder, using a device conforming to 8 cm DVD-R disc - such as a DVD player, etc. - you must finalise the disc on this DVD video camera/recorder. The finalised DVD-R disc can be played on a DVD player, as “DVD Video”: The date of programme will appear on the menu screen of DVD player as a title. 1 Press the DISC NAVIGATION button. 2 Press the MENU button.
ENG.book 116 ページ 2003年3月20日 木曜日 午後4時49分 English Others 1 Displaying Movies or Stills Independently (Category) Scenes recorded on this DVD video camera/recorder will be displayed in the order of recording regardless of whether they are movies or stills. You can use the Disc Navigation screen to switch this display to stills only or movies only. 1 Press the DISC NAVIGATION button. 2 Press the MENU button. 3 Choose “Category” on the “Others” menu screen, and then press the A button.
ENG.book 117 ページ 2003年3月20日 木曜日 午後4時49分 If you play back stills recorded on a card, the DVD video camera/recorder will enter the playback pause status after each still is played back. Setting Slide Show allows you to continuously play back stills. 1 Press the DISC NAVIGATION button. 2 Press the MENU button. 3 Choose “Slide Show”, “All” or “DPOF”, and then press the A button. Note: • With slide show, playback starts from the first still on card.
ENG.book 118 ページ 2003年3月20日 木曜日 午後4時49分 English Installing Software Before installing the DVD-RAM driver on the CD-ROM provided with this DVD video camera/recorder, make sure that another DVD-RAM driver has not already been installed in your PC. If another DVD-RAM driver has already been installed, uninstall it, and then install the DVD-RAM driver bundled on the provided CD-ROM.
ENG.book 119 ページ 2003年3月20日 木曜日 午後4時49分 English Contents on Provided CD-ROM The CD-ROM supplied with the DVD video camera/recorder contains the following folders: Contains the installer for DVD-MovieAlbumSE (see page 125 for installation). You can use DVD-MovieAlbumSE to edit the images recorded on DVD-RAM disc and create a 3D title. Contains the installer for MyDVD (see page 127 for installation). You can use MyDVD to create a DVD-Video disc from movies edited on DVD-MovieAlbumSE.
ENG.book 120 ページ 2003年3月20日 木曜日 午後4時49分 Read the electronic instruction manuals (on-line manuals) on PC for complete information on using each software programme. English lDVD-MovieAlbumSE lMyDVD You can read the instruction manual using either of the following procedures: • Open the PDF file in DVDMASE 3\manuals\English folder contained on the provided CD-ROM.
ENG.book 121 ページ 2003年3月20日 木曜日 午後4時49分 Use the following procedure to install the USB driver: 1 If you add a USB card (PCI card, PC card, etc.) 4 Choose “Search for best driver in these on your PC, do it following the instruction manual for USB card, before connecting the DVD video camera/recorder to PC.
ENG.book 122 ページ 2003年3月20日 木曜日 5 With Windows® XP, the message concerning 午後4時49分 6 Click “Finish”. English Windows Logo Test will appear: Click “Continue Anyway”.
ENG.book 123 ページ 2003年3月20日 木曜日 午後4時49分 The following explanation uses the screens for Windows® XP: Use the same procedure for Windows® 98 Second Edition / Me / 2000 Professional to install the DVD-RAM driver. 1 Open the DVD-RAM folder on the provided CD- 4 Check the contents of License Agreement: If you ROM and click “setup” or “setup.exe” to start it. 2 The driver setup screen will appear: Click the accept it, click “Yes”.
ENG.book 124 ページ 2003年3月20日 木曜日 午後4時49分 6 Check the programme folder to be installed, and 8 Installation will start. When installation is then click “Next”. English complete, some notes will appear: Check the contents, and then click “×” at the top right of window. The contents displayed on actual screen may differ from those in the figure. Click Confirm Click 7 Click “Next”.
ENG.book 125 ページ 2003年3月20日 木曜日 午後4時49分 10 If your PC uses Windows® 2000 Professional, a English message announcing the start for detecting device will appear: Click “Finish”. The detection of device will start, after which it will take several minutes for PC to detect the device. When detecting the device is complete, a message that prompts you to restart will appear: Click “Yes” and then restart the PC Installing the DVD-RAM driver is now complete.
ENG.book 126 ページ 2003年3月20日 木曜日 7 If you do not change the folder where the 午後4時49分 9 Check the contents, and then click “Next”. software is installed, click “Next”. English Click Click 8 If you do not change the programme folder name, click “Next”. Installation will start. Proceed with installation, following the instructions on screen. 10 A message for verifying whether a shortcut icon is to be created on desktop will appear: If you want to create one, click “Yes”. If not , choose “No”.
ENG.book 127 ページ 2003年3月20日 木曜日 午後4時49分 1 Insert the provided CD-ROM into the CD-ROM 5 Carefully read the Software License Agreement: drive of PC. If you accept it, click “Yes”. 2 Use Windows My Computer or Explorer to open the folder where CD-ROM is stored. 3 Open the MyDVD folder, and then double-click “Setup.exe”. 4 The screen for installing “MyDVD” will appear: Click “Next”. (This window may be omitted.
ENG.book 128 ページ 2003年3月20日 木曜日 7 Check the contents, and then click “Next”. English Installation will start. Click 8 Click “Finish”, and then restart the PC. Click Sonic Solutions Corporation, which developed MyDVD, recommends user registration of MyDVD, in order to offer appropriate support to customer. The guide for user registration will appear when you start MyDVD for the first time, or you can do it any time by accessing the following URL: http://www.mydvd.
ENG.book 129 ページ 2003年3月20日 木曜日 午後4時49分 English Creating DVD Video on PC from DVD-RAM Disc Recorded on DVD Video Camera/Recorder Using DVD-MovieAlbumSE and MyDVD, you can create a DVD video (DVD-R disc) from the images recorded on this DVD video camera/recorder, following the procedure below: 1 Insert a recorded DVD-RAM disc into the DVD video camera/recorder, and connect the DVD video camera/recorder to the USB terminal of PC.
ENG.book 130 ページ 2003年3月20日 木曜日 8 MyDVD will automatically start. After a few English moments, the exported scene will be automatically registered on the MyDVD editing screen: Now you can change the DVD menu to the desired style, change the title, etc. on this editing screen. 午後4時49分 9 Click the Burn button: Writing to DVD-R disc will start. When writing is complete, a DVD video disc will be created. Then the disc cover of DVD video camera/ recorder will open automatically.
ENG.book 131 ページ 2003年3月20日 木曜日 午後4時49分 English Subsidiary Information Cleaning Be sure to set the power switch to “POWER OFF” before cleaning this DVD video camera/recorder. lCleaning LCD screen and camera lens Use dry, soft cloth to wipe dirt off. When cleaning the LCD screen, be careful not to use force, scratch it, or subject it to impact: Doing such could cause a defect in the screen, result in display unevenness, or damage the LCD monitor.
ENG.book 132 ページ 2003年3月20日 木曜日 午後4時49分 English Changing Setting of Demonstration This DVD video camera/recorder has versatile functions, including special effects. Referring to the procedure on page 31, connect the DVD video camera/recorder, AC adapter/charger and mains lead to power the DVD video camera/recorder from AC outlet. 1 Press the MENU button. 2 Choose “Initial Setup”, “Demo Mode”, and then press the A button. 3 Use the joystick to choose the desired option, and then press the A button.
ページ 2003年3月20日 木曜日 午後4時49分 No DVD Video Camera/Recorder Operation - Check the Following: Check 1 No movie can be recorded Movie can be recorded only on DVD-RAM or DVD-R disc. Check the following: • Is DVD-RAM or DVD-R disc inserted? • Is power switch set to “O VIDEO”? • Is the DVD-RAM disc in DVD video camera/ recorder write-protected? Release the writeprotect.
ENG.book 134 ページ Check 5 2003年3月20日 English 木曜日 午後4時49分 No DVD video camera/recorder operation Check 7 Is a fully charged battery attached? Is the DVD video camera/recorder powered from AC outlet? Check 6 No image in viewfinder Is LCD monitor open? No image will appear in viewfinder unless the LCD monitor is closed and securely locked to DVD video camera/recorder.
ページ 2003年3月20日 木曜日 午後4時49分 Trouble Messages A message may appear while you are operating the DVD video camera/recorder. If a message appears, refer to the following table and take appropriate corrective action. Messages on page 135 and later are arranged in alphabetical order. Message Cause & Troubleshooting Reference page (1) Data error in a part of image file. Repair data now? (2) Found error in image file. Repair data now? (3) Data error in all image file.
ENG.book 136 ページ 2003年3月20日 Message English Cannot combine. Deselect PHOTO scenes. 木曜日 午後4時49分 Cause & Troubleshooting Select only movies and combine them. 93 Cannot combine. Select Select a range of at least 2 scenes to be combined, and then multiple scenes. combine them. Cannot delete scenes. Reference page This may occur when scene that was edited for division, etc. is to be deleted. Combine the divided scenes, and then delete them. 93 93 Cannot execute. Change display category to ALL.
ENG.book 137 ページ 2003年3月20日 木曜日 午後4時49分 Reference page This message will appear when the A button is pressed with a card inserted on which no still is recorded. (It will appear if you attempt playback or editing on Disc Navigation, but will not appear if you press A on camera through image.) Card is not formatted. Format the card now? Was the card formatted on PC? When using the card on this DVD video camera/recorder, choose “YES” and format it. 113 Control Information Error.
ENG.book 138 ページ 2003年3月20日 木曜日 午後4時49分 English Message Cause & Troubleshooting Reference page “DISC ERROR” appears when an attempt to release write-protect is made. If you have write-protected a disc using the write-protect setting tool (WPTOOL) that is equipped with the DVD-RAM driver contained on the CD-ROM provided with this DVD video camera/recorder, you cannot release the write-protect on this DVD video camera/ recorder as is.
ページ 2003年3月20日 Message Error occurred. Please replace disc. 木曜日 午後4時49分 Cause & Troubleshooting Use another disc. Reference page Finalise may not be Instantaneous shutoff occurred during finalising, after which power complete. Finalise again was supplied and disc was inserted. now? 115 It is unrecordable on this The inserted card cannot be used in this DVD video camera/ card. recorder: Use another card. 16 JPEG file related to scenes are not found.
ENG.book 140 ページ 2003年3月20日 木曜日 午後4時49分 Cause & Troubleshooting Reference page Scenes over limit. Cannot divide scene. The number of entered scenes has reached the limit that can be entered. Delete several scenes. 94, 103 Scenes over limit. Cannot move scene. This message will appear if you try to move a scene when the number of scenes has already reached the registrable limit. 92, 103 Stop processing The button was pressed to stop processing of multiple scenes.
ページ 2003年3月20日 木曜日 午後4時49分 *1 • This message may also appear when dirt adheres to disc. If this message appears when a recorded disc is recognised immediately after it is inserted, do not repair the disc; remove it and then use a soft, dry cloth to clean off the dirt before using it. • This message may also appear when condensation occurs. In this case, do not repair the disc; turn the DVD video camera/recorder off, wait until it dries out, and then turn it on again.
ENG.book 142 ページ 2003年3月20日 木曜日 午後4時49分 English Troubleshooting Check to see the following before asking for a repair. If the suggested solution still cannot restore the DVD video camera/recorder to normal, do not attempt to repair it yourself, but consult your dealer. Power supplies Symptom Battery cannot be charged. Cause and Correction Reference page Is the ambient temperature too low or too high? Charge the battery at 10-30°C.
ENG.book 143 ページ 2003年3月20日 木曜日 午後4時49分 Symptom Cause and Correction Reference page Recording starts but stops immediately. Is disc scratched or does dirt or fingerprint adhere to it? Clean the disc. If there is still no improvement, replace the disc. 75 LCD screen is hard to see. Has brightness of LCD screen been adjusted? Stop recording and adjust the brightness. 77 Is the DVD video camera/recorder being used outdoors? Use the viewfinder.
ENG.book 144 ページ 2003年3月20日 木曜日 午後4時49分 During playback English Symptom Cause and Correction Recognition of disc is not Is disc dirty? complete Use soft, dry cloth to clean it. Pressing the playback button will not start playback. Has the image been recorded by devices other than this DVD video camera/recorder? Playback of image recorded on devices other than this DVD video camera/recorder may be impossible on this DVD video camera/ recorder.
ENG.book 145 ページ 2003年3月20日 木曜日 午後4時49分 Symptom Cause and Correction No drive icon appears on The DVD video camera/recorder is not turned on. PC. Check the power supply. Reference page 36 Driver is not properly recognised. Turn PC off and on again. If the drive icon still does not appear, use “Refresh driver” in Device Manager to reinstall the driver. Turn PC off and then disconnect the PC connection cable.
ENG.book 146 ページ 2003年3月20日 Symptom 木曜日 午後4時49分 Cause and Correction Reference page English Video written to hard disk DVD-MovieAlbumSE cannot edit DVD-VR data stored on hard disk of PC cannot be edited of PC: Copy the data to another DVD-RAM disc and then edit it. on DVD-MovieAlbum copy tool. Movies are not recognised by application in PC. Make sure the power switch of this DVD video camera/recorder is set to “O VIDEO”, “ N PHOTO” or “ P PHOTO”.
ページ Symptom 2003年3月20日 木曜日 午後4時49分 Cause and Correction Reference page When executing “Export” • If stills are included in the range of “export”, it may take more time on DVD-MovieAlbumSE, because data must be re-encoded and read. it will take time to read. • If “Divide by Maker” is not chosen, it may take some time because data will be read while being re-encoded. 129 Exit Windows® once, and then disconnect the DVD video camera/ recorder.
ENG.book 148 ページ 2003年3月20日 木曜日 午後4時49分 Miscellaneous English Symptom Cause and Correction Power does not come on, Execute system reset (press the RESET button). or no operation occurs by Has the DVD video camera/recorder been subjected to impact? pressing button. The DVD video camera/recorder could be damaged. Consult your dealer. The date and time are incorrect. Has the DVD video camera/recorder been left unused for a long period of time? The internal backup battery may be discharged: Charge it.
ページ 2003年3月20日 木曜日 午後4時49分 System Reset If the DVD video camera/recorder does not operate normally, perform “System Reset”: The DVD video camera/recorder may recover to normal. “System Reset” will reset all settings to factory defaults. The date and time will also be reset: Set the date and time again before using the DVD video camera/recorder. 1 Set the power switch to “POWER OFF” to turn the DVD video camera/reorder off. Detach the battery or AC adapter/charger.
ENG.book 150 ページ 2003年3月20日 木曜日 午後4時49分 English Major Specifications CCD 1/4-inch interlaced Total number of pixels: approx. 800,000 Number of effective pixels Movie: approx. 410,000 Still: approx. 410,000 Lens F1.8-2.5, f = 3.15-31.5 mm Filter diameter: 30.5 mm Focus Auto/Manual Zoom Optical 10×, 40×-240× with digital zoom added (40× for still) Required minimum illumination 0.1 lx : When Low Light mode is selected Viewfinder 0.44-inch colour TFT (approx. 110,000 pixels) LCD monitor 2.
ページ 2003年3月20日 木曜日 午後4時49分 Battery system Lithium-ion Power consumption approx. 4.7 W when recording with LCD monitor off (FINE) Dimensions (W × H × D) approx. 57 × 89 × 134 mm (excluding projections) Operating temperature (humidity) 0-40°C (less than 80%). 0-30°C when connected to PC Storage temperature -20-60°C Weight approx. 480 g (without battery or disc) Total weight when recording approx.
ENG.book 152 ページ 2003年3月20日 木曜日 午後4時49分 English Introduction to Optional Accessory Power Supply Battery (CGA-DU14) Information on Square Adapter This DVD video camera/recorder cannot use a square adapter, such as for 8 cm DVD-RAM disc, 8 cm DVD-R disc: Remove the disc from square adapter and set it in Round DVD Holder, referring to the instruction sheet of disc.
ENG.book 153 ページ 2003年3月20日 木曜日 午後4時49分 G Matsushita Electric Industrial Co., Ltd. VQT0E31 QR34653 Web site: http://www.panasonic.co.