
Operating Instructions

取扱説明書
/
Operating Instructions/
Bedienungsanleitung/
Manuel d’utilisation/Istruzioni d’uso/
Instrucciones de funcionamiento/
Инструкция по эксплуатации
クリップマウント /Clip Mount/
Clip Halterung/Support à attache/
Clip di Aggancio/Clip Adaptador/
Крепление на клипсу
品番 /Model No./Modell-Nr./Modèle/Modello N./
Modelo N./Номер модели
VW-CLA100
パナソニック株式会社
パナソニック エンターテインメント
&コミュニケーション株式会社
〒 570-0021 大阪府守口市八雲東町 1 丁目 10 番 12 号
Panasonic Entertainment & Communication Co., Ltd.
Web site: http://panasonic.net
C Panasonic Entertainment & Communication Co., Ltd. 2014
Printed in China/Imprimé en Chine
SQT0286-2
F0514SL2062
Manufactured by:
Importer for UK:
Importer for EU:
Authorized Representative in EU:
Panasonic Entertainment & Communication Co., Ltd.
1-10-12, Yagumo-higashi-machi, Moriguchi City, Osaka, Japan
Panasonic UK, a branch of Panasonic Marketing Europe GmbH
Maxis 2, Western Road, Bracknell, Berkshire, RG12 1RT
Panasonic Marketing Europe GmbH
Panasonic Testing Centre
Winsbergring 15, 22525 Hamburg, Germany
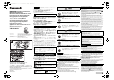
A
このたびは、パナソニック製品をお買い上げいただき、まことにありがとうござ
います。
≥ 取扱説明書をよくお読みのうえ、正しく安全にお使いください。
≥ ご使用前に「安全上のご注意」を必ずお読みください。
≥ この取扱説明書は大切に保管してください。
≥ ウェアラブルカメラは別売です。
≥
包装材料などは、商品を取り出したあと適切に処理してください。
1
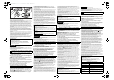
カメラ部がぐらつかないように、図のように指でしっかり押さえる
2
矢印
A
の方向にカメラ部を「カチッ」と音がするまで差し込む
3 帽子・かばんなどに取り付ける
∫ カメラの向きを変更したい場合は
カメラ取り付け部を持ち、お好みの向きに調整する
≥ カメラの向きが変えられない場合は、調整ねじ
1
を
D
方向に回して少し
緩め、調整後にねじを
C
方向に締め直してください。
∫ クリップマウントからカメラ部を取り外すには
矢印
B
の方向にカメラ部を引き抜く
≥ 取り付け・取り外し時に、ウェアラブルカメラのレンズに触ったり、カ
メラ / 本体接続ケーブルを引っ張らないでください。
≥ 使用時は、ウェアラブルカメラのカメラ / 本体接続ケーブルが絡まない
ように、お気をつけください。
≥ 装着後にカメラ部がぐらつかないように調整ねじ1をC方向に回して締
め、固定してください。([A])
調整ねじ 1 は強く締め付けすぎると、緩まなくなる場合がありますの
でお気をつけください。
≥ 調整ねじ 1 を締め付けた状態でカメラの向きを変更しないでください。
クリップマウント破損の原因となります。
≥ 海水対応ではありません。海水にぬれると、バネがさびるおそれがあり
ます。
≥ ご使用中に指などが触れるなどによって、クリップ状態がずれて画角が
変わることがあります。
≥ 長期間使用しないときは、クリップを取り付けている物から外して保管
してください。
≥
取り付け時に、カメラ / 本体接続ケーブル
を折り曲げるような負荷がか
かっていないことを確認してください。
ウェアラブルカメラ
本体の故障
の原因となる場合があります。
≥ クリップの取り付けによって、取り付ける物の表面を傷つけることがあ
ります。傷がつきやすいやわらかい物に取り付けないでください。ま
た、取り付ける際に、指をはさまないようにお気をつけください。
≥ 本製品使用時に生じた本製品およびカメラの落下による事故や破損・故
障については、責任を負いかねますので、あらかじめご了承ください。
人への危害、財産の損害を防止するため、必ずお守りい
ただくことを説明しています。
∫ 誤った使い方をしたときに生じる危害や損害の程度を
区分して、説明しています。
∫ お守りいただく内容を次の図記号で説明しています。
(次は図記号の例です)
A
クリップマウントにカメラ部を取り付ける
使用上のお願い
∫ 仕様
外形寸法: 約幅 31 mmk 高さ 73 mmk 奥行き 50 mm
質量: 約 23 g
許容温度 / 湿度: 保存 : − 10 ℃〜 60 ℃/0%RH 〜 90%RH
動作 : 0 ℃〜 40 ℃/10%RH 〜 80%RH
クリップ厚み:
約 8 mm 以下(推奨)
安全上のご注意必ずお守りください
警告
「死亡や重傷を負うおそれがある
内容」です。
注意
「軽傷を負うことや、財産の損害が
発生するおそれがある内容」です。
してはいけない
内容です。
実行しなければな
らない内容です。
日本語
Thank you for purchasing this Panasonic product.
• Please read these instructions carefully before using this product, and save this manual
for future use.
• The wearable camera is optional.
• After removing the product from its container, dispose of the packing materials and
other unnecessary items in an appropriate manner.
1 Hold the clip mount firmly with your fingers as shown in
the illustration so that the camera unit does not wobble.
2 Insert the camera unit in the direction of the arrow
A
until
it clicks into place.
3 Attach the clip mount to your cap, bag, etc.
∫ To change the direction of the camera unit
Hold the camera holder to point the camera unit at the desired
direction.
• If you cannot change the direction of the camera unit, rotate the adjustment knob
1
in
the direction of
D
to loosen it slightly. After making the adjustment, rotate the
adjustment knob in the direction of
C
to tighten it.
∫ To remove the camera unit from the clip mount
Pull out the camera unit in the direction of the arrow
B
.
• Avoid touching the lens of the wearable camera or pulling the camera/unit connection
cable when performing the attachment or removal procedures.
• Be careful that the camera/unit connection cable of the wearable camera does not get
tangled up during use.
• After attaching the camera unit, tighten the adjustment knob 1 in the direction of
C to fasten the camera unit. This prevents the camera unit from wobbling. ([A])
Be careful that if you tighten the adjustment knob 1 too much, you may not be
able to loosen it again.
• Do not change the direction of the camera when the adjustment knob
1
is
tightened. Doing so may damage the clip mount.
• The clip mount is not designed to be exposed to seawater. Doing so will cause
rust on the spring.
•
If your finger or other objects accidentally touch the camera unit during use, the clip mount
may move from the original position, causing the direction of the camera to change.
• When not using the clip mount for a long period of time, remove it from the object to
which it is attached.
• When attaching the camera unit, check that the camera/unit connection cable is not
bent at a sharp angle or subjected to any other excessive force. Not doing so may result
in damage to the wearable camera.
• The clip mount may damage the surface of the object to which the clip mount is
attached. Do not attach it to a soft object that can easily be damaged. In addition, be
careful not to catch your finger between the object and the clip mount when attaching it.
• Panasonic does not accept any responsibility for accidents, damage and malfunction
caused by this product and the camera falling off during the use of this product.
• Do not attach the clip mount to a location where the clip mount ends up restricting your
body movements. Doing so may cause accidents and injuries. Check if your body can
move freely after attaching it.
• Do not attach, remove, or adjust the position of the clip mount while driving a bicycle or
other vehicle. These could cause accidents.
• Keep the clip mount out of reach of children to prevent swallowing.
•
On a periodic basis, verify how securely the clip mount is attached. Not doing so could cause
accidents, such as the clip mount coming off or falling. Verify that it is attached correctly.
• Do not disassemble or modify. Doing so may cause trouble, such as the wearable
camera and other parts falling off.
• If a feeling of discomfort arises on any part of your body that has come directly in
contact with the clip mount, including your skin, discontinue the use immediately.
Continuing the use may cause inflammation, irritation and other symptoms.
Vielen Dank, dass Sie sich für ein Panasonic-Produkt entschieden haben.
• Lesen Sie diese Anleitung bitte sorgfältig, bevor Sie dieses Produkt verwenden, und
heben Sie dieses Handbuch für ein weiteres Nachschlagen auf.
• Die tragbare Mini-Kamera wird einzeln verkauft.
• Nachdem Sie das Produkt aus dessen Behälter entfernt haben, entsorgen Sie die
Verpackungsmaterialien sowie andere nicht benötigte Elemente.
1 Halten Sie die Clip Halterung wie in der Abbildung gezeigt
mit Ihren Fingern fest, sodass die Kamera nicht wackelt.
2 Setzen Sie die Kamera in Pfeilrichtung
A
ein, bis sie mit
einem Klicken einrastet.
3
Bringen Sie die Clip Halterung an Ihrer Mütze, Ihrem Tasche etc. an.
∫ Ändern der Kamerarichtung
Halten Sie den Kamerahalter so, dass die Kamera in die
gewünschte Richtung zeigt.
• Wenn Sie die Richtung der Kamera nicht ändern können, drehen Sie den Stellknopf
1
in Richtung
D
, um ihn etwas zu lösen. Nachdem Sie die Korrektur vorgenommen
haben, drehen Sie den Stellknopf in Richtung
C
, um ihn festzustellen.
∫ Entfernen der Kamera von der Clip Halterung
Ziehen Sie die Kamera in Pfeilrichtung
B
heraus.
• Vermeiden Sie beim Anbringen und Abnehmen ein Berühren des Objektives oder ein
Ziehen am Verbindungskabel.
• Achten Sie darauf, dass sich das Verbindungskabel der tragbaren Mini-Kamera
zwischen Kamera/Gerät beim Gebrauch nicht verheddert.
•
Nachdem Sie die Kameraeinheit angebracht haben, ziehen Sie den Feststellknopf
1
in
Richtung
C
an, um die Kameraeinheit festzustellen. Dadurch kann verhindert werden,
dass die Kameraeinheit wackelt. (
[A]
) Bitte achten Sie darauf, den Feststellknopf
1
nicht
zu fest anzuziehen, da er sich ansonsten möglicherweise nicht mehr lösen lässt.
• Ändern Sie nicht die Richtung der Kamera, wenn der Feststellknopf 1 angezogen
ist. Dies kann die Clip Halterung beschädigen.
• Die Clip Halterung darf nicht Meereswasser ausgesetzt werden. Dies kann dazu
führen, dass die Feder rostet.
動作を妨げる場所などに取り付けない
事故やけがの原因となります。取り付け後、
問題なく動作できるか確認してください。
自転車などの運転中に取り付け・取り外し・取付位
置調整はしない
事故の原因となります。
クリップマウントは、乳幼児の手の届くところに置
かない
誤って飲み込むと、身体に悪影響を及ぼします。
≥ 万一、飲み込んだと思われるときは、すぐに医師にご
相談ください。
取り付け状態を定期的に点検する
使用中に外れる・落下するなど、事故の原
因となります。
正しく取り付けられていることを確認して
ください。
分解や改造をしない
カメラの落下などの原因となります。
直接触れる肌などに異常を感じたら使用を中止す
る
そのまま使用すると、炎症やかぶれなどの
原因になることがあります。
A
Attaching the camera unit to the clip mount
警告
注意
分解禁止
ENGLISH
Notes for Using the Clip Mount
∫ Specifications
Dimensions:
Approx. 31 mm (W)
k
73 mm (H)
k
50 mm (D) [1.22
q
(W)
k
2.87
q
(H)
k
1.97
q
(D)]
Mass (Weight): Approx. 23 g [0.051 lb]
Operating temperature/humidity:
When the unit is stored: j10 oC to 60 oC [14 oF to 140 oF] /0%RH to 90%RH
When the unit is in use: 0 oC to 40 oC [32 oF to 104 oF] /10%RH to 80%RH
Thickness of an object that can be accommodated:
Approx. 8 mm [0.32
q
] or less (recommended)
United States customers:
Limited Warranty: 90 days from the date of purchase
This warranty does not include damages caused by accidents, misuse or modifications. If
the item is defective within the warranty period, we will repair or replace it, with new or
refurbished parts, without charge or refund your purchase price at our option. For further
information on defective product within the warranty period please visit our Support page.
www.panasonic.com/support
Canadian customers:
For product information and operation assistance, please visit our Support page.
www.panasonic.ca/english/support
For defective product exchange within the warranty period, please contact the original dealer.
A
Anbringen der Kamera an der Clip Halterung
Hinweise zum Gebrauch der Clip Halterung
DEUTSCH
Siehe Rückseite
VW-CLA100_SQT0286.fm 1 ページ 2022年6月9日 木曜日 午後6時23分