Installation Guide Network Disk Recorder Model No. WJ-NV200K, WJ-NV200VK WJ-NV200K/G (This illustration represents WJ-NV200VK.) Before attempting to connect or operate this product, please read these instructions carefully and save this manual for future use. The model number is abbreviated in some descriptions in this manual.
WARNING: • This apparatus must be earthed. • Apparatus shall be connected to a main socket outlet with a protective earthing connection. • The mains plug or an appliance coupler shall remain readily operable. • To prevent fire or electric shock hazard, do not expose this apparatus to rain or moisture. • The apparatus should not be exposed to dripping or splashing and that no objects filled with liquids, such as vases, should be placed on the apparatus.
For U.K. FOR YOUR SAFETY PLEASE READ THE FOLLOWING TEXT CAREFULLY. This appliance is supplied with a moulded three pin mains plug for your safety and convenience. A 5 amp fuse is fitted in this plug. Should the fuse need to be replaced please ensure that the replacement fuse has a rating of 5 amp and that it is approved by ASTA or BSI to BS1362. or the BSI mark on the body of the Check for the ASTA mark fuse.
Limitation of liability THIS PUBLICATION IS PROVIDED "AS IS" WITHOUT WARRANTY OF ANY KIND, EITHER EXPRESS OR IMPLIED, INCLUDING BUT NOT LIMITED TO, THE IMPLIED WARRANTIES OF MERCHANTABILITY, FITNESS FOR ANY PARTICULAR PURPOSE, OR NON-INFRINGEMENT OF THE THIRD PARTY'S RIGHT. THIS PUBLICATION COULD INCLUDE TECHNICAL INACCURACIES OR TYPOGRAPHICAL ERRORS. CHANGES ARE ADDED TO THE INFORMATION HEREIN, AT ANY TIME, FOR THE IMPROVEMENTS OF THIS PUBLICATION AND/OR THE CORRESPONDING PRODUCT (S).
Important safety instructions 1) Read these instructions. 2) Keep these instructions. 3) Heed all warnings. 4) Follow all instructions. 5) Do not use this apparatus near water. 6) Clean only with dry cloth. 7) Do not block any ventilation openings. Install in accordance with the manufacturer's instructions. 8) Do not install near any heat sources such as radiators, heat registers, stoves, or other apparatus (including amplifiers) that produce heat.
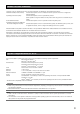
Contents Limitation of liability........................................................4 Disclaimer of warranty....................................................4 Warranty for U.S.............................................................4 Important safety instructions..........................................5 Preface...........................................................................7 Features..........................................................................7 System configuration......
Preface The network disk recorders WJ-NV200K, WJ-NV200VK and WJ-NV200K/G (hereinafter, recorders) are designed for use within a surveillance system, and record images/audio from up to 16 network cameras (hereinafter, cameras) on the hard disk drives. Up to 16 cameras can be registered.
System configuration Main monitor Live monitor (This illustration represents WJ-NV200VK.) Powered speaker Network camera (x 16 max.
About the user manuals There are 3 sets of operating instructions for the WJ-NV200K, WJ-NV200VK, WJ-NV200K/G as follows. Installation Guide (this document): Contains descriptions of how to install/connect this product and how to configure the required settings. Operating Instructions (PDF): Contains descriptions of how to operate this product.
Trademarks and registered trademarks • Adobe, Acrobat Reader and Reader are either registered trademarks or trademarks of Adobe Systems Incorporated in the United States and/or other countries. • Microsoft, Windows, Windows Vista, Internet Explorer, ActiveX, and DirectX are either registered trademarks or trademarks of Microsoft Corporation in the United States and/or other countries. • Microsoft product screen shot(s) reprinted with permission from Microsoft Corporation.
Network security As you will use this product connected to a network, your attention is called to the following security risks. q Leakage or theft of information through this product w Use of this product for illegal operations by persons with malicious intent e Interference with or stoppage of this product by persons with malicious intent It is your responsibility to take precautions such as those described below to protect yourself against the above network security risks.
About the face matching function This recorder (WJ-NV200K, WJ-NV200VK or WJ-NV200K/G) has the face matching function that compares the registered face images with a face displayed on live images to detect a person with a closer match. When the person is detected, it is possible to activate an alarm notification. To use the face matching function, there are following restrictions. • Only Camera 1 is available. • A camera supporting the face detection function is required. Refer to the "readme.
• Adjust the height, angle of depression and vertical angular field of view of the camera so that the angle between the camera and face ("θ" in the illustration) becomes 15° or less. Angle of depression Camera Vertical angular field of view era Cam Height Person θ (Angle between the camera and face) Example of camera adjustment (When shooting a person whose height is 170 cm {5.58 feet}) Vertical angular field of view (Zoom ratio) Distance between the camera and a person 2.3 m {7.
Cases not suited for face matching The performance of the face matching function varies depending on such conditions as the camera installation, camera settings, camera adjustment, surroundings and photographic subjects. Therefore, face matching may not be performed in the following cases. • Illuminance levels are dispersed. (Example: Outdoors) • Faces are interrupted by such objects as medical masks, sunglasses or helmets. • Faces are not directed to the front side.
Precautions Power source The input power source for this product is 120 V AC 60 Hz (WJ-NV200K, WJ-NV200VK), 220 V – 240 V AC 50 Hz/ 60 Hz (WJ-NV200K/G). Do not connect to the outlet that provides the power to equipment that requires a measurable amount of power (such as a copy machine, air conditioner, etc.). Avoid placing this product in locations where is subject to water. * The provided power cord(s) is (are) dedicated to the use with this product.
Cleaning Turn the power off, and then use a soft cloth to clean this product. Do not use strong or abrasive detergents when cleaning the body. When using a chemical cloth for cleaning, read the caution provided with the chemical cloth product. Indication label Refer to the indication label placed on the surface of this product for the equipment classification and power source, etc.
Precautions for installation This product is designed to be used indoors. Panasonic assumes no responsibility for injuries or property damage resulting from failures arising out of improper installation or operation inconsistent with this documentation.
Major operating controls and their functions Front view q Status indicators e DVD drive (commercially available, only for WJ-NV200VK) w Buzzer stop button y SDHC/SD memory card slot (This illustration represents WJ-NV200VK.) t Restart button r Mouse connection port * It is impossible to connect a mouse to the mouse connection port if the connector from the mouse is upside down. When it is hard to connect, check the upside down position of the connector from the mouse.
Insert an SD memory card (option) Step 1 Step 3 Open the SDHC/SD memory card slot cover. Close the SDHC/SD memory card slot cover. Note: • When removing the SD memory card from the slot, push the card until it clicks and pull it out straight. • When pulling out the SD memory card, hold both edges with your fingers. Pull the tab down. SDHC/SD memory card slot cover Step 2 Insert a SD memory card to the slot until it clicks. Hearing a click means that the card is properly inserted.
Step 3 Place a disc with the label side up and fit the hole of the disc to the center (spindle) of the tray. Then, push the tray gently. Click sound will be heard and the disc will fit in the tray. Spindle Step 4 Push the tray to the end. Click sound will be heard and the tray will be fixed. Step 5 Close the DVD drive cover. Important: • When opening/closing the DVD drive tray, do not apply force on the tray. • When not using the DVD drive, close the disc tray.
Rear view !2 HDD slots !3 SIGNAL GND terminal !1 Monitor output connector (HDMI) Link indicator Access indicator u Alarm/control connector (D-sub 25-pin) y Power cord inlet y Power cord inlet [AC IN] Connect the provided power cord to this inlet. u Alarm/control connector [ALARM/CONTROL] (D-sub 25-pin) Connect a control switch to control the recorder using an external device such as a sensor or a door switch or an external alarm device such as a buzzer or a lamp.
User/Host management It is necessary to register users who operate the recorder and hosts (PC) that accesses the recorder via a network such as a LAN. Up to 16 users can be registered. It is possible to register the following for the user information. Item Description User name User name is to be registered to log in to the recorder. The user name will be entered at the time of login. Password Password is to be registered to log in to the recorder together with the user name.
Operations flow z Obtain the license (Registration Key) x Connection c Turn on the recorder v Register the license (Registration Key) ☞ Activation Key Card z Obtain the "Registration Key" of the recorder by following the instructions on the provided Activation Key Card. ➜ ☞ Page 24 x Install hard disk drives in the recorder (☞ page 29) and connect the recorder to each device. ➜ c Turn on the power of the recorder.
Connection Connection of cameras Up to 16 cameras can be connected to the recorder via a switching hub. Use a LAN cable (straight) to connect the recorder and the switching hub. Recorder LAN cable (locally procured) 10BASE-T/100BASE-X/1000BASE-T: category 5e or better (straight) for WJ-NV200K, WJ-NV200VK category 7 (straight) for WJ-NV200K/G Switching hub Network camera (x 16 max.
Connection of monitors Connect the main monitor that displays recorded images or the setup menu to the monitor output connector (HDMI) using an HDMI cable (option). Connect the live monitor to the spot output connector (BNC) using a BNC cable (locally procured). Main monitor Live monitor * When outputting audio Connect a powered speaker. Powered speaker Audio cable (locally procured) HDMI cable (option) BNC cable (locally procured) Recorder Note: • Use "High Speed HDMI® Cable".
Connection of a PC Connect this recorder and a PC via a switching hub. Recorder IP address: 192.168.0.250 Subnet mask: 255.255.255.0 Default gateway: 192.168.0.1 PC LAN cable (locally procured) 10BASE-T/ 100BASE-TX/1000BASE-T: category 5e or better (straight) for WJ-NV200K, WJ-NV200VK category 7 (straight) for WJ-NV200K/G IP address: 192.168.0.x (except 0, 1, 250 and 255) Subnet mask: 255.255.255.0 Default gateway: 192.168.0.1 Network Switching hub IP address: 192.168.0.1 Subnet mask: 255.255.255.
About the connector How to use the terminals of the ALARM/CONTROL connector This connector is used when connecting an external device such as a sensor that outputs alarm signals or when installing an external alarm device such as a buzzer or a lamp. The connector to be used should be compatible with the pin array. Pin array 13 1 The pin array is different from other Panasonic recorders. Make sure that the connection is correct referring to the following. ALARM/CONTROL 25 Pin No.
Connection for the auto time adjustment function When a signal output from the other device is supplied to the time adjustment signal input (pin no. 20) and the time difference between the recorder and the other device is 29 minutes or less, the clock of the recorder will be set to the time set for the other device. When a signal output is supplied to the recorder 29 minutes before/after the hour, the clock of the recorder will be set to the hour (nn:00:00). ("nn" is the hour.
Alarm connection When a signal output from the other device is supplied to the Alarm input 1 to 9 terminals (pin nos. 1 - 9), recording or an alarm action will be performed in accordance with the settings. When an alarm device such as a buzzer, a lamp, etc., is installed outside, connect them to the Alarm output terminal (pin no. 21). Sensor (Alarm input 9) (Signal ground) (Alarm input 1) Door security switch 9 14 1 (Signal ground) 13 Alarming device Relays, etc.
Installation or replacement of the hard disk drives Before installing the hard disk drives, turn off the power of this recorder first. When replacing the hard disk drives, the procedures will be same as those of installation. When installing or replacing the hard disk drives for playback use only (hard disk drives that are formerly used for recording), perform the link process. Important: • When securing the hard disk drives to the HDD brackets, do not mistake the direction of the connectors.
Step 4 Step 5 Insert the HDD bracket with the hard disk drive all the way into the HDD slot, and secure the HDD bracket with the screws removed in Step 2. AC IN SIG NA LG ND HD D2 ALA Turn on the power of the recorder. (☞ Page 32) → New hard disk drive will be formatted automatically. When the formatting is completed, the hard disk drive will become operable. When the hard disk drive is formerly used for recording, perform the link process (☞ page 81) on the "HDD management" page.
Turn on the recorder Turn on the power of the recorder Turn on the power of the recorder. When using the recorder for the first time, register the license for the recorder. (☞ Page 34) Step 1 Connect the provided power cord to the power cord inlet on the rear panel of the recorder, and insert the power plug to an outlet. Be sure to use the following power source.
Turn off the power of the recorder Turn off the power of the recorder. When turning off the power, follow the procedure "During recording" or the procedure "During playback" depending on the current operation status. During recording Step 1 Select "Off" for "Recording mode" on the "REC & event" page - [Advanced setup] tab of the setup menu to stop all recordings. (☞ Page 61) Step 2 Unplug the power plug from the outlet after confirming that the [HDD1] and [HDD2] indicators are off.
Register the license (Registration Key) When using this recorder for the first time, it is necessary to register the license (Registration Key) for the recorder. Important: • After registering the "Registration Key" for the recorder or adding the license for the Additional Business Intelligence Kit, be sure to click the [Restart] button to reboot the recorder. The license will not be effective before the recorder is rebooted. Step 1 → The setup menu will be displayed.
Step 5 Click the [Setup >] button of [Registration of license]. → The registration window will be displayed. Step 8 When using the extra functions, enter the "Registration Key" for the Additional Business Intelligence Kit obtained in Step 1 on "Additional business intelligence" - "Registration Key" of the registration window in Step 5. The operations are the same as those of Step 6 and 7. Note: • Register the license for the recorder before registering that for the Additional Business Intelligence Kit.
Basic operations The recorder can be operated using the provided mouse connected to the mouse connection port on the front side of the recorder. It is also possible to perform operations and some settings of the recorder from the web browser. Refer to the Operating Instructions (PDF) for further information about the operations from the web browser.
About the operation of on-screen keyboard Setting items can be entered using the on-screen keyboard. When clicking the [ ] icon beside the entry field, the on-screen keyboard will be displayed, and it will become possible to enter characters by clicking the character keys on the keyboard. Entry field Language selection pull-down menu Click the [C] button to select the language for character entry. [Del all] button Deletes all the characters in the entry field.
Setup menu Configuration of each setting item in the setup menu should be completed in advance to use this recorder. The setup menu has the following levels for the setting items. On "Easy Start", the minimum settings required to operate the recorder will be performed, but other settings will remain default. On the [Basic setup] or [Advanced setup] page, the settings can be customized in accordance with a variety of operational modes.
Configure the minimum settings [Easy Start] The minimum settings required to operate the recorder, such as the date & time, camera registration, recording, can be configured on the setup menu - the "Quick setup" menu - "Easy Start". First, configure the minimum settings on "Easy Start", and to configure more advanced settings, go to each setup page.
Note: • Before the settings, register the cameras into the network. [New] button Detects all the connected cameras. The models and results of the detected cameras will be displayed. Make sure that the model numbers of all the connected cameras are being displayed. • When "On" is selected for the "DHCP" setting of the detected cameras, the recorder will forcibly change the setting to "Off" to give the IP addresses automatically.
[Next] button Proceeds to the settings for recording. Step 8 Step 9 Click the [Exit] button. → Saves the settings and returns to the top screen of the setup menu. Perform the settings for recording. If the settings are performed on "Easy Start", the settings will be applied to all the cameras. [Frame rate] Selects the frame rate for recording. 1 ips/ 3 ips/ 5 ips/ 10 ips/ 15 ips/ 30 ips Default: 10 ips [Image quality] Selects the image quality of recorded images.
Configure the basic settings [Basic setup] The basic settings of the recorder such as date & time and recording mode, etc. can be configured on the "Basic setup" page. The "Basic setup" page provides access to the [Date/Language], [Camera] and [REC & event] pages. Display the basic setup pages Click the desired button on the setup menu. [Date/Language] button: Displays the "Date/Language" page. Perform settings such as date & time and daylight saving time. [Camera] button: Displays the "Camera" page.
[Date & time settings] tab Perform settings such as date & time format, time zone, daylight saving time, and time adjustment method. [Daylight saving time table] Set the start (In)/end (Out) date & time of daylight saving time. Clicking the [Setup >] button will open the "Daylight saving time table" window. ■ Display format Select a display format for the current date & time. Note: • "Date & time display" on the [Camera setup] tab (☞ page 49) corresponds to the display format settings on this tab.
[Language] tab Select the display language for the main monitor and for the web browser on the PC.
Camera setup [Camera] The "Camera" page has 2 tabs; the [Camera registration] tab and the [Camera setup] tab. [Camera registration] tab Perform settings such as the network settings of the camera (IP address and port number), and the display position on the main monitor. When performing the initial settings, displays camera information detected/set on the "Easy Start". [Detect cameras] The cameras connected to a network can be detected for registration.
Detect cameras for registration [Detect cameras] Clicking the [Setup >] button of "Detect cameras" on the [Camera setup] tab will display the following window. After editing the settings, click the [OK] button to save the settings and return to the [Camera registration] tab. [New] button Detects all the connected cameras. The models, results of the detected cameras and IP addresses will be displayed. [Addition] button Detects only the added or replacing cameras.
Change the registered information [Registered information] Click the [Setup >] button for "Registered information" on the [Camera registration] tab to display the following items. After editing the settings, click the [OK] button to save the settings and return to the [Camera registration] tab. [Password] Enter the password to be used for the user whose name has been registered as "User name". (☞ Page 37) (Up to 32 alphanumeric characters) [Port No.] Set a port number from 1 - 65535 for use by the camera.
Interchange camera numbers [Change the display position of camera] Click the [Setup >] button for "Change the display position of camera" on the [Camera registration] tab to display the following items. The registered cameras will be displayed on the screen in the order of 1, 2 ...16 from top left to right. To interchange camera numbers, drag the camera image to be moved with the mouse and drop on the desired position.
Set up date & time display [Date & time display] Select the date & time display position for each camera and transmit it to the cameras to change the camera settings. Clicking the [Setup >] button for "Date & time display" on the [Camera setup] tab will display the following items. [Position] Select the position to display the date & time on the images. If the setting is to be transmitted to the camera, mark this item to select the display position.
[Display Title] To transmit the settings to the camera, mark this item, and edit the title displayed on the image. Clicking the [Edit >] button will display the following title editing window: • [Display Title] Enter a character string to be displayed on the image using the on-screen keyboard. (☞ Page 37) (Up to 16 alphanumeric characters) Available characters: 0-9, A-Z and the following marks. ! # $ % ( )* + , - .
Set up Light control mode [Light control mode] Select how to control the amount of light for each camera and transmit the information to the cameras to change the camera settings. Clicking the [Setup >] button for "Light control mode" on the [Camera setup] tab will display the setup page. [Light control mode] Outdoor scene: Depending on the brightness level (illuminance), the iris will automatically be controlled together with the shutter speed adjustment to control light.
Set up recording/events [REC & event] The "REC & event" page has 3 tabs; the [Recording setup] tab, the [Event setup] tab and the [Advanced setup] tab. Recording setup tab [Recording setup] Configure the settings relating to schedule recording. Set the day(s), time table(s), frame rate and image quality for recording. ■ Recording setup (All cameras) Set the recording frame rate and image quality. The settings will be applied to all cameras. [Frame rate] Select the recording frame rate.
Configure the advanced settings for schedule recording [Advanced schedule setup] In addition to schedule recording, up to 3 event recordings each can be set up on Time table 1 and 2. Clicking the [Advanced >] button in the "Schedules" field will open the "Advanced schedule setup" page. ■ Schedule to record 3 schedule recordings and 3 event recordings each can be set up on Time table 1 and 2. Within the same time table, event recording has priority over schedule recording.
Set up recording for individual cameras [Advanced recording setup] Set up items such as the image capture size, frame rate and image quality for individual cameras. Clicking the [Advanced >] button on the [Recording setup] tab will open the advanced setup page. [Recording] Select whether or not to apply schedule recording. On: Applies schedule recording. Off: Does not apply schedule recording. Anytime: Applies 24-hour recording every day regardless of the schedule settings.
Configure event-related settings [Event setup] tab Configure event-related settings such as the alarm output duration and buzzer duration. [Message display] Select whether or not to display a message on a PC connected to a network when an alarm occurs. On: Display a message. Off: Does not display a message. Default: On ■ Alarm action Configure alarm-related items such as alarm output duration and alarm auto reset.
Set up terminal alarm [Advanced terminal alarm setup] Configure the settings relating to the recording triggered by an alarm signal supplied to the ALARM/CONTROL connector of the recorder from an external alarm device such as a door sensor. Configure the necessary settings for each alarm input terminal of the ALARM/CONTROL connector on the rear panel of the recorder.
Set up camera site alarm [Advanced camera site alarm setup] Set up the action to be taken when a Panasonic alarm protocol received from a camera triggers camera site alarm. Refer to "Advanced terminal alarm setup" to set "Mode", "Recording camera", "Preset" and "Terminal output" in "Setup by camera" (☞ page 56). [Back] button Click the button after completing the settings. The screen returns to the [Event setup] tab.
Set up face matching alarm [Advanced face matching alarm setup] Set up the face matching alarm triggered when a previously registered face image is detected among the camera's live images. Refer to "About the face matching function" (☞ page 12) for details and cautions for use regarding the face matching function. Also refer to the Operating Instructions (PDF) for further information about the face matching functions. [Registration >] button Click this button to display the face registration window.
Register face images [Face registration] Use this page to register new face images, to check already registered face images or to assign names to the face images. Note: • Face images can be registered only on images recorded when "Alarm action" is selected for "Mode" of "Advanced face matching alarm setup". • [Matching] Select whether or not to activate the face matching function. A maximum of 8 images can be matched at the same time. On: Activates the face matching function.
Register face images [Add] A maximum of 16 face images can be registered. If 16 face images have already been registered, add new images after having deleted some of the registered images. Step 1 Click the [Add >] button in the face image registration window. If the face image automatically searched or changed name has not already been updated, click the [Update] button before adding it. → The "Face registration" window will be displayed.
Set up matching area [Setup area] Set up to 4 areas for matching face images while displaying live images. At the default, the whole area on the camera images is set to match face images. By designating the matching areas, it is possible to reduce the operation failure. Step 3 On the displayed image, click the top left corner and bottom right corner of the square that will become the area. → The designated portion will be displayed in gray and registered as a matching area.
Configure the settings relating to monitors [Monitor] The settings relating to the display of the main monitor, the live monitor connected to the recorder and the monitor of the PC connected via a network are configured on the setup menu - the "Advanced setup" menu - the "Monitor" page. The settings relating to image switching such as multiscreen display and sequence display of live images are also configured on this page. The "Monitor" page has [Main monitor], [Live monitor] and [Advanced setup] tabs.
• When "Alarm action" is selected for "Mode" of "Advanced face matching alarm setup" (☞ page 58), the sequential display will not be performed. Instead, images from the camera whose number is the smallest among the cameras selected for "Camera selection" will be displayed. Configure other settings relating to monitors [Advanced setup] Configure other monitor settings such as the eco. monitor function and monitor audio output. The eco.
[Stretch images to fit the areas in control screen display] Mark the checkbox to enlarge the vertical size of images with the aspect ratio of 16:9 to fit into the image display area on the control screen. When the images are enlarged with this setting, camera control or VMD search may sometimes not work properly in accordance with the specified coordinates or areas.
Configure the settings relating to network [Network] The settings relating to the network of the recorder are configured on the setup menu - the "Advanced setup" menu - the "Network" page. The "Network" page has [Basic], [e-Mail], [Panasonic alarm protocol] and [NTP/SNMP] tabs. Configure the basic network settings [Basic] The basic settings relating to the network can be configured on this tab. Note: • Enter the address octets and port numbers right-aligned.
■ DDNS Setup Select the DDNS service to determine whether or not to use DDNS. Off: Does not use the DDNS function. Viewnetcam.com: Uses the "Viewnetcam.com" service. Dynamic DNS Update: Uses Dynamic DNS Update (RFC2136 compliant). Default: Off Important: • Before using the DDNS service, it is necessary to perform the port forwarding setting for the router. • About Dynamic DNS Update (RFC2136 compliant) Operation using DDNS services other than the "Viewnetcam.com" service is not guaranteed.
[Access interval] Select the interval to access the Dynamic DNS Update service server to check the IP address and the host name from the following. 10 min/ 20 min/ 30 min/ 40 min/ 50 min/ 1 h/ 6 h/ 24 h Default: 1 h ■ Other setup Click the [Advanced >] button to set bandwidth control, HTTP port number, and FTP port number. The setup menu (advanced) will be displayed.
Configure the settings relating to the mail notification [e-Mail] The settings of alarm mail notice, the settings of error report mail (☞ Operating Instructions (PDF)) and the settings to use the mail functions can be configured on this tab. Note: • Available characters are as follows. A B C D E F G H I J K L M N O P Q R S T U V W X Y Z a bcdefghijklmnopqrstuvwxyz0123456 7 8 9 ! # $ % &‘ ( ) * + ,- . / : ; < = > ? @ [ \ ] ^ _ ` { | } ~ [Sender's address] Enter the mail address of a sender.
Configure the Panasonic alarm protocol settings [Panasonic alarm protocol] The settings to notify the PC of the event and error information when an event or an error occurs can be configured on this tab. To display the event and error information, it is necessary that the software (option) is installed on the recipient PC. Refer to the "readme.txt" on the provided CD-ROM for details on the software. [Port number(to PC)] Enter the addresses of the recipient PCs.
Configure the settings relating to NTP/SNMP synchronization [NTP/SNMP] The settings to synchronize the system clock with the NTP (Network Time Protocol) and SNMP (Simple Network Management Protocol) server can be configured on this tab. [Location] Enter a location name (location where the recorder is installed) in alphanumeric characters. Example: 2F [Contact] Enter the contact information such as a mail address of an administrator of this recorder.
Configure the settings relating to the user management [User management] The settings such as user authentication On/Off, administrator registration and operation levels can be configured on the setup menu - the "Advanced setup" menu - the "User management" page. The "User management" page has [Basic], [User registration] and [Administrator setup] tabs.
Restrictable operations It is possible to allow or restrict the following operations for each user. Operation Description Camera operation Camera images displayed on the main monitor can be changed. Camera control Camera control such as panning and tilting can be performed. Search and playback Recorded images can be played back and searched by VMD search. Copy Recorded images can be copied to storage media such as an SD memory card. Alarm reset An alarm action can be canceled.
Register, edit or delete the user information [User registration] Use this tab to register, edit or delete user names and passwords. [Registration] button Select this button to newly register the edited user information. ■ Edit user information Edit or delete the user information that has been registered. Select the user whose user information is to be edited or deleted. To edit items, proceed as for new user registration. [Edit] button Registers the edited user information.
Edit the administrator information [Administrator setup] The administrator information relating to the password and default screen, etc. can be registered on this tab. [Administrator name] Enter the administrator name using the on-screen keyboard. (☞ Page 37) Enter 5 to 14 alphanumeric characters for the administrator name. Default: ADMIN [Password] Enter the administrator password using the on-screen keyboard. (☞ Page 37) Enter 5 to 8 alphanumeric characters for the password.
Configure the settings relating to maintenance [Maintenance] The version of the recorder and disk information is displayed, and the settings relating to hard disk drives can be configured on the setup menu - the "Advanced setup" menu - the "Maintenance" page. It is also possible to initialize the setup data of the setup pages, check the system logs and register the license on this page. The "Maintenance" page has [System information], [HDD information] and [System management] tabs.
Note: • While overwriting recording is being performed, the overwriting cycle will be calculated based on the date & time of the oldest recorded data and that of the newest recorded data. • The more often the recording was performed in the past, the more accurate the calculation of overwriting cycle will be. • When the recording conditions are changed or when data is automatically deleted, the overwriting cycle will not be indicated accurately.
About the access log The date & time when logged in/out for the recorder, the user name, and the IP address will be displayed. Up to 100 logs are saved. When more than 100 logs are filed, the older logs will be overwritten by the newer logs. In this case, the oldest log is the first to be overwritten. **LOGIN/**LOGOUT: A user has logged in/out the recorder. CONFIG LOGIN/CONFIG LOGOUT: A host has logged in/out the "HDD management" page. UPDATE SETTINGS: Settings have been changed.
Register the licenses for the recorder and the Additional Business Intelligence Kit [Registration Key] The licenses to operate the recorder and activate the extra functions are registered. Important: • After registering the "Registration Key" for the recorder or that for the Additional Business Intelligence Kit, be sure to click the [Restart] button to reboot the recorder. The licenses will not be effective before the recorder is rebooted.
Saves the maintenance data on the SD memory card Saves the data such as logs on the SD memory card. All logs are saved. When using an unformatted SDHC/SD memory card or an SDHC/SD memory card formatted with a PC or another device, it is necessary to format it with this recorder. Refer to the Operating Instructions (PDF) for how to format a SD memory card. Step 1 Click the [Execute] button to display the confirmation window to start saving. → Saving the log data on the SD memory card will be started.
Manage the hard disk drives [HDD management] The operations relating to the hard disk drives such as checking the capacity of each recording area and formatting the drives can be performed on the "HDD management" page of the setup menu - the "Advanced setup" menu. Important: • All other operations such as recording and playback will stop when the "HDD management" page is displayed. • Displaying the "HDD management" page forcibly logs out any other users currently logged in to the recorder.
Check the hard disk drive information [HDD information] The capacities, operation time and statuses of the hard disk drives are displayed. Refer to the setup menu - the "Advanced setup" menu - the "Maintenance" page - the [HDD information] tab for further information about the items displayed on the [HDD information] tab. (☞ Page 75) Format the hard disk drives [Format HDD] Hard disk drives are formatted. Important: • When a hard disk drive is formatted, all the recorded images will be erased.
Configure the settings relating to the extra functions [Extra function] The settings relating to the extra functions such as the statistical processing are configured and the statistical processing data can be saved on an SDHC/SD memory card on the "Extra function" page of the setup menu - the "Advanced setup" menu. The “Extra function” page has the [Business intelligence] tab.
Lists of the setting items (Setup menu) Quick setup (Easy Start) Tab Setting item (including those of Available range the "Advanced setup" menu) Date & time adjust- – ment 2010/1/1 0:00 2034/12/31 23:59 Set time zone Recording setup Default Activate the Daylight saving time*1 Recording setup (The same setting for all cameras) Frame rate Image quality Referenced recording days GMT-12:00, GMT-11:00, GMT-10:00, GMT-9:00, GMT-8:00, GMT-7:00, GMT-6:00, GMT-5:00, GMT-4:30, GMT-4:00, GMT-3:30, GMT-3:00, GM
Menu/Tab Setting item (including those of Available range the "Advanced setup" menu) Default Auto time adjustment Off, On Off *1 Marking the checkbox for [Activate the Daylight saving time] is the same as selecting "Auto" for "Daylight saving time".
Menu/Tab Setting item (including those of Available range the "Advanced setup" menu) Default 360 pan-flip 360 pan-flip Camera selection Off, On Checked/Not checked Off (Registered cameras are checked.) Upside-down Upside-down Camera selection On (desktop), Off (ceiling) Checked/Not checked On (desktop) (Registered cameras are checked.
Menu/Tab Setting item (including those of Available range the "Advanced setup" menu) Schedule to record (Time table2-Schedule recording-HDD saving mode) Schedule to record (Time table2-Event recording) Checked/Not checked --:--, 00:00 - 24:00 Schedule to record Checked/Not checked (Time table2-Event recording-eMail) Schedule to record Checked/Not checked (Time table2-Event recordingPanasonic alarm protocol) Advanced recording setup Model (Registered information will be displayed.
Menu/Tab Setting item (including those of Available range the "Advanced setup" menu) Default Advanced command alarm setup Mode Off, Recording only, Recording & alarm action Setup by camera Off, Cam.1, ..., Cam.
Menu/Tab Setting item (including those of Available range the "Advanced setup" menu) Default Remarks Other setup Checked/Not checked Not checked d Auto-hide the status display Checked/Not checked panel and the operation panel in wide view Not checked d Divide the live camera image positions equally in wide view Not checked d Stretch images to fit the areas in Checked/Not checked control screen display Not checked d Display images in 16:9 aspect ratio on the web browser window Not checked d
Menu/Tab Panasonic alarm protocol NTP/SNMP Setting item (including those of Available range the "Advanced setup" menu) Default Remarks Destination address (Warning) Checked/Not checked Checked d Destination address (Alarm) Checked/Not checked Checked d d Panasonic alarm protocol Port number(to PC) (Port No.) 1818 Retry 0, …, 8 2 d Destination address (Address) (Text will be entered.) (Blank) d Time adjustment Off, On Off d NTP server address (Text will be entered.
Menu/Tab User registration Setting item (including those of Available range the "Advanced setup" menu) Default Remarks Setup Checked/Not checked Manager: (Checked, Fixed) Operator: Not checked Viewer: Not checked Logged out: (Not checked, Fixed) d Camera image display Checked/Not checked Manager: (Checked, Fixed) Operator: Checked Viewer: Checked Logged out: Checked d (Text will be entered.) (Blank) d Register new user User name Password (Text will be entered.
Menu/Tab System management Setting item (including those of Available range the "Advanced setup" menu) Default Remarks System setup Error buzzer duration 0 s, 2 s, 5 s, 10 s, 20 s, 30 s, 1 min, Ext. 2s d Error output duration 0 s, 2 s, 5 s, 10 s, 20 s, 30 s, 1 min, Ext. 2s d Network link down detection Off, On Off d HDD hour meter warning Off, 10000 h, 20000 h, 30000 h, 40000 h, 50000 h 20000 h d Auto data delete Off, 1 day, ...
Menu/Tab Setting item (including those of Available range the "Advanced setup" menu) HDD information (Status) (Indication only) Default (Indication only) Remarks d HDD information (Format) Checked/Not checked Not checked d HDD information (Results) (Indication only) (Indication only) d Remove HDD HDD information (Capacity) (Indication only) (Indication only) HDD information (Operation) (Indication only) (Indication only) HDD information (Status) (Indication only) (Indication only) HDD
About the error logs and the network logs Error logs This section describes the display contents on the status display panel of the main monitor, the logs of error occurrence (error logs) and their details. The display contents of each error logs are common between the main monitor and the web browser. • "x" indicates the HDD (hard disk drive) number. • "f" indicates the cooling fan number. • "cc" indicates the camera number.
Network logs This section describes the details on the network logs and their details. The network logs are displayed by selecting the "Maintenance" page - [System management] tab - "Network log" on the setup menu or the web browser of a PC that is connected to the recorder. The display contents of each error logs are common between the main monitor and the web browser.
Troubleshooting Before asking for repairs, check the symptoms with the following table. Contact your dealer if a problem cannot be solved even after checking and trying the solution in the table or a problem is not described below. Symptom Power is not turned on. The error indicator lights orange. The recorder stops because of the thermal error. Cause/solution Reference pages • Is the power plug connected to the outlet firmly? Confirm the cable is firmly connected.
Symptom The images or embedded characters displayed on the monitor look blurry. Cannot play back images. Audio is not output from the camera. Or audio is accompanied by noise. Cannot control the cameras. No alarm action is taken. Cause/solution • Depending on the photographic subject or HDMI monitor that is connected, images or embedded characters may look blurry. That is not a trouble. – • Are there any recorded images on the hard disk drives? Check if there are recorded images.
Symptom Cause/solution Reference pages • Is the Ethernet cable firmly connected to the 10BASE-T, 100BASE-TX or 1000BASE-T port? Confirm the cable is firmly connected. 21 • Is the link indicator (orange) of the network port lit? When it is not lit, connection to a LAN is not established or a network is not working correctly. Confirm that the link indicator of the network port is lit. Refer to the system administrator if it is not lit.
Inspect the power cord, power plug and connectors periodically. Symptom The power cord insulation is damaged. The power cord, plug and connectors get hot during use. The power cord gets hot when bent or stretched. 98 Cause/solution • The power cord, connector, or power plug is damaged. This may result in electric shock or a fire. Unplug the power plug from the AC outlet immediately, and refer to qualified service personnel.
Specifications • General Power source: Power consumption: Ambient operating temperature: Ambient operating humidity: Maximum operating altitude: Dimensions (excluding rubber feet and projections): 120 V AC 60 Hz (WJ-NV200K, WJ-NV200VK) 220 V - 240 V AC 50 Hz/60 Hz (WJ-NV200K/G) 45 W Main body: +5 °C to +45 °C {41 °F to 113 °F} Mouse (accessory): +5 °C to +40 °C {41 °F to 104 °F} 5 % - 90 % (non condensing) (WJ-NV200K,WJ-NV200K/G) 10 % - 80 % (non condensing) (WJ-NV200VK) 2000 m {6562 feet} or
Standard accessories CD-ROM*........................................................................... 1 pc. Mouse................................................................................ 1 pc. Installation Guide (this document)....................................... 1 pc. Quick Reference Guide....................................................... 1 pc. Warranty (provided with WJ-NV200K, WJ-NV200VK)......... 1 pc. The following are for installation: Power cord (WJ-NV200K, WJ-NV200VK)...............
Information for Users on Collection and Disposal of Old Equipment and used Batteries These symbols on the products, packaging, and/or accompanying documents mean that used electrical and electronic products and batteries should not be mixed with general household waste. For proper treatment, recovery and recycling of old products and used batteries, please take them to applicable collection points, in accordance with your national legislation and the Directives 2002/96/EC and 2006/66/EC.