
Installation Guide

46
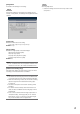
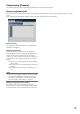
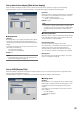
Detect cameras for registration [Detect cameras]
Clicking the [Setup >] button of "Detect cameras" on the [Camera setup] tab will display the following window.
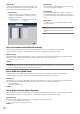
After editing the settings, click the [OK] button to save the settings and return to the [Camera registration] tab.
[New] button
Detects all the connected cameras. The models, results of
the detected cameras and IP addresses will be displayed.
[Addition] button
Detects only the added or replacing cameras. The models,
results of the detected cameras and IP addresses will be
displayed.
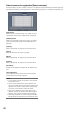
[Camera]
Refer to "[Easy Start]" (☞ page 39) for further information.
[Select]
Mark the checkboxes of cameras to register.
[Model]
Refer to "[Easy Start]" (☞ page 39) for further information.
[Results]
Refer to "[Easy Start]" (☞ page 39) for further information.
[IP address]
Displays the IP addresses configured for the detected cam-
eras.
[Auto addressing]
The IP addresses of the cameras whose checkboxes are
marked will be automatically configured.
Note:
• Itisimpossibletoregisterthecamerasinothersubnets
via the same router.
• Forthesecurityenhancement,cameradetectionwill
become impossible when 20 minutes have passed. That
depends on the camera models. Refer to the operating
instructions of the camera for further information.
• When"On"isselectedforthe"DHCP"settingofthe
detected cameras, the recorder will forcibly change the
setting to "Off" to give the IP addresses automatically.
• Clickthe[Cancel]buttontoreturntothe[Cameraregis-
tration] tab without applying the camera detection result.