Digital Photo Frame User’s Guide
UGPI7000W01 & PI8004W01-V5.
Table of Contents INTRODUCTION ....................................................................................... 6 The DPF includes these Key Features ................................................. 6 What’s In the Box .................................................................................. 6 Important Safety Precautions ................................................................ 7 Cleaning the Digital Photo Frame .........................................................
Play Music with a Slideshow............................................................... 20 Set Slideshow Music Mode................................................................. 21 Set Slideshow Transition .................................................................... 21 Set Slideshow Speed.......................................................................... 22 Set Slideshow Shuffle ......................................................................... 22 All Photos Slideshow ...........
Disconnect the DPF from the Computer............................................. 36 Connect to a Macintosh ...................................................................... 37 Frequently Asked Questions ............................................................... 37 Bluetooth Setting Options ............................................................... 39 Technical Specifications ...................................................................... 40 Limited Warranty ...........................
INTRODUCTION Welcome to the Pandigital Multimedia Digital Photo Frame (DPF). Now you can display your digital photos directly from your memory card, no computer is necessary. Simply insert a memory card into the DPF and power on. You’ll be treated to an automatic slideshow of your photos. It’s as easy as that.
Important Safety Precautions Always follow these basic safety precautions when using your Multimedia Digital Photo Frame (DPF). This will reduce the risk of fire, electric shock, and injury. WARNING: Do not expose this product to rain or moisture. WARNING: Do not remove the cover. There are no user-serviceable parts inside. Refer all servicing to qualified personnel. • • The DPF is for indoor use only. Unplug the DPF before performing care and maintenance.
Set Up the Digital Photo Frame (DPF) It is a quick and easy process to set up the DPF. 1. Plug the AC Power Adapter into the DPF and into a wall outlet. 2. Insert a memory card or USB Flash Drive into the appropriate slot.
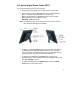
Changing the Decorative Frame or Matt Depending on the model, your Digital Photo Frame may include interchangeable decorative frames or matts. 1. To change the frame or matt, remove screws on the back of the frame and lift the unit from the frame. 2. After replacing either frame or matt, replace the screws and just finger-tighten. Note: The effective range and angle of the remote control will be reduced if you use the grey or the black paper matt.
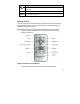
Button Action Move the selection down or right, display the next photo or select the next file. EXIT Exit the current display, or go back a screen. SETUP Open the Onscreen Menu. Remote Control You can access all of the DPF’s features, and perform all of the functions by using the remote control. You will be able to perform several functions not possible with the frame buttons. Note: Before first time use, pull the plastic tab sticking out of the remote control.
2. While pressing down on the ridged area of the battery cover, pull the battery tray out. 3. Place a “CR2025” Lithium battery on the tray with the positive “+” end facing toward you 4. Close the tray. The DPF’s Menu Screens You control the DPF’s features through the menu screens, and you can navigate the menus by using either the remote control or the buttons on the top of the DPF. The HOME Screen The DPF has five main features, all accessed through the HOME menu screen.
FILE View all files on each present memory source CLOCK Calandar, date and time, alarm and schedule On/Off functions Press ◄ / ►arrows to highlight a feature, and then press ENTER to select that feature. Press EXIT to return to the previous menu. DPF Functions Overview You will use the DPF’s main Setup Menu to set most of the functions for your viewing/listening preferences. To access the main Setup Menu, on the HOME screen, press SETUP.
Display Option 13 Setting Description Slideshow Music ON (default) OFF ON = Plays background music with your photo slideshows. OFF = Even though music files are present on the memory source, music will not play with your photo slideshows.
Display Option Setting Description Set ON/OFF Schedule Weekdays,on/off Weekend, on/off Set a schedule to automatically display the Slideshow Select Media Internal Memory SD/MMC xD-Card MS/MS-DUO USB CF View Folder Family Friends Vacation Events Others Select the memory source for your viewing/listening preferences Memory sources not present in the DPF will be grayed out Photos can be copied into these five category folders for custom group viewing Select Media (Memory Source) The DPF has an inte
2. On the HOME screen, press SETUP. 3. Use ▲ / ▼ to highlight Select Media and then press ENTER. 4. Use ▲ / ▼ to select the desired memory source, and then press ENTER. The memory source you selected will now be the source of your photo, video and music playback until you select a different source or power off the DPF. Power Saver You can set the DPF to stay on until you power it off, or to automatically shut off when left idle for a specific amount of time.
PHOTOS You can view your photos individually or as slideshows, with or without background music. Display Image Size There are two modes for displaying your photos on the DPF: • Original = Displays photos in actual photo size, which may result in part of a photo not being visible on the screen. • Optimal = Reduces the size and resolution to best fit the screen. Set Image Size Mode 1. On the HOME screen, press SETUP. 2. Use ▲ / ▼ to highlight Display Image Size, and then press ENTER. 3.
Rotate a Photo Note: You must use your remote control to rotate photos. 1. With a photo individually displayed, rotate it by pressing ROTATE on the remote control. The photo will be rotated by 90 degrees clockwise with each press of the ROTATE button. 2. Press EXIT to return to the photo thumbnail screen. The photo will remain rotated even after the DPF is powered off. Zoom a Photo Note: You must use your remote control to zoom photos. 1.
Set the Photo Copy Method 1. On the HOME screen, press SETUP. 2. Use ▲ / ▼ to highlight Photo Copy Method, and then press ENTER. 3. Use ▲ / ▼ to highlight Optimized or Non-optimized, and then press ENTER. 4. Press EXIT to close the menu. Copy Photos from Memory Card into Internal Memory You can copy all or individual selected photos from your memory source into the DPF’s internal memory. Copy All Photos 1. On the HOME screen, highlight PHOTOS and then press ENTER. 2. Press SETUP. 3.
4. Press SETUP. 5. Use ▲ / ▼ to highlight Copy Photo, and then press ENTER. 6. Use ▲ / ▼ to highlight Selected, and then press ENTER. 7. Press ENTER on Yes to confirm the copy request. The photos will be copied and a message appears stating the number of photos that were copied. 8. Press EXIT twice to return to the HOME screen. Delete Photos from the Internal Memory Note: You can delete photos from the DPF’s internal memory, but not from your memory cards.
photos. Press “+” to select photos you want to delete. A check mark will appear in the upper-right corner of the thumbnail photo. Use ‘-‘ to de-select. 3. Continue selecting all the photos you want to delete. 4. Press SETUP. 5. Use ▲ / ▼ to highlight Delete Photo, and then press ENTER. 6. Use ▲ / ▼ to highlight Selected, and then press ENTER. 7. Press ENTER on Yes to confirm the delete request. The photos will be deleted and a message appears stating the number of photos that were deleted. 8.
Adjust the Volume Use “+” and “-” on the remote control to adjust the volume on the DPF. Set Slideshow Music Mode You can either have slideshow background music playing or not, even if music files are present on the memory source. Note: Refer to the MUSIC section beginning on page 26 for more information on playing music files. ON (default) OFF ON = Play background music with slideshow OFF = Do not play music with slideshow 1. On the HOME screen, press SETUP. 2.
1. On the HOME screen, press SETUP. 2. Use ▲ / ▼ to highlight Slideshow Transition, and then press ENTER. 3. Use ▲ / ▼ to highlight the preferred effect, and then press ENTER. 4. Press EXIT twice to return to the HOME screen. Set Slideshow Speed You can set the speed at which the photos transition from one to another during a slideshow. 5 secs (default) 10 secs 30 secs 60 secs 1 hour 24 hours Determines how quickly photos transition from one to another 1. On the HOME screen, press SETUP. 2.
3. Use ▲ / ▼ to highlight the preferred mode, and then press ENTER. 4. Press EXIT to return to the HOME screen. All Photos Slideshow To play a slideshow of all photos on the selected memory source: 1. On the HOME or photo thumbnails screen, press SLIDE SHOW. 2. Press EXIT to pause and EXIT again to stop the slideshow. Custom Category Folder Slideshows There are five category folders in the internal memory into which you can copy photo files for custom slideshows.
assign the selected photos to that folder. Note: The photos are assigned to the folder, not copied. If you delete the photo file from internal memory later, the link to the photo will also be deleted. TIP: You can also assign photos to folders while viewing individual photos or slideshows by pressing SETUP. Select Assign Photo To, and then select a folder as described in steps 4-5 above. Play Slideshow from Category Category Folders 1. On the photo thumbnail screen, press SETUP. 2.
Temporary Custom Slideshow A temporary custom slideshow is comprised of individual photos you select and display immediately without saving them in a category folder. Note: You must use your remote control to create a temporary custom slideshow. 1. On the HOME screen, use ◄ / ► to highlight PHOTOS, and then press ENTER. The photo thumbnails screen will be displayed. 2. Use ▲ / ▼ ◄ / ► to scroll through the photos. Press “+” to select photos or “-” to de-select them. 3.
4. Use ▲ / ▼ to set the time and AM/PM and ◄ / ► to scroll between each option. 5. The Set Always OFF option allows you to toggle the Weekdays / Weekends scheduling on and off as desired. 6. When all options have been set, press EXIT to save and return to the Calendar/Clock screen. TIP: You can also schedule a slideshow from the HOME screen SETUP, and then follow steps 3-6 above.
Play MP3 files at any Time You can play music MP3 files located on your memory source without a slideshow being displayed at any time. This allows you to use your DPF as a personal MP3 player. 1. On the HOME screen, use ◄ / ► to highlight MUSIC, and then press ENTER. A list of all MP3 files found on the memory source is displayed. 2. Use ▲ / ▼ to highlight the MP3 file you want to listen to, and then press ENTER. 3.
Music Playback Mode There are three playback modes that you can set in the DPF. No Repeat Repeat Single Repeat All No Repeat – play a selected music file only once. Repeat Single – play a selected music file continuously until you stop it. Repeat All – play all music files on the memory source continuously until you stop them. Set Music Playback Mode 1. On the HOME screen, use ◄ / ► to highlight MUSIC, and then press ENTER. A list of all music files found on the memory source is displayed. 2.
2. On the HOME screen, use ◄ / ► to highlight VIDEO, and then press ENTER. A list of all video files found on the memory source is displayed. 3. Use ▲ / ▼ to highlight the video you want to view, and then press ENTER. 4. The video will begin to play. 5. Press EXIT to stop viewing the video and return to the file list. To play another video, repeat step 3. 6. Press EXIT again to return to the HOME screen. Adjust the Volume Use “+” and “-” on the remote control to adjust the volume on the DPF.
FILE This feature offers another method for viewing or listening to available files on your selected memory cards, whether it’s audio, photo, or video files. View Contents of Selected Memory Source 1. On the HOME screen, use ◄ or ► to highlight FILE, and then press ENTER. The contents of the selected memory source will be displayed. 2. Press ENTER on an individual file name to activate the file, i.e., view photo/video, or play music.
2. On the FILE screen, use ▲ / ▼ to scroll through your files. Press “+” to select files you want to copy. A check mark will appear in the upper-right corner of the file name. Use ‘-‘ to de-select if needed. 3. Continue selecting all the files you want to copy. 4. Press SETUP. 5. Press ENTER on Copy File. 6. Use ▲ / ▼ to highlight Selected and then press ENTER. 7. Press ENTER on Yes. The files will be copied and a message appears stating the number of files that were copied. 8.
Set the Clock 1. On the Calendar/Clock screen, press SETUP. 2. Use ▲ / ▼ to highlight Set Clock and then press ENTER. 3. Use ◄ / ► to move between the Time and Date fields, and use ▲ / ▼ to change the value in the selected field. 4. When the date and time are correct, press ENTER to save and return to the normal Calendar/Clock screen. Set the Alarm You can use your DPF as an alarm clock, and you can set the alert as either a built-in tone or music.
5. A small alarm clock will be displayed in the lower right corner. Depending on the alert tone you selected, (default tone) a small speaker symbol (default tone) or (music) a music note symbol will also be displayed next to the little clock. Note: At least one MP3 music file must be present in the internal memory for the alert to play music. If you set the alert to play Music and there is no MP3 music file present on the selected memory source, the default tone will sound instead. 6.
3. Use ▲ / ▼ to highlight your desired photo source and then press ENTER. Note: If you select a folder that does not contain photo files, the round clock will be displayed instead. If you select a folder that contains photo files, the time will be displayed under the photo slideshow. Copy Files between Computer and DPF You can connect the DPF to a Windows PC or Macintosh computer to copy files between the computer and the DPF’s internal memory via a standard USB cable. Connect to Windows PC 1.
4. Each memory card present in the DPF and the built-in memory will be associated with one disk drive on your computer. IMPORTANT: If your PC is connected to Local Area Network drives, or if you have multiple drive letters already assigned to peripheral devices, you will need to manage your drive settings in Windows to free up the four drive letters immediately following your CD-ROM drive so the DPF can assign them to memory. card slots properly. 5.
6. To copy files from the memory card, select and drag them to the drive associated with the DPF’s internal memory. 7. Similarly, to copy photos from your computer to the built-in memory, first locate the files on your computer, select the files you want to copy, and then drag and drop them to the drive associated with the DPF’s internal memory. TIP: Most cameras and graphic programs store photos in the Windows ‘My Pictures’ folder.
1. In Windows XP, left-click on the select the correct storage device. 2. Click OK. A final dialog box opens. 3. Select Close. 4. When the message “It is Now Safe to Disconnect Hardware” appears, you can disconnect the USB cable from your computer. icon in the system tray and Connect to a Macintosh 1. Use the included USB cable to connect your DPF to your Macintosh. 2. Macintosh will recognize the DPF as an external storage device. 3.
Power Switch on the left side of the DPF may not be in the ON position. Q: I have a memory card in the DPF; why can’t I view my photos? A: A) Be sure that the memory card is one of the formats listed above and that the files on the card are JPEG images files. Some digital cameras save images in other formats. Refer to your camera’s user guide if your photos are not JPEG files. B) Power the DPF Off and make sure that the memory card is inserted all the way into the card slot. C) Power the DPF On.
Bluetooth Setting Options (Only available on the 8” DPF models) Bluetooth USB Dongle Required The USB Bluetooth Dongle allows you to connect to popular mobile phones; e.g.: BlackBerry, Motorola, Nokia, SonyEricssson and others. Note: Not all phones support transmitting photos to devices like a DPF. Insert USB Bluetooth Dongle into the DPF 1. Insert to the USB host port and then turn on the DPF. Check Pandigital’s website for the compatable USB Bluetooth adapters. http://www.pandigital.net 2.
Technical Specifications Product Resolution 7” LCD Screen Digital Photo Frame 480 X 234 pixels Product Resolution 8” LCD Screen Digital Photo Frame 800X600 pixels Memory Card Formats Secure Digital™, Multi Media Card™, Compact Flash™, xD Memory Card™, Memory Stick™, Memory Stick PRO™, and USB Flash Drives. CF availability varies depnding on model.
Limited Warranty The limited warranty set forth below is given by Pandigital with respect to Pandigital brand electronics products purchased and used in the United States of America. Pandigital warrants this product against defects in material or workmanship as follows: LABOR: For a period of ninety (90) days from the date of purchase, if this product is found to be defective, Pandigital will repair or replace the product, at its option, at no charge.
in duration to the duration of this warranty. Some states do not allow the exclusion or limitation of incidental or consequential damages, or allow limitation on how long an implied warranty lasts, so the above limitations or exclusions may not apply. This warranty gives you specific legal rights, and you may have other rights, which vary from state to state.