USER MANUAL P2000 breeze3
Breeze3 P2000 User Manual Thank you for choosing the Pantech Breeze3 P2000, our latest mobile phone. The Pantech Breeze3 P2000 has many features designed to enhance your mobile experience. From its EZ to read menus, to its sleek, stylish design, we know you will enjoy the entire Breeze3 P2000 experience. This User Guide contains important and useful information that will maximize your familiarity with all that the Pantech Breeze3 P2000 has to offer.
Specifications Power Management (Performance) Battery Type Capacity Standby Time Talk Time Design Standard Up to 920mAh Up Up to 3 hours Clamshell phone with internal and external display Lithium-Ion to 250 hours (Li-ion) Displays y 260K Colors TFT LCD with 2.2” internal display Operating Frequency y 260K Colors TFT LCD with 1.
Phone overview Earpiece Volume up / down External Display Camera Strap Hole Internal display One-touch Quick Call Navigation key Scroll through the menu options Voice Command Send key Voicemail OK key or access MEdia Net Press to enter menu system Left/Right Soft key Perform the functions shown at the bottom line of the display Camera key Power on & off / Menu exit / End key Turns phone on / off, ends calls, exit menus LED Indicators Message, Call, Battery Vibrate mode Microphone Speaker 16 Pin
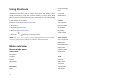
Using Shortcuts Create Message Sent Numbered menu items, such as menus, sub-menus, and options can be Voice Mail quickly accessed by using their shortcut numbers. In Menu mode, Main Mobile Email Menus can be accessed by pressing the number keys (1 to 0) corresponding to their location on the screen. Camera Example: Accessing the Phone Mode menu. Take a Picture 1. Press Menu. Record a Video 2. Press the [#] for Settings. My Pictures 3. Press the [1] for Phone Mode. My Videos Online Locker 4.
Settings Settings Phone Status Templates Sounds & Alerts User Space Bluetooth Font Size IM Wallpaper Phone Mode Mobile Email * SIM dependent Mobile Web ** Network dependent Mobile Web Advanced mode menu AppCenter Address Book All Contacts AT&T GPS Favorites AT&T Navigator Groups Where My Settings AllSport GPS Messaging YPmobile Conversations Create Message My Stuff Mobile Email Applications IM Audio Outbox Games Drafts Online Locker Voice Mail Picture
Video Security Tools AT&T Software Update Other Files Reset Used Space TTY Phone Information AT&T Music Music Player * SIM dependent Shop Music ** Network dependent Shazam AT&T Radio Music Videos Make-UR-Tones Community Music Apps Mobile Video Settings Phone Mode Sounds & Alerts Display Call Phone Network Connections Network Connectivity 6
Quick & Easy Keys Keys Functions Functions Cancel user input and return to standby mode while Perform the functions shown at the bottom line of in Menu mode. the display by using these soft keys. Quickly connect to the voice mail server if pressed Scroll through the menu options in Menu mode. In and held in standby mode. standby mode, ~ Enters numbers, letters or special characters. Go to Left Scroll: Access Voice Mail menu the dial screen if pressed in standby mode.
Keys Functions Turn camera capture mode on. Work as a camera shutter in capture mode.
Contents 3. Messaging Entering text...........................................................................................25 Specifications ............................................................................................... 2 Messaging .............................................................................................26 Phone overview ............................................................................................ 3 Receiving messages...............................
6. Connectivity Bluetooth ............................................................................................... 44 Using the browser ................................................................................. 45 Profiles setting....................................................................................... 45 7. Settings Language .............................................................................................. 48 Time and date.............................................
1.
Package contents Phone 12 Battery Travel charger User Manual
SIM Card and Battery 2. Insert the SIM card into the slot. The gold contacts of the SIM card should go against the metal contacts of About your SIM card the phone. Put the contacts of the battery into the hole When you subscribe to your network operator, you receive a SIM located at the bottom of the unit insert and press the (Subscriber Identity Module) card containing your registration information, upper side of the battery until you hear the “click”. PIN code, etc.
Turn on/off the phone To turn on Data* folder Incoming calls set to ring only (Normal) Incoming calls set to Vibrate then Ring 1. Press and hold [ ] in red color. Incoming calls set to Vibrate Only Incoming calls set to Silent To turn off Received one or more text messages 1. Press and hold [ ] in red color. Received one or more multimedia messages Received one or more WAP push messages Received one or more FAX messages Keypad lock Received one or more other messages Locking the keypad 1.
Available, Away, Invisible Status of AIM To change the theme from Breeze Mode to Advanced Mode Online, Away, Busy, Offline Status of MSN 1. Press Menu > Settings > Phone Mode. Available, Busy, Invisible Status of YAHOO You have received one or more IM messages * Network dependent 2. Select Advanced Mode. Assigning the menu In Breeze Mode, you can set the most commonly used menu in Options in standby mode. Setting theme 1. Press Shortcuts in standby mode > select Unassigned. 2. Press Add.
To send a message using one touch key 1. Press [ ]. 2. Press Option > Send Message. Updating software You can update your software without visiting your nearest dealer. To update the software In Advanced mode 1. Press Menu > Settings > AT&T Software Update. 2. Press Check for Update > Yes.
2.
Making a call during a call Making, receiving and ending a call 1. Enter the phone number or press Options > Contact Search. Making a call 2. Press [ on hold. 1. Enter the area code and phone number. 2. Press [ ] to dial the second call. The first call is automatically put ]. Switching between two calls Answering a call 1. Press [ 1. Press Swap. ]. Making an international call Ending a call 1. Press [ 1. Press and hold [ ] key for the international prefix until the ‘+’ character appears. ].
Answering a second call** Multi-party calls** 1. Press [ ]. The first call is automatically put on hold. You can talk with more than one person or conference call. 2. Press [ ] to end the second call. The call on hold is automatically reconnected. Making a multi-party call 1. Call the first participant. 2. Call the second participant. The first call is automatically put on hold. Options during a call 3. Press Options > Join.
Searching a number in address book during a call 1. Press [ ] or press Options > Contact Search. 2. Select a number > [ ]. Call setting Answering with any key press 1. [BR] Press Menu > Settings > Answer Type. Searching for a name or group in address book [ADV] Press Menu > Settings > Call > Answer Type. Enter the first letters of the name for Name Search. The entries are 2. Select Any Key. displayed starting with the first entry matching your input.
Deleting call logs 1. Press Menu > Recent Calls > Delete Call Logs. Speed dialing 2. Select All Calls > Yes. You can dial quickly using speed dialing. Up to 8 phone numbers can be NOTE: If no logs exist, the message “List Empty” appears. programmed using numbers 2 to 9. Viewing call time [ ] : Voice mail [ ] : Prefix for international call 1. Press Menu > Recent Calls > Call Time. 2. Press [ / ] to view Last Call, Received Calls, Dialed Calls, and Total Calls. Setting speed dial 1.
2. Select a person to call. Using address book 3. Press [ ] in green color. You can save names, phone numbers, and information on the SIM or phone. Forwarding contact details Entries can depend on the capacity of the SIM card. 1. Press Menu > Address Book > Contact List. Adding a contact 2. Select a contact > Options > Forward Contact Info. 1. Press Menu > Address Book > New Contact. 3. You can send the information Send as Multimedia Message or Send via Bluetooth. 2. Select SIM Card or Phone. 3.
this service. Using your headset 1. Press Menu > Settings > Security. You can send or receive a call using your headset. 2. Press Fixed Dialing > Fixed Dial List. When you connect your headset to the jack the button on the headset works NOTE: PIN2 must be correctly entered within 3 attempts. If you input as follows. incorrect code three times in a row the PIN2 code will be blocked.
3.
Key characters by language Entering text Each of the following keys will scroll through these sequential options listed by language. You can enter text with multi-tap, predictive, numeric or symbol. key 1 Useful keys [ ] Display and undisplay symbols [ ] Adding space [ ] Press to change capital mode. Press to change ab Ab AB and press and hold to change from multi to predictive to Number to Symbol Multi-tap (all small 2 3 4 5 6 7 8 9 English .
Alphabet input mode Press the key labeled with the target letter once for the first letter; press it Messaging twice for the second letter, and so on. You can send, receive and save the text message and multimedia message. 1. Press and hold [ 2. Press [ press [ ] to [ ] to change the mode as multi-tap. ] to input text repeatedly. To write the letter “C”, ] 3 times. To write number 2 press [ ] 4 times. Managing memory When the message box is full the messages full icon will appear.
Viewing memory space information 4. Press Options > Save. 1. Press Menu > Messaging > Memory Info. Saving the object in the received multimedia message 2. Press [ / ] to view SIM and Phone memory. 1. Press Menu > Messaging > Inbox. 2. Open the multimedia message. Receiving messages 3. Press Options > Save Objects. 4. Select an object > Save. Viewing a new message 5. Edit the filename > Options > Save. 1. Press View or press OK. It will be saved in one of the categories in the My Stuff folder.
7. To view sent message press Menu > Messaging > Sent. 3. Write a message. NOTE: You can send up to 10 person at a time. 4. Press Options > Add Object > Add Image. NOTE: All successfully send messages will save in Sent. 5. Select Take a Photo > focus on the object > OK. 6. Press Insert. Finding all sent messages 7. Press Options > Send to. 1. Press Menu > Messaging > Sent. For details on taking a picture, see page 33. Creating a multimedia message Adding recorded voice memo to the message 1.
7. Press Options > Send to. For details on recording video, see page 34. For details on recording voice memo, see page 40. Adding other file to the message Adding saved video to the message 1. Press Menu > Messaging > Write New. 1. Press Menu > Messaging > Write New. 2. Select Multimedia Message. 2. Select Multimedia Message. 3. Write a message. 3. Write a message. 4. Press Options > Add Object. 4. Press Options > Add Object > Add Image. 5. Select Add Other files. 5.
Message settings Setting e-mail gateway 1. Press Menu > Messaging > Settings. Setting default editing mode 2. Press Text Massage > E-mail Gateway. 1. Press Menu > Messaging > Settings. 3. Enter new gateway for receiving e-mail. 2. [BR] Press Default Edit Mode. 4. Press Select. [ADV] Press Common Settings > Default Edit Mode. 3. Select Alphabet or Predictive. Setting default save place 1. Press Menu > Messaging > Settings. Setting to save sent message 2. Press Text Massage > Save to. 1.
[ADV] Press Menu > Email & IM > IM. Setting voice message 2. Select the IM application > Select. Setting receiving voice message 3. Enter logon and password > Sign On. 1. Press Menu > Messaging > Settings. 2. Press Voice Mail. Viewing the conversation log 3. Enter the number of the voice mail center > OK. You can view the log of your conversations in the Instant Messenger Saved NOTE: This number may be pre-configured by the service provider upon History. activation.
4.
In options menu for camera Camera Icons Name Description You can take pictures and record movies using the built-in camera. The Take a Picture photos and video clips can be saved and sent via multimedia message. View Photos Take a Video Image Size Size 640x480( Quality White balance Self Timer Multi-shot Remain 320x240( ), ) Image Quality Low( Duration Recording Effects Nomal, Sepia, Monochrome, Nagative, Recording Type White Balance 1.
In options menu for video camera Icons Name Increasing or decreasing the brightness Description 1. Press [ Take a Video / ]. It ranges from -3 to +3. View Videos Taking a picture Take a Photo Video Size 128x96( Image Low( ), 176x144( ), High( 1. [BR] Press [ ) ] in standby mode or press Menu > Tools. [ADV]Press [ ) ] in standby mode or press Menu > My Stuff > Tools. 2. Press Camera > Take a Photo. Quality Unlimited( ), For Msg( ) Record Type 3.
Viewing the taken picture 3. Press OK to stop. 1. [BR] Press Q in standby mode or press Menu > Camera > Take a Video. 4. Press Play to play the video clip. [ADV] Press Q in standby mode or press Menu > My Stuff > Camera > 5. Press Back to go back to preview mode. Take a Video. 6. Press OK to save. 2. Press Options > View Photos. Changing to camera mode 3. Select the picture > OK. 1.
After saving recorded video clips Setting as wallpaper in the display To Press 1. Press [ ] in standby mode or press Menu > My Stuff > Photo Album. Send a multimedia message Options > Send as Multimedia 2. Select a picture > Options > Set as > Wallpaper. message View recorded video clip Options > View Videos Uploading pictures on the web [ADV] Delete Options > Delete 1. Press [ Send using Bluetooth Options > Send via Bluetooth 2. Select a picture > Options > Send to HP's Snapfish.
Sending video clip using multimedia message Video album 1. Press [ You can view, send, save and delete videos. ] in standby mode or press Menu > My Stuff > Video Album. 2. Select a video. 3. Press Options > Send as Multimedia Message. Playing the saved video clips 1. Press [ For details on creating a multimedia message, see page 27. ] in standby mode or press Menu > My Stuff > Video Album. Select a video clip > OK or press Options > Play.
Playing games You can download games to play with. It is easy to download and you can preview them beforehand. You will only be able to view games that are available on your mobile. Previewing games 1. [BR] Press Options > Games & Apps. [ADV] Press Menu > Games & Apps. 2. Select a game > OK. 3. Play the demo and press BUY to download the complete game.
5.
Creating a new event and edit Calendar 1. Select a day > Options > New Event. Calendar helps you manage your schedule including your time for calls or 2. Input the events > Save. special days. You can set a reminder on any given date with this function. NOTE: You can create up to 50 scheduled events. NOTE: You can create events for dates from 01/01/2000 to 12/31/2049. Viewing calendar 1. [BR] Press C in standby mode or press Menu > Tools > Calendar.
Editing existing alarms 3. Press OK to restart. 1. [BR] Press R to access alarm or press Menu > Tools > Alarm. 4. To record lap time, press Lap. [ADV] Press Menu > My Stuff > Tools > Alarm. 5. Press Reset to clear. 2. Select an alarm > Options > Select. 3. Edit the alarm settings. 4. To delete an alarm > Options > Delete. Notepad and voice memo NOTE: You cannot delete Simple Alarm. Using notepad 1. [BR] Press Menu > Tools > Notepad. Calculator, converter and stopwatch Using the calculator 1.
Listening the recorded sound Updating information 1. [BR] Press Menu > Tools > Voice Memo. 1. Press Menu > Address Book > My Business Card. [ADV] Press Menu > My Stuff > Tools > Voice Memo. 2. Select a sound > Options > Select. 2. Press Options > Edit. 3. Update information. 4. Press Options > Save. Using sound controls To Press Pause OK Phone status Stop You can view status of your phone for My Phone Number, Signal Strength, Rewind Battery Remaining, Sounds & Alerts, Alarm, and New Messages.
6.
Bluetooth Setting device for outgoing call 1. [BR] Press Options in standby mode > Bluetooth > Outgoing Call Bluetooth technology enables free wireless connections between electronic Device. devices within a maximum range of 33 feet (10 meters). Bluetooth [ADV] Press Menu > Settings > Connectivity > Bluetooth > Outgoing connection can be used to send images, text, business cards, calendar Call Device. notes, or to connect to computers using Bluetooth technology. 2.
Naming the phone Entering address 1. [BR] Press Options in standby mode > Bluetooth > Name. 1. Press Menu > MEdia Net > Go to URL. [ADV] Press Menu > Settings > Connectivity > Bluetooth > Name. 2. Enter the web address > OK. 2. Enter the name > Options > Save. NOTE: This is what others will see in their device’s display for your phone when Setting profile searching for your device. 1. Press Menu > MEdia Net > Profiles. 2. Select Options. Using the browser Accessing browser Viewing certificates 1.
Editing profile 1. Press Menu > MEdia Net > Profiles. 2. Select other profile > Options > Edit. Adding new profile 1. Press Menu > MEdia Net > Profiles. 2. Select Empty > Add. 3. Enter the profile name > Options > Save. Deleting profile 1. Press Menu > MEdia Net > Profiles. 2. Select a profile > Options > Delete.
7.
Language Decorating the display Setting up Setting the display 1. Press Menu > Settings > Phone > Language. 1. [EZ] Press Menu > Settings. [ADV] Press Menu > Settings > Display > Main Screen. Time and date 2. Press Wallpaper > Graphic or Photo Album. 3. Select the file > Options > Set as. Setting up 1. Press Menu > Settings > Phone > Time & Date. Setting the font 2. Set each option > Save. 1. Press Menu > Settings > Display > Font. Ringtones Entering greeting message 1.
Locks Reset Locking the phone Resetting the phone 1. Press Menu > Settings > Security > Phone Lock. 1. Press Menu > Settings > Reset > Master Reset. 2. Select On. NOTE: It will return configuration settings to default. The default password is NOTE: The default password is ‘1234’. To change the password press Menu ‘1234’. > Settings > Security > Change Password. Clearing the phone Locking the PIN 1. Press Menu > Settings > Reset > Master Clear.
TTY The teletypewriter (TTY) is a telecommunications device that allows people who are deaf or hard of hearing, or who have speech or language disabilities, to communicate via a telephone. Setting teletypewriter 1. Press Menu > Settings > TTY. 2. Select Disabled, TTY Full, TTY Talk or TTY Hear. y Disabled: TTY mode is disabled. y TTY Full: User who cannot talk and hear send and receive a text message. y TTY Talk: User who can talk but cannot receive a text message and send voice message.
8.
Alert message can still receive calls even if your mobile phone becomes locked after entering the incorrect PIN1 on three consecutive attempts. If you experience any problem while using your mobile phone, please refer to the following checklist. If the problem still persists, contact your dealer or When the “No Service” or “Network Search” appears: nearest carrier.
When you are unable to send a message: Either you are not registered to receive an SMS service, or you may be in an Safety information area where your network service provider cannot provide such a service. The following list shows how to maintain your mobile phone, together with precautions to take. When you are unable to make a call: y Keep your mobile phone and its accessories out of the reach of children. Your phone may be set to “fixed dial.” Cancel the “fixed dial” function.
Safety precautions Switch off in hospitals and near medical equipment Always switch your phone off in hospitals, and obey the regulations or rules Using a mobile phone while driving may be prohibited. of the hospital. Please check local laws and regulations with regard to the prohibition of Switch your phone off when using medical equipment for private purposes, if mobile phone use while driving, and comply with them. possible.
y Do not modify or remanufacture, attempt to insert foreign objects into the y Battery life inevitably shortens over time. battery, immerse or expose to water or other liquids, expose to fire, y Use an authorized battery and charger only. explosion or other hazard. y Since overcharging may shorten battery life, remove the phone from its y Do not put your battery into contact with conductive objects. charger once it is fully charged.
M-Ratings: Phones rated M3 or M4 meet FCC requirements and are likely to are consistent with safety standards previously set by both U.S. and generate less interference to hearing devices than phones that are not international standards bodies: American National Standard Institute (ANSI), labeled. M4 is the better/higher of the two ratings. National Council of Radiation Protection and Measurements(NCRP), and International Commission on Non-Ionizing Radiation Protection (ICNRP).
Statement according to FCC part 15.21 standard incorporates a substantial margin of safety to give additional Modifications not expressly approved by this company could void the user's protection for the public and to account for any variations in. authority to operate the equipment. **This device contains 1800 MHz GSM functions that are not operational in RF exposure FCC U.S.
12 Month Limited Warranty Pantech Wireless, Inc. (the Company) warrants to the original retail framing and non-operative parts; (f) Product damaged from external causes such as fire, flooding, dirt, sand, purchaser of this Pantech handheld portable cellular telephone, that should weather conditions, battery leakage, blown fuse, theft or improper usage this product or any part thereof during normal consumer usage and of any electrical source.
OF THIS OR ANY OTHER WARRANTY, EXPRESS OR IMPLIED, WHATSOEVER. THE COMPANY SHALL NOT BE LIABLE FOR THE DELAY IN RENDERING SERVICE UNDER THIS WARRANTY OR LOSS OF USE DURING THE TIME THE PRODUCT IS BEING REPAIRED OR REPLACED. No person or representative is authorized to assume for the Company any liability other than expressed herein in connection with the sale of this product.