
Installation Instructions


10.05.10
MAN1001012
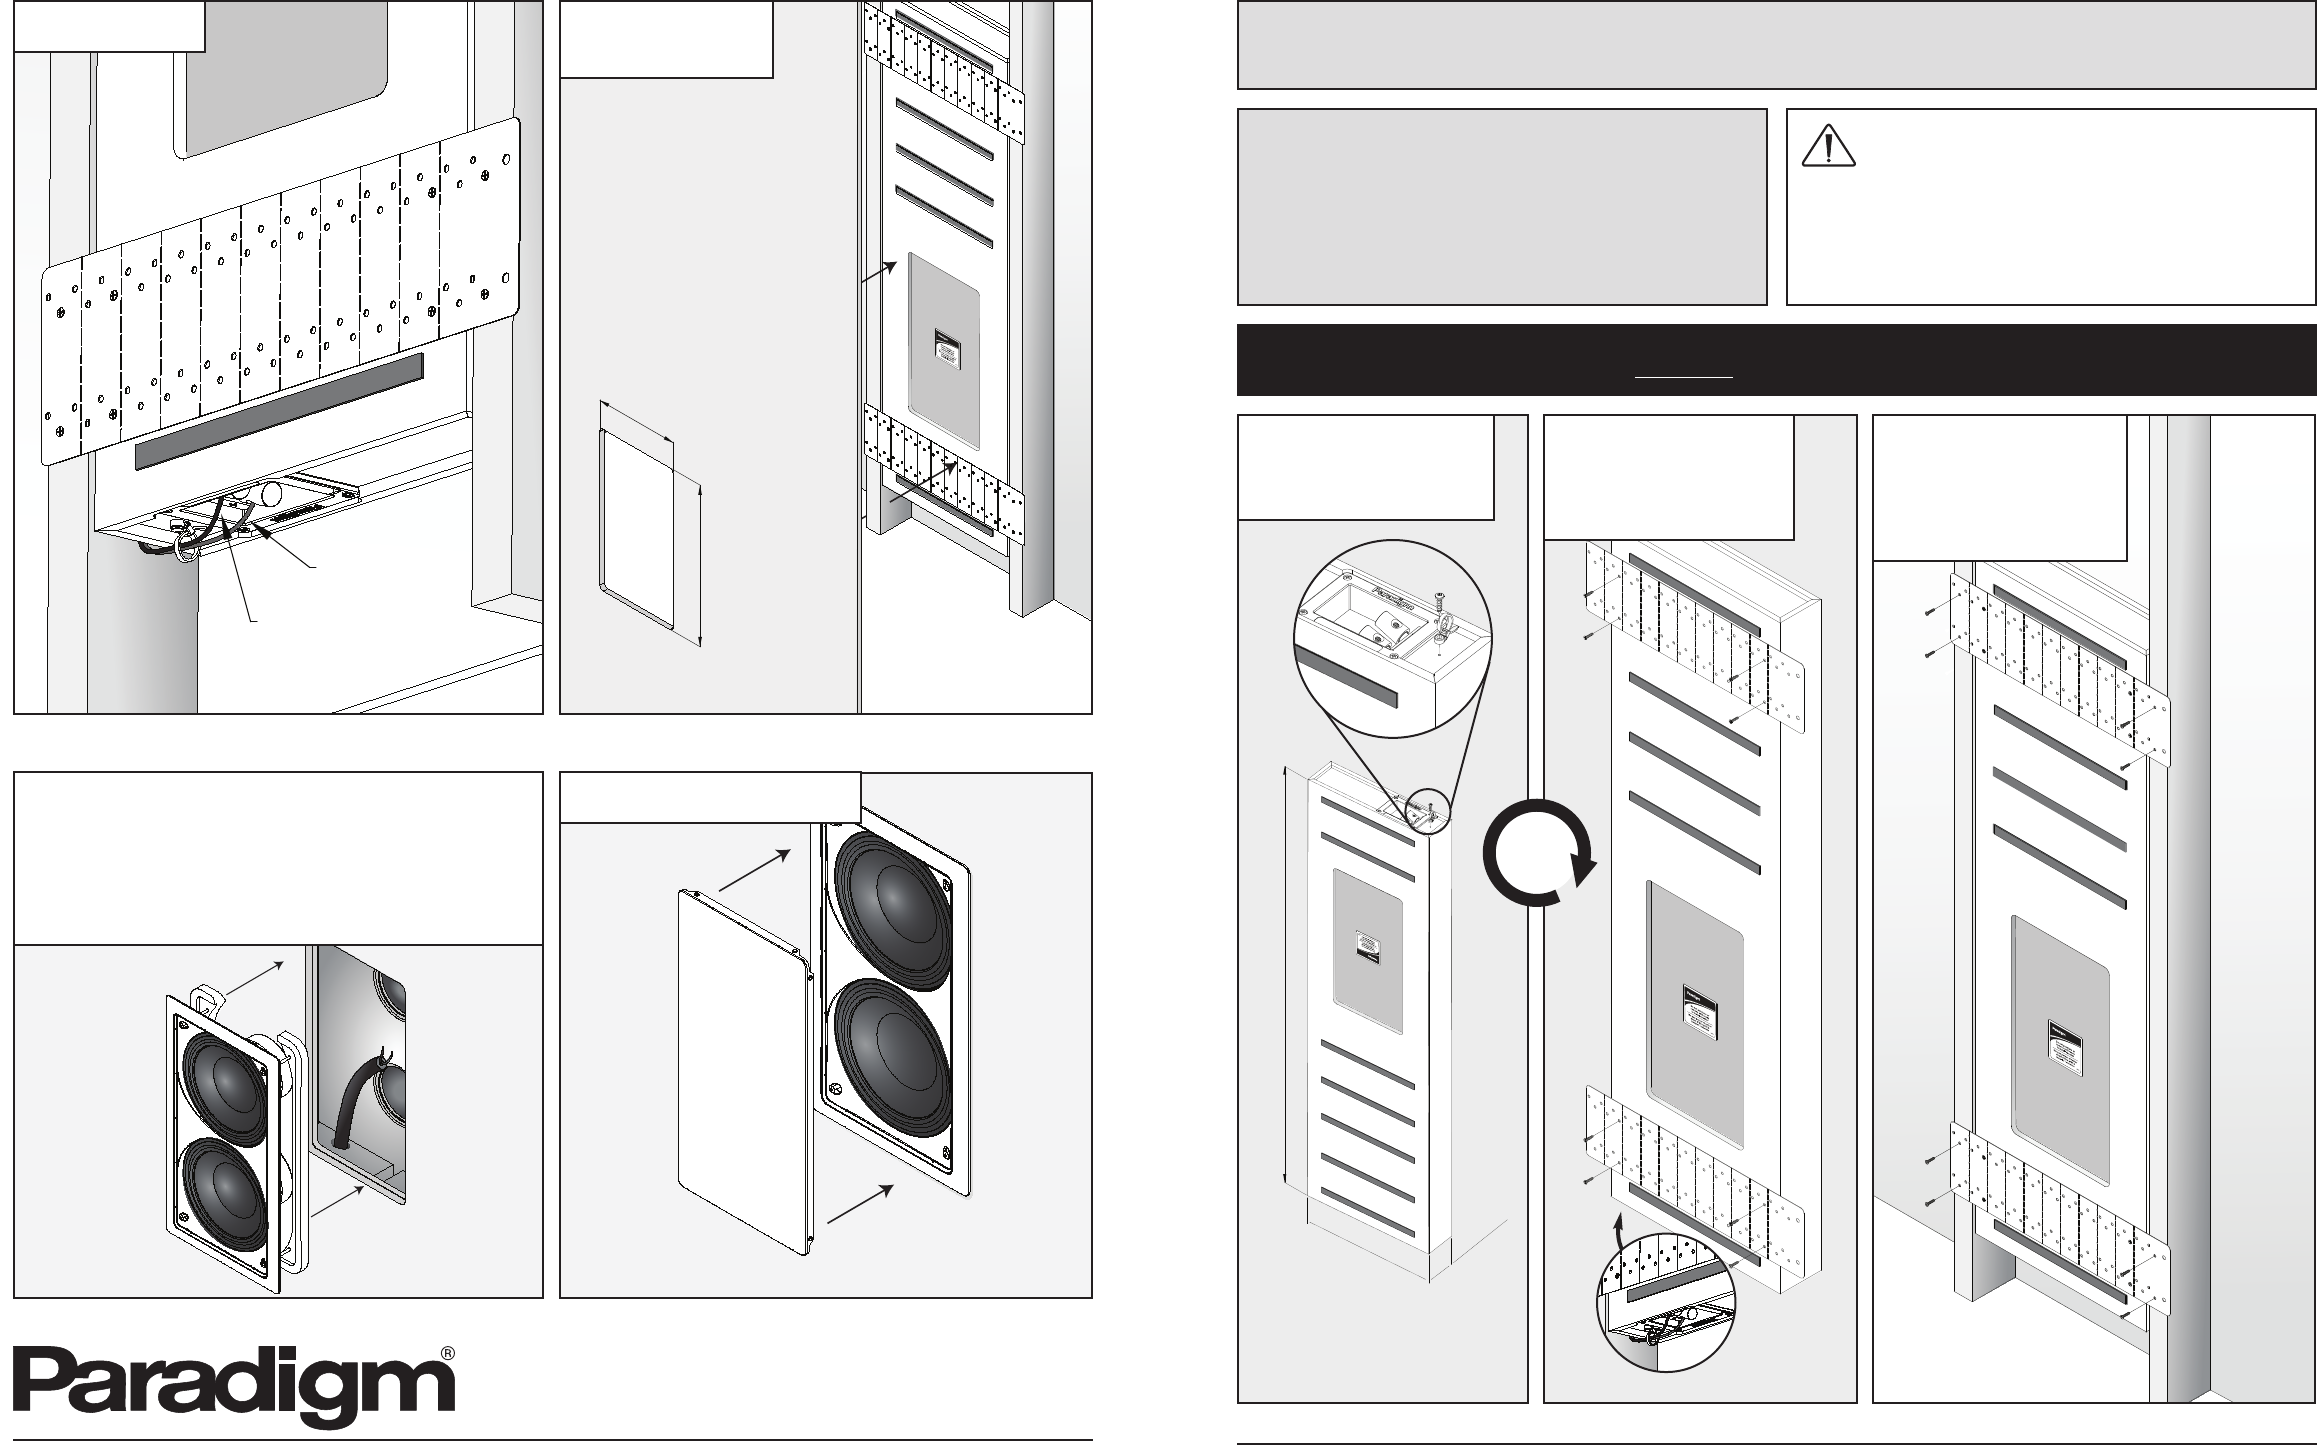
INSTALLATION DE L’ENCEINTE
a) En tenant la bordure avant de l’enceinte avec les pouces et index, pousser
les 4 vis de montage les unes vers les autres avec les autres doigts, de
manière à ce que les supports de fixation s’insèrent dans le trou par un
mouvement vers le haut et l’intérieur. Relâcher les vis et appuyer doucement
sur l’enceinte pour l’insérer dans le boîtier arrière.
Faire passer le fil dans la
boucle pour filage puis le long du plafond jusqu’à
l’emplacement de l’amplificateur avant d’apposer la cloison sèche.
REMARQUE
: Retirer la grille avant de peindre.
INSTALLATION DE
LA CLOISON SÈCHE
INSTALLATION DE LA GRILLE
ÉTAPE 6 ÉTAPE 7
ÉTAPE 5
INSTALLATION FOR BX-82SQ BACKBOX AND SuBwOOFER
STEP 3
PARADIGM DOES NOT SUPPLY SCREWS FOR MOUNTING BACKBOX
AND SUBWOOFER TO WALL. CHOOSE SCREWS APPROPRIATE FOR
WALL COMPOSITION AND WEIGHT OF BACKBOX WITH SUBWOOFER.
BX-82SQ BACKBOX: 17.6 lb / 8 kg
PCS-82SQ SUBWOOFER: 8.8 lb / 4 kg
TOTAL WEIGHT: 26.4 lb / 12 kg
IF YOU ARE NOT COMFORTABLE PERFORMING THE FOLLOWING PROCEDURE,
CONTACT A PROFESSIONAL INSTALLER.
IMPORTANT NOTE: The required amount of damping material is included and correctly positioned in backbox. DO NOT remove, compact or add additional
damping material. DO NOT add damping material to wall directly behind
backbox.
STEP 2STEP 1
PARTS INCLUDED:
• 1 – Backbox
• 2 – Pre-Construction Brackets • 1 – Wire Loop with Screw
NOTE: DO NOT PUNCTURE OR REMOVE PROTECTIVE PLASTIC OVER
CUTOUT UNTIL READY TO INSTALL SUBWOOFER.
REQUIRED, NOT INCLUDED:
• 16 – #8 Wood Screws
(8 to attach brackets to box; 8 to attach box to wall)
To prevent vibrations and resonances
from coloring output, center the box
between joists—backbox must not
touch joists.
INSTALLING BACKBOX
14 in /35.6 cm
3-3/8 in
8.6 cm
48 in / 121.9 cm
CAUTION: Mounting brackets are
made of galvanized steel. Edges
may be sharp.
INSTALLING BRACKETS
8-1/8 po / 20,6 cm
15-5/8 po / 39,6 cm
BACKBOX DIMENSIONS
NOTE: Wire loop must be attached
with screw provided.
ROUGE (+)
NOIR (–)
RACCORDEMENT
ÉTAPE 4
180˚
IMPORTANT! Backbox has been inverted.
DO NOT install in this position, see proper
position in Step 2.
Terminal cup
sits here.