
User`s guide


Setting Up a Virtual Machine 88
Typical Installation Mode
1 Start Parallels Desktop and launch New Virtual Machine Assistant by choosing New Virtual
Machine from the File menu.
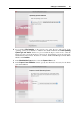
2 In the Operating System Detection window, click Skip Detection.
3 In the Select Operating System Type and Version window, select the guest OS you plan to
install inside your virtual machine and click Continue.
4 In the Virtual Machine Type window, select Typical and click Continue.
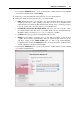
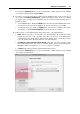
5 In the Name and Location window, define the main parameters for your virtual machine:
Name. Indicate the name to be assigned to the virtual machine. By default, the virtual
machine gets the name of the operating system that you selected to be installed in this
virtual machine. If a virtual machine with this name already exists, you will be prompted
to specify another name. The name must not exceed 50 characters.
Let other Mac users access this virtual machine. Select this option if you want to share
this virtual machine with other users of your Mac. In this case, the virtual machine file
(PVM file) will be saved in the /Users/Shared folder on your Mac.
Location. In this field, specify the virtual machine files location.
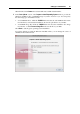
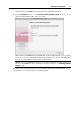
Sharing (for Windows virtual machines only). Use this field to configure access to the
disks and folders on the physical computer from inside the virtual machine. After the
virtual machine creation, you can edit these settings in the Shared Folders pane (p. 180)
of the Virtual Machine Configuration dialog.
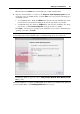
If you click the Advanced button, you can set the number of CPUs and the amount of RAM
of your future virtual machine.