YOU AND YOUR NEW COOKER — A GREAT TEAM You'd be amazed how many good cooks use gas ~ research has shown that if's the preferred fuel for cooking by both professionals and home cooks. i you've never cooked with gas before, you'h be pleasantly surprised by the speed and economy and how easy iris 1o use.
IMPORTANT NOTES IT IS MOST IMPORTANT THAT THIS INSTRUCTION BOOK SHOULD BE RETAINED WITH THE APPLIANCE FOR FUTURE REFERENCE, SHOULD THE APPLIANCE BE SOLD OR TRANSFERRED TO ANOTHER OWNER, 0Of SHOULD YOU MOVE HOUSE AND LEAVE THE APPLIANCE, ALWAYS ENSURE THAT THE BOOK i8S SUPPLIED WITH THE APPEARANCE IN ORDER THAT THE NEW OWNER CAN BE ACQUAINTED WITH THE FUNCTIONING OF THE APPLIANCE AND THE RELEVANT WARNINGS. THESE WARNINGS ARE PROVIDED IN THE INTEREST OF SAFETY.
Special oven linings must only be cleaned s recommended in this booklet, When operating the grill or oven, make sure that the gas is fully ignited. The storage ama above the appliance will become warm when the appliance is in use, do not store perishable items. It your appliance fails to operate comely, according 1o the instructions. given in this book, arrange for it to be serviced by a competent engineer.
GENERAL INFORMATION This appliance must be fitted into a cabinet with a minimum aperture height of 585mm and & minimum aperture width of 560mM. Cabinets must be leveled and securely fixed 10 the wall. The appliance may be located in a kitchen, a kitchenette or a bed siting room but notion a room containing & bath or shower.
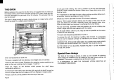
CONTROLS " OFFBEAT 65 & 1 Automatic oven bean 2 Oven conking neon 3 Oven light neon 4 Oven light switch & Minute minder symbol Page d 6 Start time symbol 7 Stop time symbol 8 Automatic timer knob 9 Grill control 10 Oven control
IGNITION The grill and oven boomers light automatically, 1T 1S NOT POSSIBLE TO USE THE GRILL AND OVEN AT THE SAME TIME. If the oven is alight, the door opened and grill control! accidentally turned on, the oven burner will go out and the grill burner will fight. o light the girl, open the door, push in and tum the grill control fully ants clockwise t the position marked § . The girl can only be used with the door open.
THE OVEN Before cooking in the oven for the first time, we suggest that you wipe out the interior with a cloth which has been wrung out in warm water and dry the oven thoroughly on gas mark 5 for 30 inmates. This ensures that any dust is removed. The oven is large sough to cook a family dinner or 3 large turkey which should be placed in a suitably sized roasting in. Oven roof positioned on shelf ane. “The ova is supplied with two shelves, one straight and one cranked, There are five oven runners.
Minimize Spillage @ Donor overfill dishes. ©} Stand pies, e1c. on & baking tray. ) Places dishes centrally on the shelf. i Donor place found 50 high in the oven that it could stick to the rapt 2. Minimize Splashing ts Use a roasting tin which is just large enough for the meat or meat plus potatoes. i) Dry off excess water from vegetables that are to be roasted fat Use a covered roaster ar foil which may be removed for the last half hour or 5o 1o brown and crisp the meat. 3.
TIMER CONTROLS Autocratic oven neon Cave cooking rein Oven light neon Oven fight switch Minute minder symbol Start time symbol Stop time symbol Autocratic timer knob Grill contort Page 8 CLOCK The clock will aerate even i the automatic control is ot being used, 1f the appliance is switched off at the socket outlet, the clock will snot. It will start as soon a3 the appliance is switched on again.
, | Setting the Timer Control Follow these simple steps: A TO SET THE TIMER TO SWITCH ON’ AN “OFF AUTOMATICALLY. OPERATION NOTES 1 Male sure the electricity supply is switched ON. 2 Place food in oven and lose the vane door. 3 Check that the clock shows the correct Push in and terr inner knob in either direction uni the clock time of day. Adjust if necessary. shows the correct time. 4 Set the stop time. Turn the outer knob clockwise to the time you want the food to stop cooking 5 Set the start time.
TO RETURN THE APPLIANCE TO MANUAL OPERATION Follow the steps below ta ensure that after use the oven is returned 1o manual, otherwise it will not operate. At the end of & timed cooking operation the auto neon will comm on. Turn the outer knob clockwise 0 that the orange and white sections are not visible. Turn the oven control OFF, No indicator neon should operate.
SLOW COOKING ‘SLOWEST’ OVEN CONTROL ‘Slowest' is indicated by an slowly 8t low temperatures. There are two methods of using the oven for ‘Stow set” cooking. A, Tun the oven control 1o gas mark 8, press the ignition button and the over will light then tur the oven contra to gas mark & and cook for 30 minutes.
Joints of Meat and Poultry Do ot ook meat joints over 2.7kg {Bib Do not cook poultry over Zkg (4f Boil. Cook using method 'A. Cook towards the Top of the oven i2. no lower than sheaf 3, Never stuff before caking Conk for a minimum of 6 hours. Joints of Park must only be cooked if vou can ensure, by using & meat thermometer, that is has reached an internal temperature of at least BLOC. 8. For good air circulation always stand joints on a rack in the roasting tin or casserole 9.
COOKING CHARTS The following chants give guidance for when cooking a numbs of foods. Mo waver, for convenience (10 accommodate an extra deep dish for instance or % brown and cook found to your diking you may taker the shelf position or the gas mark, Always leave at least one runner position between shelves to allow the heat to circulate proper. MEAT ROASTING Shaft Ford Gas Mark position Cooking Time and Remarks ROAST MEAT Beef 5 4 20 mind. per % kg {lb), 20 mind. over Mutton and Lamb 5 4 25 mind.
OVEN COOKING Continued Shell rood Gas Mark Position Caking Time and Remarks PASTRY Short Crust: Fruit Pig in dish 6 3 According 1o recline. Plate Tarts — Single 6 3 35-minsters. T help pastry brown on 2 together in the vane 5 2erankedand § BO-Jasmines. underside, cook on a dul flat Interchange tinned plate, or providing after 35 mind) plates are flat and have no im Jam Tart large 6 3 2530 mind. underneath, place o0 baking Jam Tar tits 8 3 15-minsters.
TO CLEAN THE OVEN DOOR TO REPLACE THE GLASS PANEL To make cleaning eases, the inner glass panel on the oven door can b 1 Re-position the glass panel and enamel frame removed. To do this follow these instructions 2 Replace the two fixing screws in the halos provided and tighter, CLEANING THE GRILL Care rust be taken when cleaning around the grill 1o avoid catching the grill fret and burner thus causing accidental damage.