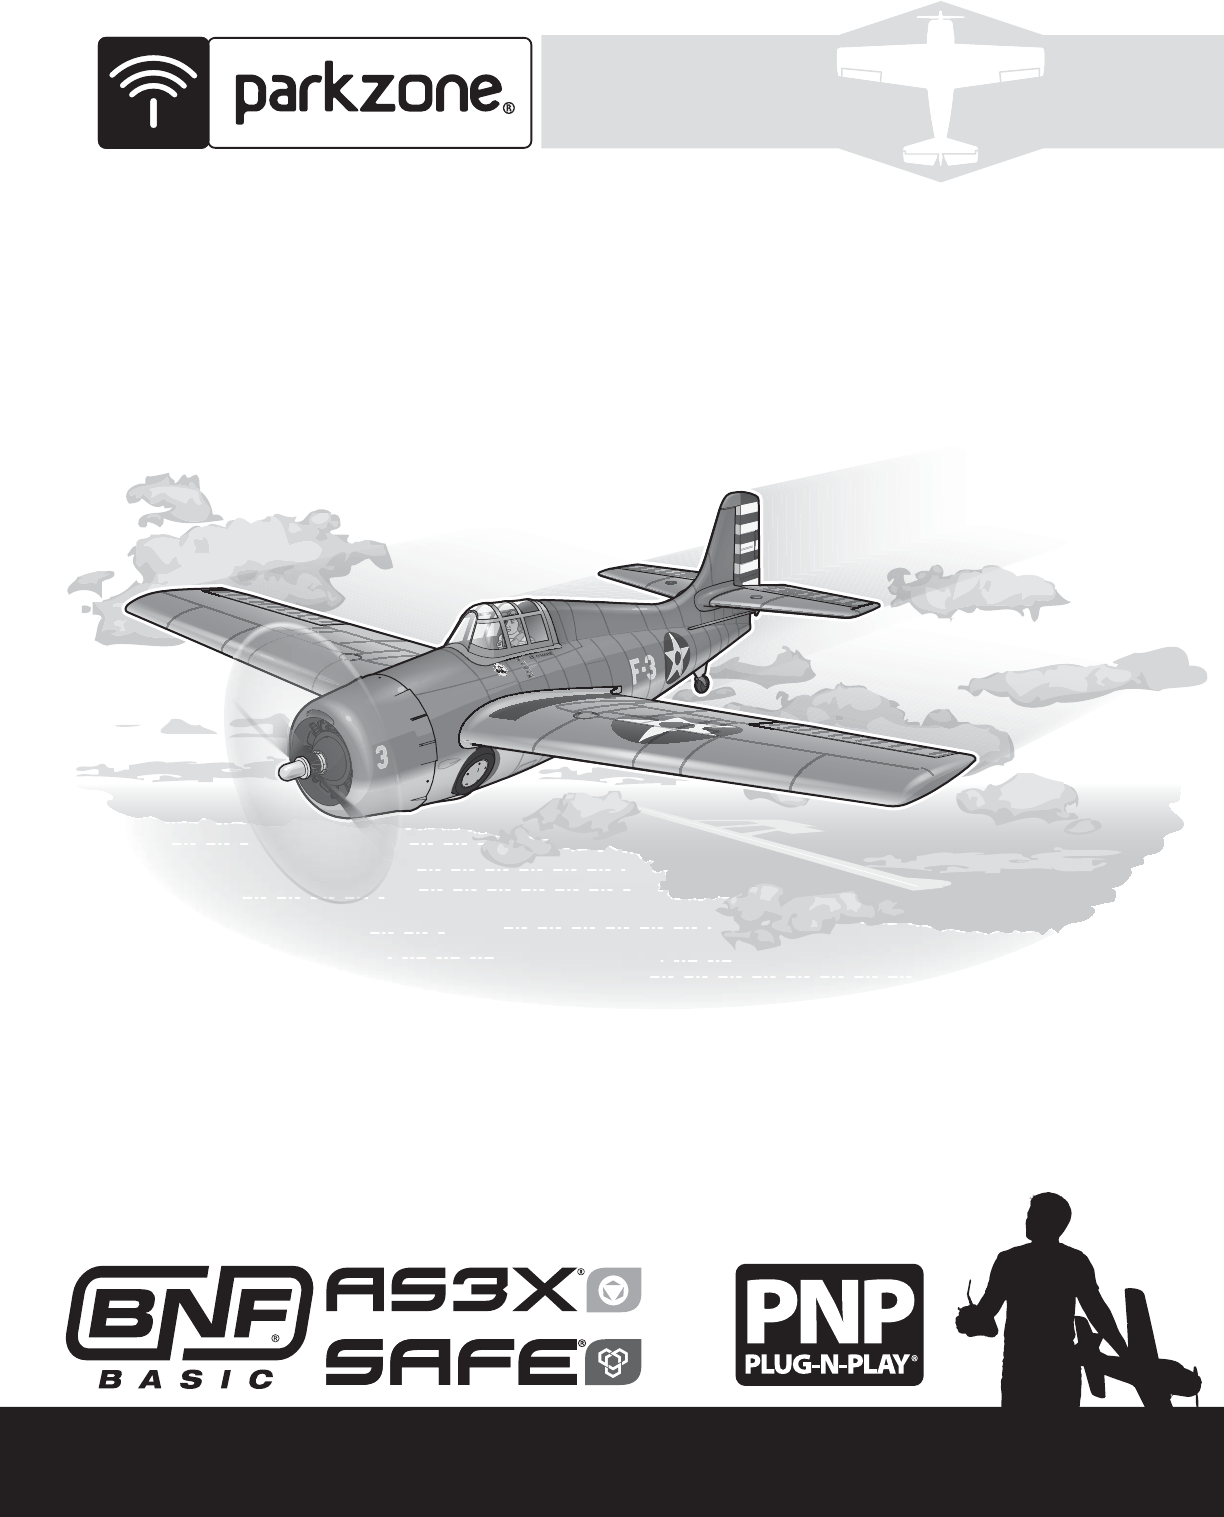
F4F Wildcat Instruction Manual / Bedienungsanleitung Manuel d’utilisation / Manuale di Istruzioni PKZ1950 PKZ1975
EN NOTICE All instructions, warranties and other collateral documents are subject to change at the sole discretion of Horizon Hobby, LLC. For up-to-date product literature, visit www.horizonhobby.com and click on the support tab for this product.
EN Table of Contents Battery Charging............................................................................................. 4 Assembly ........................................................................................................ 4 Control Horn and Servo Settings ..................................................................... 5 Receiver and Battery Selection and Installation ...............................................
EN Battery Charging Refer to the charging warnings. It is recommended to charge the battery while you inspect the aircraft. The flight battery will be required to confirm proper aircraft operation in future steps. Battery Charging Process NOTICE: Charge only batteries that are cool to the touch and are not damaged. Look at the battery to make sure it is not damaged e.g., swollen, bent, broken or punctured. 1. Attach the input cord of the charger to the appropriate power supply (12V accessory outlet). 2.
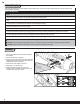
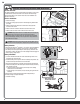
EN Installing the Tail 1. Insert the horizontal stabilizer tube (A) into the hole in the rear of the fuselage. 2. Slide the right horizontal tail onto the tube on the right side of the fuselage until it seats into the slot in the fuselage. 2 1 A 3. Repeat Steps 1 and 2 for the left horizontal tail while connecting the elevator joiner to the left and right horizontal tails. 4. Attach the horizontal tail sections to the top and bottom of the fuselage with (4) pieces of tape (B).
EN Receiver and Battery Selection and Installation Receiver Selection 1 The Spektrum AR636 receiver is recommended for ths airplane. If you choose to install another receiver, ensure that it is at least a 6-channel full range (sport) receiver. Refer to your receiver manual for correct installation and operation instructions. Receiver Installation 1. Remove the canopy. 2. Install your full range (sport) receiver in the fuselage using double-sided servo tape. 3.
EN Transmitter and Receiver Binding / Switching ON and OFF SAFE® Select This product requires an approved Spektrum™ DSM2®/DSMX® compatible transmitter. Visit www.bindnfly.com for a complete list of approved transmitters. The aircraft has an optional SAFE Select feature, which can be switched ON or OFF easily by binding in a specific manner as described below.
EN SAFE® Select Switch Designation SAFE® Select technology can be easily assigned to any open switch (2 or 3 position) on your transmitter. With this new feature, you have the flexibility to enable or disable the technology while in flight. Mode 1 and 2 Transmitters IMPORTANT: Before assigning your desired switch, ensure that the travel for that channel is set at 100% in both directions. Assigning a switch 1. Bind the aircraft correctly to activate SAFE Select.
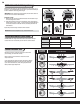
EN Center of Gravity (CG) An aircraft with correct CG has its weight balanced on the center of the aircraft for safe, stable flight. 17/8 inches back from the leading edge of the wing at the root, +/– 1/8 inch Balance the aircraft on your fingertips near the fuselage under the wings. Adjust the battery position as needed. - If the nose goes down, move the flight battery back until the aircraft balances. - If the nose goes up, move the flight battery forward until the aircraft balances.
EN Flying Elevator Transmitter command Aircraft Reaction Up Elevator Command Down Elevator Command Aileron Stick Right Stick Left Rudder Stick Right Stick Left Low Voltage Cutoff (LVC) LVC is a mechanism built into your ESC to protect the battery from overdischarge. When the battery charge is too low, LVC limits power supplied to the motor. The aircraft will begin to slow and you will hear the motor pulse.
EN Post Flight NOTICE: When you are finished flying, never leave the aircraft in direct sunlight or in a hot, enclosed area such as a car. Doing so can damage the foam. Post Flight Checklist 1. 2. 3. 4. 5. 6. Disconnect flight battery from the aircraft. (Required for Safety) Remove flight battery from the aircraft. Power off transmitter. Recharge flight battery. Repair or replace all damaged parts. Store flight battery apart from the aircraft and monitor the battery charge. 7.
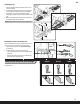
EN Service of Power Components CAUTION: Always disconnect the flight battery from the model before removing the propeller. E Disassembly 1. 2. 3. 4. 5. 6. Loosen the spinner nut (A) on the collet shaft and remove. Remove the propeller (B) from the collet shaft. Remove the collet (D) from the motor shaft. Remove the (4) screws (C) from the cowl. Remove (4) screws (E) from the motor mount (F) and the fuselage. Assemble in reverse order.
EN Troubleshooting Guide Problem Possible Cause Loose or damaged propeller, shaft or motor Aircraft oscillates Solution Replace parts or correctly align all parts and tighten fasteners as needed Loose receiver Align and secure receiver in fuselage Loose aircraft controls Tighten or otherwise secure parts (servo, arm, linkage, horn and control surface) Worn parts Replace worn parts (especially propeller, spinner or servo) Trim is at extreme and aircraft does not fly straight or level Trim is not a
EN Limited Warranty What this Warranty Covers – Horizon Hobby, LLC, (Horizon) warrants to the original purchaser that the product purchased (the “Product”) will be free from defects in materials and workmanship at the date of purchase.
EN FCC Information FCC ID: BRWDASRX15 PKZ1950: This equipment has been tested and found to comply with the limits for a Class B digital device, pursuant to part 15 of the FCC Rules. These limits are designed to provide reasonable protection against harmful interference in a residential installation. This equipment generates, uses and can radiate radio frequency energy and, if not installed and used in accordance with the instructions, may cause harmful interference to radio communications.
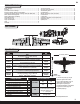
Replacement Parts • Ersatzteile • Pièces de rechange • Pezzi di ricambio Part # | Nummer Description Numéro | Codice PKZ1908 Landing gear set Beschreibung Description Descrizione Fahrwerksatz Ensemble de train d’atterrissage Set carrello d’atterraggio PKZ1913 Complete Canopy w/Pilot Vollständige Kanzelabdeckung m.
© 2017 Horizon Hobby, LLC. ParkZone, E-flite, AS3X, SAFE, the SAFE logo, DSM, DSM2, DSMX, Bind-N-Fly, BNF, the BNF logo, EC3, Prophet, Plug-N-Play and ModelMatch are trademarks or registered trademarks of Horizon Hobby, LLC. The Spektrum trademark is used with permission of Bachmann Industries, Inc. All other trademarks, service marks and logos are property of their respective owners. US 9,056,667. US 8,672,726. www.parkzone.