Instruction Manual 012-08489B *012-08489* Brewster’s Angle Accessory Model No.
Brewster’s Angle Accessory Model No. OS-8170A Table of Contents Equipment..................................................................................................... 3 Introduction ................................................................................................... 5 Theory........................................................................................................... 5 Setup Instructions ...................................................................................
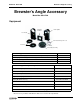
Model No. OS-8170A Brewster’s Angle Accessory Brewster’s Angle Accessory Model No. OS-8170A Equipment Analyzing Polarizer Beam Splitter Lens Holder Semi-circular Acrylic “D” Lens Polarizers Lens Mount Pivot Plate Assembly Included Equipment Model Number 1. Polarizer Assembly (1 lens holder and 2 round polarizers) 003-09784 2. Analyzing Polarizer (1), Lens Mount (1), and Pivot Plate Assembly (1) 003-08332 3. Beam Splitter (1) OS-8171 4.
Brewster’s Angle Accessory Model No.
Model No. OS-8170A Brewster’s Angle Accessory Introduction The Brewster’s Angle Accessory (OS-8170A) is used in optics for studying the polarization of reflected light and for determining Brewster’s angle. The accessory consists of a lens holder with two polarizers, a rotating platform (Pivot Plate Assembly) with a semi-circular “D” lens, an analyzing polarizer, and a beam splitter.
Brewster’s Angle Accessory Model No. OS-8170A where n is the index of refraction of the medium and is the angle of the ray from the normal.
Model No. OS-8170A Brewster’s Angle Accessory 4. Mount a High Sensitivity Light Sensor to an Aperture Bracket and attach the Aperture Bracket/Light Sensor to the Spectrophotometer Arm.) 5. Mount the Rotary Motion Sensor to the upper holes on the hinge of the Spectrophotometer Base. Mount the Spindle on the shaft of the Rotary Motion Sensor so that the bigger diameter of the spindle is against the edge of the Spectrophotometer Degree Plate (see Figure 4). 6.
Brewster’s Angle Accessory Model No. OS-8170A Align the Laser Beam 1. Put a Laser Diode on the end of the bench opposite to the Spectrophotometer Base.. Connect the laser’s power supply to a grounded electrical outlet and plug the power cord into the laser. Turn on the laser (the ON-OFF switch is on the back of the laser). Collimating Slits Laser WARNING: Do not look directly into the beam of the laser light source or reflected light from the laser light source, such as from a mirror.
Model No. OS-8170A Brewster’s Angle Accessory Controlling the Laser Intensity 1. Place the second optics bench at right angles to the first optics bench at the spot where the Beam Splitter is mounted. 2. Mount the second High Sensitivity Light Sensor on an Aperture Bracket, and attach the Aperture Bracket to a Lens Holder. Set the disk on the Aperture Bracket to slit #5. 3. Mount the Light Sensor/Aperture Bracket at the far end of the second optics bench (see Figure 1).
Brewster’s Angle Accessory 8. The square Analyzing Polarizer (see Figure 9) has its transmission axis marked. Position the Analyzing Polarizer with its label on top and with its axis horizontal. Model No.
Model No. OS-8170A Brewster’s Angle Accessory Note: If the Reflected Light Intensity is as high as possible without exceeding 95%, but the Reference Light Intensity is above 95%, try one of the following to reduce the Reference Light Intensity: • Slightly adjust the second optics bench from side-to-side so that only part of the laser beam enters through slit #5 of the Aperture Disk. • Rotate the Aperture Disk in front of the second light sensor so that the laser beam enters slit #4 instead of slit #5.
Brewster’s Angle Accessory 3. Remove the Analyzing Polarizer from the Spectrophotometer Arm. Turn the Lens Mount so that the index mark on the high step is at 85° on the Pivot Plate (measured from the zero mark closest to the Beam Splitter). Model No. OS-8170A Pivot Plate zero mark Lens Mount 85° 4.
Model No. OS-8170A Brewster’s Angle Accessory Digits display is the same (or close to it). Adjust the Spectrophotometer Arm so the Digits display of Reflected Light Intensity is a maximum. 11. Repeat steps 6 through 9. 12. Continue to repeat the procedure, reducing the angle of the Lens Mount by five degrees until you reach 65°. When the reflected light intensity is approaching the minimum, record data (press “Keep”) every one degree.
Brewster’s Angle Accessory Model No. OS-8170A 1. To determine Brewster’s Angle, use the Graph display (“Norm +” versus “Angle”). In the Graph, select a group of data points on both sides of the apparent minimum. 2. Click the “Fit” menu in the toolbar of the Graph and select “Quadratic Fit”. (Note: Double click the Quadratic Fit legend box to open the Curve Fit dialog box. Make sure that “Fit with first selected data point at X = 0” is NOT selected.) Quadratic Fit legend box Questions 1.
Model No. OS-8170A Brewster’s Angle Accessory Teacher’s Guide: Discovering Brewster’s Angle Sample Data The Table display “Green Data Collection” shows sample data of Angle, Reflected Light Intensity, and Reference Light Intensity for a green (532 nanometer) diode laser.
Brewster’s Angle Accessory Model No. OS-8170A The Table display “Data Entry” shows sample data entered into the table and calculated values for “Norm +” and “Norm ||”. The Graph display “Green Laser” shows normalized reflected light intensity for parallel and perpendicular polarized light versus angle.
Model No. OS-8170A Brewster’s Angle Accessory The Curve Fit dialog box for the green laser shows the coefficients of the quadratic formula of the curve fit. Curve Fit dialog box for green laser Questions 1. From the curve fit, how do you determine the minimum of the function? To find the minimum, set dy/dx equal to zero for the quadratic formula . dy ------ = 2Ax + B = 2 0.00127 – 0.142 = 0 dx Solving for x gives 55.9°.
Brewster’s Angle Accessory Model No. OS-8170A 3. Would Brewster’s Angle be larger or smaller for light in air reflecting off water? The Brewster’s Angle would be smaller for light in air reflecting off water. n2 1.33 tan p = ----- = ---------- p = 53 n1 1 4. Would Brewster’s Angle be larger or smaller for light in water reflecting from the “D” Lens (that is, if the “D” Lens were submerged in water)? The Brewster’s Angle would be smaller for light in water reflecting from the “D” Lens. n2 1.
Model No. OS-8170A Brewster’s Angle Accessory Sample Data (Blue Laser) The following Graph display shows polarized light intensity versus angle for blue laser light having a wavelength of 405 nm. The Curve Fit dialog box for the blue laser shows the coefficients of the quadratic formula of the curve fit. To find the minimum, set dy/dx equal to zero for the quadratic formula dy ------ = 2Ax + B = 2 0.00164 – 0.188 = 0 dx Solving for x gives 57.3°.
Brewster’s Angle Accessory Model No. OS-8170A Further Investigation I. Intensity of reflected light (without polarizer) Note: This experiment uses the same setup except the Analyzing Polarizer is removed and you do not need the second optics bench, aperture bracket, and High Sensitivity Light Sensor. 1. Reflect the laser beam off the outside plane side of the “D” lens. 2. Make a graph of Light Intensity versus Angle where Angle is a calculation: Angle = (180-abs(x)/15)/2, where x is the Angular Position.
Model No. OS-8170A Brewster’s Angle Accessory 4. In DataStudio, set up the displays as shown below. 5. Repeat this procedure with the lens turned around. Have the flat side of the “D” lens towards the laser. This will show total internal reflection above angles of about 40 degrees. Sample Data: Light Intensity vs.
Brewster’s Angle Accessory Model No. OS-8170A III. Snell’s Law For the data from the first part of part II, graph Sin (incident angle) vs. Sin (refracted angle). The slope of the line is the refraction index of the acrylic plastic. Sample Data: Incident Angle vs. Refracted Angle In DataStudio, create the following equations: a) refracted angle=Oi-x(deg), where Oi is the incident angle, and x is the arm angle in degrees. b) sin incident = sin(x), where x is the incident angle (degrees).
Model No. OS-8170A Brewster’s Angle Accessory Appendix A: Creating Equations in DataStudio Step 2: Type in and/or build the equation. (Use the Scientific, Statistical, and Special menus, and the trigonometric functions to build the equation.) Click the Accept button. Step 3: Define the dependent variables. Under “Variables,” use the down arrow to select a variable or constant, etc. and click OK. (Example: For “x,” select “Data Measurement.” In the pop-up, select “Angular Position,” and click OK.
Brewster’s Angle Accessory Model No. OS-8170A Appendix B: Laser Safety Information The OS-8525A Laser Diode is a low power, Class 2 laser. When Class 2 lasers are used in accordance with Occupational Health and Safety Administration (OSHA) standards, Class 2 lasers are not harmful. However, when appropriate safety precautions are not taken, Class 2 lasers can cause permanent, irreversible damage to the eyes.
Model No. OS-8170A Brewster’s Angle Accessory If you believe you have a laser injury, report the injury immediately to your instructor/ supervisor, school health department and/or safety officer. If necessary, go to an emergency health facility or contact a medical doctor or opthalmologist.
Brewster’s Angle Accessory Model No. OS-8170A Technical Support For assistance with the OS-8170A Brewster’s Angle Accessory or any other PASCO products, contact PASCO as follows: Address: PASCO scientific 10101 Foothills Blvd. Roseville, CA 95747-7100 Phone: (916) 786-3800 FAX: (916) 786-3292 Web: www.pasco.com Email: techsupp@pasco.com Copyright and Warranty Information Copyright Notice The PASCO scientific 012-08489B Brewster’s Angle Accessory Manual is copyrighted and all rights reserved.