
User's Guide
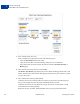
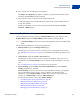

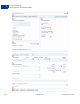
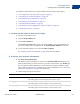
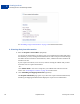
Table Of Contents
- Invoicing User’s Guide
- Contents
- Preface
- About Invoicing
- Creating Invoices
- Managing Your Invoices
- Managing Invoice Payments
- Customizing Your Invoice Information
- Working with Invoice Templates
- Working with the Address Book
- Working with Saved Items
- Managing Your Tax Information
- Invoice Administration

Creating Invoices
Creating Invoices and Entering Details
2
20 September 2010 Invoicing User’s Guide
See “Including a Logo in Your Invoices” on page 74 for detailed instructions.
3. Entering Recipient Information
1. Enter the Recipient’s email address. (Required)
As you type the email address, you will see a list of your address book contacts that match
the characters you enter, starting with the third character. The search process looks through
the address book for matches in email addresses, names, and business names and shows all
matches in the list.
If your recipient is in the list, select it. If not, continue entering the address until you have
entered the correct recipient email address.
- Or -
Click Address book to search for a recipient in your address book and return it to the
invoice. See
“Searching for a Contact” on page 115 for instructions.
2. Click Add billing and shipping information. (Optional)
The Recipient information page opens. If you selected a recipient from the address book,
the billing and shipping information fields display the recipient’s saved information.