
User's Guide
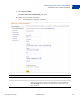
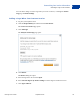
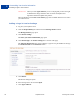
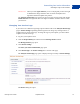
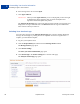
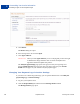
Table Of Contents
- Invoicing User’s Guide
- Contents
- Preface
- About Invoicing
- Creating Invoices
- Managing Your Invoices
- Managing Invoice Payments
- Customizing Your Invoice Information
- Working with Invoice Templates
- Working with the Address Book
- Working with Saved Items
- Managing Your Tax Information
- Invoice Administration

Customizing Your Invoice Information
Including a Logo in Your Invoices
5
76 September 2010 Invoicing User’s Guide
IMPORTANT: When you click Agree and Save you are certifying that you have the right
to distribute the image and that it does not violate the PayPal User
Agreement and the Acceptable Use policies.
The logo displays in the Create a new invoice page and is included with the invoice when
you send or save it.
Adding a Logo in Invoice Settings
1. Log in to your PayPal account.
2. Click the Request Money tab and then click the Manage Invoices subtab.
The Manage invoices page opens.
3. Click Invoice Settings.
The Enter your contact information page opens.
4. Click Invoice logo in the Invoice Settings box at the left of the page.
The Add your invoice logo page opens. It displays a gray box as a placeholder for the logo
and No file selected next to the Browse button.
5. Click Browse.
The Browse dialog box opens.
6. Select the logo file to use and click Open.
7. Click Agree and Save.