
Getting Started Guide

PayPal for Nonprots: Get Started Guide
7 January 2012
III. Customize Your Payment Pages
You can customize PayPal’s payment pages to match your website’s colors and images in order to provide
a more seamless payment experience. Custom Payment Page styles can be applied to all PayPal website
payment pages. The page style you select will apply to every page in the payment flow. To customize your
pages:
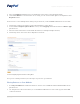
1. Click on Profile, then More Options. Under Selling Preferences, click on the Custom Payment Pages
link. This will take you to Customize Your Payment Page.
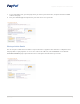
2. From this page, you can Add, Edit, Preview, and Remove page styles, and make any page style the
primary style.
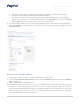
3. To access customization options, click on the Add button. This takes you to the Edit Custom Page Style
page, where you can specify your customizations.
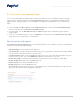
Edit Custom Page Style Options
On the Edit Custom Page Style page, you can provide the specific colors and links to any logos or URL images
needed to customize your payment pages.
• Page Style Name – Enter a name for your reference.
• Logo Image URL – Provide the URL to an image in .gif, .jpg, or .png format, no larger than 190 pixels wide by
60 pixels high. The image should be on a secure server.
• Cart Area Gradient Color – Enter the HTML hex code for this color. Do not include the # symbol. If you do
not know your hex code, click on the HTML Hex Code link on the page for a color chart.
• Header Image URL – Provide the URL to an image no larger than 750 pixels wide by 90 pixels high.
• Header Background Color – Enter the HTML hex code.
• Header Border Color – Enter the HTML hex code.
• Background Color – Enter the HTML hex code.
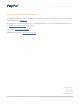
• Click Preview to preview your page style, or click Save when you are finished. When you create your next
button, you will have the option to apply this page style.