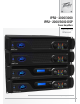
IPR2 2000/3000 IPR2 2000/3000 DSP ™ ™ Power Amplifiers Operating Manual www.peavey.
Intended to alert the user of the presence of important operating and maintenance (servicing) instructions in the literature accompanying the product. CAUTION: Risk of electrical shock — DO NOT OPEN! CAUTION: To reduce the risk of electric shock, do not remove cover. No user serviceable parts inside. Refer servicing to qualified service personnel.
Är avsedd att uppmärksamma användaren på förekomsten av viktiga handhavande- och underhållsinstruktioner (service) i den litteratur som medföljer produkten. OBSERVERA: Risk för elektrisk stöt – ÖPPNA INTE! OBSERVERA: För att minska risken för elektrisk stöt, avlägsna inte höljet. Inga delar inuti kan underhållas av användaren. Låt kvalificerad servicepersonal sköta servicen.
JAPANESE 」人体への電気ショックの危険が考えられる製品筐体内の非絶縁「危険電圧 。の存在をユーザーに警告す るものです 製品に付属している説明書に記載の重要な操作およびメンテナンス 。(サービス)要領の存在をユーザーに警告するものです !注意: 電気ショックの危険あり — 開けないでください 、注意: 電気ショックの危険を低減するため 。カバーを外さないでください 内部部品はユーザーによるサービス不可。資格のあるサービス要因のサービスを要請してくだ 。さい 、警告:電気ショックまたは火災の危険を避けるため 。この装置を雨または湿気にさらしてはなりません 。ま た、過敏など液体を含む物をこの装置上に置いてはなりません 。この装置を使用する前に、警告事項につ いて操作ガイドをお読みください CHINESE 保護接地端子。装置は保護接地に接続している電源コンセントに接続する必要があります 。三角形内带有箭头闪电状符号意在敬告用户,表明产品内部有非绝缘的“危险电压”存在,
IMPORTANT SAFETY INSTRUCTIONS 1. Read these instructions. 2. Keep these instructions. 3. Heed all warnings. 4. Follow all instructions. 5. Do not use this apparatus near water. 6. Clean only with a dry cloth. 7. Do not block any of the ventilation openings. Install in accordance with manufacturer’s instructions. 8. Do not install near any heat sources such as radiators, heat registers, stoves or other apparatus (including amplifiers) that produce heat. 9.
CUIDADO: Cuando use productos electrónicos, debe tomar precauciones básicas, incluyendo las siguientes: 1. Lea estas instrucciones. 2. Guarde estas instrucciones. 3. Haga caso de todos los consejos. 4. Siga todas las instrucciones. 5. No usar este aparato cerca del agua. 6. Limpiar solamente con una tela seca. 7. No bloquear ninguna de las salidas de ventilación. Instalar de acuerdo a las instrucciones del fabricante. 8.
ATTENTION: L’utilisation de tout appareil électrique doit être soumise aux precautions d’usage incluant: 1. Lire ces instructions. 2. Gardez ce manuel pour de futures références. 3. Prétez attention aux messages de précautions de ce manuel. 4. Suivez ces instructions. 5. N’utilisez pas cette unité proche de plans d’eau. 6. N’utilisez qu’un tissu sec pour le nettoyage de votre unité. 7.
SICHERHEITSHINWEISEACHTUNG: Beim Einsatz von Elektrogeräten müssen u.a. grundlegende Vorsichtsmaßnahmen befolgt werden: 1. Lesen Sie sich diese Anweisungen durch. 2. Bewahren Sie diese Anweisungen auf. 3. Beachten Sie alle Warnungen. 4. Befolgen Sie alle Anweisungen. 5. Setzen Sie dieses Gerät nicht in der Nähe von Wasser ein. 6. Reinigen Sie es nur mit einem trockenen Tuch. 7. Blockieren Sie keine der Lüftungsöffnungen. Führen Sie die Installation gemäß den Anweisungen des Herstellers durch.
1. Lue nämä ohjeet. 2. Säilytä nämä ohjeet. 3. Huomioi kaikki varoitukset. 4. Noudata kaikkia ohjeita. 5. Älä käytä laitetta veden lähellä. 6. Puhdista vain kuivalla kankaalla. 7. Älä tuki mitään tuuletusaukkoja. Asenna valmistajan ohjeiden mukaisesti. 8. Älä asenna lämpölähteiden, kuten pattereiden, liesien tai muiden lämpöä tuottavien laitteiden (kuten vahvistinten) lähelle. 9. Älä poista polarisoidun tai maadoitustyyppisen tulpan suojausta.
VARNING: När du använder elektriska produkter ska grundläggande försiktighetsåtgärder iakttas, inklusive följande: 1. Läs dessa instruktioner. 2. Behåll dessa instruktioner. 3. Iakttag alla varningar. 4. Följ alla instruktioner. 5. Använd inte apparaten i närheten av vatten. 6. Rengör endast med en torr trasa. 7. Blockera inte ventilationsöppningarna. Installera i enlighet med tillverkarens instruktioner. 8.
ADVARSEL: Ved bruk av et elektrisk apparat må grunnleggende forsiktighetsregler følges, inklusive de følgende: 1. Les disse instruksjonene. 2. Ta vare på disse instruksjonene. 3. Følg alle advarslene. 4. Følg alle instruksjoner. 5. Ikke bruk apparatet i nærheten av vann. 6. Rengjør bare med en tørr klut. 7. Ikke blokker noen av ventilasjonsåpningene. Installer i henhold til produsentens instruksjoner. 8.
WAARSCHUWING: Bij gebruik van elektrische producten, moeten elementaire voorzorgsmaatregelen altijd worden opgevolgd, waaronder het volgende: 1. Lees deze gebruiksaanwijzing. 2. 3. 4. 5. 6. 7. 8. 9. 10. 11. 12. 13. 14. 15. 16. 17. 18. 19. 20. Bewaar deze gebruiksaanwijzing. Besteed aandacht aan alle waarschuwingen. Volg alle instructies op. Gebruik dit apparaat niet in de buurt van water. Reinig het alleen met een droge doek. Blokkeer geen ventilatieopeningen.
ATTENZIONE: Durante uso di apparecchiature elettriche vanno osservate alcune precauzioni basilari, tra cui le seguenti: 1. Leggete queste istruzioni. 2. Conservate le istruzioni. 3. Rispettate tutte le avvertenze. 4. Seguite le istruzioni. 5. Non usate questo prodotto vicino all’acqua. 6. Pulite esclusivamente con un panno asciutto. 7. Non ostruite le fessure di ventilazione. Installate il dispositivo seguendo le istruzioni del produttore. 8.
ADVERTÊNCIA: Ao usar eletrodomésticos, precauções básicas devem sempre ser seguidas, incluindo as seguintes: 1. Leia estas instruções. 2. Mantenha estas instruções. 3. Preste atenção a todas as advertências. 4. Siga todas as instruções. 5. Não use este aparelho perto d’água. 6. Limpe somente com um pano seco. 7. Não obstrua nenhuma das aberturas de ventilação. Instale de acordo com as instruções do fabricante. 8.
警告: 電気製品を使用するときは、次の項目を含め、基本的な注意事項を常にお守りください。 1. 本書の指示内容をお読みください。 2. 本書は保管してください。 3. すべての警告に注意してください。 4. すべての指示に従ってください。 5. 本装置を水の近くで使用しないでください。 6. お手入れには乾いた布をお使いください。 7. 開口部をふさがないでください。 メーカーの指示に従って設置してください。 8. ラジエータ、 ストーブなど (アンプを含む)、発熱体の近くに設置しないでください。 9. 分極プラグや接地プラグの安全性を損なわないようにしてください。分極プラグの2つのブレードは、一方が他より幅広くなっています。 接地式のプラグには2つのブレードと接地プラグがあります。幅広のブレードや接地プラグは安全のために付けられています。所定のプ ラグがコンセントなどに合わない場合、 旧式のコンセントなどの交換について技術者に問い合わせてください。 10.
CHINESE 重要安全事项 警告 :操作电器产品时,请务必遵守基本安全注意事项,包括 : 1. 阅读说明书。 2. 妥善保管说明书。 3. 注意所有安全警告。 4. 按照要求和指示操作。 5. 请勿在靠近水(或其它液体)的地方使用本机。 6. 本机只能用干燥布料擦拭。 7. 请勿遮盖任何通散热口。确实依照本说明书安装本机。 8. 请勿将本机安装在任何热源附近,例如电暖器、蓄热器件、火炉或其他发热电器(包括功率放大器)。 9. 请勿破坏两脚型插头或接地型插头的安全装置。两脚型插头有两个不同宽度的插头片,一个窄,另一个宽一点。接地型插头有两个相同 的插头片和一个接地插脚。两脚型插头中宽的插头片和接地型插头接地插脚起着保障安全的作用。如果所附带的插头规格与您的插座不 匹配,请让电工更换插座以保证安全。 10. 请勿踩踏或挤压电源线,尤其是插头、插座、设备电源输入接口或者电源线和机身连接处。 11. 本机只可以使用制造商指定的零件 / 配件。 12.
경고: 전기 제품 사용 시 다음 사항을 포함해 기본적인 주의 사항을 항상 따라야 합니다. 1. 이 지침을 읽어 주십시오. 2. 이 지침을 준수하여 주십시오. 3. 모든 경고 사항에 주의해 주십시오. 4. 모든 지침을 따라 주십시오. 5. 물기가 있는 근처에서 이 기기를 사용하지 마십시오. 6. 마른 헝겊으로만 청소해 주십시오. 7. 통풍구를 막지 마십시오. 제조업체의 지침에 따라 설치해 주십시오. 8. 라디에이터, 가열기, 난로 또는 열을 발산하는 기타 기기(앰프 포함) 근처에 설치하지 마십시오. 9. 극성 플러그나 접지형 플러그의 안전 용도를 무시하지 마십시오. 극성 플러그는 한쪽 날이 다른 쪽보다 더 넓습니다. 접지형 플러그에는 2개의 날과 1개의 접지 플러그가 있습니다. 넓은 날 또는 1개의 접지 플러그는 안전을 위해 제공됩니다. 제공된 플러그가 사용자의 콘센트에 맞지 않으면 구식 콘센트의 교체에 대해 전기 기술자에게 문의하십시오. 10.
ARABIC ﺗﻌﻠﻴﻤﺎﺕ ﺍﻷﻣﺎﻥ ﺍﻟﻤﻬﻤﺔ ﺗﺤﺬﻳﺮ :ﻋﻨﺪ ﺍﺳﺘﺨﺪﺍﻡ ﺍﻟﻤﻨﺘﺠﺎﺕ ﺍﻟﻜﻬﺮﺑﻴﺔ ،ﻳﺠﺐ ﺍﺗﺒﺎﻉ ﺍﻻﺣﺘﻴﺎﻃﺎﺕ ﺍﻷﺳﺎﺳﻴﺔ ﺩﺍﺋﻤﺎ ،ﻭﺍﻟﺘﻲ ﺗﺸﻤﻞ ﺍﻟﺘﺎﻟﻲ: .1 ﻗﺮﺍءﺓ ﻫﺬﻩ ﺍﻟﺘﻌﻠﻴﻤﺎﺕ. .2 ﺍﻟﺤﻔﺎﻅ ﻋﻠﻰ ﻫﺬﻩ ﺍﻟﺘﻌﻠﻴﻤﺎﺕ. .3 ﺍﻻﻧﺘﺒﺎﻩ ﻟﺠﻤﻴﻊ ﺍﻟﺘﺤﺬﻳﺮﺍﺕ. .4 ﺍﺗﺒﺎﻉ ﻫﺬﻩ ﺍﻟﺘﻌﻠﻴﻤﺎﺕ. .5 ﻋﺪﻡ ﺍﺳﺘﺨﺪﺍﻡ ﻫﺬﺍ ﺍﻟﺠﻬﺎﺯ ﻋﻠﻰ ﻣﻘﺮﺑﺔ ﻣﻦ ﺍﻟﻤﺎء. .6 ﻳﻨﻈﻒ ﻓﻘﻂ ﺑﻘﻄﻌﺔ ﻗﻤﺎﺵ ﺟﺎﻓﺔ. .7 ﻻ ﺗﻘﻢ ﺑﺴﺪ ﺃﻱ ﻓﺘﺤﺎﺕ ﺗﻬﻮﻳﺔ .ﻳﺘﻢ ﺍﻟﺘﺜﺒﻴﺖ ﻭﻓﻘﺎ ﻟﺘﻌﻠﻴﻤﺎﺕ ﺍﻟﻤﺼﻨﻊ. .
ed his es or bly ur act his 005 ne ur es la é, ur à 05 a un en ja llä vat EG 05 uct d. de et te en dit 设备 生 成 请 收 the the retailer retailer where where the the product product was was purchased. purchased. They They can can take take this this product productfor forenvironmental environmentalsafe saferecycling. recycling. Logo referenced in Directive 2002/96/EC Annex Logotipo al que se hace referencia en la Directiva 2002/96/EC IV (OJ(L)37/38,13.02.
FCC Compliancy Statement This device complies with Part 15 of the FCC rules. Operation is subject to the following two conditions: (1) this device may not cause harmful interference, and (2) this device must accept any interference received, that may cause undesired operation. Warning: Changes or modifications to the equipment not approved by Peavey Electronics Corp. can void the user’s authority to use the equipment.
ENGLISH IPR2™ 2000 / 3000 Power Amplifier Congratulations on your purchase of an IPR2™ power amplifier, designed for years of reliable, flawless operation under rigorous use. The groundbreaking IPR2 series utilizes an advanced design that allows Peavey engineers to dramatically reduce weight while increasing output power, reliability and thermal efficiency.
Front Panel 8 IPR2™ 3000 1 2 9 6 4 6 5 9 4 3 8 IPR2™ 2000 1 2 9 7 4 1 AC POWER SWITCH 2 PEAVEY LOGO 6 5 9 4 3 This button triggers the relay that provides power to the amplifier. This button indicates power is connected to the amplifier by glowing dimly while the amplifier is off (or in standby). When the switch is depressed, the amplifier will turn on and the switch will illuminate brightly. While the amplifier is off, the logo is illuminated dimly to indicate power is connected.
Rear Panel 13 IPR2™ 3000 12 10 11 12 10 10 10 15 13 IPR2™ 2000 12 11 12 10 14 14 15 CHANNEL MODE SWITCH: HIGH PASS This position is used to activate the HIGH PASS filter for the corresponding channel. This filter will limit the frequencies sent to the associated amplifier channel to frequencies above 100 Hz.
ENGLISH IPR2™ 2000/3000 DSP Power Amplifier As the name implies, the IPR2™ 2000 and 3000 DSP all include advanced digital signal processing. The DSP was designed to be incredibly effective, yet extremely easy to use. Using unique and revolutionary advanced bass enhancement processes, the IPR2 DSP amplifiers dramatically improve the perceived level of bass in any system, using a fraction of the power that would be required with any other power amplifier.
Front Panel 1 9 2 3 10 IPR2™ 3000 DSP 1 8 5 2 IPR2™ 2000 DSP 1 AC POWER SWITCH 2 PEAVEY LOGO 3 LCD SCREEN 4 INDICATORS 5 ACTIVE LED 6 SIGNAL LED 7 DDT™ (DISTORTION DETECTION TECHNIQUE) LED 8 TEMP LED 9 DC LED 10 INPUT ATTENUATORS 3 7 6 10 5 4 9 10 8 5 7 6 10 5 4 This button indicates power is connected to the amplifier by glowing dimly while the amplifier is off. When the switch is depressed, the amplifier will turn on and the switch will illuminate brightly.
Rear Panel IPR2™ 3000 DSP 14 10 11 10 12 11 12 13 IPR2™ 2000 DSP 10 11 10 14 11 11 12 12 13 CONNECTING INPUTS Input connections are made via the 3-pin XLR (pin 2+) or 6.3mm plug combination connectors on the rear panel of the amplifier. The inputs are actively balanced. The input overload point is high enough to accept the maximum output level of virtually any signal source. 12 THRU/OUT JACKS 13 CONNECTING OUTPUTS 14 CIRCUIT BREAKER This 1/4” (6.
Navigation Overview Once the IPR2™ screen appears, you can start adjusting the DSP processor. Pressing the encoder will bring you to the main menu. The encoder knob to the right of the display is used to navigate and control the DSP functions. The Channel A and B controls to the left of the display are also encoders but are dedicated to adjusting input gain for each channel. Turning the encoder knob to the right of the display will allow you to scroll through the Main Menu selections.
To select an item from the Main Menu, rotate the encoder until the cursor marks the selection you want. Press the encoder to navigate to the Sub Menu adjustment screens for that processing function. When you enter a processing function Sub Menu, the cursor will appear in the upper left corner of the screen allowing you to scroll through Sub Menu screens. To edit a parameter, press the encoder to move the cursor to the desired parameter on the screen. Turning the encoder then adjusts that parameter.
Unlike the other function Sub Menus, the input mode does not change until you select “Save and Apply” and return to the Main Menu. Crossover Filters, Band-Pass Filters and Polarity Set: BP Filters Independently When you enter the “XOVER” Sub Menu, you are given three options for how the band-pass filters can be set. When Set “BP Filters Independently” is selected, the Channel A and B high-pass and low-pass filters are individually set.
Output Polarity Output Polarity The output polarity can be inverted on either channel. Select Normal or Invert in the polarity screen. If you create a crossover with 12dB per octave filters, the high frequency output would likely need to be inverted to maintain the proper phase relationship at the crossover frequency. Temporarily inverting the polarity of one channel of a multi-way system can also aid in the setting of the delay for driver alignment.
Horn EQ The Horn EQ provides a 6dB per octave high frequency boost that is sometimes required for high frequency horns. The frequency control sets the low frequency corner of the filter. To return to the Main Menu, select Discard and Exit or Save and Exit. Delay Delay can be used to align drivers within a loudspeaker or to delay auxiliary speakers like those installed under a balcony. A short delay can also be used to delay the main speakers to align them with the drums or bass guitar.
Saving Settings In the Memory Operation Sub Menu, select “Save Settings.” Select one of the four preset locations. Edit the name by rotating the cursor to select the character and pressing the encoder to step to the next position. Continue until complete. To keep the same name, press the encoder six times to step through the name edit screen. Once the save location has been selected and you have named the preset, you will be given a yes/no option to complete the save.
ESPAÑOL IPR2™ 2000 / 3000 Amplificador de potencia Felicitaciones por su compra de un amplificador de potencia IPR2™, diseñado para años de funcionamiento confiable y sin problemas bajo un uso riguroso. La serie innovadora IPR2 utiliza un diseño avanzado que permite que los ingenieros de Peavey reduzcan dramáticamente el peso al mismo tiempo que aumentan la potencia de salida, la fiabilidad y la eficiencia térmica.
Panel Frontal 8 IPR2™ 3000 1 2 9 6 4 6 5 9 4 3 8 IPR2™ 2000 1 2 9 7 4 1 6 5 9 4 3 INTERRUPTOR AC POWER Este botón activa el relé que proporciona alimentación al amplificador. Este botón indica que la alimentación está conectada al amplificador al brillar de forma atenuada mientras el amplificador está apagado (o en espera). Cuando se oprima el interruptor, el amplificador se encenderá y el interruptor se iluminará de forma brillante.
Panel trasero 13 IPR2™ 3000 12 10 11 12 10 10 10 15 13 IPR2™ 2000 12 11 12 14 10 14 15 INTERRUPTOR DE MODO DE CANAL: HIGH PASS Esta posición se usa para activar el filtro HIGH PASS (PASA ALTO) para el canal correspondiente. Este filtro limitará las frecuencias enviadas al canal asociado del amplificador para frecuencias por encima de los 100 Hz.
ESPAÑOL IPR2™ 2000/3000 DSP Amplificador de potencia Como su nombre implica, el IPR2™ 2000 y el 3000 DSP incluyen el procesamiento avanzado de señales digitales. El DSP se ha diseñado para ser increíblemente eficaz sin dejar de ser extremadamente fácil de usar.
Panel Frontal 1 9 2 3 10 IPR2™ 3000 DSP 1 8 5 2 IPR2™ 2000 DSP 1 INTERRUPTOR ALIMENTACIÓN CA 2 LOGOTIPO DE PEAVEY 3 PANTALLA LCD 3 7 6 10 5 4 9 10 8 5 7 6 10 5 4 Este botón indica que la alimentación está conectada al amplificador al brillar de forma atenuada mientras el amplificador está apagado. Cuando se oprima el interruptor, el amplificador se encenderá y el interruptor se iluminará de forma brillante.
Panel trasero IPR2™ 3000 DSP 14 10 11 10 12 11 12 13 IPR2™ 2000 DSP 10 11 10 14 11 12 11 ENTRADAS DE CONEXIÓN 12 CONECTORES THRU/OUT 12 13 Las conexiones de entrada se hacen a través de conectores de combinación XLR de 3 patillas (patilla 2+) o 6.3 mm en el panel trasero del amplificador. Las entradas están balanceadas activamente. El punto de sobrecarga de la entrada es lo suficientemente alto para aceptar el nivel de entrada máximo de virtualmente cualquier fuente de señales.
Descripción general de la navegación Once the IPR2™ screen appears, you can start adjusting the DSP processor. Pressing the encoder will bring you to the main menu. The encoder knob to the right of the display is used to navigate and control the DSP functions. The Channel A and B controls to the left of the display are also encoders but are dedicated to adjusting input gain for each channel. Turning the encoder knob to the right of the display will allow you to scroll through the Main Menu selections.
Para seleccionar una opción del Main Menu, gire el codificador hasta que el cursor parque la selección que desea. Pulse el codificador para navegar hasta las pantallas de ajuste del Sub Menu para esa función de procesamiento. Cuando entra en un Sub Menu de una función de procesamiento, el cursor aparecerá en la esquina superior derecha de la pantalla, lo que le permite desplazarse a través de las pantallas del Sub Menu.
A diferencia de otras funciones de los Sub Menus, el modo de entrada no cambia hasta que usted selecciona “Save and Apply” y regresa al Menú Principal. Filtros de cruce, filtros pasa banda y polaridad Set: BP Filters Independently Cuando entra en el Menú secundario “XOVER” se le dan tres opciones para el ajuste de los filtros pasa banda. Cuando se selecciona el ajuste “BP Filters Independently”, se ajustan individualmente los filtros pasa alto y pasa bajo de Channel A y B.
Output Polarity Output Polarity La output polarity puede invertirse en cualquier canal. Seleccione Normal o Invert en la pantalla de polaridad. Si usted crea un filtro de cruce con filtros de 12 dB por octava, la salida de alta frecuencia probablemente necesitaría invertirse para mantener la relación de fase adecuada en la frecuencia de cruce. La inversión temporal de la polaridad de un canal de un sistema multivías puede ayudar también en el ajuste del retardo para la alineación del excitador.
Horn EQ El Horn EQ proporciona un refuerzo de alta frecuencia de 6 dB por octava que se requiere algunas veces para bocinas de alta frecuencia. El control de frecuencia establece la esquina de baja frecuencia del filtro. Para regresar a Main Menu, seleccione Discard and Exit o Save and Exit. Delay Delay puede usarse para alinear excitadores dentro de un altavoz o para retardar altavoces auxiliares como los instalados bajo un balcón.
Guardar Ajustes En el Sub Menu Memory Operation, seleccione “Save Settings”. Seleccione una de las cuatro ubicaciones preajustadas. Edite el nombre girando el cursor para seleccionar el carácter y pulsando el codificador para avanzar a la siguiente posición. Continúe hasta terminar. Para mantener el mismo nombre, pulse el codificador seis veces para avanzar a través de la pantalla de edición del nombre.
FRANÇAIS IPR2™ 2000 / 3000 Amplificateur de puissance Félicitations pour l’acquisition de votre amplificateur de puissance IPR2™, conçu pour durer des années et fonctionner à la perfection sous des conditions d’utilisation rigoureuse. La gamme innovante IPR2 est d’une conception avancée qui permet aux ingénieurs Peavey de réduire le poids de façon drastique tout en gagnant en puissance de sortie et en efficacité thermique.
Panneau Avant 8 IPR2™ 3000 1 2 9 6 4 6 5 9 4 3 8 IPR2™ 2000 1 2 9 7 4 1 COMMUTATEUR D’ALIMENTATION AC 2 LOGO PEAVEY 6 5 9 4 3 Ce bouton enclenche le relais qui fournit l’alimentation à l’amplificateur. Ce bouton indique la présence de l’alimentation sur l’amplificateur en s’allumant faiblement alors que l’amplificateur est éteint (ou mis en veille). Quand le commutateur est enfoncé, l’amplificateur est mis sous tension et le commutateur s’allume vivement.
Panneau arrière 13 IPR2™ 3000 12 10 11 12 10 10 10 15 13 IPR2™ 2000 12 11 12 14 10 14 15 COMMUTATEUR DE MODE DE VOIE : HIGH PASS Cette position active le filtre PASSE-HAUT de la voie correspondante. Ce filtre coupe les fréquences envoyées à la voie de l’amplificateur associée audessus de 100 Hz.
FRANÇAIS IPR2™ 2000/3000 DSP Amplificateur de puissance Comme le nom l’indique, les amplificateurs IPR2™ 2000 et 3000 DSP intègrent tous un traitement avancé du signal numérique. Le système DSP a été conçu pour être incroyablement efficace, tout en restant extrêmement simple d’emploi.
Panneau Avant 1 9 2 3 10 IPR2™ 3000 DSP 1 8 5 2 IPR2™ 2000 DSP 1 COMMUTATEUR D’ALIMENTATION AC 2 LOGO PEAVEY 3 ÉCRAN LCD 3 7 6 10 5 4 9 10 8 5 7 6 10 5 4 Ce bouton indique la présence de l’alimentation sur l’amplificateur en s’allumant faiblement alors que l’amplificateur est éteint. Quand le commutateur est enfoncé, l’amplificateur est mis sous tension et le commutateur s’allume vivement.
Panneau arrière IPR2™ 3000 DSP 14 10 11 10 12 11 12 13 IPR2™ 2000 DSP 10 11 10 14 11 12 11 CONNEXION DES ENTRÉES 12 PRISES THRU/OUT 12 13 Les connexions d’entrée sont réalisées par l’intermédiaire de connecteurs combinés XLR à 3 broches (broche 2, +) ou de cordon de 6,3 mm sur le panneau arrière de l’amplificateur. Les entrées sont isolées de façon active. Le niveau de saturation d’entrée est assez élevé pour accepter le niveau de sortie maximum de presque toute source de signal.
Vue d’ensemble de la navigation Once the IPR2™ screen appears, you can start adjusting the DSP processor. Pressing the encoder will bring you to the main menu. The encoder knob to the right of the display is used to navigate and control the DSP functions. The Channel A and B controls to the left of the display are also encoders but are dedicated to adjusting input gain for each channel. Turning the encoder knob to the right of the display will allow you to scroll through the Main Menu selections.
Pour choisir un élément dans Main Menu, tournez le bouton-codeur tant que le curseur ne marque votre sélection. Appuyez sur le boutoncodeur pour parcourir les écrans de réglage dans le sous-menu pour la fonction de traitement désirée. Quand vous accédez à une fonction de traitement de Sub Menu, le curseur apparaîtra dans le coin supérieur gauche de l’écran ce qui vous permet de faire défiler les écrans de Sub Menu.
Contrairement aux autres fonctions de Sub Menus, le mode d’entrée ne change pas tant que vous ne sélectionnez pas “Enregistrer et Appliquer” et ne revenez pas dans le menu principal. Filtres séparateur, filtres passe-bande et polarité Réglage : BP Filters independendtly Quand vous accédez dans “XOVER” dans le sous-menu, trois options vous sont proposées pour définir de quelle façon sont réglés les filtres passe-bande.
Polarité de sortie Polarité de sortie Le réglage de sortie de polarité peut être inversé sur les deux voies. Sélectionnez Normal ou Inversé dans l’écran de polarité Si vous mettez en œuvre un séparateur avec des filtres de 12 dB par octave, la sortie des fréquences supérieures doit probablement être inversée pour conserver la relation de phase correcte à la fréquence de séparation.
Horn EQ L’égaliseur de pavillon acoustique offre une amplification des hautes fréquences de 6 dB par octave qui est parfois nécessaire pour les pavillons à hautes fréquences. La commande de fréquence définit la fréquence de coupure basse du filtre. Pour revenir dans Main Menu, sélectionnez “Ignorer et Quitter” ou “Enregistrer ou Quitter”. Delay L’effet Delay permet d’aligner les haut-parleurs d’une enceinte ou de retarder des haut-parleurs auxiliaires comme ceux installés sous un balcon.
Enregistrer les réglages Dans le Sub Menu des opérations de mémoire, sélectionnez “Enregistrer les réglages.” Sélectionnez l’un des quatre emplacements de préréglages. Modifiez le nom en tournant le curseur pour sélectionner un caractère et appuyez sur le bouton-codeur pour passer au prochain caractère. Continuez tant que l’opération n’est pas achevée. Pour garder le même nom, appuyez sur le bouton-codeur six fois pour compléter l’écran de changement du nom.
DEUTSCH IPR2™ 2000 / 3000 Leistungsverstärker Glückwunsch zu Ihrem Erwerb eines IPR2™ Leistungsverstärkers, der für jahrelange zuverlässige, fehlerfreie Bedienung unter gewissenhafter Verwendung entwickelt wurde. Die bahnbrechende IPR2-Reihe nutzt ein fortschrittliches Design, dass den Peavey-Ingenieuren ermöglicht, das Gewicht drastisch zu reduzieren, während die Ausgangsleistung, Verlässlichkeit und Wärmeeffizienz erhöht wird.
Frontplatte 8 IPR2™ 3000 1 2 9 6 4 6 5 9 4 3 8 IPR2™ 2000 1 2 9 7 4 1 6 5 9 4 3 AC-VERSORGUNGSSCHALTER Dieser Knopf löst ein Relais aus, das den Verstärker mit Strom versorgt. Dieser Knopf zeigt an, dass der Verstärker an den Strom angeschlossen ist, in dem er schwach leuchtet, während der Verstärker ausgeschaltet (oder im Standby) ist. Wenn der Schalter gedrückt wird, wird der Verstärker einschalten und der Schalter wird hell leuchten.
Rückseite 13 IPR2™ 3000 12 10 11 12 10 10 10 15 13 IPR2™ 2000 12 11 12 14 10 14 15 KANAL-MODUS-SCHALTER: HIGH PASS Diese Position wird verwendet, um den HOCHPASS-Filter für den entsprechenden Kanal zu aktivieren. Dieser Filter wird die Frequenzen, die an den ordnungsgemäßen Verstärkerkanal gesendet wurden, auf Frequenzen über 100 Hz begrenzen.
DEUTSCH IPR2™ 2000/3000 DSP Leistungsverstärker Wie der Name schon sagt, umfassen alle IPR2™ 2000 und 3000 DSP fortschrittliche digitale Signalverarbeitung. Der DSP wurde entwickelt, um unglaublich effektiv und dennoch extrem einfach zu nutzen zu sein.
Frontplatte 1 9 2 3 10 IPR2™ 3000 DSP 1 5 2 IPR2™ 2000 DSP 1 AC-VERSORGUNGSSCHALTER 2 PEAVEY-LOGO 3 8 3 7 6 10 5 4 9 10 8 5 7 6 10 5 4 Dieser Knopf zeigt an, dass der Verstärker an den Strom angeschlossen ist, in dem er schwach leuchtet, während der Verstärker ausgeschaltet ist. Wenn der Schalter gedrückt wird, wird der Verstärker einschalten und der Schalter wird hell leuchten.
Rückseite IPR2™ 3000 DSP 14 10 11 10 12 11 12 13 IPR2™ 2000 DSP 10 11 10 14 11 12 11 EINGÄNGE VERBINDEN 12 THRU/OUT-BUCHSEN 12 13 Eingangsanschlüsse werden über die 3-pin XLR (pin 2+) oder 6,3mm Steckerkombinationsverbinder auf der Rückseite des Verstärkers gemacht. Die Eingänge sind aktiv symmetrisch. Der Eingangs-Überlastpunkt ist hoch genug, um das maximale Ausgangslevel von praktisch jeder Signalquelle zu akzeptieren.
Navigationsübersicht Once the IPR2™ screen appears, you can start adjusting the DSP processor. Pressing the encoder will bring you to the main menu. The encoder knob to the right of the display is used to navigate and control the DSP functions. The Channel A and B controls to the left of the display are also encoders but are dedicated to adjusting input gain for each channel. Turning the encoder knob to the right of the display will allow you to scroll through the Main Menu selections.
Um einen Punkt vom Main Menu auszuwählen, drehen Sie den Drehknopf bis der Cursor auf der gewünschten Auswahl steht. Drücken Sie den Drehknopf, um zum Einstellungsbildschirm des Sub Menu für die Verarbeitungsfunktion zu navigieren. Wenn Sie eine Verarbeitungsfunktion Sub Menu wählen, erscheint der Cursor in der oberen linken Bildschirmecke und ermöglicht Ihnen durch die Sub Menu-Bildschirme zu scrollen.
Anders als die andere Funktion Sub Menus, ändert sich der Eingangsmodus nicht bis Sie “Speichern und Übernehmen” wählen und zum Hauptmenü zurückkehren. Frequenzweichenfilter, Band-Pass-Filter und Polarität Einstellung: BP-Filter Unabhängig Wenn Sie das “XOVER” Untermenü wählen, bekommen Sie drei Optionen darüber, wie der Band-Pass-Filter eingestellt werden kann.
Ausgangs-Polarität Ausgangs-Polarität Die Ausgangs-Polarität kann auf jedem Kanal umgedreht werden. Wählen Sie Normal oder Umgekehrt auf dem PolaritätenBildschirm. Wenn Sie eine Frequenzweiche mit 12dB pro OktaveFilter erstellen, muss der Hochfrequenzausgang wahrscheinlich umgekehrt werden, um das richtige Phasenverhältnis bei der Trennfrequenz zu halten.
Horn EQ Das Horn-EQ bietet einen 6dB pro Oktave-HochfrequenzBoost, der manchmal für Hochfrequenz-Hörner erforderlich ist. Der Frequenzregler stellt die Niederfrequenzecke des Filters ein. Um zum Main Menu zurückzukehren, wählen Sie Verwerfen und Beenden oder Speichern und Beenden. Delay Die Verzögerung kann verwendet werden, um Treiber innerhalb eines Lautsprechers einzustellen oder um AUX-Lautsprecher wie diejenigen die unter einem Balkon installiert wurden zu verzögern.
Speichereinstellungen Im Speicherbetrieb Sub Menu, wählen Sie „Einstellungen Speichern.“ Wählen Sie eine der vier voreingestellten Orte. Bearbeiten Sie den Namen, indem Sie den Cursor drehen, um den Buchstaben auszuwählen und den Drehknopf zu drücken, um zur nächsten Position zu gehen. Fahren Sie fort bis zum Abschluss. Um denselben Namen zu behalten, drücken Sie den Drehknopf sechs Mal, um durch den Namenbearbeitungsbildschirm zu gehen.
ITALIANO IPR2™ 2000 / 3000 Amplificatore di potenza Congratulazioni per aver acquistato un amplificatore di potenza IPR2™, progettato per funzionare con affidabilmente in modo impeccabile e per anni se utilizzato con rigore. L’innovativa serie IPR2 utilizza un design avanzato che consente ai tecnici di Peavey di ridurne drasticamente il peso, aumentando l’efficienza di potenza, affidabilità e l’efficienza termica in uscita.
Pannello anteriore 8 IPR2™ 3000 1 2 9 6 4 6 5 9 4 3 8 IPR2™ 2000 1 2 9 7 4 1 INTERRUTTORE DI ALIMENTAZIONE AC 2 LOGO PEAVEY 6 5 9 4 3 Questo pulsante attiva il relè che fornisce potenza all’amplificatore. Questo pulsante indica che l’alimentazione è collegata all’amplificatore illuminandosi leggermente mentre l’amplificatore è spento (o in standby). Quando l’interruttore è premuto, l’amplificatore si accende e l’interruttore si illumina.
Pannello posteriore 13 IPR2™ 3000 12 10 11 12 10 10 15 13 IPR2™ 2000 10 12 11 12 14 10 14 15 INTERRUTTORE MODALITÀ CANALE: HIGH PASS Questa posizione è utilizzata per attivare il filtro HIGH PASS per il canale corrispondente. Questo filtro limiterà le frequenze inviate al canale dell’amplificatore associato alle frequenze superiori a 100 Hz.
ITALIANO IPR2™ 2000/3000 DSP Amplificatore di potenza Come implica il nome, gli amplificatori IPR2™ 2000 e 3000 DSP sono muniti di processore digitale per l’elaborazione del segnale. Il DSP è stato progettato per essere incredibilmente efficace, ma estremamente facile da usare.
Pannello anteriore 1 9 2 3 10 IPR2™ 3000 DSP 1 8 5 2 IPR2™ 2000 DSP 1 INTERRUTTORE DI ALIMENTAZIONE AC 2 LOGO PEAVEY 3 SCHERMO LCD 3 7 6 10 5 4 9 10 8 5 7 6 10 5 4 Questo pulsante indica che l’alimentazione è collegata all’amplificatore illuminandosi leggermente mentre l’amplificatore è spento. Quando l’interruttore è premuto, l’amplificatore si accende e l’interruttore si illumina a pieno.
Pannello posteriore IPR2™ 3000 DSP 14 10 11 10 12 11 12 13 IPR2™ 2000 DSP 10 11 10 14 11 12 11 INGRESSI DI COLLEGAMENTO 12 JACK THRU/OUT 12 13 Le connessioni degli ingressi sono effettuati tramite la spina a 3 pin XLR (pin 2+) o i connettori di combinazione spine 6,3mm sul pannello posteriore dell’amplificatore. Gli ingressi sono bilanciati attivamente. Il punto di sovraccarico dell’ingresso è alto abbastanza per accettare il livello di uscita massimo di virtualmente qualsiasi segnale.
Panoramica navigazione Once the IPR2™ screen appears, you can start adjusting the DSP processor. Pressing the encoder will bring you to the main menu. The encoder knob to the right of the display is used to navigate and control the DSP functions. The Channel A and B controls to the left of the display are also encoders but are dedicated to adjusting input gain for each channel. Turning the encoder knob to the right of the display will allow you to scroll through the Main Menu selections.
Per selezionare una voce dal Main Menu, ruotare l’encoder fino a quando il cursore evidenza la selezione desiderata. Premere l’encoder per navigare alle schermate di regolazione Sub Menu per tale funzione in corso. Quando si accede alla funzione in corso Sub Menu, il cursore apparirà nell’angolo in alto a sinistra della schermata consentendo di scorrere tra le schermate del Sub Menu. Per modificare un parametro, premere l’encoder per spostare il corsore al parametro desiderato sullo schermo.
Diversamente dalla funzione Sub Menus, la modalità di immissione non è modificata finché non si seleziona “Save and Apply” e si ritorna al Main Menu. Crossover Filters, Band-Pass Filters e Polarity Imposta: BP Filters indipendentemente Quando si accede al sottomenu “XOVER”, ci sono tre opzioni per l’impostazione dei filtri band-pass. Se è selezionata l’impostazione “BP Filters Independently”, Channel A, B highpass e low-pass filters sono impostati singolarmente.
Polarità uscita Output Polarity La output polarity può essere invertita su entrambi i canali. Selezionare Normale o Invertita nella schermata della polarità. Se si crea un crossover con 12dB per filtri ottava, l’uscita di alta frequenza deve essere invertita per mantenere il rapporto di fase appropriato in frequenza crossover. L’inversione temporanea della polarità di un canale di un sistema a più vie può anche assistere nell’impostazione del ritardo per allineamento del driver.
Horn EQ Horn EQ fornisce 6dB per ottava di aumento di alta frequenza che è a volte necessario per picchi di alta frequenza. Il controllo della frequenza imposta l’angolo di bassa frequenza del filtro. Per ritornare al Main Menu, selezionare Discard e Exit o Save e Exit. Delay Delay può essere utilizzato per allineare i driver in un altoparlante o per ritardare gli altoparlanti ausiliari come quelli installati sotto un balcone.
Salvataggio impostazioni Nel Sub Menu Memory Operation, selezionare “Save Settings.” Selezionare uno dei 4 percorsi disponibili. Modifica il nome ruotando il cursore per selezionare il carattere e premendo l’encoder per passare alla posizione successiva. Continua fino al completamento. Per mantenere lo stesso nome, premere l’encoder sei volte per passare alla schermata di modifica.
日本語 IPR2™ 2000 / 3000 パワーアンプ IPR2™ パワーアンプをお買い上げいただきありがとうございます。 このアンプは、厳しい使用条件でも長期間正常な動作と信頼性 を保つように設計されています。先進設計を採用した画期的IPR2シリーズにより、Peaveyエンジニアは、出力、信頼性、熱効率を高 めながら、重量を大幅に減らすことができます。IPR2シリーズアンプは、 レゾナントスイッチモード電源とクラスD高速トポロジの設 計により、音響解像度と効率を最大にしています。 きわめて効率の良い軽量設計のこの革命的なアンプから得られるのは、Peavey の代名詞でもある音響優位性および比べるもののない信頼性です。先進技術と充実した保護回路により、負荷や電力を扱いにく い困難な条件下でも動作効率を高めています。DDT™ (Distortion Detection Technique) 回路は、2オームと低い負荷までトラブルフリ ー動作を保証します。DDTは、負荷が極端に大きい条件下でも、 ドライバを保護し、音響整合性を保ちます。 アンプは、IPR2の高効 率設計により、かなり低い温度でも動作し、冷却
フロントパネル 8 IPR2™ 3000 1 2 9 6 4 6 9 4 5 3 8 IPR2™ 2000 1 2 9 7 4 6 9 4 5 1 2 3 AC電源スイッチ このボタンは、 アンプに電源を供給するリレーをトリガします。電源がアンプに接続されていることを示すため、 アンプがオフ (またはスタンバイ) のときは暗く点灯します。 スイッチを押し込むと、 アンプはオンになり、 スイッチは明るく点灯します。 PEAVEYロゴ アンプがオフのとき、 ロゴは暗く点灯し、電源が接続されていることを示します。 アンプがオンのときロゴは明るく点灯します。 3 インジケータ IPR2™ アンプは、 チャネルごとに次の5つのフロントパネルLEDインジケータがあります。ACTIVE、SIGNAL、DDT™、TEMP、DCです。 これらのLEDインジケ ータは、各チャネルの動作状態を知らせ、異常な状態があれば警告します。 4 アクティブLED チャネルが動作していることを示します。 アンプが正常動作のとき点灯します。 アクティブLED がオフのときチャネ
リアパネル 13 IPR2™ 3000 12 10 11 12 10 10 10 15 13 IPR2™ 2000 12 11 12 10 14 14 15 チャネルモードスイッチ HIGH PASS この位置は、 対応チャネルのHIGH PASSフィルターを有効にします。 このフィルターは、 関連アンプチャネルに送られる周波数を 100 Hzを超える周波数に制限します。 別に独立したサブウーファーキャビネットを使用する場合、 この位置は、 中間・高周波スピ ーカーキャビネットを、 HIGH PASSスイッチに関係するチャネルに接続することを示します。 FULL RANGE 名前のとおり、 このスイッチのフルレンジ位置は全周波数がアンプに通ることを示します。 通常は、 フルレンジスピーカーのエン クロージャをアンプの出力に接続するとき使用します。 SUBWOOFER この位置は、 対応チャネルのLOW PASSフィルターを有効にします。 このフィルターは、 関連アンプチャネルに送られる周波数を 100 Hz未満に制限します。 別に独立したサブウーファーキャビネット
日本語 IPR2™ 2000/3000 DSP パワーアンプ 名前のとおり、IPR2™ 2000、3000 DSPは拡張デジタル信号処理を行います。DSPは、驚くほど効率が良く、 しかも非常に使いやすいよ うに設計されています。 ユニークかつ画期的な拡張バスエンハンスプロセスを採用したIPR2 DSPアンプは、 どのようなシステムで も、他のパワーアンプに必要な出力のごく一部を使い、バスの受信レベルを大幅に改善します。 アンプに信号を送る前に、本製品のAC電源電圧が正しいか確認することは非常に重要です。 アンプの適正電圧は、本体リアパネ ルにあるIECライン (電源) コードの横に記載してあります。製品の各機能に番号が付けられています。番号の横の機能については、 このマニュアルのフロントパネル図を参照してください。 アンプの安全および人身の安全を守るため、本書をよくお読みください。 IPR2™ 2000 / 3000 DSPの特徴 • DDT™ プロテクト • 各チャネル最大120 msディレイ • 画期的IPR2 class Dトポロジ • 各チャネル4バンドパラメトリックイコライゼーション •
フロントパネル 1 9 2 3 10 IPR2™ 3000 DSP 1 5 2 7 10 5 6 2 IPR2™ 2000 DSP 1 8 3 4 9 10 8 5 7 6 10 5 4 AC電源スイッチ 電源がアンプに接続されていることを示すため、 アンプがオフのときは暗く点灯します。 スイッチを押し込むと、 アンプはオンになり、 スイッチ は明るく点灯します。 PEAVEYロゴ アンプがオフのとき、 ロゴは暗く点灯し、電源が接続されていることを示します。 アンプがオンのときロゴは明るく点灯します。 3 LCD画面 青色バックライトLCD画面にDSP設定を表示します。 4 インジケータ IPR2™ アンプは、 チャネルごとに5つのフロントパネルLEDインジケータがあります。ACTIVE、SIGNAL、DDT™、TEMP、DCです。 これらのLEDインジケ ータは、各チャネルの動作状態を知らせ、異常な状態があれば警告します。 5 アクティブLED チャネルが動作していることを示します。 アンプが正常動作のとき点灯します。 アクティブLED
リアパネル IPR2™ 3000 DSP 14 10 10 11 12 11 12 13 IPR2™ 2000 DSP 10 11 10 14 11 11 12 12 13 入力接続 入力の接続には、 アンプのリアパネルにある3ピンXLR (ピン2+) または6.3mmプラグのコンビネーションコネクタを使用します。 入力はアクティブバランスです。入力の過負荷ポイントは、事実上すべての信号ソースの最大出力レベルを受けるのに十分な 高さになっています。 12 THRU/OUTジャック この1/4” (6.3mm)ジャックは、入力コネクタへのパラレル接続で、 このアンプや他のパワーアンプの入力にパッチします。平衡 接続を維持するためTRSプラグを使用する必要があります。 13 出力接続 すべてのモデルで2極ツイストロック1/4” (6.
ナビゲーション概要 Once the IPR2™ screen appears, you can start adjusting the DSP processor. Pressing the encoder will bring you to the main menu. The encoder knob to the right of the display is used to navigate and control the DSP functions. The Channel A and B controls to the left of the display are also encoders but are dedicated to adjusting input gain for each channel. Turning the encoder knob to the right of the display will allow you to scroll through the Main Menu selections.
Main Menuからアイテムを選択するには、 カーソルがアイテムをマークする位置にくるまでエンコーダーを回します。 エ ンコーダーを押してその処理機能のSub Menu調整画面までナビゲートします。処理機能のSub Menuに入ると、画面左 上にカーソルが表示され、Sub Menu画面をスクロールできます。パラメータを編集するには、 エンコーダーを押してカ ーソルを画面上のパラメータに移動します。 ここでエンコーダーを回してそのパラメータを調節します。別の画面にス クロールするには、 エンコーダーを押してカーソルを画面左上に戻します。 ここでサブメニュー画面をスクロールでき ます。 削除と終了 DSPをリセットして編集内容を削除するには、サブメニュ ーから”消去と終了”を選択し、サブメニューに入ってから 編集したものを削除します。 保存と終了 ほとんどのプロセスでサブメニューの最後の画面は”保存 と終了”です この画面でエンコーダーを押し、編集内容を 保存し、 メインメニューに戻ります。 注: 調整したものは、 「保存と終了」が選択されてメインメニュ ーに戻るまで保存されません。サブメニューで編集中に
入力モードは、他の機能のSub Menuとは異なり、”保存と 適用” を選択してメインメニューに戻るまで変わりません。 クロスオーバーフィルター、バンドパスフィルター、極性 設定:BP Filterを個別に “XOVER”サブメニューでは、バンドパスフィルターを設定 する方法について3つのオプションがあります。“BP Filters Independently”設定を選択すると、 チャネルA、Bのハイパス とローパスのフィルターが個別に設定されます。 設定:BP Filters Channel B=A 両方のチャネルが同じに設定されるステレオシステムで アンプを使用する場合、“Channel B=A”を選択すると、両方 のチャネルが一度に設定されます。Channel Aのフィルター を設定すると Channel Bも設定されます。 設定:X-Over Freq A Lows B Highs アンプのチャネル間でクロスオーバーをつくる場合、”Xover Freq A Lows B Highs” を選択すると、 クロスオーバー 周波数とフィルタータイプをコントロール1セットで設定 できます。 クロスオー
出力極性 出力極性 出力極性はいずれかのチャネルで逆にできます。極性画 面でノーマルまたはインバートを選択します。 オクターブ フィルター当たり12dBのクロスオーバーをつくる場合、 ク ロスオーバー周波数で最適な位相関係を維持するため、 高周波出力は逆にする必要があるでしょう。 マルチウェイ システムの1チャネルで極性を一時的に逆にすると、 ディ レイも設定しやすくなり、 ドライバアライメントに有効で す。 ディレイを調整して、 クロスオーバー周波数でキャンセ ルができます。設定が終了したら忘れずに極性をノーマ ルに戻します。 Equalization メインメニューに戻るには「削除と終了」 または「保存と 終了」 を選択します。 IPR2™ DSPは5バンドのパラメトリックEQ, Waves® Maxx Bass® 、 エンハンスメント、ホーンEQが各チャネルにあります。 Bypass EQ Bypass EQサブメニューの最初の画面はバイパス画面です。.
Horn EQ Horn EQは、時どき高周波ホーンに必要になるオクターブ 高周波ブースト当たり6dBです。 この周波数コントロール でフィルターの低周波コーナーを設定します。 Main Menuに戻るには「削除と終了」 または「保存と終了」 を選択します。 Delay ディレイは、 スピーカー内のドライバを揃えるか、バルコ ニー下に取り付けるような補助スピーカーを遅らせるた めに使用できます。 メインスピーカーを遅らせてドラムや ベースギターと揃えるためにショートディレイも使用でき ます。 ディレイはチャネルごとにトータルで125 mSです。 ド ライバのアライメントでは5 mSのディレイを 41.
設定の保存 メモリ操作Sub Menuで”設定の保存”を選択します。 4つのプリセット位置の1つを選択します。 名前を編集するには、 カーソルを回して文字を選択し、 エ ンコーダーを押して次の位置に進みます。終了するまで これを続けます。同じ名前をキープするには、 エンコーダ ーを6回押し、名前編集画面をステップごとに進みます。 保存場所を選択し、 プリセットに名前を付けた後、 「はい/ いいえ」 オプションで保存を完了します。 Recalling a Preset メモリ操作Sub Menuで”設定の呼び出し”を選択します。 プリセット番号を選択して呼び出すか、“出荷時設定を呼 び出す”を選択してニュートラル状態を呼び出します。保 存機能と同じく、呼び出しオプションを完了せずに終了す るオプションが表示されます。 Lock IPR2™ DSPのセキュリティロック機能では、選択したコントロールをロックして不正な調整を防ぐことができます。ロッ クをかけるとき、4桁のパスワードを設定する必要があります。サブメニューに入るときはこのパスワードを入力する必 要があります。これにより編集機能に一時的にアクセスできま
中文 IPR2™ 2000 / 3000 功率放大器 感谢您购买IPR2™功率放大器,该功放设计用于在严峻的使用条件下提供经久、可靠和完美的运作。IPR2系列开创性地采 用了先进的设计理念,使Peavey(百威)的工程师们能够在大幅度减轻该机重量的同时,提高输出功率、可靠性和散热效 率。IPR2系列放大器使用开关模式谐振电源及一个高速class D结构,产生最高的可用音频分辨率和效率。这一独出心裁的放 大器以极其有效和轻便的设计,提供了Peavey(百威)闻名遐迩的音响优势和无以伦比的可靠性。其先进的技术和广泛的保 护电路使操作在对付复杂的负载及电源条件时具有更高的效率。DDT™ (Distortion Detection Technique) 电路确保低至2欧姆的负 载能无故障运行。即使在极端的过载状态下,DDT也能保护驱动,保障声波的完整性。 IPR2的高效率设计使放大器的操作温 度非常低,不需要大量的散热片进行冷却。为了您的安全,请阅读重要预防措施章节,以及输入、输出和电源连接说明。 虽然IPR2放大器操作简单,采用超强度、超轻质的机箱,不当使用仍可能发生危险。这个放大器功率非常高,在高达30 kH
前面板 8 IPR2™ 3000 1 2 9 6 4 6 9 4 5 3 8 IPR2™ 2000 1 2 9 7 4 6 5 1 9 4 3 AC 电源开关 此按钮触发为放大器提供电源的继电器。当放大器处于关闭状态时(或待机时),这个按钮发微光显示电源已连接。按下开关时,放大 器开启,开关照明转为明亮。 2 PEAVEY 商标 放大器关闭时,商标发微光,表示电源已连接。放大器打开后,商标照明转为明亮。 3 指示灯 IPR2™ 放大器在每个通道上设有五个前面板LED指示灯:ACTIVE、SIGNAL、DDT™、TEMP 和 DC。这些LED 指示灯告诉用户各通道的操作状 态,以及对可能出现的异常情况发出警告。 4 ACTIVE LED Active LED表示该通道可以使用。放大器正常运行时该灯亮起。如果Active LED灯熄灭,则该通道不可用。 5 SIGNAL LED 此LED 指示灯在其通道产生4伏有效值或更高值输出信号时亮起。这一Signal LED指示灯表明某信号正在进入并被放大器放大。 6 DDT™ (DISTORTION DE
后面板 13 IPR2™ 3000 12 10 11 12 10 10 10 15 13 IPR2™ 2000 12 11 12 14 10 14 15 通道模式切换开关: HIGH PASS 这一位置用于启动相应通道的HIGH PASS滤波器。该滤波器将发送至关联放大器通道的频率限制在100 Hz以上。在使用单独 的低音扬声器音箱时,这个位置表示将中高频率的扬声器音箱连接到与HIGH PASS开关相关联的通道上。 FULL RANGE 顾名思义,这个开关的Full Range位置放行所有通往放大器的频率。 通常用于将全音域扬声器音箱连接到放大器的输出。 SUBWOOFER 这一位置用于启动相应通道的LOW PASS滤波器。该滤波器将发送至关联放大器通道的频率限制在100 Hz以下。在使用单独 的低音扬声器音箱时,这个位置表示将低音扬声器音箱连接到与低音扬声器开关相关联的通道上。 11 直通/输出插孔 这个1/4”(6.3mm)插孔提供关联通道的并行输出信号,补偿该放大器和/或额外的功放输入。 12 连接输入 这个1/4”(6.
中文 IPR2™ 2000/3000 DSP 功率放大器 顾名思义,IPR2™ 2000和3000 DSP 都拥有先进的数字信号处理。DSP的设计异常有效,使用又极其简便。通过采用独特的、 革命性的先进低音增强程序,IPR2 DSP放大器仅使用其它功率放大器所要求的功率中的一小部分,即已极大地提高了任何系 统内的可感低音电平。 在您用放大器发送信号之前,要确认设备有适当的AC线路电压供电,这非常重要。你能在设备的后面板上,打印在靠近 IEC(国际电工委员会)(电源)线的地方,找到你的放大器所用的正确电压。产品的各项性能都已编号。请参阅本手册前 面板图示,找到各编号项下的具体功能。 请仔细阅读本手册,确保您的人身安全,也确保您放大器的安全。 IPR2™ 2000 / 3000 DSP功能特点: • DDT™ 保护 • 各通道高达120 毫秒的延迟 • 别出心裁的 IPR2 class D结构 • 各通道 4 波段参数均衡 • XLR及1/4” 组合输入 • 安全锁 • 2 柱扭锁式输出连接器 • 可调式分频 • 重量轻 • 各通道使用四阶高通滤波器可调二阶 • 各通道都具有1/4”单独信号
前面板 9 1 2 3 10 IPR2™ 3000 DSP 1 5 7 10 5 6 2 3 IPR2™ 2000 DSP 1 8 4 9 10 8 5 7 6 10 5 4 AC 电源开关 当放大器处于关闭状态时,这个按钮发微光显示电源已连接。按下开关时,放大器开启,开关照明转为明亮。 2 PEAVEY 商标 放大器关闭时,商标发微光,表示电源已连接。放大器打开后,商标照明转为明亮。 3 LCD 显示屏 蓝色背光LCD显示屏显示DSP设置。 4 指示灯 IPR2™ 放大器在每个通道上设有五个前面板LED指示灯:ACTIVE、SIGNAL、DDT™、TEMP 和 DC。这些LED 指示灯告诉用户各通道的操作状 态,以及对可能出现的异常情况发出警告。 5 ACTIVE LED Active LED表示该通道可以使用。放大器正常运行时该灯亮起。如果Active LED灯熄灭,则该通道不可用。 6 SIGNAL LED 此LED指示灯在其通道产生4伏有效值或更高值输出信号时亮起。这一Signal LED指示灯表明某信号正在进入并被放大器放大。
后面板 IPR2™ 3000 DSP 14 10 10 11 12 11 12 13 IPR2™ 2000 DSP 10 11 10 14 11 11 12 12 13 连接输入 通过放大器后面板上的3-芯XLR (芯2正极) 或6.3mm插头组合连接器的输入连接。输入为主动平衡。输入过载点很高,足 以接受几乎任何信号源的最大输出电平。 12 THRU/OUT 插孔 这个1/4”(6.3mm)插孔是输入连接器的并行连接,用于补缀该放大器和/或额外的功放输入。必须用一个TRS插头来保持 平衡的连接。 13 连接输出 所有型号在每个通道上都有一个两柱扭锁和1/4”(6.
导航概述 Once the IPR2™ screen appears, you can start adjusting the DSP processor. Pressing the encoder will bring you to the main menu. The encoder knob to the right of the display is used to navigate and control the DSP functions. The Channel A and B controls to the left of the display are also encoders but are dedicated to adjusting input gain for each channel. Turning the encoder knob to the right of the display will allow you to scroll through the Main Menu selections.
要从Main Menu中选择项目,旋转编码器,直至光标标记您要的选项。按编码器导航至Sub Menu中该处理功能的 调整屏,当您进入一个处理功能Sub Menu时,光标出现在屏幕的左上角,您就可以滚动浏览Sub Menu屏幕了。要 编辑参数,按编码器,将光标移动至屏幕上所要的参数。然后旋转编码器调整该参数。要滚动至另一屏幕,按 编码器,令光标返回到屏幕的左上角。您现在可以滚动浏览Sub Menu屏幕了。 Discard and Exit 要重置DSP并放弃编辑,在Sub Menu中选择“Discard and Exit”,删除进入Sub Menu后所作的编辑。 Save and Exit 大多数Sub Menu进程的最后一个屏幕是“Save and Exit”。 在这个屏幕中按编码器保存编辑并返回主菜单。 注:在选择Save and Exit并返回主菜单之前,所作的调整不 会被存储。在Sub Menu中进行编辑时关闭放大器,其结果 和“Discard and Exit”相同。 Volume 音量 电流增益设置始终位于主菜单屏内。前面板上专用的 编码器用于在立体声和单声道模式下调整通道A和通道 B。
不同于其它Sub Menus功能,在您选择“Save and Apply”并返回Main Menu之前,输入模式不会改变。 分频滤波器、带通滤波器和极性 设置: BP Filters Independently 当您进入“XOVER”Sub Menu时,就如何设置带通滤波 器,您有三个选项。选择“BP Filters Independently”设 置时,Channel A 和 B 的高通及低通滤波器都是单独设 置。 设置: BP Filters Channel B=A 如果您在两个通道设置相同的立体声系统中使用放大 器,选择“Channel B=A”,两个通道将会一次设置完 成。Channel A 的滤波器设置也设置Channel B。 设置: X-Over Freq A Lows B Highs 如果您在放大器的通道间创建一个分频,选择“X-over Freq A Lows B Highs”,分频频率和滤波器类型可以用一 套控件来设置。用分频屏幕、高通和低通屏幕设置。 可用于高通和低通滤波器的滤波器类型有: 关闭 无滤波器 BW-12 dB Butterworth 滤波器,每倍频程斜
Output Polarity Output Polarity Output polarity 可以在任一通道上转换。在极性屏幕上选 择Normal(正常)或Invert(转换)。如果您创建一个带 每倍频程12分贝滤波器的分频,高频输出可能会需要转 换相位来维持分频频率的正确相位关系。临时转换多路 系统中一个通道的极性还有助于驱动校准的延迟设置。 您可以调整延迟,用于分频频率消除。请记得在完成后 将极性切换回Normal(正常)。 要返回到Main Menu,选择Discard and Exit 或 Save and Exit。 Equalization IPR2™ DSP 在各通道上提供参数均衡的五个波段、Waves® Maxx Bass® 增强和horn EQ。 Bypass EQ Bypass EQ Sub Menu中的第一个屏幕是旁通屏。通道可以独立 旁通,或者A&B也可以一起旁通。 按编码器,直到光 标位于所要更改的参数底下,旋转编码器,更改旁通 模式。完成后按光标,令其返回到左上角,以便滚动 到其它屏幕。 Set Channel EQ EQ Sub Menu中的第一个屏幕是旁通屏。通道可
Horn EQ Horn EQ 给每倍频程提供了一个6分贝的高频提升,高 频扬声器有时需要这个提升。频率控制设置滤波器的 低频转角。 要返回到Main Menu,选择Discard and Exit 或 Save and Exit。 Delay Delay 可以用来在一个扬声器内校准驱动,或延迟像 安装在楼座下那样的辅助扬声器。短暂的延迟也可以 用来延迟主扬声器,使之与鼓或低音吉他对齐。每个 通道提供总共125毫秒的延迟。延迟有5 毫秒提供41.
Saving Settings 在内存操作的Sub Menu内,选择“Save Settings”。 选择四个预设位置之一。 通过旋转光标选择字符编辑名称,按编码器进入下一 个位置。继续操作直至完成。如要保持相同名称,按 编码器六次跨过名称编辑屏幕。 一旦选定了存储位置并命名了预设置,就会给您一个 是/否的选择来完成存储。 Recalling a Preset 在内存操作的Sub Menu内,选择“Recall Settings”。 选择要调出的预设置号,或选择“Recall Factory Settings”,恢复到中性状态。和保存功能一样,有提 供选择,在未完成恢复选项时就退出。 Lock IPR2™ DSP 的安全锁功能允许锁止选定的控制,防止未经授权的调整。启动锁止时必须设置一个四位数的密码。只要想 进入Sub Menu,就必须输入这一密码,才能允许临时访问编辑功能。任何时候您返回Main Menu或关闭本机的开关,锁 止即再次启动。电源关闭时所有编辑都被锁止。 注:请务必记下密码。如果密码丢失或误置,请联系客户服务。 IPR2放大器有三种不同的锁止模式: Off 所有设置都可以调整,无需密码。
IPR2™ 2000 Specification Sheet Rated Watts 2ch x 2 ohms 1100 watts 20ms repetitive burst / 900 watts 1% THD both channels driven @ 1kHz. Rated Watts 2ch x 4 ohms 600 watts 20ms repetitive burst / 570 watts 1% THD / 530 watts 0.15% THD, both channels driven @ 1kHz. Rated Watts 2ch x 8 ohms 370 watts 20ms repetitive burst / 325 watts 1% THD / 300 watts 0.15% THD, both channels driven @ 1kHz.
IPR2™ 3000 Specification Sheet Rated Power 2ch x 2 ohms 1750 watts 20ms repetitive burst / 1450 watts 1% THD both ch. driven @ 1kHz. Rated Power 2ch x 4 ohms 950 watts 20ms repetitive burst / 900 watts 1% THD / 815 watts 0.2% THD, both ch. driven @ 1kHz. Rated Power 2ch x 8 ohms 525 watts 20ms repetitive burst / 500 watts 1% THD / 430 watts 0.15% THD, both ch. driven @ 1kHz. Minimum Load Impedance 2 ohms Maximum RMS Voltage Swing 70 volts Frequency Response 20 Hz - 22 kHz; +/-.
IPR2™ 2000 DSP Specification Sheet Rated Watts 2ch x 2 ohms 1100 watts 20ms repetitive burst / 900 watts 1% THD both channels driven @ 1kHz. Rated Watts 2ch x 4 ohms 600 watts 20ms repetitive burst / 570 watts 1% THD / 500 watts 0.15% THD, both channels driven @ 1kHz. Rated Watts 2ch x 8 ohms 370 watts 20ms repetitive burst / 325 watts 1% THD / 270 watts 0.15% THD, both channels driven @ 1kHz. Minimum Load Impedance 2 ohms Maximum RMS Voltage Swing 56 volts Frequency Response 10Hz - 22kHz; +/- 0.
IPR2™ 3000 DSP Specification Sheet Rated Power 2ch x 2 ohms 1750 watts 20ms repetitive burst / 1450 watts 1% THD both ch. driven @ 1kHz. Rated Power 2ch x 4 ohms 950 watts 20ms repetitive burst / 900 watts 1% THD / 815 watts 0.2% THD, both ch. driven @ 1kHz. Rated Power 2ch x 8 ohms 525 watts 20ms repetitive burst / 500 watts 1% THD / 430 watts 0.15% THD, both ch. driven @ 1kHz. Minimum Load Impedance 2 ohms Maximum RMS Voltage Swing 70 volts Frequency Response 20 Hz - 22 kHz; +/-.
Notes:
Notes:
Notes:
Notes:
U.S. CUSTOMER WARRANTY REGISTRATION Optional Product Extended Warranty Registration Give us some information and put your extended warranty into effect! Please take a few minutes to fill out this information/survey sheet to help us get to know and serve you better. To save time, submit your warranty registration online at www.peavey.com/support/warrantyregistration 1. 7.
FROM: Place Postage Here Peavey Electronics Corporation Attn: Warranty Department P.O.
PEAVEY ELECTRONICS CORPORATION LIMITED WARRANTY Effective Date: 09/15/2010 What This Warranty Covers Your Peavey Warranty covers defects in material and workmanship in Peavey products purchased and serviced in the U.S.A. and Canada.
Features and specifications subject to change without notice. ©2013 Peavey Electronics Corporation • 5022 Hartley Peavey Drive • Meridian • MS • 39305 (601) 483-5365 • FAX (601) 486-1278 • www.peavey.