FIUS1201G169 USE AND CARE EN EMPLEO Y MANUTENCION ES UTILISATION ET ENTRETIEN FR See separate insert sheet for more information Vea la hoja separada del separador de millares para másinformación Voir ls feuille séparée d’insertion pour plus d’information POWER SCOOP NOTE: because this manual contains 3 languages, the Assembly illustrations are separate from the Assembly verbal instructions (Assembly verbal instructions are several pages deeper into the manual) NOTA: este manual contiene 3 idiomas,
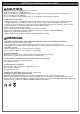
SEE VERBAL INSTRUCTIONS AFTER THE PICTURES ASSEMBLY MONTAJE VER LAS INSTRUCCIONES DESPUÉS DE LOS DISEÑOS MONTAGE VOIR LES INSTRUCTIONS APRÈS LES DESSINS 1 chrome decal 2 1 2 3 4 5 6 7 8 9 10 2 chrome decal 1 11 12 13
1 2 14 15 16 17 18 19 20 21 22 23 24 25 A 26 27 1 2
1 2 28 29 30 32 31 A 33 34 35 Apply decal # 5R / 5L first 2 1 36 37 38 NO OK 39 40 41
42 43 44 C A B BATTERY RECHARGE B CARGA DE LA BATERÍA CHARGE DE LA BATTERIE 47 45 46 48 49 VEHICLE FEATURES AND INSTRUCTIONS FOR USE CARACTERÍSTICAS Y USO DEL VEHÍCULO 2 posterior trasera arriére 1 R front delante devant A CARACTERÍSTIQUES ET UTILISATION DU VEHICULE 52 50 51 53 54 B
A REMOVING THE BATTERY B CAMBIO DE LA BATERÍA REPLACEMENT DE LA BATTERIE 56 55 INSTALLING BATTERY INSTALACIÓN DE LA BATERÍA INSTALLATION DE LA BATTERIE 57 58 A B 60 59 b = blue bk = black r = red w = white b = azul bk = negro r = rojo w = blanco 61 b = bleu bk = noir r = rouge w = blanc MEPU0003 MEPU0002 MEDI0010 b M1- r M2- R + - b M1+ M2+ w SAGI0035 r bk MEPU0001 w b MOTOR LEFT MOTOR RIGHT SAGI9997 SAGI9997
REPLACEMENT PARTS PIEZAS DE RECAMBIO PIÈCES DE RECHANGE DECAL CALCOMANIAS 28 DECALCOMANIES ELECTRIC SYSTEM INSTALACIÓN ELÉCTRICA CIRCUIT ÉLECTRIQUE 40 38 32 41 4 6 5 12 42 7 39 36 11 3 45 8 33 10 9 L 13 34 43 2 44 31 15 14 R 37 35 1 16 29 30 27 17 21 22 USA Call toll free: 1-800-728-2108 Llame gratis: 1-800-225-1558 24 23 9 R CANADA Call toll free: Appelez le péage libre: 1-800-661-5050 18 R 19 25 R 20 1 2 3 4 5 6 7 8 9R 9L 10 11 12 13 26 • • • • • • • • • • • • • • S
ENGLISH PEG PEREGO® thanks you for choosing this product. For more than 60 years, PEG PEREGO have been taking children for an outing: first with its famous baby carriages and strollers, later with its pedal and battery operated toy vehicles. Discover our complete range of products, news and other information about the Peg Perego world on our web site www.pegperego.
BATTERY MAINTENANCE AND SAFETY CAUTION: Only adults should recharge batteries never children. Never allow children to handle batteries. Only use the batteries specified by the manufacturer. Only use the charger specified by the manufacturer. Do not mix old and new batteries. Do not mix alkaline, standard (carbon-zinc), or rechargeable (nickel-cadmium) batteries. CHARGING THE BATTERY • Charge the batteries no longer than 24 hours, following the instructions enclosed with the battery charger.
INITIAL BATTERY CHARGE !• Remove battery and charger from packaging. Connect battery charger to a 120vac wall recepticle. Connect battery charger to battery. ASSEMBLY INSTRUCTIONS CAUTION: ADULT ASSEMBLY REQUIRED. USE CARE WHEN UNPACKING AS COMPONENTS TO BE ASSEMBLED MAY POSE A SMALL PARTS/SHARP EDGE HAZARD. BATTERY ALREADY INSTALLED IN VEHICLE. 1 • Apply the silver stickers to the special areas on the front headlights. 2 • Position the headlight lens by attaching the outer side.
INSTALLING BATTERY 59 • If you have bought or own a Peg Perego 12V/12Ah battery, you will have to remove the plastic filler (A) by slipping it off the battery clamp. 60 • Reposition the new battery with the battery clamp in its housing. Fasten the clamp with the two screws. 61 • Connect the battery plugs to the electrical system. Reposition the hood. Attention: always screw the two safety screws back onto the sides of the hood.
VEHICLE MAINTENANCE AND SAFETY This product meets and/or exceeds all ASTM (American Society for Testing and Materials) TOY SAFETY STANDARDS, including F 963, Consumer Toy Safety Specification. This vehicle is not intended for use on streets, around traffic or parked cars. MAINTENANCE AND CARE • Regularly check the conditions of the vehicle, particularly the electrical system, the plug connections, the covering caps and the charger. In case of fault, do not try to use the vehicle and the charger.
ESPAÑOL PEG PEREGO® le agradece que haya elegido esto producto. Hace más de 60 a os que PEG PEREGO lleva a pasear a los ni os: al nacer, con sus famosos coches-cuna y coches de paseo, después con los fantásticos vehículos de juguete a pedal y con la batería. Descubre la gama completa de los productos, las novedades y otras informaciones acerca del mundo Peg Perego en nuestra página Web www.pegperego.
MANTENIMIENTO Y SEGURIDAD DE LA BATERÍA ADVERTENCIAS: Las baterías deben ser cargadas sólo por personas adultas. No deje que los niños jueguen con las baterías. Use sólo las baterías especificadas por el fabricante. Use solamente el cargador especificado por el fabricante. No mezcle baterías viejas y nuevas. No mezcle baterías alcalinas, estándar (carbono-zinc) o recargables (níquel - cadmio).
PRIMERA CARGA DE LA BATERÍA !• Quite la batería y el cargador del empaquetado. Conecte el cargador de la batería con un socket doméstico. Conecte el cargador de batería con la batería. INSTRUCCIONES DE MONTAJE PRECAUTION: REQUIERE MONTAJE DE UN ADULTO. ALGUNOS COMPONENTES AL SER ENSAMBLADOS PODRÍAN TENER PARTES PEQUEÑAS/RIESGO POR BORDES CONTANTES. LA BATERÍA PODRÍA ESTAR INTRODUCIDA EN EL ARTÍCULO. 1 • Poner los adhesivos de plata en los alojamientos de los faros delanteros.
CAMBIO DE LA BATERÍA 55 56 57 58 • Quitar los dos tornillos de seguridad de la cabina; Quitar la cabina. Desconectar las clavijas de alimentación de la batería. • Quitar los dos tornillos del sujeta-batería como indica la figura. • Sacar la batería. • Sacar el sujeta-batería de la batería que no funciona y meterlo en la batería nueva. INSTALACIÓN DE LA BATERÍA 59 • Si han comprado o tienen una batería Peg Perego de 12V/12 Ah hay que eliminar el espesor de plástico (A) sacándolo del sujeta-batería.
MANTENIMIENTO Y CUIDADOS DEL VEHICULO Este producto cumple con y/o sobrepasa los ESTÁNDARES DE SEGURIDAD ASTM TOY, incluido el F 963, Especificaciones de seguridad en juguetes para consumidores. SEste vehículo no ha sido fabricado para ser usado en la vía pública, con vehículos en movimiento o aparcados. MANTENIMIENTO Y CUIDADOS • Controlare periódicamente el estado del vehículo, en especial la instalación eléctrica, las conexiones de los enchufes, las caperuzas de protección y el cargador.
FRANÇAIS PEG PEREGO® vous remercie de votre confiance et vous félicite d'avoir choisi ce produit. Depuis plus de 60 ans, PEG PEREGO emmène en promenade les enfants: à peine nés, avec ses fameux landaus et poussettes et plus tard, avec ses fantastiques véhicules à pédales et à batterie. Découvrez sur notre site la gamme complète des produits, les nouveautés et d’autres renseignements sur le monde Peg Perego. www.pegperego.
MAINTENANCE ET SECURITE DE LA BATTERIE PRECAUTION: Les batteries ne doivent être rechargées que par ou sous la surveillance d’adultes. Ne pas laisser les enfants jouer avec les batteries. Utiliser uniquement le chargeur de batterie fourni et les batteries originales PEG PEREGO. Ne pas utiliser simultanément des batteries neuves et usagées. Ne pas utiliser simultanément des batteries alcalines standard (zinc-carbone) ou rechargeables (nickel-cadmium).
PREMIERE CHARGE DE BATTERIE !• Retirez la batterie et le chargeur de l’empaquetage. Reliez le chargeur de batterie à un plot domestique. Reliez le chargeur de batterie à la batterie. INSTRUCTION DE MONTAGE ATTENTION: ASSEMBLAGE PAR UN ADULTE REQUIUS. ASSEMBLER PEUVENT COMPORTER UN DANGER DE PETITES PIÈCES OU DE BORDS TRANCHANTS. IL SE POURRAIT QUE LA BATTERIE SOIT DEJA MONTEE SUR LE VEHICULE. 1 • Appliquer les autocollants d'argent sur les logements des phares avant.
INSTALLATION DE LA BATTERIE 59 • Si vous avez acheté ou possédez une batterie Peg Perego de 12V/12Ah, vous devrez supprimer la couche de plastique (A) en la retirant de la barrette de la batterie. 60 • Repositionnez la nouvelle batterie avec la barrette de fixation à l’emplacement prévu ; fixez la barrette de la batterie avec les deux vis. 61 • Connectez les fiches de la batterie et de l’installation électrique. Remettez en place le capot.
ENTRETIEN ET SECURITE DU JOUET Ce produit réponde et/ou dépasse tous les CONDITIONS DE SECURITE ASTM TOY et il est conforme à la NORME DE SURETE F 963 pour les utilisateurs des jouets électriques. Ce véhicule n’est pas conforme aux dispositions des normes de circulation routière et ne peut par conséquent pascirculer sur la voie publique.
STOP! Do not return your vehicle to the store! We’re a toll-free phone call away and we can help. If you are missing parts or need assistance, please see the contact information below. ¡ALTO! ¡No vuelva su vehículo al almacén! Somos una llamada telefónica gratis lejos y podemos ayudar. Si usted es piezas que falta o necesita ayuda, vea por favor la información del contacto abajo.