
Digital Camera User Manual


C2946M-D (6/08) 23
TITLE
Select this option to configure the camera title.
TITLE: Use this option to enable or disable the title display. The default setting is OFF.
EDIT TITLE: Use this option to enter or edit the camera title, up to 16 characters. The default
setting is blank.
To enter a camera title, complete the following steps:
1. Change the TITLE setting on the TITLE menu to ON.
2. Select the EDIT TITLE menu. The EDIT TITLE menu appears.
3. Press the button up, down, left, or right to move the cursor to the desired character.
The space character is located below the letter “n.”
4. Press the center of the button to select the character. The selected character appears in the
blank area at the bottom of the screen.
5. To clear a character, select BS (backspace). The camera deletes the last character entered.
6. Repeat steps 3 and 4 until you have entered the camera title.
7. When the title is correct, select BACK to return to the TITLE menu.
SAVE AS CUSTOM
Select this option to create and save a custom profile. Whenever you open and make changes to the
EXPOSURE SET and FUNCTION SET menus, the camera stores the settings. These setting can be saved
as a custom profile.
To save defined exposure and function settings as a CUSTOM profile, complete the following steps:
1. Move the cursor to the SAVE AS CUSTOM menu.
2. Press the menu selection button, the SAVE AS CUSTOM menu is displayed.
3. Move the cursor to OK and then press the selection button again. The profile is saved and the screen automatically returns to the MAIN
MENU.
PIXEL CORRECTION
If white spots appear in the video image, one or more pixels on the camera imager may be defective.
This condition is common to CCD camera imagers.
Select this option to automatically detect and correct these defects. This feature helps you maintain
image quality.
To perform this procedure, complete the following steps:
1. Use a lens cap to cover the lens. Make sure no light can enter the lens. The mechanical iris lens aperture does not completely block the
light. Therefore, you should use a lens cap.
2. Select PIXEL CORRECTION. The PIXEL CORRECTION menu appears.
3. Select OK. The camera performs the procedure and the MAIN MENU appears.
NOTE: Any defective pixels that cannot be completely corrected may still appear.
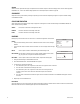
-> OFFTITLE
EDIT TITLE
BACK EXIT
TITLE
ABCDEFGHIJKLM
NOPQRSTUVWXYZ
abcdefghijklm
nopqrstuvwxyz
123456789-/
BS
RETURN
TITLE EDIT
CURRENT SETTING
ARE SAVED
OK CANCEL
SAVE AS CUSTOM
COVER THE LENS
AND PRESS OK
OK CANCEL
PIXEL CORRECTION